1. Introduction
The LEADSTAR Shell Painting Kit is designed to inspire creativity and artistic expression in children. This kit provides all the necessary materials to transform natural seashells into unique works of art. It is suitable for children aged 4 and above, offering an engaging activity that promotes hand-eye coordination, color recognition, and imaginative play.
2. Safety Information
- Adult Supervision: Always ensure adult supervision during use, especially for younger children, to prevent accidental ingestion of small parts or paints.
- Non-Toxic Materials: All paints and materials included in this kit are non-toxic and safe for children. However, avoid contact with eyes and mouth. Wash hands thoroughly after use.
- Allergies: If your child has known allergies to specific materials, please review the component list carefully before use.
- Choking Hazard: Small parts such as googly eyes and jewel stickers may pose a choking hazard for children under 3 years old. Keep these items out of reach of infants.
3. What's Included (Kit Contents)
Your LEADSTAR Shell Painting Kit contains the following items:
- 12 x Seashells (various sizes)
- 12 x Vibrant Acrylic Paints
- 2 x Metallic Paints
- 2 x Paint Brushes
- 1 x Color Palette
- 4 x Glitter Glues
- 6 x Packs of Modeling Clay (different colors)
- 1 x Sheet of Jewel Stickers
- 16 x Googly Eyes

Image: All components of the LEADSTAR Shell Painting Kit.
4. Setup and Preparation
- Prepare Your Workspace: Choose a flat, stable surface. Cover it with newspaper or a protective mat to prevent paint spills.
- Wear Protective Clothing: Encourage children to wear an art smock or old clothes to protect against paint stains.
- Organize Materials: Lay out all the seashells, paints, brushes, and decorative elements within easy reach. Use the provided palette for mixing colors.
5. Operating Instructions (Creative Process)
5.1 Painting the Seashells
- Select a seashell and choose your desired acrylic or metallic paint colors.
- Dip a brush into the paint and apply it evenly onto the seashell surface. You can create patterns, solid colors, or abstract designs.
- For glow-in-the-dark effects, use the special glow-in-the-dark paints. To achieve a brighter glow, expose the painted shell to a strong light source (like a lamp or sunlight) for a few minutes after the paint has dried.
- Allow the paint to dry completely before proceeding to the next step. Drying time may vary depending on paint thickness and environmental conditions.

Image: Children engaged in painting seashells.
5.2 Decorating with Glitter, Stickers, and Googly Eyes
- Once the paint is dry, apply glitter glue to add sparkle. Squeeze the glitter glue directly onto the shell in desired patterns or areas.
- Peel off jewel stickers from the sheet and press them firmly onto the shell.
- Attach googly eyes to create characters or add playful expressions to your shell creations. A small amount of craft glue (not included) may be needed for better adhesion if the self-adhesive backing is insufficient.

Image: Various decoration techniques for seashells.
5.3 Using Modeling Clay
The modeling clay can be used to create three-dimensional elements on your shells, such as animal features, textures, or stands. Knead the clay until it is pliable, then shape and attach it to the shells. Allow the clay to air dry and harden.
5.4 Color Mixing Guide
Experiment with mixing the acrylic paints to create new colors. Refer to the basic color mixing chart below for guidance:
| Color 1 | Color 2 | Resulting Color |
|---|---|---|
| Red | Yellow | Orange |
| Red | Blue | Purple |
| Blue | Yellow | Green |
| Red | White | Pink |
| Black | White | Grey |
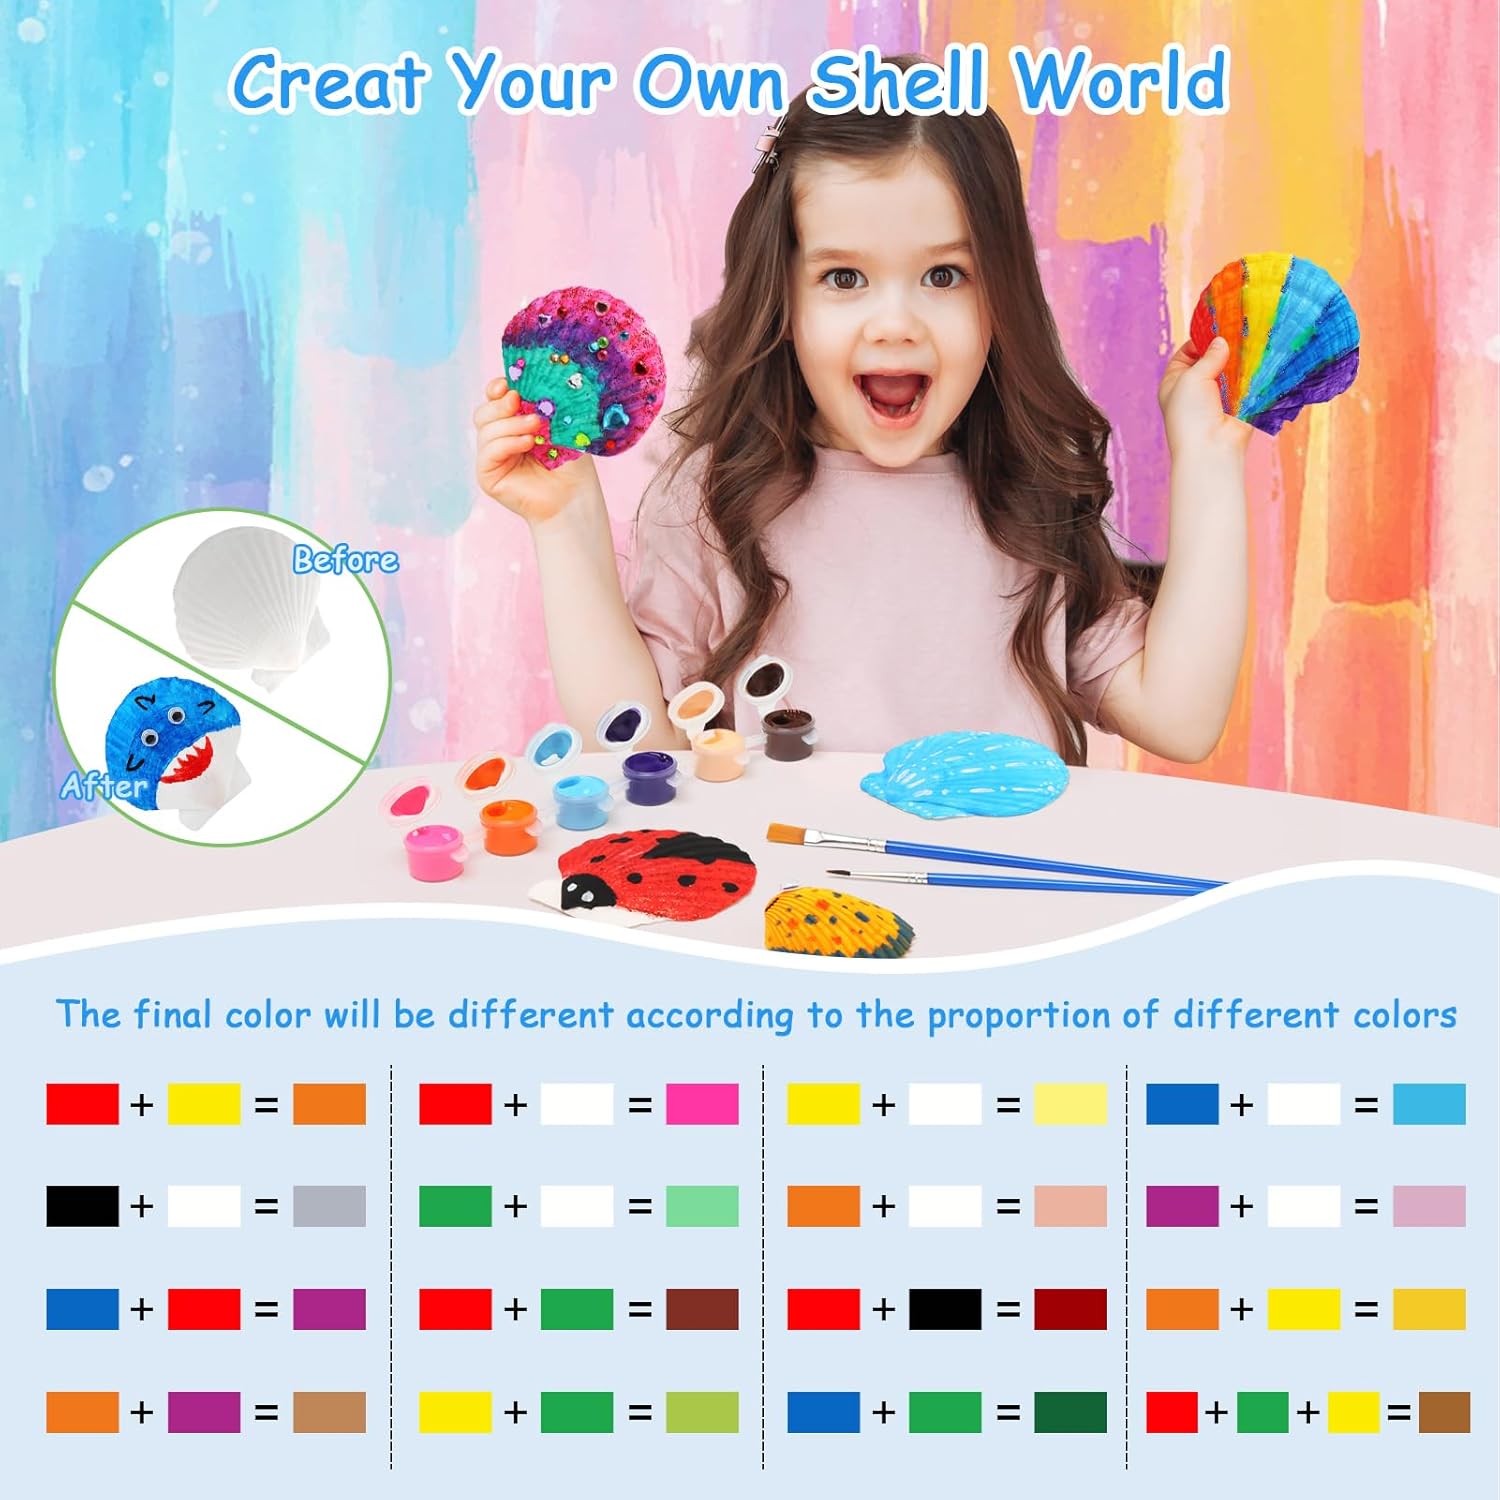
Image: Example of painted shells and a color mixing guide.
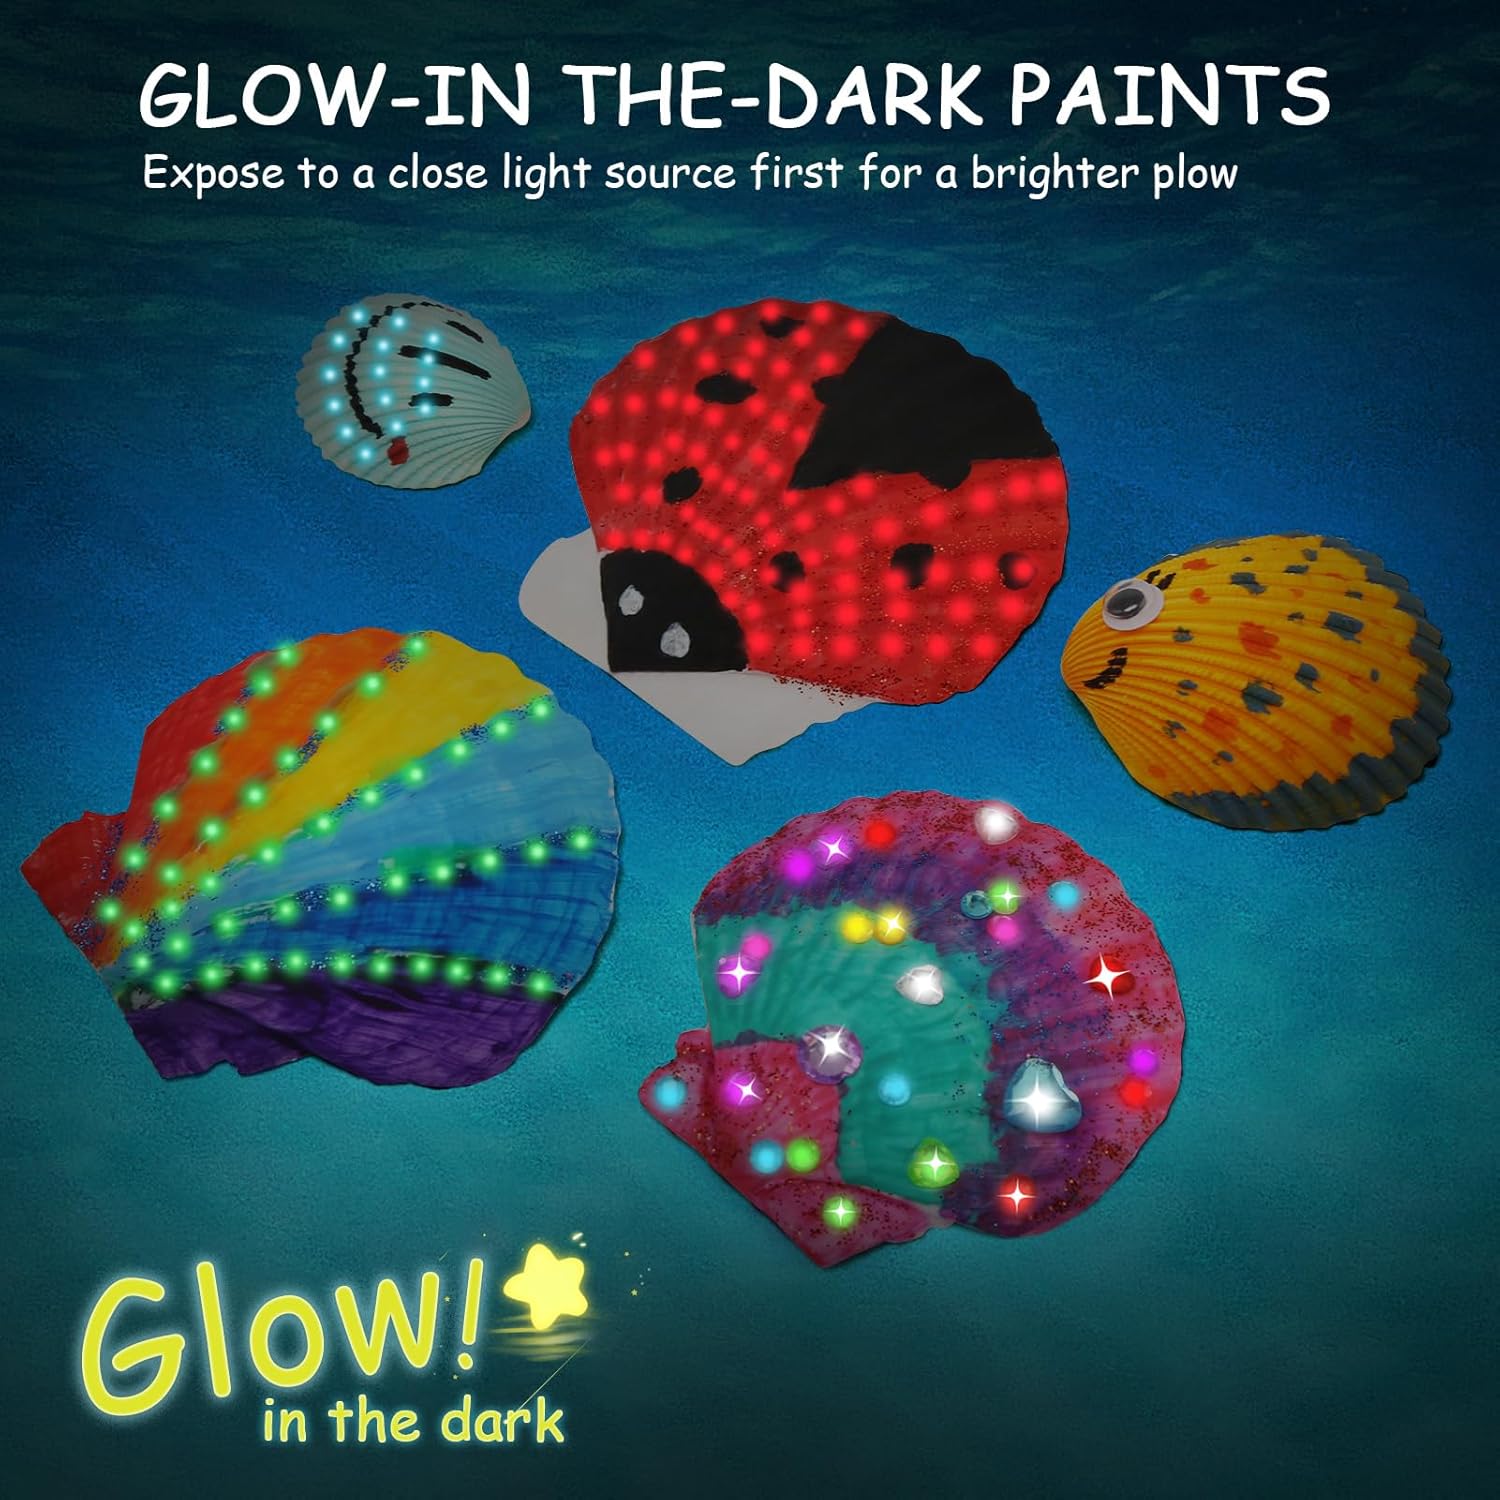
Image: Seashells decorated with glow-in-the-dark paints.
6. Maintenance
- Cleaning Brushes: After each use, wash paint brushes thoroughly with water and a mild soap. Reshape the bristles and allow them to air dry.
- Storing Paints: Ensure all paint pots are tightly sealed after use to prevent drying. Store paints in a cool, dry place away from direct sunlight.
- Storing Clay: Keep modeling clay in its sealed packaging or an airtight container to prevent it from drying out.
- Disposal: Dispose of any waste materials responsibly according to local regulations.
7. Troubleshooting
- Paint is too thick: If acrylic paint appears too thick, add a very small drop of water and mix thoroughly on the palette. Do not add too much water, as it can dilute the color intensity.
- Paint not drying: Ensure paint is applied in thin, even layers. Thicker layers will take longer to dry. Allow adequate ventilation in the drying area.
- Googly eyes/stickers not sticking: For better adhesion, especially on uneven surfaces or if the self-adhesive backing loses its stickiness, a small amount of craft glue (not included) can be used.
8. Specifications
| Feature | Detail |
|---|---|
| Brand | LEADSTAR |
| Model Number | LING-Painting Shells |
| Package Dimensions | 21.8 x 16.3 x 4.2 cm |
| Item Weight | 330 Grams |
| Material | Seashells |
| Paint Type | Acrylic |
| Number of Pieces | 41 |
| Recommended Age | 4 years and up |
9. Warranty and Support
For any questions, concerns, or support regarding your LEADSTAR Shell Painting Kit, please contact the manufacturer directly through your purchase platform. Please retain your proof of purchase for any warranty claims or customer service inquiries.


