Introduction
Thank you for choosing the Mayoki MFPSG001 Cordless HVLP Paint Sprayer. This manual provides essential information for the safe and efficient operation, maintenance, and troubleshooting of your paint sprayer. Please read these instructions carefully before use and retain them for future reference.
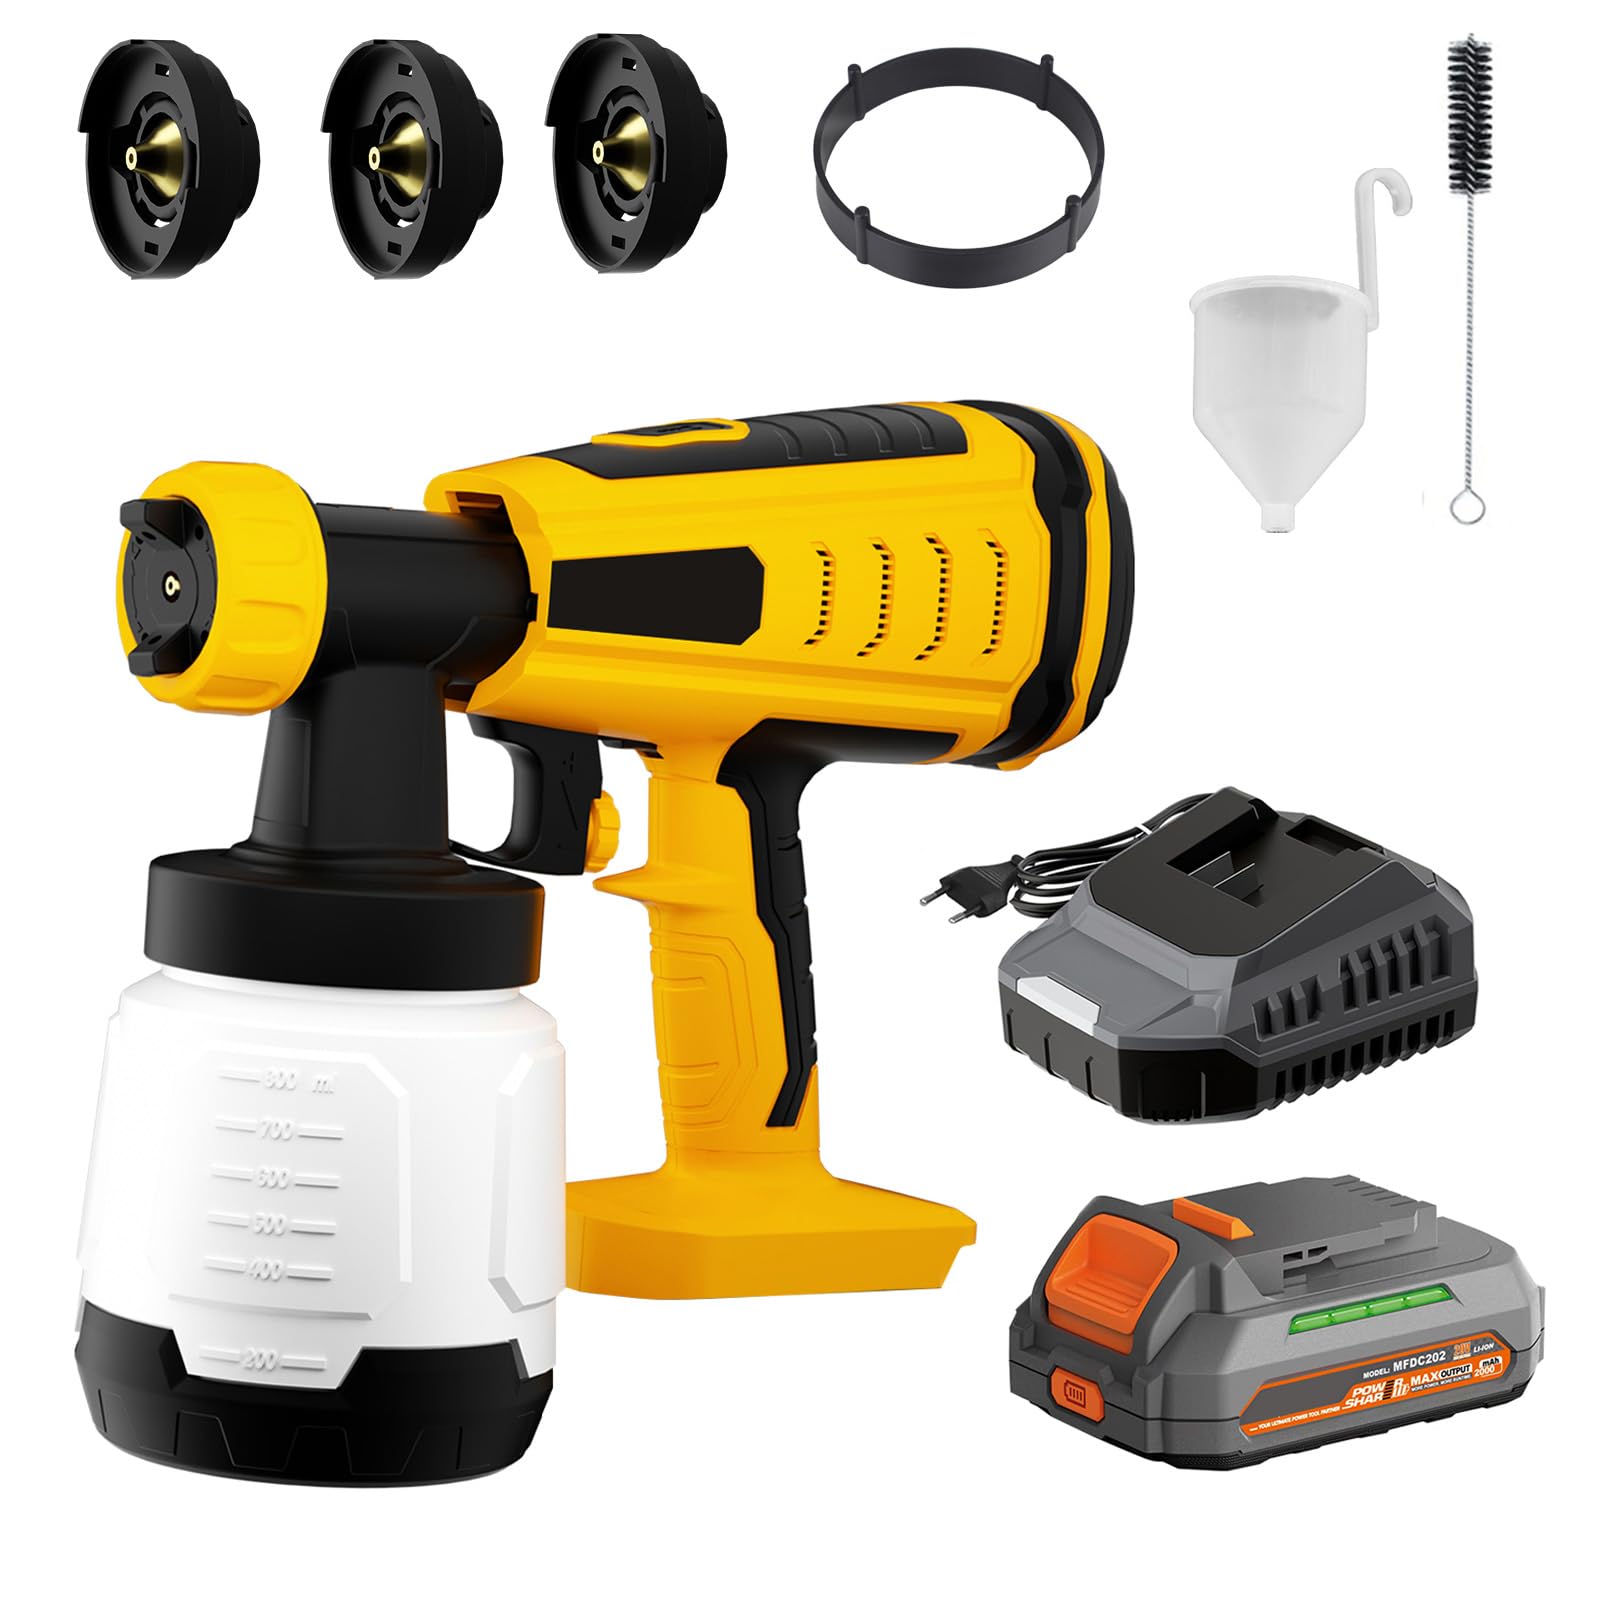
Image: The Mayoki Cordless HVLP Paint Sprayer, showing its compact design and attached battery.
Safety Information
Always follow basic safety precautions when using this product to reduce the risk of fire, electric shock, or personal injury.
- Read all instructions before operating the sprayer.
- Wear appropriate personal protective equipment (PPE) including eye protection, gloves, and a respirator.
- Ensure the work area is well-ventilated.
- Do not use near open flames or in wet conditions.
- Keep children and pets away from the work area.
- Always disconnect the battery before cleaning, adjusting, or performing maintenance.
- Use only recommended thinning agents for your paint material.
Package Contents
Verify that all items are present in your package:
- 1 x Cordless Paint Sprayer
- 1 x 20V 2.0Ah Battery
- 1 x 20V 2.0A Battery Charger
- 1 x 800ml/25oz Container
- 2 x Gaskets for Container
- 1 x Cleaning Brush
- 1 x User Manual (this document)
- 3 x Copper Nozzles (1mm; 1.5mm; 2.5mm)
- 1 x Viscosity Cup
Product Overview
Familiarize yourself with the components of your Mayoki HVLP Paint Sprayer:

Image: Exploded view diagram showing the Cap Nut, Air Cap, Copper Nozzle, Trigger Switch, Brushless Motor Housing, 800ml/25fl.oz Container, Suction Tube, and Flow Rate Adjusting Knob.
- Cap Nut: Secures the air cap and nozzle.
- Air Cap: Directs the airflow and determines the spray pattern.
- Copper Nozzle: Dispenses paint; available in different sizes for various viscosities.
- Trigger Switch: Activates the sprayer.
- Brushless Motor Housing: Contains the motor that powers the sprayer.
- 800ml/25oz Container: Holds the paint material.
- Suction Tube: Draws paint from the container to the nozzle.
- Flow Rate Adjusting Knob: Controls the volume of paint sprayed.
Setup
1. Battery Installation and Charging
Ensure the 20V 2.0Ah battery is fully charged before use. Insert the battery into the sprayer handle until it clicks into place. To charge, connect the charger to a power outlet and attach the battery. The LED indicator on the battery will show charging status.

Image: The 20V 2.0Ah battery and its dedicated charger.
2. Paint Preparation and Viscosity Check
Proper paint viscosity is crucial for optimal spraying. Use the included viscosity cup to test your paint. Fill the cup with paint, plug the bottom hole with your finger, then release and time how long it takes for the paint to completely run out. If the runoff time is too long, thin the paint with the appropriate solvent (e.g., water for latex paint) until the desired viscosity is achieved. Refer to your paint manufacturer's recommendations for thinning ratios.
Video: Demonstrates how to dilute paint and check its viscosity using the provided cup.
3. Filling the Container
After preparing your paint, carefully pour it into the 800ml container. Ensure the container is securely attached to the sprayer body.
4. Nozzle and Air Cap Adjustment
Select the appropriate copper nozzle (1mm, 1.5mm, or 2.5mm) based on the paint viscosity and desired spray pattern. The 1mm nozzle is suitable for thinner materials, while the 2.5mm nozzle is for thicker coatings. Attach the chosen nozzle and then the air cap, securing it with the cap nut.

Image: Illustration of the three available spray patterns: circular (45°), vertical (90°), and horizontal (180°).
Adjust the air cap ears to change the spray pattern:
- Circular Pattern: For small areas, edges, and corners.
- Vertical Pattern: For horizontal spraying.
- Horizontal Pattern: For vertical spraying.

Image: Close-up view of the three copper nozzles (1mm, 1.5mm, 2.5mm) for different coating viscosities.
The suction tube can be rotated 360 degrees. For spraying downwards, position the tube towards the front of the sprayer. For spraying upwards, position it towards the rear.

Image: Diagram illustrating the 360° adjustable suction tube, allowing for spraying in various orientations.
Operating Instructions
1. Powering On/Off
To start spraying, press the trigger switch. Release the trigger to stop. The brushless motor provides efficient power for consistent spray.

Image: An internal view highlighting the brushless motor, indicating its power and efficiency.
2. Adjusting Flow Rate
Use the flow rate adjusting knob to control the volume of paint. Turn the knob clockwise for a higher flow rate (up to 1,000 ml/min) and counter-clockwise for a lower flow rate. Adjust according to your project needs and paint type.
3. Spraying Techniques
Maintain a consistent distance from the surface (typically 6-8 inches) and move the sprayer in smooth, even strokes. Overlap each pass by about 50% to ensure uniform coverage. Practice on a scrap piece of material before starting your main project.
Maintenance
1. Cleaning
Thorough cleaning after each use is essential to prevent clogging and ensure longevity. Disassemble the sprayer components (container, nozzle, air cap, suction tube). Clean all parts with warm soapy water for water-based paints or appropriate solvent for oil-based paints. Use the included cleaning brush for small openings. Rinse thoroughly and allow to dry completely before reassembly.

Image: Sprayer components disassembled and being cleaned under running water, demonstrating ease of cleaning.
Video: Shows how to disassemble and clean the paint sprayer to prevent leakage issues.
2. Storage
Store the clean and dry paint sprayer in a cool, dry place, away from direct sunlight and extreme temperatures. Ensure the battery is removed and stored separately.
Troubleshooting
| Problem | Possible Cause | Solution |
|---|---|---|
| No spray or weak spray |
|
|
| Uneven spray pattern |
|
|
| Paint leakage |
|
|
Specifications
| Feature | Detail |
|---|---|
| Brand | Mayoki |
| Model Name | Paint sprayer |
| Model Number | MFPSG001 |
| Power Source | Battery Powered (20V) |
| Motor Type | Brushless |
| Tank Volume | 800 Milliliters |
| Max Flow Rate | 1,000 ml/min |
| Max Viscosity | 120 DIN |
| Nozzle Sizes | 1mm, 1.5mm, 2.5mm (Copper) |
| Spray Patterns | Circular, Vertical, Horizontal |
| Weight | 2.2 lbs (sprayer only, approximate) |
| Material | Plastic |
| Recommended Uses | Painting, Bleaching, Vehicle Washing |
Warranty and Support
Mayoki provides a 5-year warranty for this product. For any issues or support needs, please contact Mayoki customer service directly. Our customer service team is available 24/7 to assist you.
Contact information can typically be found on the product packaging or the official Mayoki website.