1. Introduction
This manual provides detailed instructions for the safe and effective use of your YesRight Mini Electric Screwdriver 155-in-1 Set. This comprehensive tool kit is designed for precision repair tasks on various electronic devices, including phones, computers, watches, and drones. Please read this manual thoroughly before operating the device and retain it for future reference.
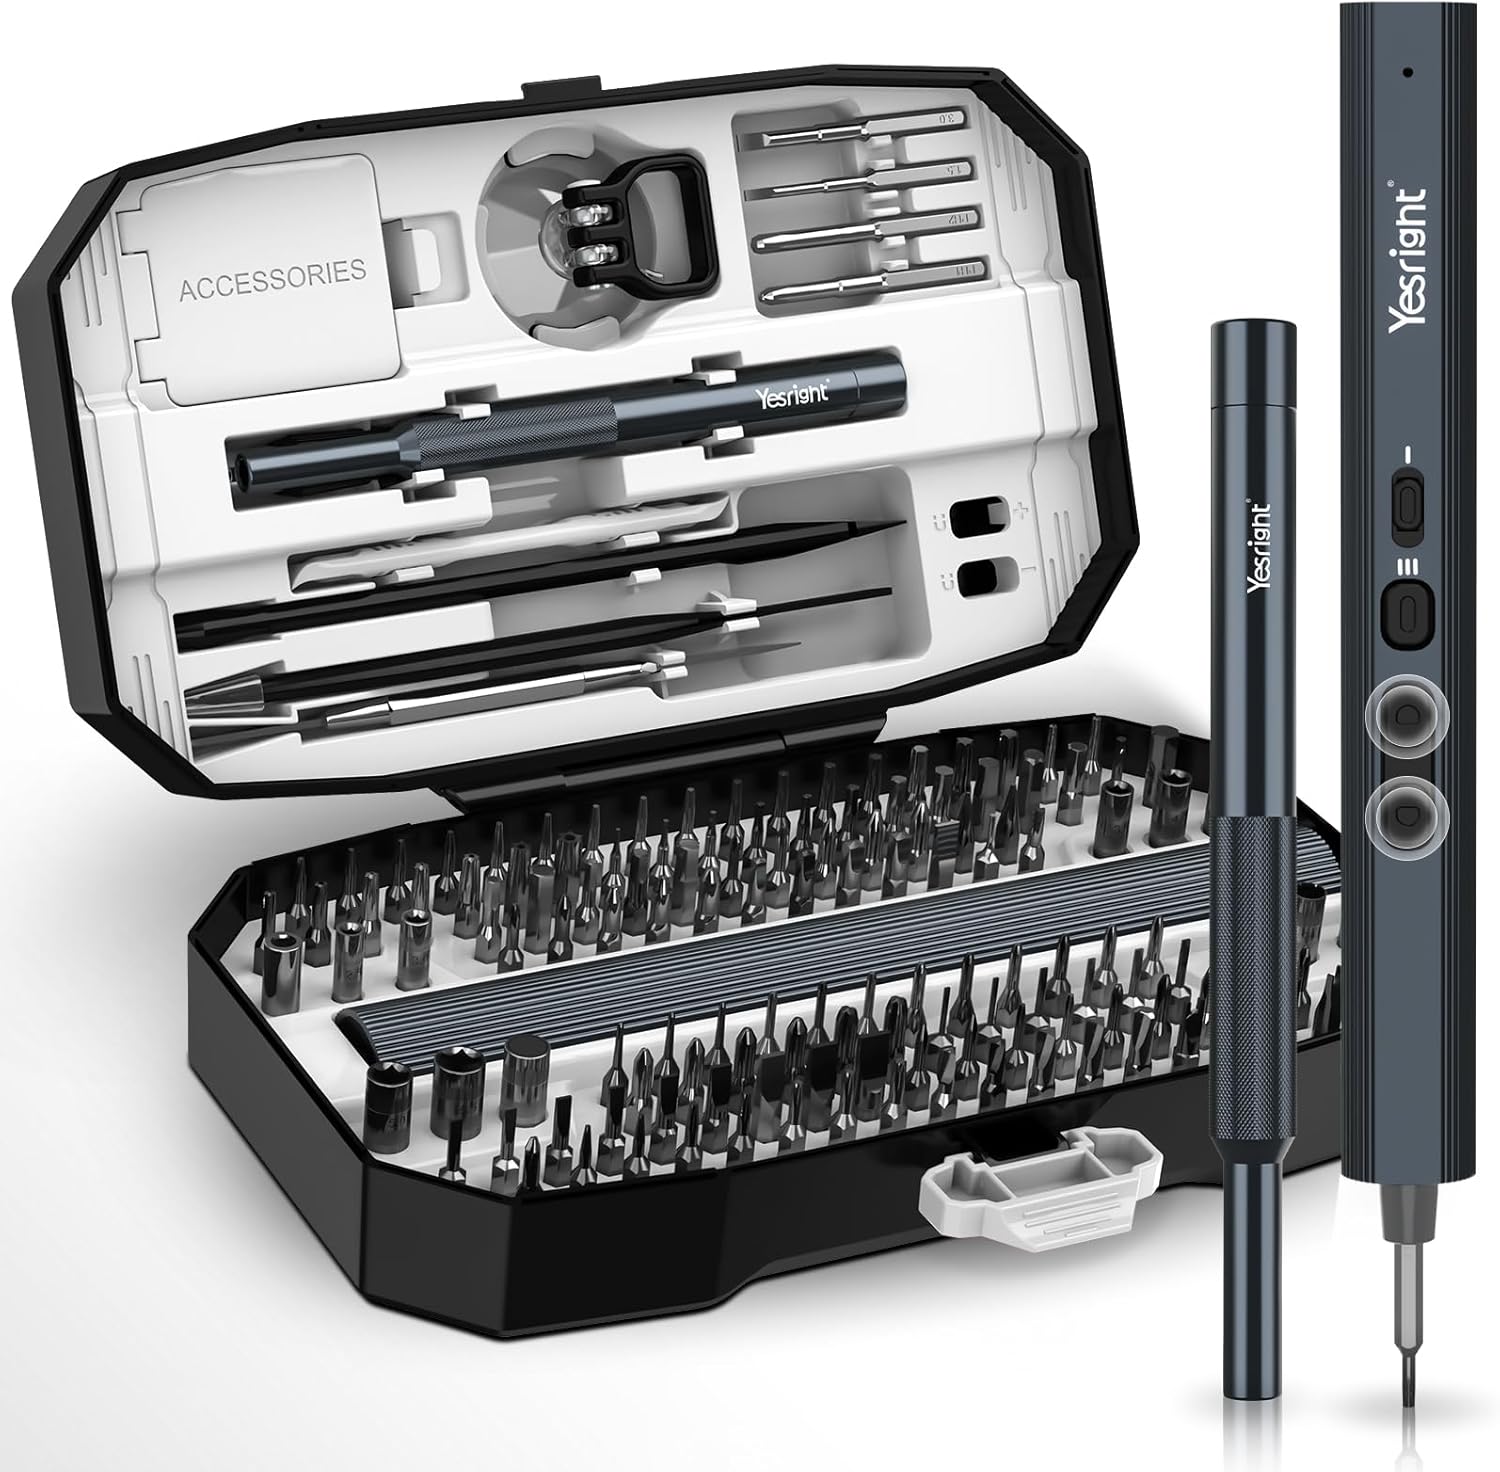
Image 1: The complete YesRight Mini Electric Screwdriver 155-in-1 Set, including the electric screwdriver, manual screwdriver, and bit case.
2. Package Contents
Verify that all items listed below are present in your package:
- 1x Electric Screwdriver
- 1x Manual Precision Screwdriver
- 140x S2 Magnetic Bits (various types and sizes)
- 1x Flexible Extension Shaft
- 1x USB Type-C Charging Cable
- 4x Opening Picks
- 1x Magnetic Mat
- 1x Metal Spudger
- 1x Long Crowbar (Pry Tool)
- 2x Pointed Tweezers
- 2x Plastic Pry Tools
- 1x Suction Cup
- 1x Magnetizer/Demagnetizer Area (integrated into case)
- 1x Storage Case

Image 2: Detailed view of the 140 S2 alloy steel bits and additional repair tools included in the set.
3. Setup
3.1 Charging the Electric Screwdriver
Before first use, fully charge the electric screwdriver. Connect the provided USB Type-C charging cable to the charging port on the screwdriver and to a compatible USB power source (e.g., power adapter, laptop, car charger, power bank). The charging indicator light at the bottom of the screwdriver will illuminate during charging and turn off or change color when fully charged.
- Battery Capacity: 650mAh Lithium-ion
- Charging Time: Approximately 1 hour for a full charge.
- Usage per Charge: Can drive over 500 screws on a full charge.

Image 3: The electric screwdriver connected via its Type-C port for charging, showing the charging indicator.
3.2 Installing Bits
Select the appropriate S2 magnetic bit for your task. Insert the bit firmly into the magnetic bit holder of either the electric or manual screwdriver. The magnetic holder will secure the bit in place.
3.3 Magnetization and Demagnetization
The storage case includes a dedicated area for magnetizing and demagnetizing screwdriver bits. To magnetize a bit, touch it to the 'Magnetize' section for 5 seconds. To demagnetize, use the 'Demagnetization' section.

Image 4: Illustration of how to use the integrated magnetization and demagnetization areas in the storage case.
4. Operating Instructions
4.1 Electric Screwdriver Operation
The electric screwdriver features intuitive controls for efficient operation:
- Screw In Button: Press to rotate the bit clockwise for tightening screws.
- Screw Out Button: Press to rotate the bit counter-clockwise for loosening screws.
- LED Light Switch: Activates the four bright LED lights to illuminate the work area.
- Rotary Torque Knob: Adjusts the electric torque setting. There are 3 gear torque settings: 0.15 N.m, 0.35 N.m, and 0.7 N.m. Select the appropriate torque for the task to prevent overtightening or stripping screws.
- Max Speed: The motor operates at a maximum speed of 200 RPM.

Image 5: Labeled diagram of the electric screwdriver, highlighting its magnetic bit, LED light, screw in/out buttons, LED light switch, rotary torque knob, anti-slip striped handle, charging indicator, and Type-C charging port.

Image 6: The electric screwdriver in various repair scenarios, demonstrating the utility of its LED light for clear visibility.
4.2 Manual Precision Screwdriver Operation
For tasks requiring higher torque or more precise control, use the manual precision screwdriver. It provides a manual torque of up to 7 N.m.

Image 7: Comparison of the electric and manual screwdrivers, detailing their respective torque capabilities.
4.3 Using Accessories
- Flexible Extension Shaft: Attach this shaft to either screwdriver for reaching screws in tight or awkward spaces.
- Magnetic Mat: Place small screws and components on the magnetic mat to prevent loss and keep them organized during disassembly and reassembly.
- Pry Tools, Tweezers, Suction Cup, Opening Picks: Use these specialized tools for safely opening device casings, handling delicate components, and removing screens without causing damage.
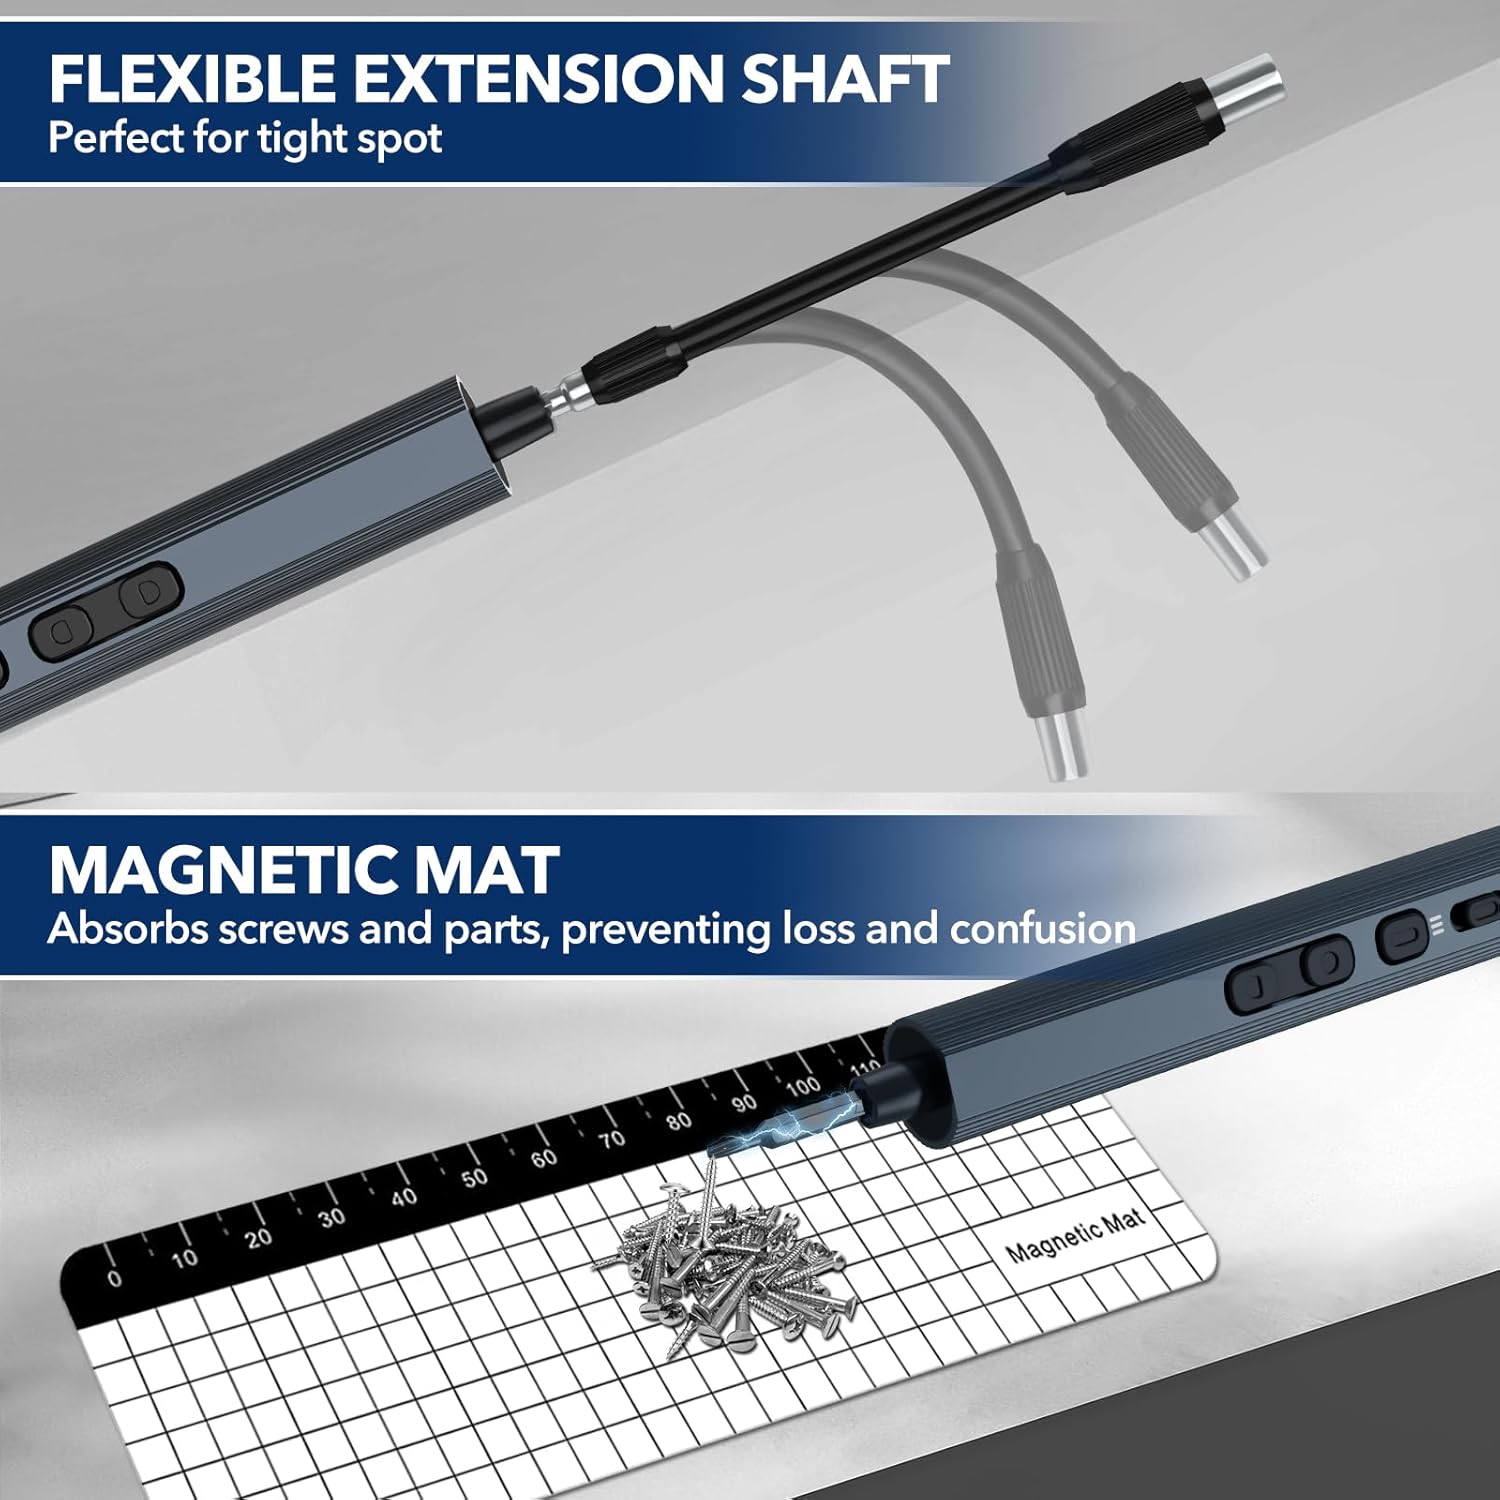
Image 8: Demonstrates the flexible extension shaft for accessing confined areas and the magnetic mat for securing small parts.
4.4 Product Video
For a visual guide on the product's features and usage, please watch the official product video below:
Video 1: Official YesRight Mini Electric Screwdriver Set 155 in 1 product overview and demonstration.
5. Maintenance
5.1 Cleaning
Regularly clean the electric screwdriver, manual screwdriver, and bits with a soft, dry cloth. Avoid using abrasive cleaners or solvents that could damage the tools.
5.2 Storage
Always store the tools and bits in the provided magnetic storage case. This protects them from damage, keeps them organized, and prevents loss of small components. Store in a cool, dry place away from direct sunlight and moisture.
5.3 Bit Care
The S2 steel bits are designed for durability (up to 60HRC hardness). However, proper use and storage will extend their lifespan. Ensure bits are clean and dry before storing. Avoid applying excessive force that could bend or break the bits.
6. Troubleshooting
- Screwdriver not turning on: Ensure the electric screwdriver is fully charged. Connect it to a power source using the Type-C cable and check the charging indicator.
- Insufficient electric torque: Verify the torque setting using the rotary torque knob. For tasks requiring higher force, switch to the manual precision screwdriver.
- Bits slipping or stripping screws: Ensure you are using the correct bit size and type for the screw. Confirm the bit is fully inserted into the magnetic holder. Adjust the torque setting to prevent overtightening.
- LED light not working: Check if the LED light switch is activated. If the battery is very low, the LED light might not function optimally.
- Screws not adhering to bit: Use the magnetization area in the storage case to re-magnetize the bit.
7. Specifications
| Feature | Detail |
|---|---|
| Brand | YesRight |
| Model Name | YESR-LSD153S |
| Number of Items | 155 (including bits) |
| Head Style | Hex (for bits) |
| Material | Aluminum (screwdriver body), S2 Steel (bits) |
| Color | Grey |
| Electric Torque | 0.15-0.35-0.7 N.m (3 settings) |
| Manual Torque | >7 N.m |
| Max Speed | 200 RPM |
| Battery Capacity | 650mAh Lithium-ion |
| Charging Interface | Type-C |
| Special Features | Adjustable Torque, Flexible Shaft, LED Light, Magnetic Tip, Portable |
| Item Dimensions (L x W x H) | 4 x 2 x 3 inches |
| Item Weight | 1.87 pounds |
8. Warranty Information
No specific warranty information is provided in the product details. Please refer to the retailer or manufacturer's website for current warranty terms and conditions.
9. Customer Support
For technical assistance, product inquiries, or support, please contact the retailer or visit the official YesRight brand store. Specific contact details are not provided in this manual.
You can visit the YesRight store at: YesRight Store