
1. Introduction
This manual provides detailed instructions for the installation, operation, and maintenance of your Yoidesu 3 Channel Car Dash Cam. Please read this manual thoroughly before using the device to ensure proper functionality and to maximize your user experience. This dash cam is designed to record video from the front, inside, and rear of your vehicle, offering comprehensive coverage for your driving and parking needs.
2. Package Contents
Please verify that all items listed below are included in your package. If any items are missing or damaged, please contact customer support.
- 1 x Yoidesu 3 Channel Dash Cam Unit
- 1 x Suction Cup Bracket
- 1 x Car Charger Cable
- 1 x Rear Camera
- 2 x Screws (for rear camera installation)
- 1 x Hook and Loop Fastener (for rear camera installation)
- 2 x User Manuals

Image: The Yoidesu 3 Channel Car Dash Cam main unit, suction cup bracket, car charger cable, rear camera, screws, and hook and loop fastener.
3. Specifications
| Feature | Specification |
|---|---|
| Item Type | 3 Channel Car Dash Cam |
| Material | ABS |
| Built-in Battery | Lithium Battery 150mAh |
| Video Resolution | Front: 1920x1080P, Inside: 640x480P, Rear: 640x480P (30fps) |
| Memory Card Support | Maximum 64GB (Not Included) |
| Product Screen | 2.0 Inch Screen |
| Viewing Angle | Front: 140 Degrees, Inside: 90 Degrees, Rear: 90 Degrees |
| Loop Recording | Supported |
| Motion Detection | Supported |
| Bracket | Upgraded 360 Degree Rotating Slide Buckle Twisting Bracket |
| Parking Monitoring | One Second One Frame Time Lapse Recording |
| G-Sensor | Supported |
| Product Dimensions | 7.87 x 4.33 x 3.15 inches |
| Item Weight | 13.6 ounces |
4. Setup and Installation
4.1 Inserting the Memory Card
Before installation, ensure the dash cam is powered off. Insert a compatible Micro SD card (up to 64GB, Class 10 or higher recommended) into the designated slot on the side of the dash cam until it clicks into place. Ensure the card is inserted correctly to avoid damage.
4.2 Mounting the Front Dash Cam
- Clean the area on your windshield where you intend to mount the dash cam.
- Attach the suction cup bracket to the dash cam unit.
- Press the suction cup firmly against the windshield and flip the lever to secure it. Adjust the angle of the dash cam to ensure a clear view of the road ahead.

Image: The main dash cam unit with its suction cup mount, positioned to record the road ahead.
4.3 Installing the Rear Camera
- Identify a suitable location on the rear windshield or license plate area for the rear camera.
- Use the provided screws or hook and loop fastener to secure the rear camera.
- Route the rear camera cable to the main dash cam unit, ensuring it does not interfere with driving or vehicle operations. Connect the cable to the designated rear camera port on the main unit.
4.4 Connecting Power
- Connect the car charger cable to the dash cam's power input port.
- Plug the other end of the car charger into your vehicle's 12V power outlet (cigarette lighter socket).
- For a cleaner, hidden installation, route the power cable along the edge of the windshield and dashboard.

Image: An illustration demonstrating how to route power and rear camera cables for a discreet installation within the vehicle's interior.
5. Operating Instructions
5.1 Powering On/Off
- Automatic Power On/Off: The dash cam will automatically power on and begin recording when your vehicle's engine starts and power is supplied. It will power off automatically shortly after the engine is turned off.
- Manual Power On/Off: Press and hold the Power button (location varies by model, typically on the side or bottom) for a few seconds to manually turn the device on or off.
5.2 Basic Recording
Once powered on, the dash cam will automatically start recording video from all three channels (front, inside, rear). The recording status is usually indicated by a flashing LED light or an icon on the screen.
5.3 Menu Navigation
Use the physical buttons on the dash cam (e.g., Menu, Up, Down, OK) to navigate through settings. Refer to the on-screen prompts for specific functions.
5.4 Formatting the Memory Card
It is recommended to format the memory card regularly (e.g., once a month) to ensure optimal performance and prevent recording errors. This can typically be done through the dash cam's settings menu. Warning: Formatting will erase all data on the memory card. Back up any important files before formatting.
6. Key Features
6.1 3-Channel Recording
This dash cam simultaneously records video from three perspectives: the front road (1080P), the vehicle's interior (480P), and the rear road (480P). This provides comprehensive coverage for various driving scenarios.

Image: Visual representation of the three camera channels (front, inside, rear) and their recording resolutions.
6.2 Loop Recording
When the memory card reaches its full capacity, the dash cam will automatically overwrite the oldest unlocked video files with new recordings. This ensures continuous recording without manual intervention. Important video segments can be locked to prevent them from being overwritten.

Image: A graphic depicting how loop recording functions, showing older files being replaced by new ones.
6.3 G-Sensor (Gravity Sensor)
The built-in G-Sensor detects sudden impacts or collisions. In the event of an accident, it automatically locks the current video segment, preventing it from being overwritten by loop recording. This ensures critical evidence is preserved.

Image: A visual representation of the G-Sensor activating during a collision, automatically securing the video footage.
6.4 Parking Monitoring
With parking monitoring enabled, the dash cam can record in time-lapse mode (one frame per second) when the vehicle is parked. This feature helps protect your vehicle by capturing events while it is unattended. This requires a continuous power supply, often through a hardwire kit (sold separately).
6.5 Starlight Night Vision
The dash cam is equipped with enhanced night vision capabilities, allowing it to capture clear video and photos even in low-light conditions. This improves visibility and recording quality during nighttime driving or parking.

Image: An example of the dash cam's interior camera capturing clear footage in low-light conditions, showcasing its night vision feature.
6.6 Reverse Parking View
When the vehicle is shifted into reverse gear, the dash cam automatically displays a rear view on its screen, often with guiding lines. This assists the driver in safely parking and maneuvering the vehicle.
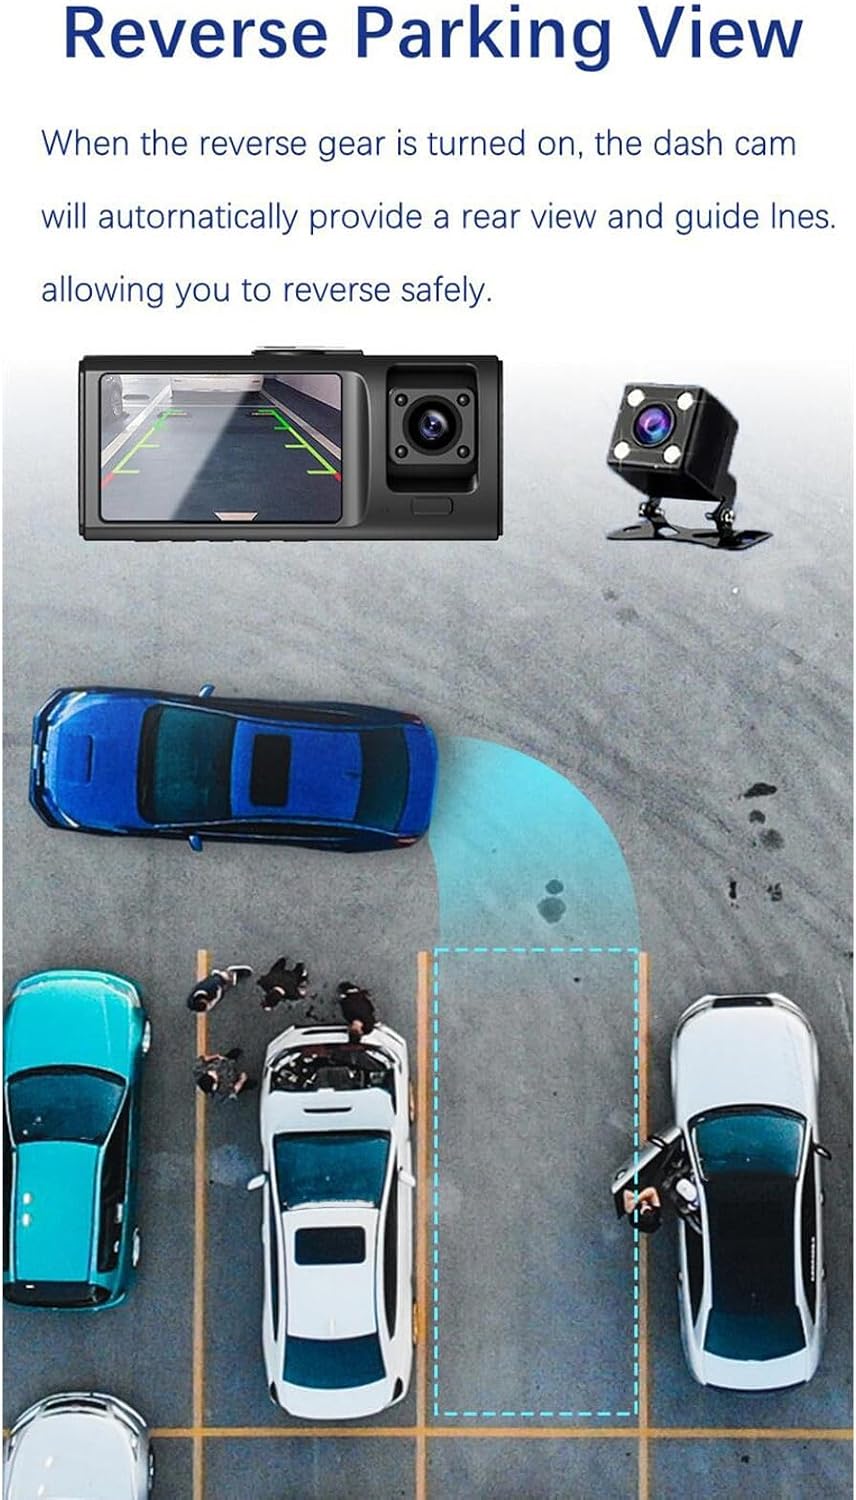
Image: An illustration demonstrating the reverse parking view feature, showing parking guidelines on the dash cam display.
7. Maintenance
- Cleaning: Use a soft, dry cloth to clean the dash cam lens and screen. Avoid using abrasive cleaners or solvents.
- Memory Card Care: Regularly format the memory card to maintain optimal performance. Replace the memory card if it shows signs of degradation or error.
- Temperature: Avoid exposing the dash cam to extreme temperatures for extended periods, as this can affect battery life and device performance.
8. Troubleshooting
8.1 Dash Cam Not Powering On
- Ensure the car charger is securely plugged into both the dash cam and the vehicle's 12V power outlet.
- Check if the vehicle's 12V power outlet is functioning (e.g., by testing with another device).
- Try manually powering on the device by pressing and holding the Power button.
8.2 Recording Issues (e.g., not recording, corrupted files)
- Ensure a compatible Micro SD card is inserted correctly.
- Format the memory card through the dash cam's settings menu.
- Try using a different, high-quality Micro SD card (Class 10 or higher).
- Check if loop recording is enabled in the settings.
8.3 Screen Display Problems
- Check screen brightness settings.
- If the screen is black, ensure the dash cam is powered on. Some models have a screen saver feature that turns off the display during recording.
8.4 Rear Camera Not Working
- Ensure the rear camera cable is securely connected to both the rear camera and the main dash cam unit.
- Check the cable for any visible damage.
9. Warranty and Support
For warranty information and customer support, please refer to the documentation provided with your purchase or contact Yoidesu customer service directly. You can typically find contact details on the manufacturer's website or on the product packaging.