TREEYX B0DBDSPDRH
TREEYX Retractable Table Saw User Manual
Model: B0DBDSPDRH
1. Introduction
This manual provides essential information for the safe operation, maintenance, and troubleshooting of your TREEYX Retractable Table Saw, Model B0DBDSPDRH. Please read this manual thoroughly before operating the saw to ensure proper use and to prevent injury or damage.
2. Safety Instructions
Always follow basic safety precautions to reduce the risk of fire, electric shock, and personal injury.
General Safety Rules:
- Read all instructions: Familiarize yourself with the controls and proper use of the tool.
- Wear appropriate safety gear: Always use eye protection, hearing protection, and a dust mask.
- Keep work area clean and well-lit: Cluttered or dark areas invite accidents.
- Do not operate in explosive atmospheres: Do not use power tools in the presence of flammable liquids, gases, or dust.
- Keep children and bystanders away: Distractions can cause you to lose control.
- Avoid accidental starting: Ensure the switch is in the off position before plugging in.
- Do not overreach: Maintain proper footing and balance at all times.
- Disconnect power: Always unplug the saw before making adjustments, changing accessories, or servicing.
- Use the right tool for the job: Do not force a small tool or attachment to do the job of a heavy-duty tool.
- Maintain tools with care: Keep cutting tools sharp and clean for better and safer performance.
- Check for damaged parts: Before use, inspect the saw for any damage. Replace or repair damaged parts before operation.
Specific Table Saw Safety:
- Always use the blade guard and splitter when operating the saw.
- Never reach over the saw blade while it is running.
- Use a push stick or push block when making narrow cuts.
- Ensure the workpiece is firmly supported and guided against the fence.
- Avoid cutting freehand.
- Do not remove cut-off pieces until the blade has stopped.
- Be aware of kickback and how to prevent it.
3. Product Overview
The TREEYX Retractable Table Saw is a versatile woodworking tool designed for precision cutting of various materials. Its robust construction and adjustable features make it suitable for a range of tasks.
Key Features:
- Powerful 1800W Motor: All-copper motor delivers a no-load speed of 5000r/min, providing efficient and high-temperature resistant operation.
- Adjustable Cutting Depth: Saw blade height is adjustable from 5mm to 45mm, allowing for varied cutting thicknesses.
- Precision Angle Adjustment: Features 0-45° angle adjustment for miter and bevel cuts.
- Extendable Table: The workbench surface can be extended to increase the working area.
- Adjustable Backing Position: Can be installed on the pusher ruler with a ruler for reference.
- Electromagnetic Switch: Includes an overload protection function for enhanced safety.
- Dust Removal System: Can be connected to a vacuum cleaner for a cleaner work environment.
- Anti-slip Rubber Feet: Provides stability during operation.
Components:
Refer to the images below for a visual guide to the saw's components.
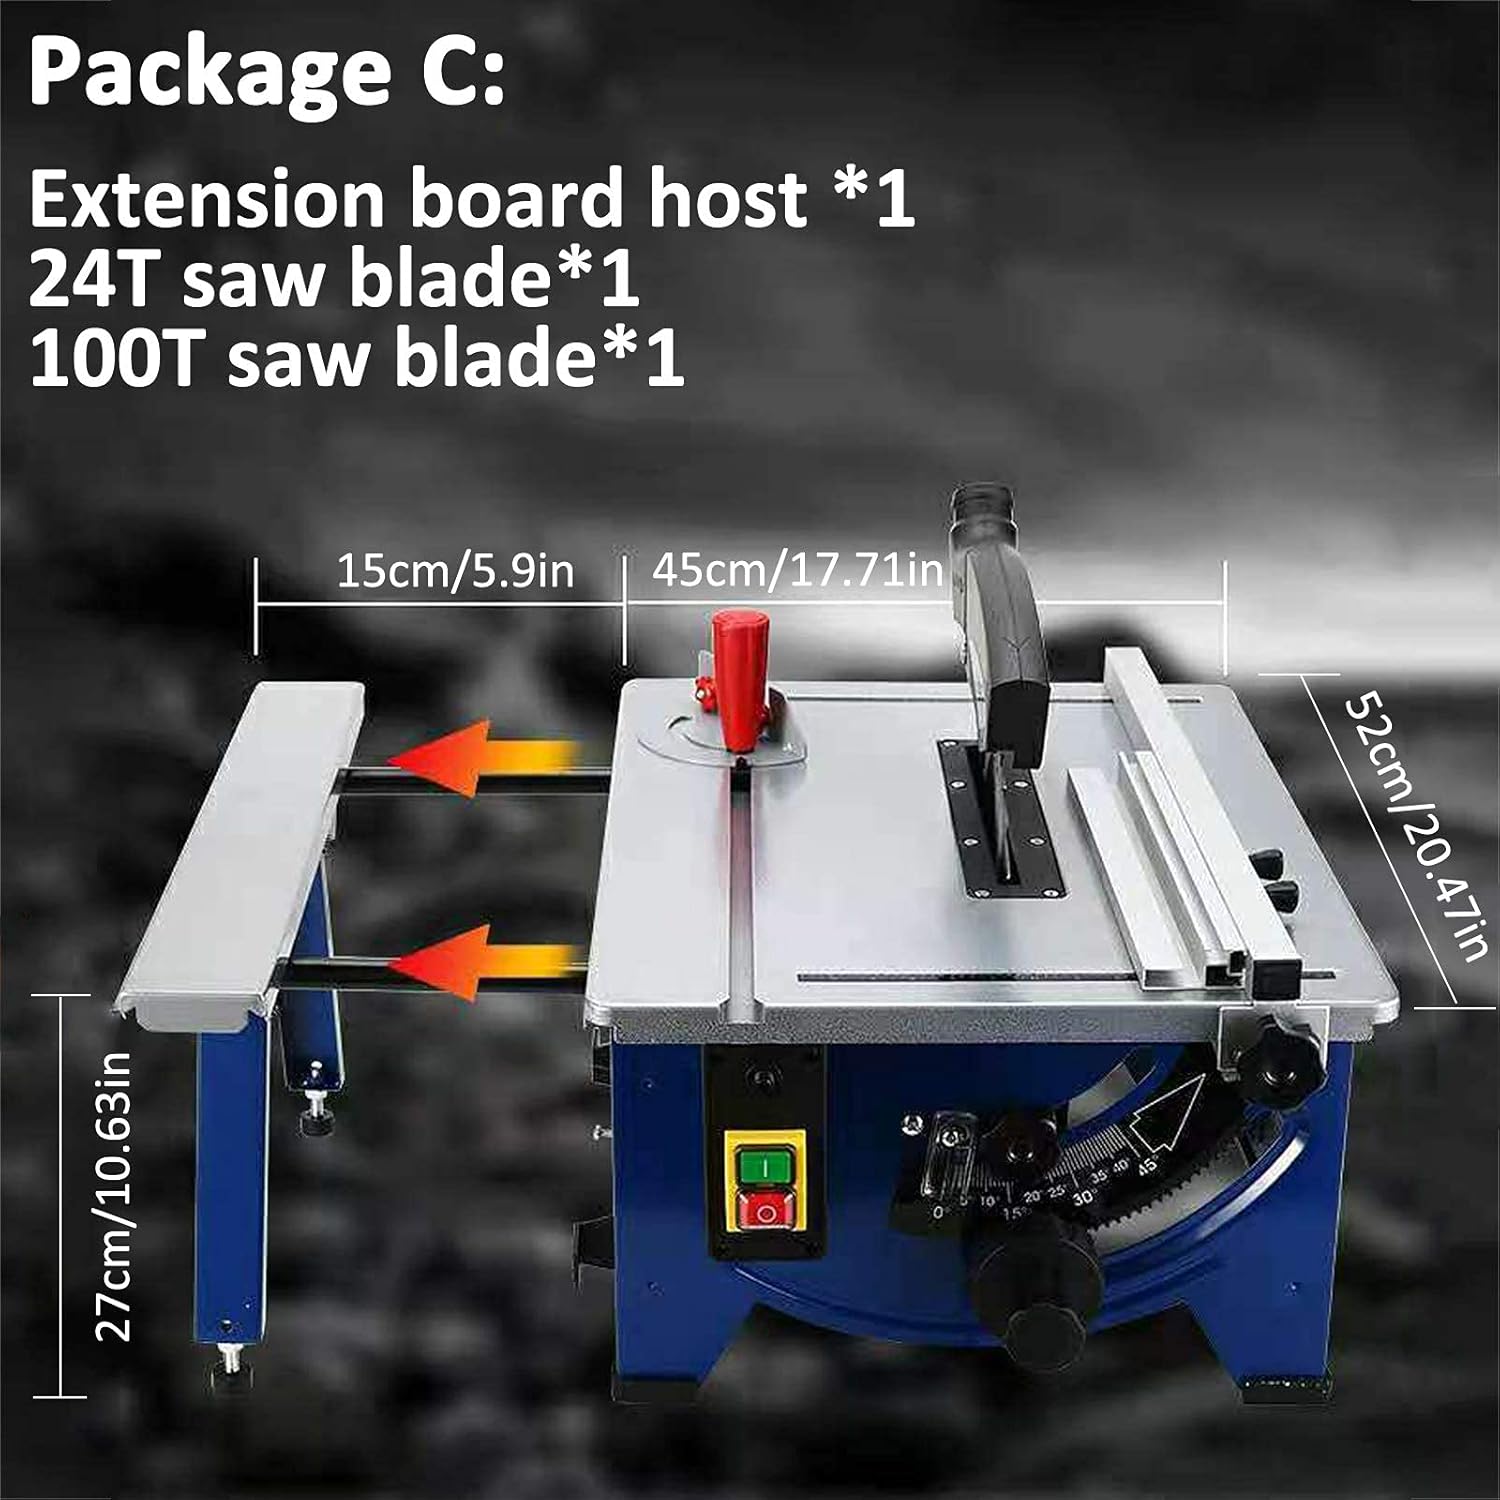
Figure 3.1: Overall view of the TREEYX Retractable Table Saw, showing key dimensions and the main components including the extension board, 24T saw blade, and 100T saw blade (as part of Package C).

Figure 3.2: Detailed view of the saw's control panel and features, including the electromagnetic switch with overload protection, the saw blade adjustment button for height and angle, anti-slip rubber feet for stability, and the dust outlet for vacuum cleaner connection.
Specifications:
| Parameter | Value |
|---|---|
| Product Name | Multifunctional Table Saw |
| Rated Power | 1800W |
| Rated Voltage | 110V-220V |
| No-load Speed | 5000r/min |
| Maximum Cutting Depth | 45mm |
| Saw Blade Angle Adjustment | 0-45° |
| Saw Blade Inner Hole Diameter | 30mm / 24.4mm |
| Saw Blade Diameter | 210mm / 200mm |
| Product Net Weight | Approx. 17kg |
4. Setup
Unpacking:
Carefully remove all components from the packaging. Verify that all items listed in the packing list are present and undamaged. The package includes the main unit, extension board, 24T saw blade, and 100T saw blade.

Figure 4.1: Contents of Package C, including the extension board host, 24T saw blade, and 100T saw blade.
Assembly:
- Secure the Saw: Place the table saw on a stable, level surface. Ensure the anti-slip rubber feet are making full contact with the surface.
- Install Extension Boards (if applicable): If your model includes extension boards, attach them to the main table as shown in the diagram. Use the desktop fixed knob to secure them.

Figure 4.2: Illustration of the telescopic table extension, showing how the board surface can be extended to increase the working area and the desktop fixed knob for securing it.
- Install Saw Blade: Ensure the saw is unplugged. Follow the instructions for your specific blade type to install it correctly. Ensure the blade is securely fastened.
- Attach Blade Guard: Always ensure the blade guard is properly installed and functional before operation.
- Connect Dust Removal System: If desired, connect a vacuum cleaner to the dust outlet for efficient dust collection.
5. Operating Instructions
Before Operation:
- Inspect the saw blade for sharpness and damage.
- Ensure all guards are in place and functioning.
- Verify the power cord is in good condition and properly connected.
- Clear the work area of any obstructions.
- Wear all necessary personal protective equipment (PPE).
Adjusting Cutting Depth and Angle:
- Adjusting Cutting Depth: Use the saw blade adjustment button to raise or lower the saw blade. The maximum cutting depth is 45mm.

Figure 5.1: Demonstrates the 45mm saw blade rise and fall mechanism, indicating the maximum cutting thickness of 45mm and saw blade diameters of 200mm/210mm with a 30mm inner hole.
- Adjusting Cutting Angle: Loosen the angle locking knob and tilt the saw blade assembly to the desired angle between 0° and 45°. Securely tighten the knob.
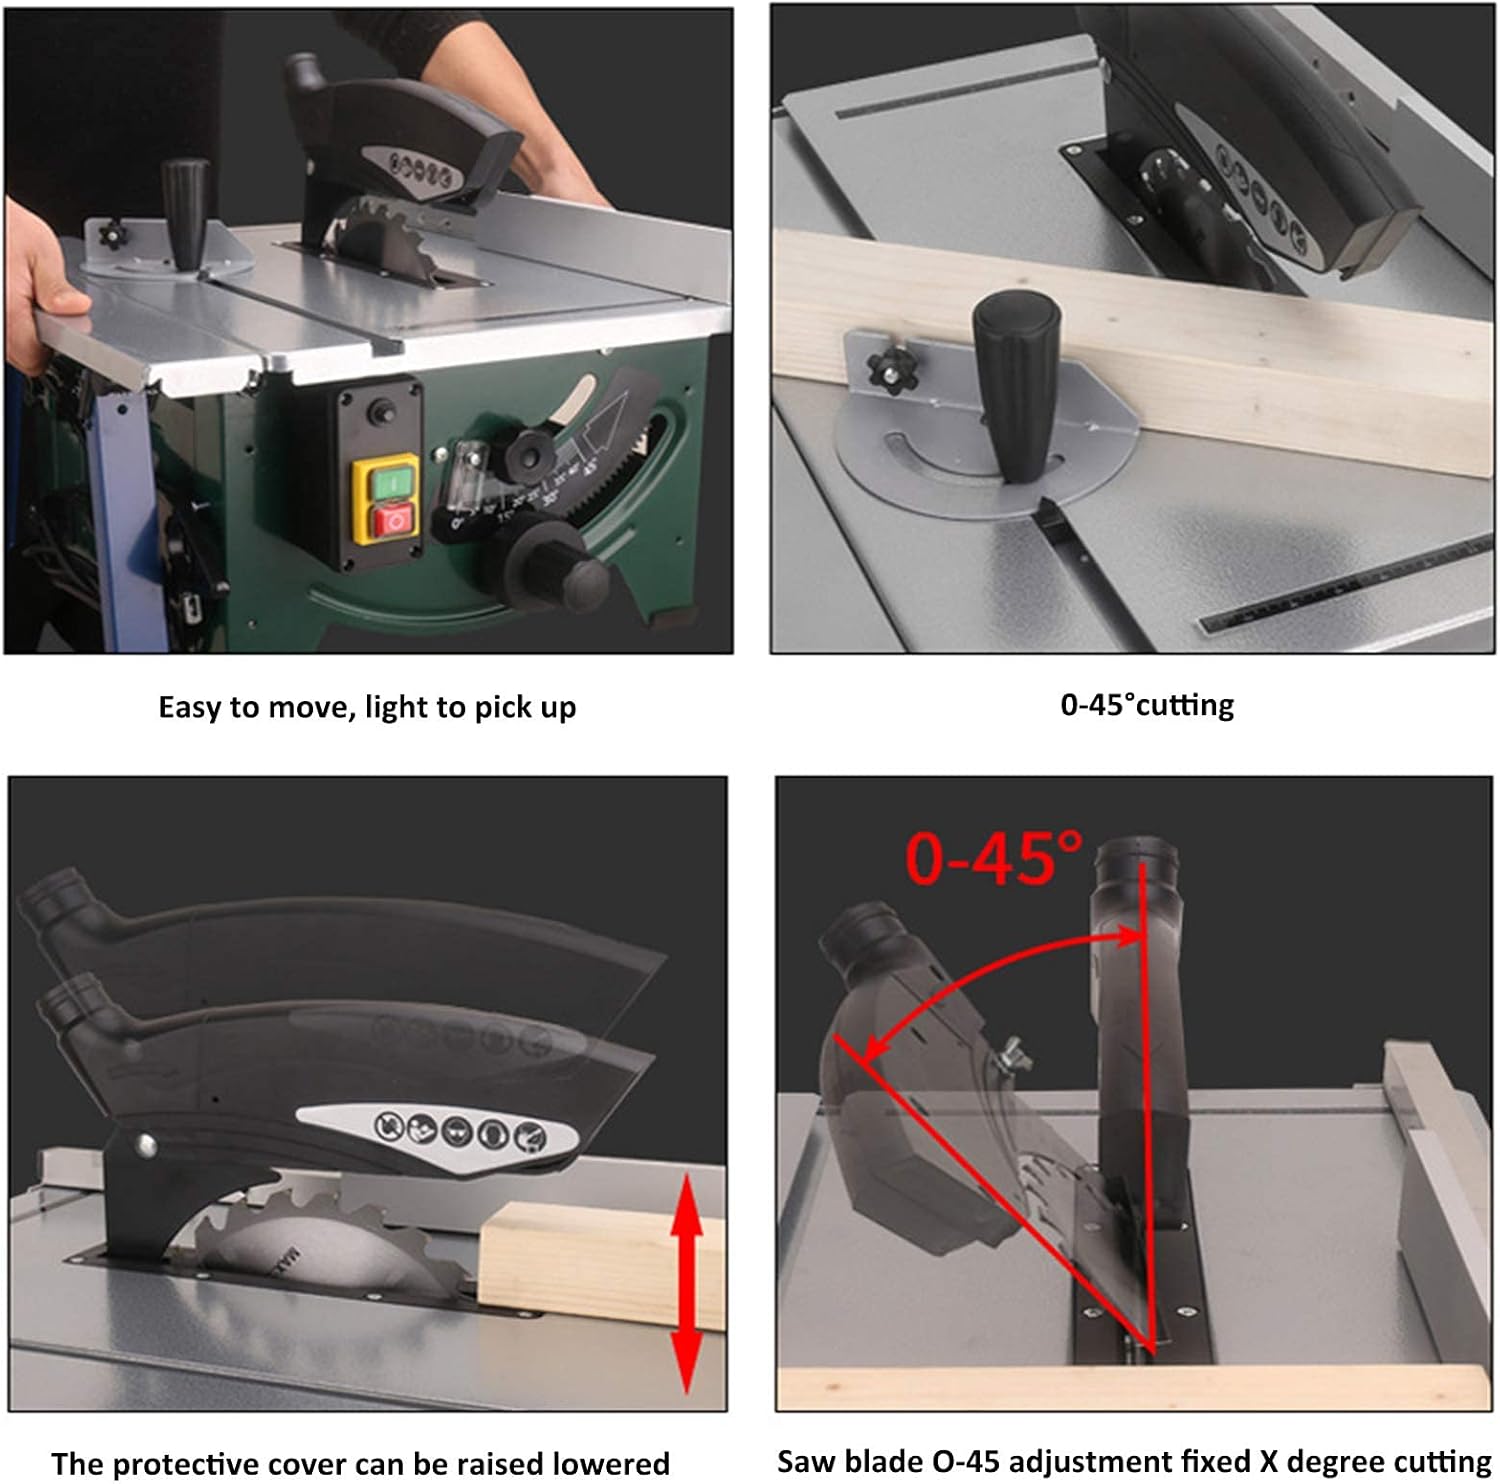
Figure 5.2: Shows the saw's capability for 0-45° angle cutting, alongside an image demonstrating the ease of moving and picking up the saw.
- Adjusting Backing Position: The backing position can be adjusted and used with a pusher ruler for precise cuts.
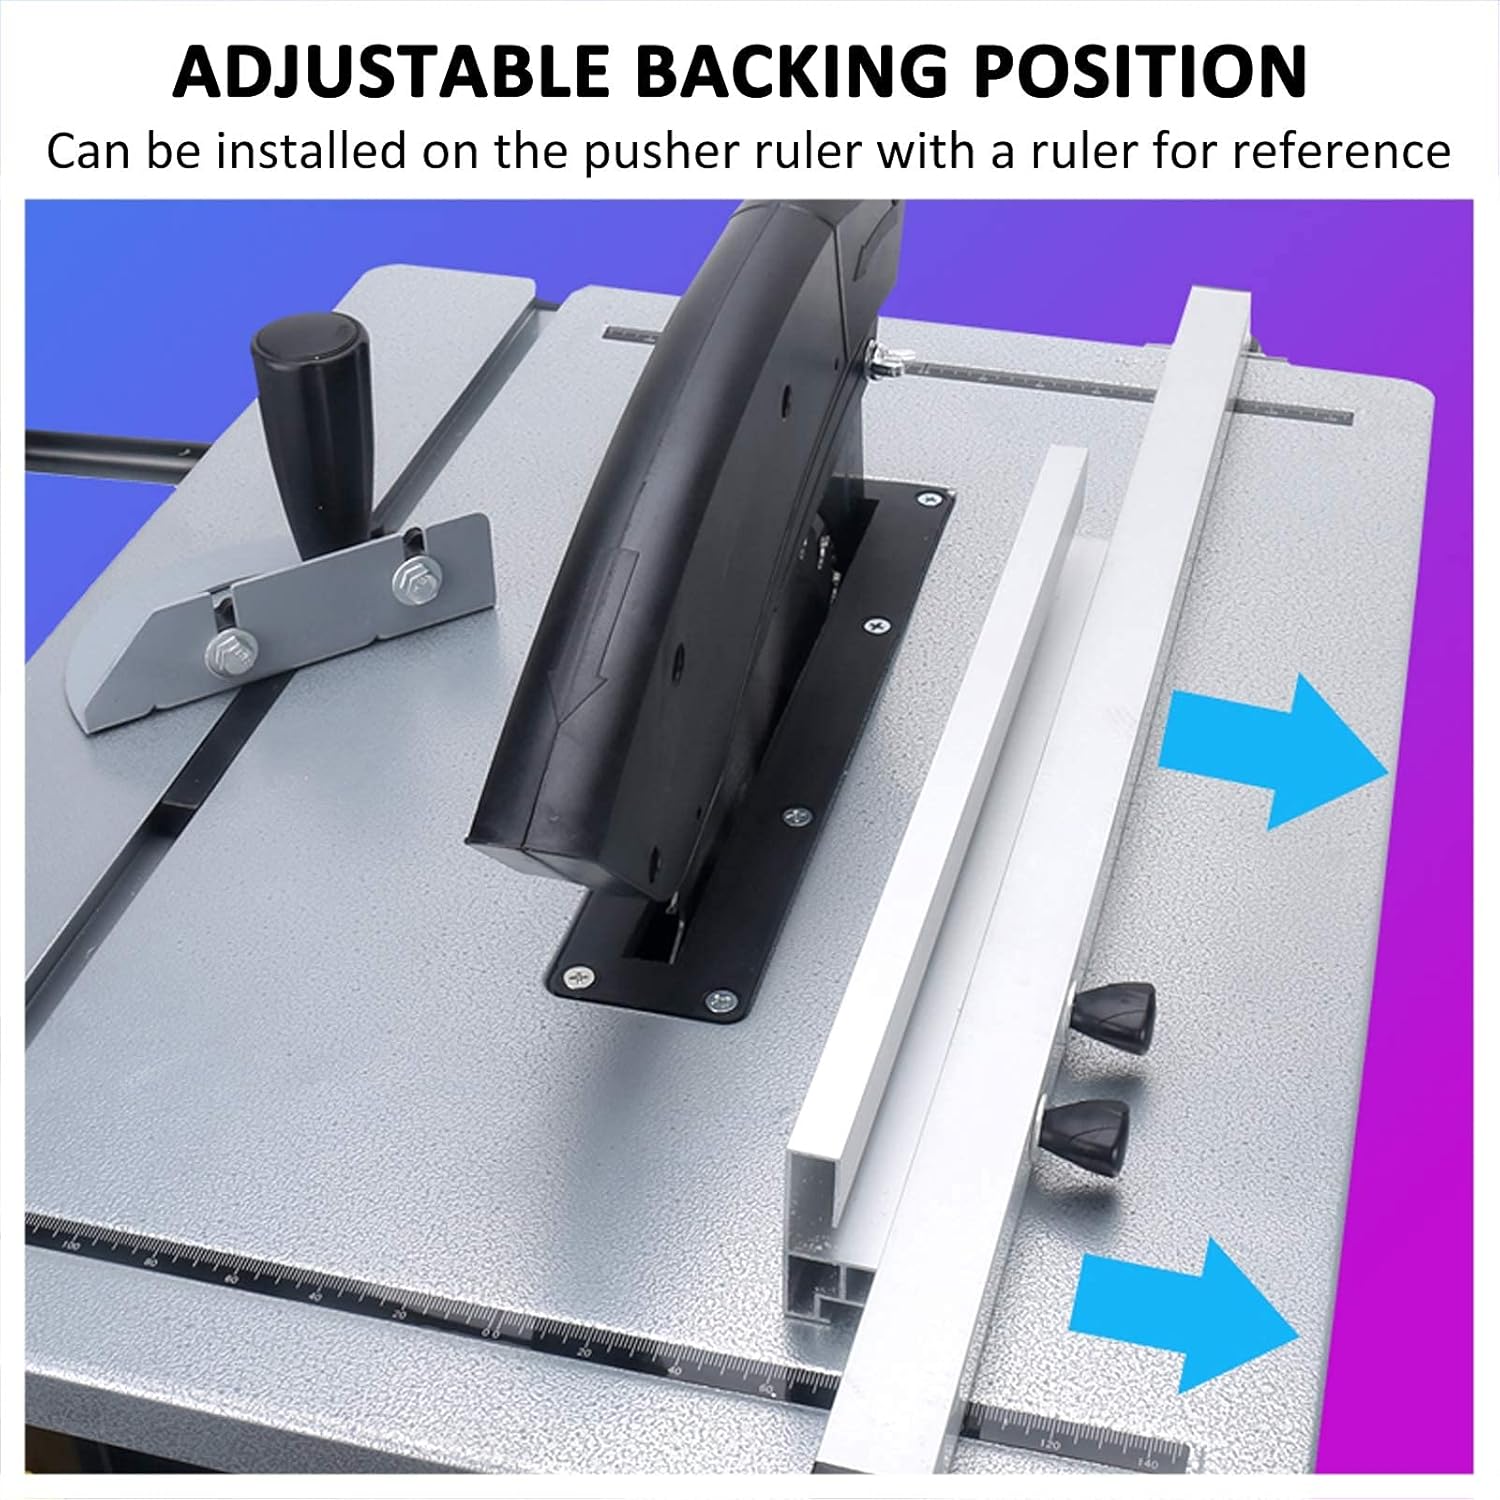
Figure 5.3: Illustrates the adjustable backing position, which can be installed on the pusher ruler for accurate measurements and guidance during cutting.
Making a Cut:
- Power On: Press the green "ON" button on the electromagnetic switch to start the motor.

Figure 5.4: View of the 1800W powerful hybrid motor, capable of reaching speeds up to 5000r/min.
- Position Workpiece: Place the workpiece firmly against the fence and the table.
- Feed Material: Slowly and steadily feed the material into the rotating saw blade. Use a push stick for smaller pieces.
- Power Off: Once the cut is complete, press the red "OFF" button on the electromagnetic switch. Wait for the blade to come to a complete stop before removing the workpiece or cut-off pieces.
6. Maintenance
Regular maintenance ensures the longevity and safe operation of your table saw.
- Cleaning: After each use, unplug the saw and clean off sawdust and debris from the table, blade guard, and motor vents. Use a brush or compressed air.
- Blade Inspection: Regularly inspect the saw blade for dullness, damage, or missing teeth. Replace dull or damaged blades promptly.
- Lubrication: Periodically lubricate moving parts as recommended in the full service manual (if available).
- Electrical Cord: Check the power cord for any signs of damage, fraying, or cuts. Replace if damaged.
- Fasteners: Ensure all nuts, bolts, and screws are tight.
7. Troubleshooting
This section addresses common issues you might encounter with your table saw.
| Problem | Possible Cause | Solution |
|---|---|---|
| Saw does not start | No power; Electromagnetic switch tripped; Faulty switch | Check power supply; Reset electromagnetic switch; Contact service center |
| Blade binds or smokes | Dull blade; Incorrect blade for material; Misaligned fence; Overfeeding material | Replace or sharpen blade; Use appropriate blade; Adjust fence; Reduce feed rate |
| Inaccurate cuts | Misaligned fence; Loose blade; Worn blade | Calibrate fence; Tighten blade; Replace blade |
| Excessive vibration | Loose components; Damaged blade; Unstable surface | Tighten all fasteners; Replace damaged blade; Ensure saw is on a stable surface |
8. Warranty and Support
For warranty information or technical support, please contact TREEYX customer service. Keep your purchase receipt as proof of purchase.
If you have any questions, concerns, or require assistance, please contact the seller or manufacturer directly.
Ask a question about this manual
Ask about setup, troubleshooting, compatibility, parts, safety, or missing instructions. Manuals+ will review the question and use this page’s manual context to help answer it.