1. Introduction
This manual provides detailed instructions for the assembly, operation, and maintenance of your Irontar 70.9" Kitchen Pantry. Please read this manual thoroughly before assembly and use to ensure proper function and safety. Keep this manual for future reference.

Figure 1: Irontar 70.9" Kitchen Pantry (Model CWG011E)
2. Safety Information
WARNING: Failure to follow these safety instructions may result in injury or damage to the product.
- Secure the cabinet to the wall using the provided anti-tipping device to prevent accidental falling, especially in households with children or pets.
- Exercise caution when using the integrated AC outlets. Ensure appliances are properly plugged in and do not exceed the maximum power rating of the outlets.
- Keep all small parts and packaging materials away from children during assembly.
- Assemble the unit on a soft, clean surface to prevent scratches.
- Do not stand or climb on the cabinet.
- Avoid exposing the cabinet to excessive moisture or direct sunlight.

Figure 2: Anti-tip Device Installation
3. Package Contents
Before beginning assembly, verify that all parts and hardware are present and undamaged. Refer to the parts list included in your product packaging. If any parts are missing or damaged, contact customer support.
- Cabinet panels (e.g., side panels, back panels, shelves, door panels, drawer panels)
- Hardware kit (e.g., screws, dowels, cam locks, hinges, drawer slides, handles)
- Anti-tipping device
- Power strip with AC outlets
- Instruction manual
4. Assembly Instructions
Assembly is required for this product. Detailed, step-by-step instructions with numbered accessories are included in the product packaging. Please follow these instructions carefully.
- Preparation: Clear a spacious area for assembly. Lay out all parts and hardware, organizing them by their labels.
- Base Assembly: Begin by assembling the base frame of the cabinet.
- Panel Installation: Attach the side and back panels according to the diagrams.
- Shelf and Drawer Installation: Install shelves and drawer slides. Assemble drawers and insert them into their designated slots.
- Door Installation: Attach hinges to the doors and then to the cabinet frame. Adjust as needed for proper alignment.
- Top Section Assembly: Assemble the upper cabinet section, including glass doors and shelves.
- Charging Station Integration: Install the power strip into the designated area on the countertop.
- Final Placement and Safety: Once assembled, move the cabinet to its desired location. Secure it to the wall using the anti-tipping device.
Note: Two people are recommended for assembly to ensure stability and ease of handling larger components.
5. Product Features Overview
The Irontar Kitchen Pantry is designed for versatile storage and functionality in various home environments.
- Spacious Countertop: A large central countertop provides space for appliances such as microwaves, coffee makers, or toasters.
- Integrated Charging Station: Equipped with 2 AC outlets for convenient power access for kitchen appliances or electronic devices.
- Upper Glass Door Cabinets: Visible storage for cans, glassware, or decorative items.
- Adjustable Shelves: Both upper and lower cabinets feature adjustable shelves to accommodate items of various heights.
- Three Drawers: Provides enclosed storage for cutlery, utensils, or other small items.
- Lower Cabinets: Offers concealed storage for larger items, pots, pans, or storage baskets.
- Anti-tip Device: Included for enhanced safety and stability.
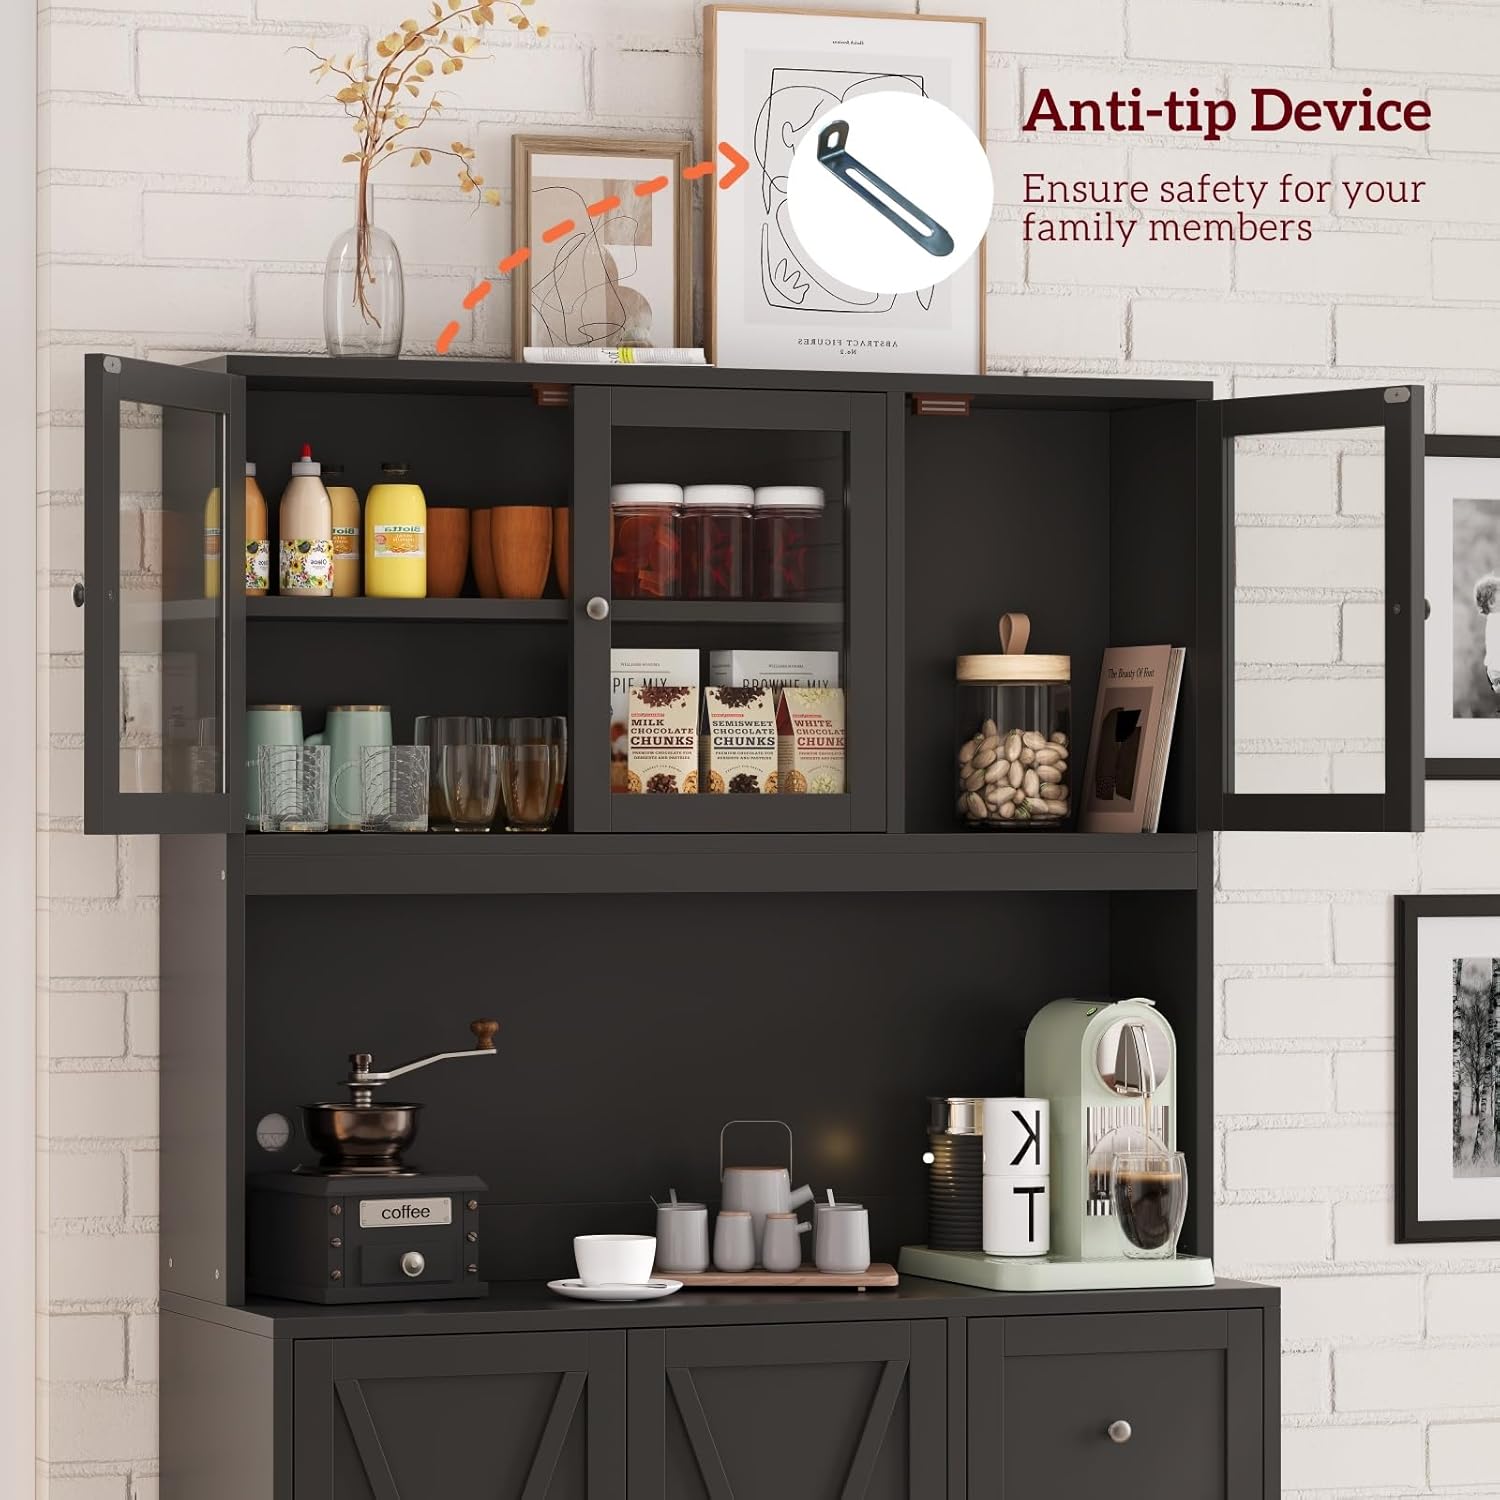
Figure 3: Feature Breakdown

Figure 4: Detailed Features (Microwave Countertop, Drawers, Charging, Door Design)
6. Operating Instructions
This section outlines the basic operation of the pantry's features.
- Using the Charging Station: Plug the pantry's power cord into a standard wall outlet. The two AC outlets on the countertop are now active. Plug your appliances (e.g., microwave, coffee maker) or electronic devices into these outlets as needed.
- Adjusting Shelves: To adjust a shelf, remove all items from the shelf. Carefully lift the shelf and reposition the shelf pins to the desired height. Ensure all four pins are securely inserted before placing the shelf back.
- Drawer Operation: The drawers operate on metal rails for smooth opening and closing. Avoid overloading drawers to ensure longevity of the slides.
- Door Operation: Open and close cabinet doors gently. For glass doors, handle with care to prevent damage.
7. Maintenance
Regular maintenance helps preserve the appearance and functionality of your pantry.
- Cleaning: Wipe surfaces with a soft, damp cloth. Avoid abrasive cleaners or harsh chemicals, which can damage the finish. For glass doors, use a standard glass cleaner.
- Spills: Immediately wipe up any spills, especially liquids, to prevent water damage or staining. The product is not water-resistant.
- Hardware Check: Periodically check all screws and fasteners to ensure they are tight. Retighten if necessary.
- Anti-tip Device: Regularly inspect the anti-tipping device to ensure it remains securely attached to both the cabinet and the wall.
8. Troubleshooting
This section addresses common issues you might encounter.
- Wobbly Cabinet: Ensure all assembly screws are tightened. Verify the cabinet is on a level surface. Use shims if necessary to stabilize. Confirm the anti-tip device is properly installed.
- Drawers Not Sliding Smoothly: Check that drawer slides are correctly installed and free of obstructions. Ensure drawers are not overloaded.
- Doors Not Aligning: Adjust the hinges as per the assembly instructions to correct door alignment.
- Charging Outlets Not Working: Ensure the pantry's main power cord is securely plugged into a functional wall outlet. Check if the wall outlet itself is receiving power.
For issues not covered here, please contact Irontar customer support.
9. Specifications
| Feature | Specification |
|---|---|
| Brand | Irontar |
| Model Name | CWG011E |
| Product Dimensions | 15.7"D x 39.4"W x 70.9"H |
| Item Weight | 103.6 Pounds |
| Color | Black |
| Material | Engineered Wood |
| Weight Limit | 150 Pounds (approx.) |
| Number of Shelves | 2 (adjustable) |
| Number of Drawers | 3 |
| Special Features | Adjustable Shelf, Glass Door, Charging Station (2 AC outlets) |
| Assembly Required | Yes |

Figure 5: Product Dimensions
10. Warranty and Support
For warranty information or customer support, please refer to the documentation included with your purchase or contact Irontar directly through their official website or the retailer where the product was purchased. Please have your model number (CWG011E) and purchase date available when contacting support.


