Introduction
This manual provides essential information for the installation, operation, and maintenance of your new Generic Laptop CPU Fan, specifically designed for the Aocwei A2 laptop model. Please read this manual thoroughly before installation to ensure proper function and longevity of the product.
Important Safety Information
- Always disconnect power from the laptop before attempting any installation or maintenance.
- Handle the fan by its edges to avoid damaging the blades or electronic components.
- Ensure the fan's wire sequence matches your laptop's original fan. Warning: This fan has many different wire sequences. The order of the wires is different and may not be universal. Please contact us before purchasing if you are unsure.
- If you are not confident in performing the installation, seek assistance from a qualified technician.
Product Overview
The Generic Laptop CPU Fan for Aocwei A2 is a replacement cooling component designed to dissipate heat from your laptop's central processing unit (CPU). It operates at DC5V 0.25A and connects via a 4-pin connector.
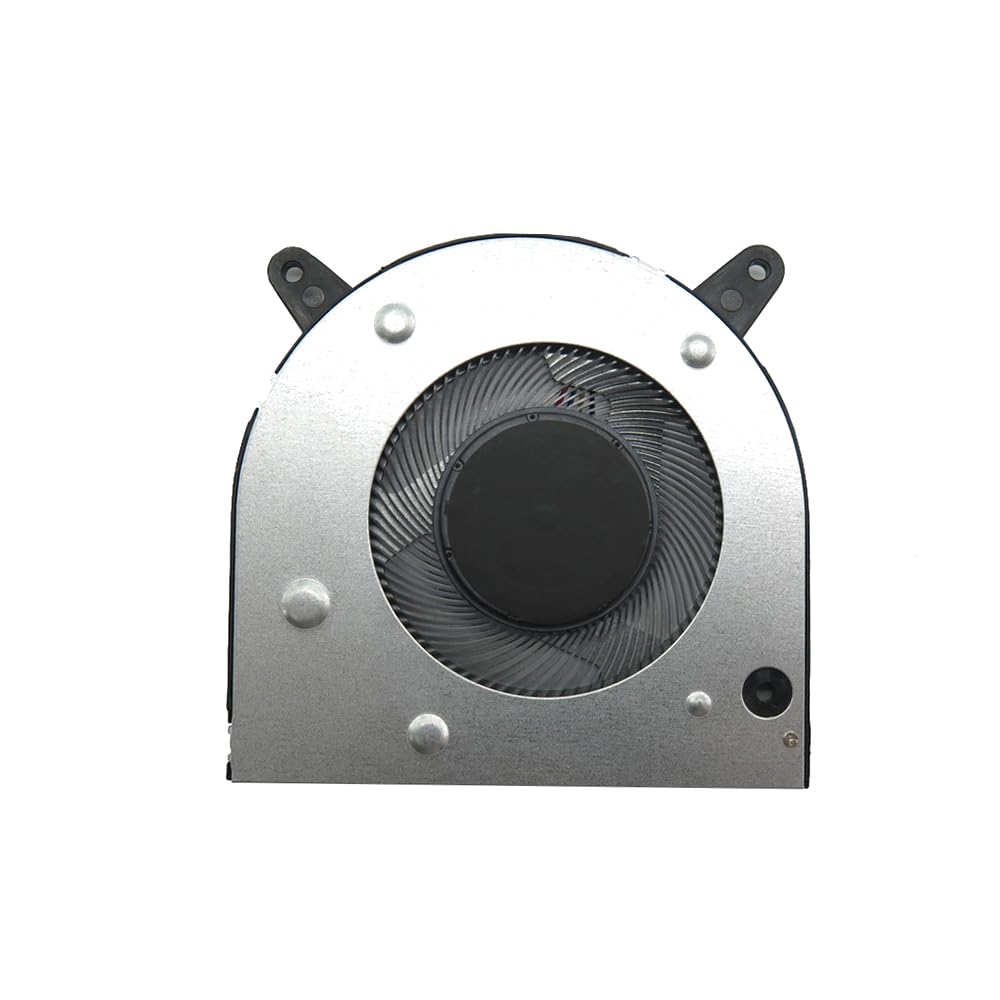
Image: Generic Laptop CPU Fan for Aocwei A2. This image shows the fan unit with its blades and 4-pin connector cable.
Setup and Installation
- Preparation: Ensure your laptop is powered off and disconnected from all power sources. Remove the battery.
- Accessing the CPU Fan: Carefully open your laptop's casing to access the internal components, following your laptop's specific service manual if available.
- Removing the Old Fan: Disconnect the old fan's 4-pin connector from the motherboard. Unscrew any mounting screws holding the old fan in place and gently remove it.
- Installing the New Fan: Position the new Generic Laptop CPU Fan in the same location as the old one. Secure it with the appropriate screws.
- Connecting the Fan: Carefully connect the new fan's 4-pin connector to the corresponding port on the motherboard. Ensure the connection is firm and correctly oriented. (Refer to the safety information regarding wire sequence.)
- Reassembly: Reassemble your laptop's casing, ensuring all screws are tightened and components are properly seated.
- Testing: Reconnect the battery and power adapter. Power on the laptop and verify that the new CPU fan is operating correctly and quietly. Monitor CPU temperatures to ensure effective cooling.
Operation
Once installed, the CPU fan operates automatically, controlled by your laptop's system to maintain optimal CPU temperatures. It will adjust its speed based on the thermal load to prevent overheating.
Maintenance
- Regular Cleaning: Periodically (e.g., every 6-12 months), open your laptop and gently clean the fan blades and heatsink fins using compressed air or a soft brush. This prevents dust buildup, which can impede airflow and reduce cooling efficiency.
- Inspection: Check for any signs of wear, damage, or unusual noise during operation. If the fan becomes excessively noisy or stops spinning, it may require replacement.
Troubleshooting
| Problem | Possible Cause | Solution |
|---|---|---|
| Fan not spinning | Loose connection, faulty fan, insufficient power. | Check 4-pin connector. Ensure proper installation. If still not working, the fan may be faulty. |
| Loud fan noise | Dust buildup, worn bearings, improper installation. | Clean the fan blades. Recheck installation for obstructions. If noise persists, the fan may need replacement. |
| Laptop overheating | Fan not cooling effectively, blocked vents, thermal paste issue. | Ensure fan is spinning. Clean vents. Consider reapplying thermal paste to the CPU if the fan is working but temperatures remain high. |
| Incorrect wire sequence | Incompatibility with laptop model. | As noted in safety information, verify wire sequence before purchase. If already purchased, contact seller for guidance. |
Specifications
- Model: Aocwei A2 Compatible
- Voltage: DC5V
- Current: 0.25A
- Connector: 4-Pin
- Material: Plastic
- Item Weight: Approximately 0.5 Kilograms
Warranty and Support
This product comes with a 90-day warranty from the date of purchase. For warranty claims or technical support, please contact your retailer or the manufacturer directly. When contacting support, please have your purchase details and the product's ASIN (B0DBDL6FR1) available.
To ensure you receive the correct goods and for any pre-purchase inquiries regarding wire sequences, please check your registered email after payment or contact the seller.