
1. Introduction
Thank you for choosing the eShelf 3x6ft Overhead Garage Storage Rack. This product is designed to help you maximize your garage space by utilizing unused ceiling areas. This manual provides essential information for safe installation, proper use, and maintenance. Please read all instructions carefully before assembly and use.
2. Safety Information
- Weight Capacity: Do not exceed the maximum load capacity of 450 pounds. Overloading can lead to structural failure and injury.
- Installation Surface: This rack is suitable for installation on wood studs/joists and concrete walls only. DO NOT mount to metal walls.
- Ceiling Angle: Ensure your ceiling angle is under 15 degrees for safe installation.
- Stud Finder: Always use a reliable stud finder to accurately locate ceiling joists before drilling.
- Professional Installation: If you are unsure about any part of the installation process, consult a qualified professional.
- Secure Fasteners: Ensure all screws and fasteners are tightened securely before loading the rack.
- Weight Distribution: Distribute weight evenly across the rack surface. Avoid concentrating heavy items in one area.
3. Package Contents
Verify that all components are present and undamaged before beginning assembly. If any parts are missing or damaged, please contact customer support.
- Ceiling Brackets
- Vertical Support Bars (Adjustable)
- Mesh Panels (Rack Surface)
- Mounting Hardware (8mm screws, washers, nuts)
- Instruction Manual
4. Specifications
| Feature | Detail |
|---|---|
| Product Dimensions | 36"D x 72"W x 40"H (Maximum Height) |
| Size | 3x6ft |
| Weight Limit | 450 Pounds |
| Adjustable Dropdown Height | 22" to 40" |
| Material | Metal |
| Installation Type | Ceiling Mount |
| Joist Spacing Compatibility | ≤24 inches, or 36 inches (with specific conditions) |
| Ceiling Angle Compatibility | Under 15 degrees |
| Item Weight | 46.2 pounds |
5. Setup and Installation
5.1. Preparation Before Installation
- Locate Joists: Use a stud finder to accurately locate the wooden joists in your ceiling. Mark their positions.
- Verify Spacing: Confirm that the spacing between your joists is compatible with the rack (≤24 inches, or 36 inches if your beam spacing is greater than 24 inches).
- Plan Layout: Determine the exact location for your rack, ensuring sufficient clearance for garage doors, vehicles, and other items.

Figure 5.1: Use a stud finder to locate wooden joists and confirm spacing.

Figure 5.2: Plan the installation area to ensure adequate space.
5.2. Mounting the Ceiling Brackets
The long ceiling brackets are designed to span across two joists, enhancing stability and load distribution.
- Align the ceiling brackets with the marked joist locations.
- Drill pilot holes as per the instructions provided with your hardware.
- Securely fasten the ceiling brackets to the joists using the provided 8mm screws and washers. Ensure they are tightly secured.

Figure 5.3: Long ceiling brackets ensure safety by spanning across two beams.

Figure 5.4: Rack compatibility with various joist spacings.

Figure 5.5: This method is only suitable for ceilings with an inclination angle of less than 15 degrees.

Figure 5.6: Secure vertical posts to the wooden studs in the wall, ensuring the distance between the studs is 72 inches.
5.3. Assembling the Rack
- Attach the vertical support bars to the ceiling brackets. These bars are adjustable from 22 inches to 40 inches, allowing you to customize the dropdown height.
- Connect the mesh panels to the vertical support bars to form the storage surface. The integrated design of the mesh panels and frames ensures durability and prevents separation.
- Use the high-quality 8mm screws for all connections, ensuring each is tightened to prevent any wobbling.

Figure 5.7: Integrated wire grid enhances safety and stability.

Figure 5.8: The rack offers adjustable height and a 450-pound loading capacity.
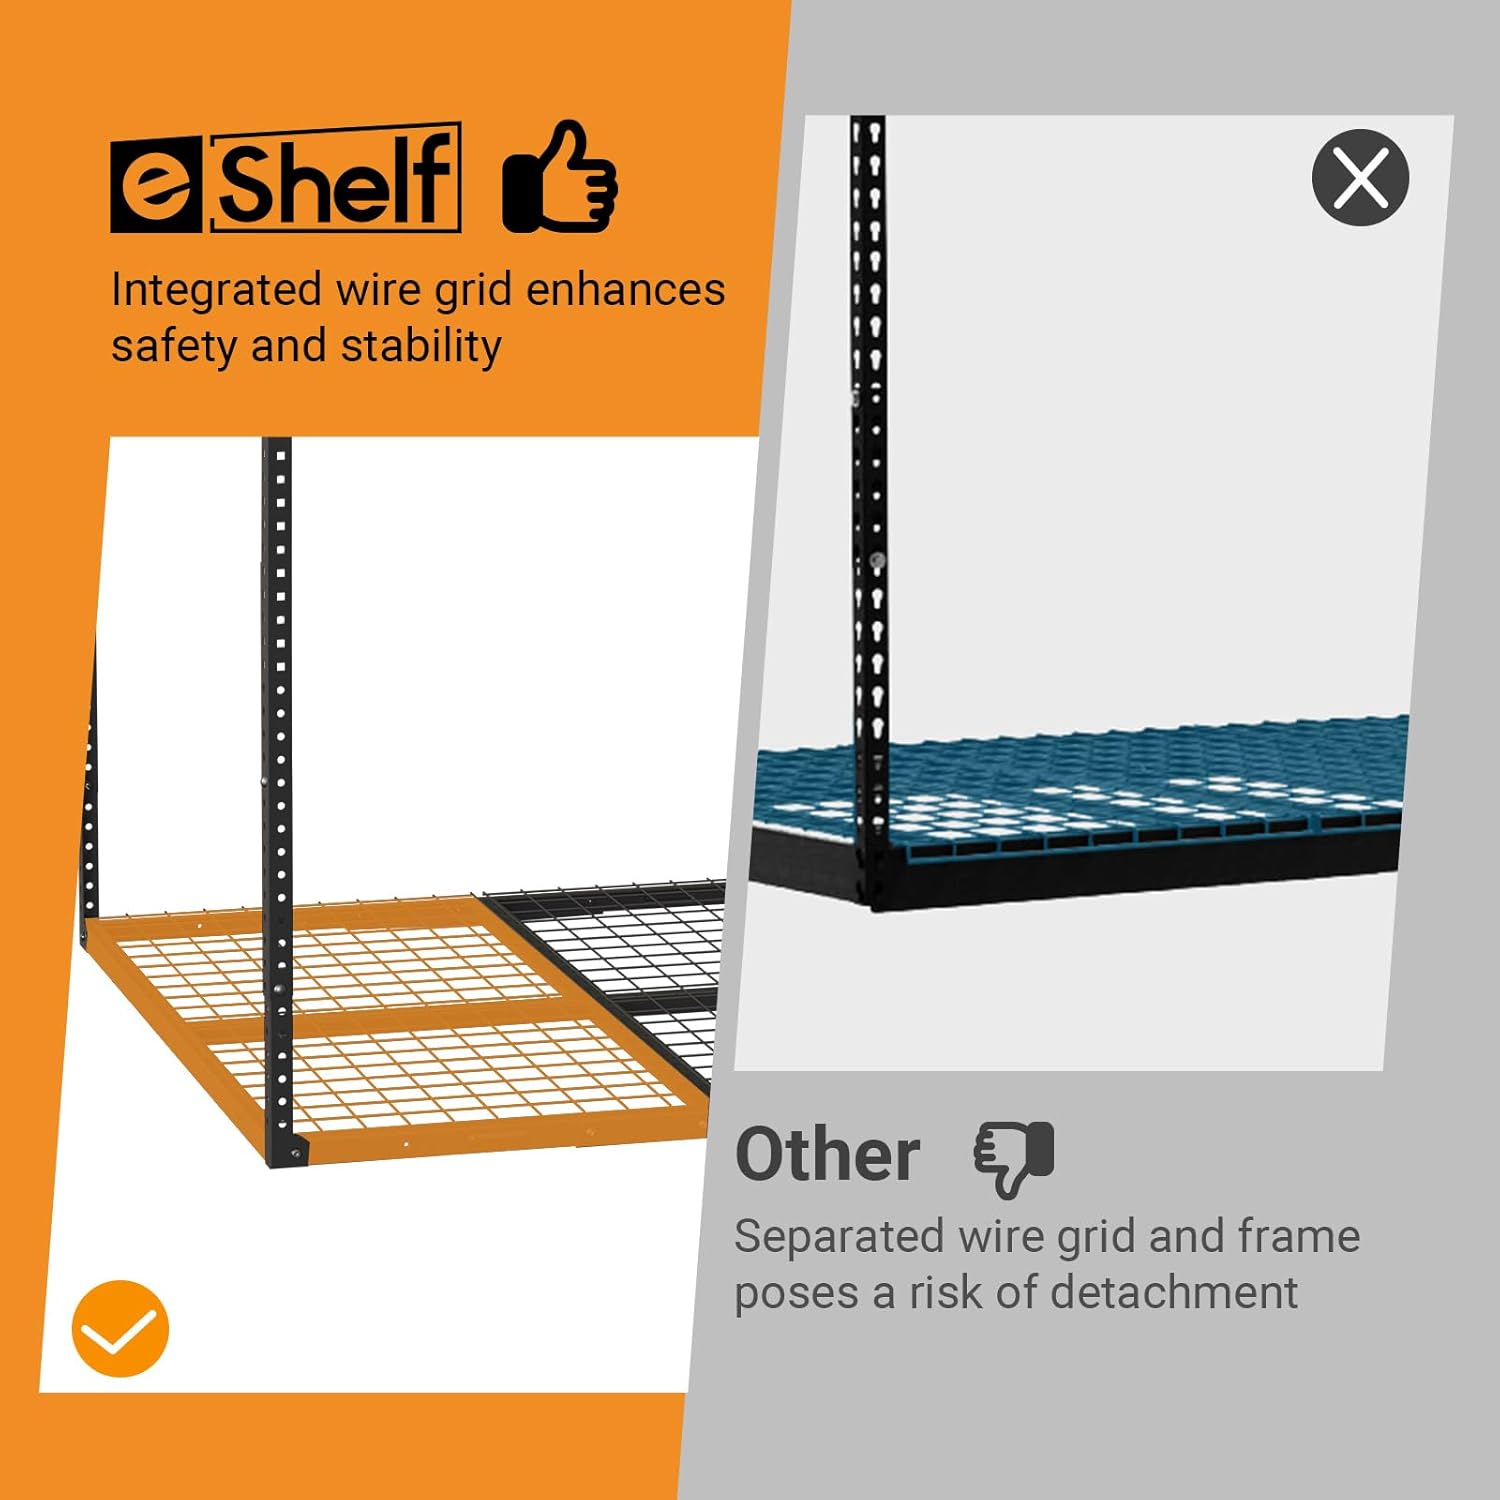
Figure 5.9: High-quality 8mm screws are used for secure assembly.
6. Operating Instructions
- Loading the Rack: Carefully place items onto the rack. Always distribute the weight as evenly as possible across the entire surface.
- Maximum Capacity: Do not exceed the stated maximum weight capacity of 450 pounds.
- Item Placement: Place heavier items closer to the support bars and distribute lighter items across the remaining space.
- Clearance: Ensure that items stored on the rack do not interfere with garage door operation or vehicle movement.
7. Maintenance
- Cleaning: Wipe the rack with a dry cloth to remove dust and debris. Avoid using harsh chemicals that may damage the finish.
- Periodic Inspection: Regularly inspect all mounting points and fasteners (screws, bolts) to ensure they remain tight and secure. Tighten any loose fasteners immediately.
- Damage Check: Periodically check the rack for any signs of damage, bending, or corrosion. If significant damage is found, discontinue use and contact customer support.
8. Troubleshooting
- Rack Wobbles After Installation:
- Ensure all mounting screws are fully tightened into the ceiling joists/studs.
- Verify that the ceiling brackets are properly aligned and secured across joists. - Difficulty Attaching Mesh Panels:
- Check that the vertical support bars are correctly oriented and aligned.
- Ensure no parts are bent or obstructed. - Rack Appears Uneven:
- Re-check the measurements and leveling during installation.
- Adjust the vertical support bars to ensure the rack is level.
9. Warranty and Support
For any questions, concerns, or assistance with your eShelf Overhead Garage Storage Rack, please contact eShelf customer support. While specific warranty details are not provided in this manual, please refer to your purchase documentation or the eShelf website for warranty information.
Contact Information: Please visit the official eShelf website or refer to your product packaging for the most current customer support contact details.