KINGEAR Pink Cute Bunny Switch Pro Controller
KINGEAR Pink Cute Bunny Switch Pro Controller User Manual
Model: Pink Cute Bunny Switch Pro Controller
Introduction
Thank you for choosing the KINGEAR Pink Cute Bunny Switch Pro Controller. This wireless controller is designed to enhance your gaming experience across multiple platforms, including Nintendo Switch, Switch OLED, Switch Lite, and PC. It features advanced functionalities such as turbo, dual motor vibration, 6-axis motion control, and programmable macros, all within an ergonomic and adorable design. Please read this manual carefully to ensure proper setup and optimal performance of your new controller.
Package Contents
- 1 x KINGEAR Pink Cute Bunny Switch Pro Controller
- 1 x USB-C Charging Cable
- 1 x User Manual
Video: Unboxing and initial overview of the controller, showing the controller, charging cable, and user manual.
Controller Layout

Image: Detailed diagram illustrating all buttons, joysticks, and ports on the controller, including the HOME button, action keys (A, B, X, Y), directional keys, turbo key, status indicator LEDs, left/right rockers (L3/R3), L/R/LT/RT triggers, and Type-C charging port.
- HOME Button: Powers on/off, wakes up console, pairing.
- Directional Keys: Up, Down, Left, Right.
- Action Keys (A, B, X, Y): Standard gaming input.
- Left/Right Rockers (L3/R3): Analog joysticks with push-button functionality.
- L/R/LT/RT Triggers: Shoulder and trigger buttons.
- Turbo Key: Activates/deactivates turbo function.
- Status Indicator LEDs: Show connection status and battery level.
- Type-C Port: For charging and wired connection.
- M1/M2 Buttons: Programmable macro buttons on the underside.
Setup and Connection
Charging the Controller
Before first use, fully charge the controller. Connect the supplied USB-C cable to the controller's Type-C port and the other end to a USB power source (e.g., Nintendo Switch dock, PC, USB wall adapter). The breathing light indicators will show charging status.

Image: Visual representation of battery capacity (500mAh), charging time (2.5 hours), and play time (8-10 hours) for the controller.
Pairing with Nintendo Switch/Switch OLED/Switch Lite
- From the HOME Menu, select Controllers > Change Grip/Order.
- On the controller, press and hold the HOME button (bunny nose) for 3 seconds until the indicator lights flash rapidly.
- Once paired, the indicator lights will remain solid, and the controller will be ready for use.

Image: Illustration showing how to connect the controller to a game console (Switch/OLED/Lite) or PC by pressing the HOME button for 3 seconds.
Connecting to PC (Wired/Wireless)
- Wired Connection: Connect the controller to your PC using the USB-C cable. The PC should automatically detect and install the necessary drivers.
- Wireless Connection (Bluetooth): Ensure your PC has Bluetooth enabled. Go to Bluetooth settings, search for new devices, and select the controller when it appears.
Operating the Controller
Turbo Function
The turbo function allows for rapid, continuous input of a button press. This controller supports 3 burst speeds: Low, Normal, and High.
- To activate: Press and hold the Turbo button, then press the desired action button (A/B/X/Y/L/R/ZL/ZR) you wish to set to turbo. Release both buttons.
- To adjust speed: With turbo active, press the Turbo button and the Up directional key to cycle through speeds (Low > Normal > High).
- To deactivate: Press and hold the Turbo button, then press the action button again. Alternatively, press the Turbo button and the Down directional key to turn off turbo for all buttons.

Image: Visual guide to the three adjustable turbo speeds: High, Normal, and Low, indicating rapid input for gaming.
Vibration Adjustment
The controller features dual motor vibration with 4 adjustable levels (0%, 30%, 70%, 100%) for an immersive gaming experience.
- To adjust: Press the Turbo button and the Left/Right directional keys simultaneously to cycle through vibration intensities.
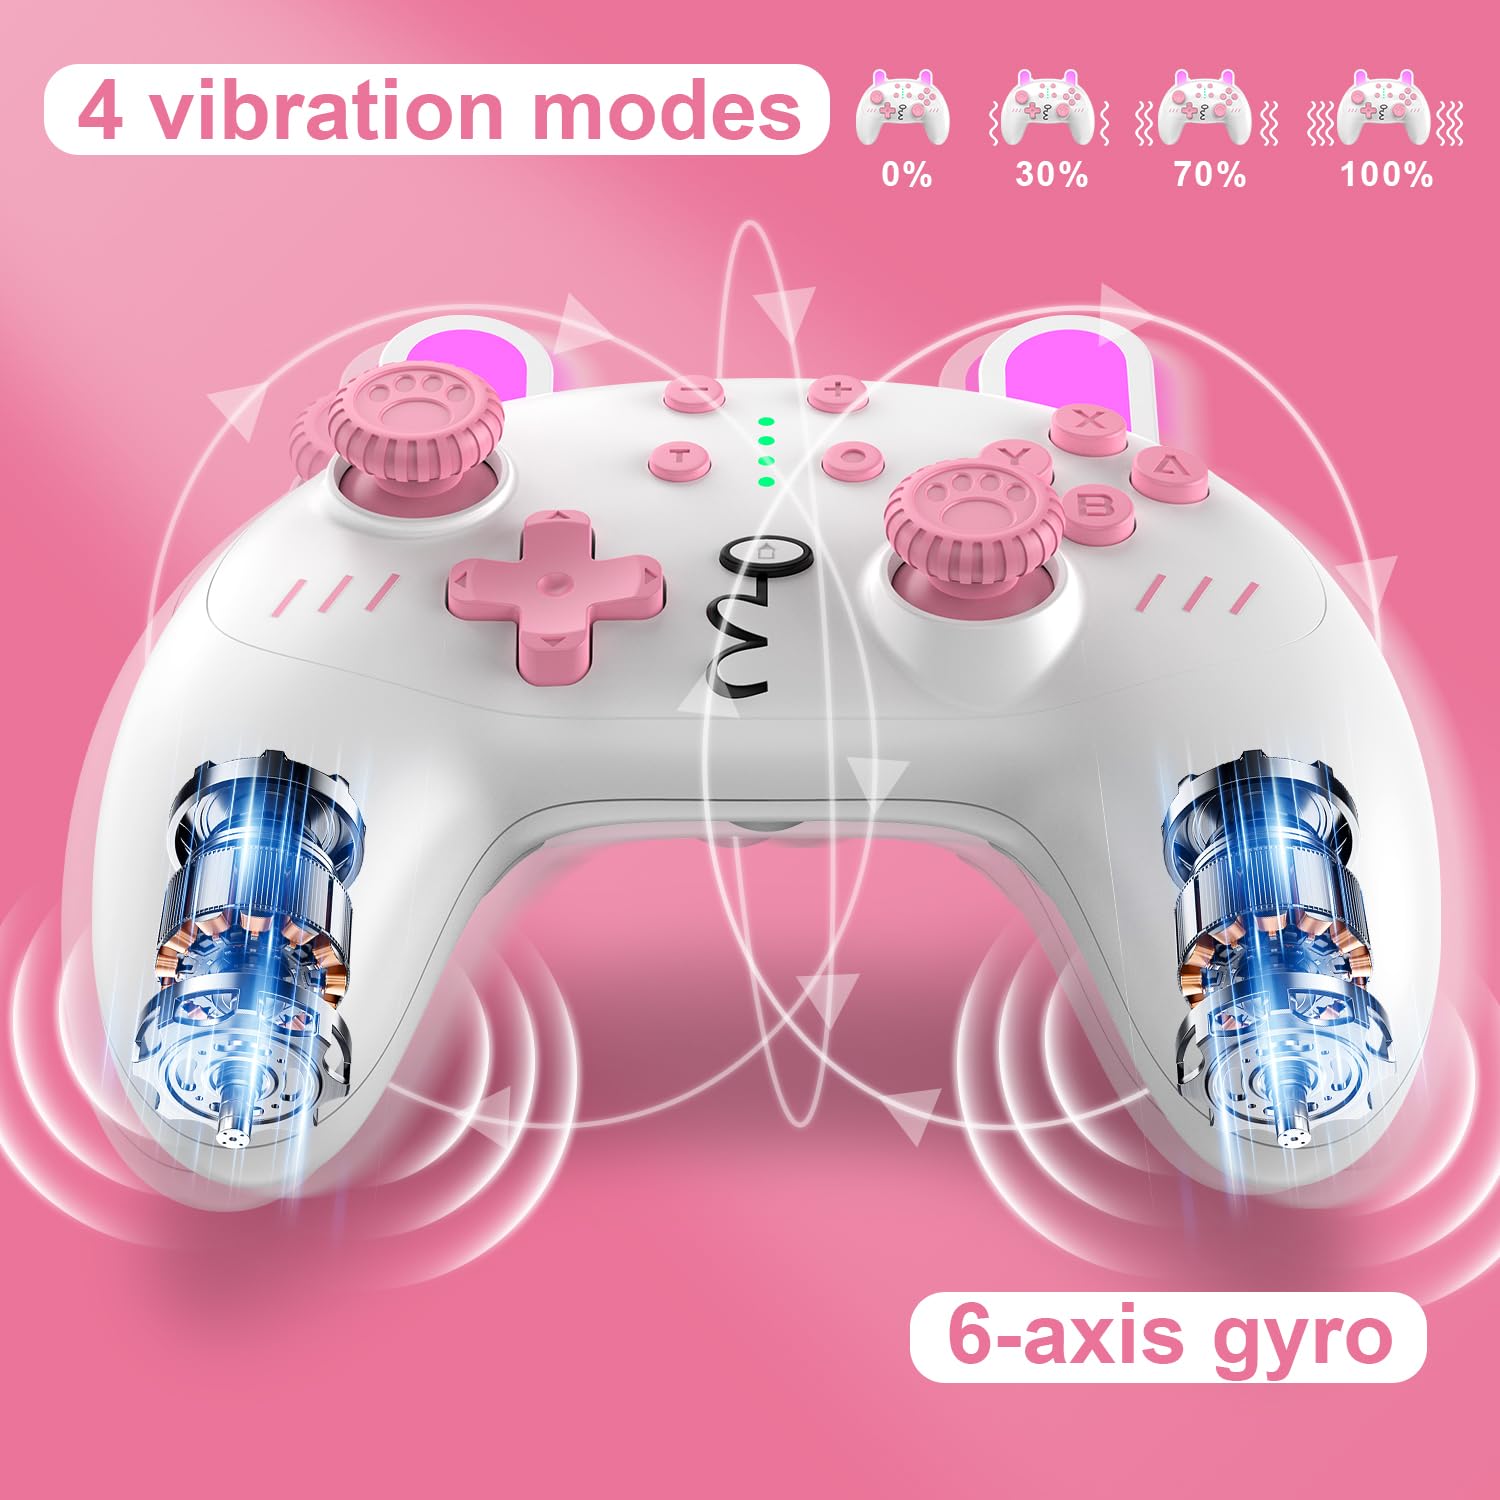
Image: Diagram showing the four vibration levels (0%, 30%, 70%, 100%) and highlighting the 6-axis gyro feature for enhanced gameplay.
6-Axis Motion Control
The built-in 6-axis gyro provides precise motion sensing for games that support tilt and motion controls. This feature is automatically active when connected to a compatible console.
Programmable Macro Buttons (M1/M2)
The M1 and M2 buttons on the underside of the controller can be programmed to execute a sequence of button presses, providing a competitive edge in games.
- To enter programming mode: Press and hold the M1/M2 button you wish to program, then press the Turbo button. The indicator lights will flash slowly.
- Input the desired sequence of buttons (e.g., UP+DOWN+LEFT+RIGHT+A+B+X+Y+L+R+LT+RT).
- To save: Press the M1/M2 button again. The indicator lights will stop flashing, indicating the macro is saved.
- To use: Simply press the programmed M1 or M2 button during gameplay.

Image: Illustration detailing the M1 and M2 programmable macro buttons located on the back of the controller, with an example of a complex button sequence that can be assigned.
Maintenance
- Cleaning: Use a soft, dry cloth to clean the controller. Do not use harsh chemicals or abrasive materials.
- Storage: Store the controller in a cool, dry place away from direct sunlight and extreme temperatures.
- Battery Care: Avoid fully discharging the battery frequently. Charge the controller regularly, even if not in use, to maintain battery health.
Troubleshooting
| Issue | Possible Cause | Solution |
|---|---|---|
| Controller won't turn on | Low battery | Charge the controller fully. |
| Unable to pair with Switch/PC | Incorrect pairing steps; Interference | Ensure the Switch is in 'Change Grip/Order' mode. Try re-pairing. Move closer to the console/PC. Ensure no other Bluetooth devices are causing interference. |
| Buttons/Joysticks unresponsive or drifting | Software glitch; Physical debris | Restart the controller and console/PC. Check for firmware updates. Clean around buttons/joysticks. If issues persist, contact support. |
| Vibration not working | Vibration setting too low or off; Game does not support vibration | Adjust vibration intensity using Turbo + Left/Right directional keys. Verify the game supports vibration. |
Specifications
| Feature | Detail |
|---|---|
| Model | Pink Cute Bunny Switch Pro Controller |
| Compatibility | Nintendo Switch, Switch OLED, Switch Lite, PC (X input mode) |
| Connectivity | Wireless (Bluetooth), Wired (USB-C) |
| Battery Type | Lithium Ion (included) |
| Item Weight | 9.6 ounces |
| Package Dimensions | 5.94 x 4.69 x 2.52 inches |
| Manufacturer | KINGEAR |
Warranty and Support
KINGEAR products are manufactured to high quality standards. For any issues or questions regarding your controller, please refer to the warranty information provided with your purchase or contact KINGEAR customer support directly. Contact details can typically be found on the product packaging or the official KINGEAR website.
For the latest information and support, please visit: KINGEAR Amazon Store
Ask a question about this manual
Ask about setup, troubleshooting, compatibility, parts, safety, or missing instructions. Manuals+ will review the question and use this page’s manual context to help answer it.