1. Introduction
Thank you for choosing VLAND LED Tail Lights. This manual provides essential information for the proper installation, operation, and maintenance of your new tail lights. Please read these instructions carefully before proceeding with installation to ensure safe and correct usage.
These VLAND LED Tail Lights are designed to enhance the rear visibility and aesthetic of your vehicle with advanced LED technology and a modern design.

Image 1.1: VLAND LED Tail Lights installed on a Jeep Wrangler JL JLU, showcasing the product in its intended application.
2. Compatibility
These VLAND LED Tail Lights are specifically designed for the following vehicle models:
- Jeep Wrangler JL (2018, 2019, 2020)
- Jeep Wrangler JLU (2018, 2019, 2020)
- Compatible Trims: Sport, Sahara, Rubicon, Moab
Note: These tail lights are NOT compatible with Jeep Wrangler JK models.
3. Features
The VLAND LED Tail Lights incorporate several advanced features for performance and durability:
- LED Display: Equipped with fiber optic cables and durable, efficient LED light bars for a bright, neon-like glow.
- Dynamic Animation: Features a start-up animation and dynamic amber sequential turn signals.
- Multi-Functionality: Integrates DRL (Daytime Running Light), Brake Light, Reverse Light, and Sequential Turn Signal functions.
- Durability: Designed to be Waterproof (IP67 rated), Dust-proof, and Shock-proof for reliable performance in various conditions.
- Quality Assurance: Each assembly undergoes thorough testing to ensure functionality and longevity.

Image 3.1: Illustration highlighting the thorough testing process and the LED display technology of the tail lights.

Image 3.2: Visual representation of the dynamic start-up animation and sequential turn signal indicator.

Image 3.3: Icons illustrating the waterproof, dust-proof, and shock-proof capabilities of the tail lights.
4. Installation (Setup)
Installation of these tail lights is designed to be a direct replacement for your factory lights. No assembly of the tail light unit itself is required. However, professional installation is recommended to ensure proper wiring and functionality.
General Installation Steps:
- Preparation: Ensure your vehicle is turned off and the parking brake is engaged. Disconnect the negative terminal of the vehicle's battery to prevent electrical shorts.
- Access: Refer to your vehicle's service manual for specific instructions on how to access and remove the factory tail light assemblies. This typically involves removing retaining screws or clips from the inside of the tailgate or fender area.
- Disconnect: Carefully disconnect the electrical connectors from the factory tail light assembly.
- Remove: Once all fasteners and connectors are detached, gently remove the old tail light assembly.
- Install New Lights: Connect the main plug of the VLAND LED Tail Light to the vehicle's wiring harness. For Deluxe Edition models, re-use the parallel auxiliary radar of your vehicle and connect it with the parallel auxiliary main plug.
- Secure: Position the new VLAND LED Tail Light assembly into the vehicle's tail light opening. Secure it with the factory retaining screws or clips.
- Test: Reconnect the vehicle's battery. Test all light functions (DRL, brake, reverse, turn signals) before fully reassembling any interior panels.
- Final Assembly: Reinstall any removed interior panels or trim pieces.
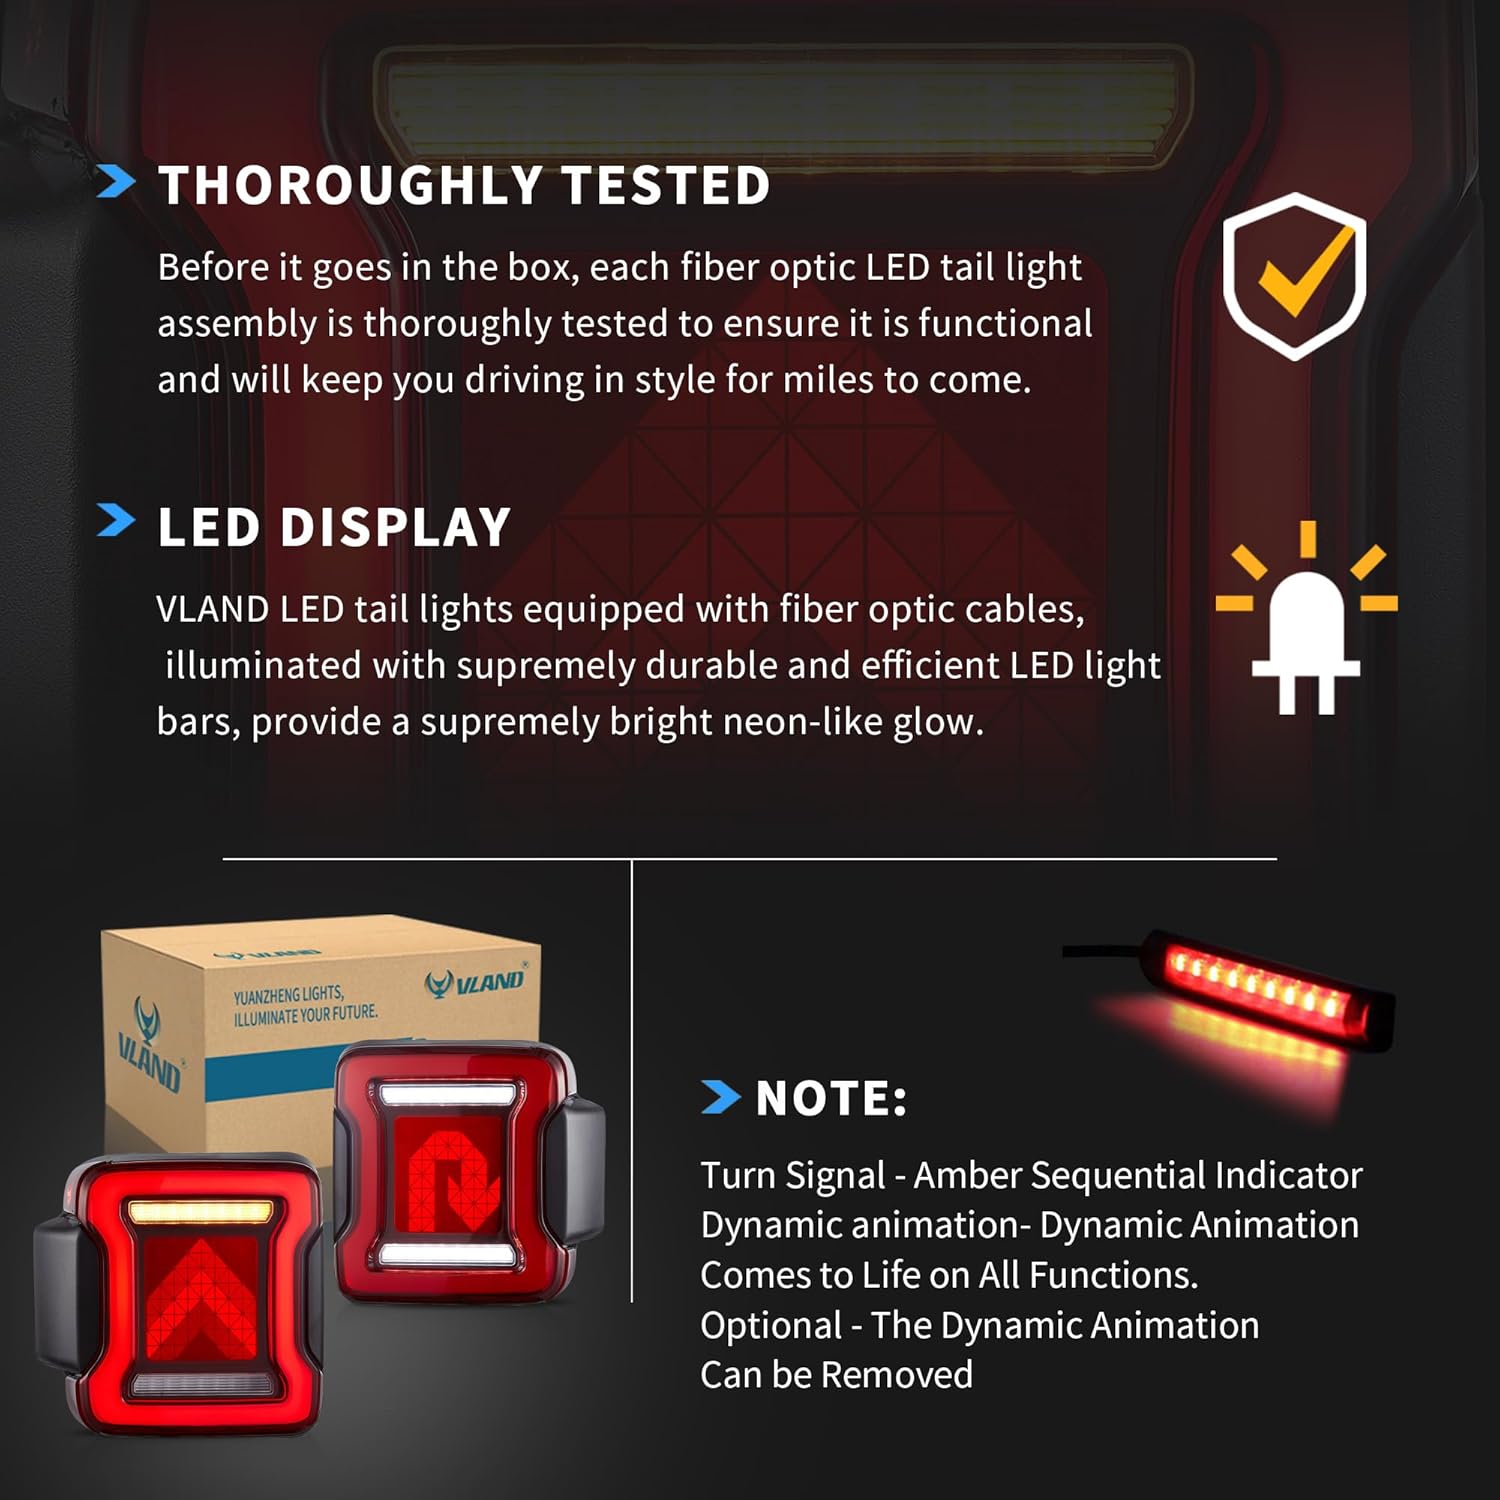
Image 4.1: Rear view of the tail light unit, indicating the main plug for electrical connection and an auxiliary plug for Deluxe Edition models.
5. Operation
Your VLAND LED Tail Lights are designed to operate automatically with your vehicle's existing lighting system. They feature distinct patterns for various functions:
- DRL (Daytime Running Light): Illuminates when the vehicle is running, providing enhanced daytime visibility.
- Brake Light: Activates with increased brightness when the brake pedal is pressed.
- Reverse Light: Illuminates when the vehicle is shifted into reverse gear.
- Turn Signal: Displays an amber sequential indicator when the turn signal lever is activated.

Image 5.1: Visual guide to the different lighting modes: DRL, Brake Light, Turn Off, Reverse Light, and Sequential Turn Signal.
Switching to Static Mode (Optional):
If you prefer a static turn signal instead of the dynamic animation, follow these steps:
- Apply the brake.
- Put the vehicle in reverse gear.
- Turn the running lights on and off twice.
6. Maintenance
To ensure the longevity and optimal performance of your VLAND LED Tail Lights, follow these simple maintenance guidelines:
- Cleaning: Clean the lens surfaces regularly with a soft cloth and mild automotive soap. Avoid abrasive cleaners or harsh chemicals that could damage the lens.
- Inspection: Periodically inspect the tail lights for any signs of damage, cracks, or loose connections. Address any issues promptly.
- Waterproof Seal: The lights are designed to be waterproof (IP67). However, avoid directing high-pressure water jets directly at the seals during washing.
- Electrical Connections: Ensure all electrical connections remain secure and free from corrosion.
7. Troubleshooting
If you encounter any issues with your VLAND LED Tail Lights, consider the following troubleshooting steps:
- Lights Not Working:
- Check all electrical connections to ensure they are securely plugged in.
- Inspect the vehicle's fuse box for any blown fuses related to the tail lights. Replace if necessary.
- Ensure the vehicle's battery is properly connected and charged.
- Flickering or Dim Lights:
- Verify that the voltage supply to the lights is stable.
- Check for any loose or corroded wiring connections.
- Incorrect Function (e.g., Turn Signal not sequential):
- Review the
Ask a question about this manual
Ask about setup, troubleshooting, compatibility, parts, safety, or missing instructions. Manuals+ will review the question and use this page’s manual context to help answer it.
- Review the