LUXOAK BMB021
LUXOAK Full Floating Bed Frame with LED Lights and Charging Station
Model: BMB021
Brand: LUXOAK
Introduction
This manual provides detailed instructions for the assembly, operation, and maintenance of your LUXOAK Full Floating Bed Frame. This innovative bed frame features a hidden support system for a floating aesthetic, integrated RGB LED lighting, and a convenient charging station built into the headboard. Please read this manual thoroughly before assembly and use to ensure proper setup and safe operation.

Figure 1: LUXOAK Full Floating Bed Frame with integrated LED lighting and headboard charging station.
Important Safety Information
Caution: The bed frame has sharp edges on the LED lights. Be careful when assembling and using the product to avoid injury.
- Ensure all parts are present and undamaged before beginning assembly.
- Follow all assembly steps in the correct order.
- Do not overtighten screws during assembly.
- Keep small parts away from children.
- Do not exceed the maximum weight capacity of 800 lbs.
- Ensure the bed frame is placed on a level surface.
- Unplug the charging station and LED lights from the power source before cleaning or performing any maintenance.
Package Contents
Verify that all components listed below are included in your package. Refer to the assembly diagram for visual identification of parts.
- Headboard with integrated charging station and LED lights
- Bed frame side rails (left and right)
- Footboard
- Center support beam(s)
- Metal bed slats
- Support legs (hidden design)
- Assembly hardware (screws, bolts, washers, Allen wrench)
- LED light remote control
- Power adapter for LED lights and charging station

Figure 2: Overview of the bed frame structure and components.
Setup and Assembly
Assembly of the LUXOAK Floating Bed Frame is designed to be straightforward. All parts and tools are labeled with numbers for quick identification. It is recommended to assemble with two people for easier handling of larger components.
- Unpack and Identify Parts: Carefully remove all components from the packaging. Lay them out on a clean, soft surface to prevent scratches. Identify each part using the provided assembly diagram and part labels.
- Assemble Headboard: Attach the headboard frame components as per the instructions. Ensure the integrated charging station is securely fastened.
- Connect Side Rails: Attach the side rails to the headboard and footboard. Ensure all connections are firm and secure.
- Install Center Support: Place and secure the center support beam(s) to the frame.
- Place Metal Slats: Lay the metal slats across the frame, ensuring they are evenly spaced and securely attached.
- Attach Hidden Support Legs: The floating design incorporates hidden support legs. Ensure these are correctly installed and provide stable support.
- Install LED Light Strips (if not pre-installed): For newer versions, the LED light strips utilize 3M stronger adhesive and 14PCS sticky hooks for improved attachment. If you purchased this product before March, please contact customer support for a new set of strips and remote control.
- Final Check: Before placing your mattress, double-check all connections to ensure they are tight and the frame is stable.

Figure 3: Illustration of the innovative hidden support legs design, allowing for easy cleaning underneath.

Figure 4: Improved LED light strip attachment method with 3M adhesive and additional hooks.
Operating Instructions
RGB LED Lights
The integrated RGB LED lights can be controlled via a dedicated remote control or a smartphone application. These lights are located at the headboard and the bottom of the bed, enhancing the floating effect.
- Power On/Off: Use the power button on the remote or in the app to turn the lights on or off.
- Color Selection: Choose from thousands of colors using the color wheel or preset color buttons.
- Brightness Adjustment: Adjust the light intensity to your preference.
- Mode Selection: Select from various dynamic modes (e.g., flashing, fading, jumping) or music modes that synchronize with audio.
- Timing Function: Set timers for the lights to turn on or off automatically.
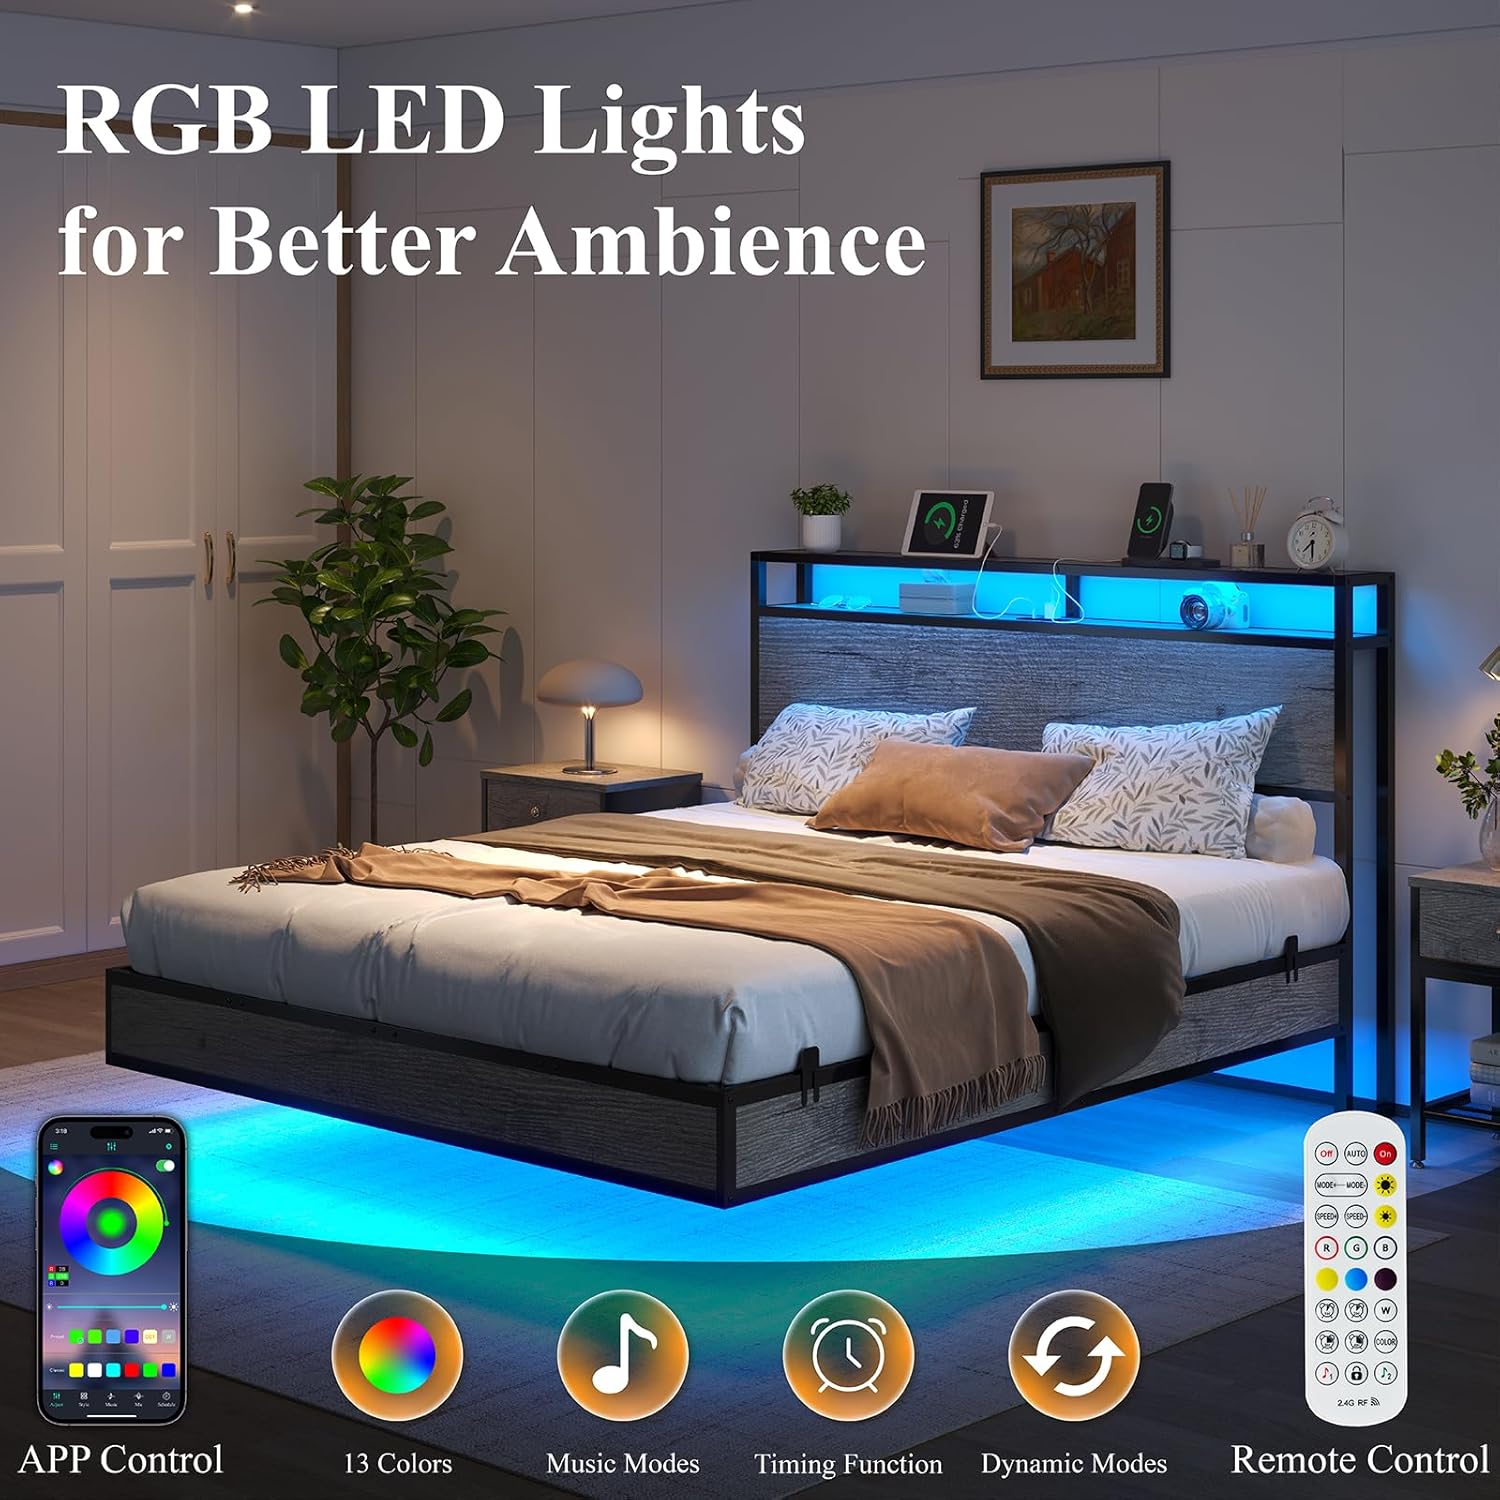
Figure 5: Control options for the RGB LED lights, including app and remote functionalities.
Integrated Charging Station
The headboard features a built-in charging station for your convenience.
- Ports: The charging station includes:
- 1 x Type-C Port
- 1 x USB Port
- 2 x AC Outlets
- Usage: Simply plug your devices into the appropriate ports to charge them directly from your bed.

Figure 6: Detail of the convenient Type-C, USB, and AC power ports located on the headboard.
Maintenance
- Cleaning the Frame: Wipe the bed frame surfaces with a soft, damp cloth. Avoid using harsh chemicals or abrasive cleaners that could damage the finish.
- LED Lights: Ensure the LED light strips are free from dust. If cleaning is required, gently wipe with a dry, soft cloth. Do not use liquids directly on the LED strips or electrical components.
- Charging Station: Keep the charging ports free of dust and debris. Do not insert foreign objects into the ports.
- Regular Checks: Periodically check all screws and bolts to ensure they remain tight. Retighten if necessary to maintain stability.
- Under-Bed Clearance: The 5.1 inches of under-bed clearance allows for easy cleaning, including by sweeping robots.
Troubleshooting
| Problem | Possible Cause | Solution |
|---|---|---|
| LED lights not turning on. | Power cable disconnected; Remote control battery low; LED strip connection loose; App not connected. | Ensure power cable is securely plugged into the wall and the bed frame. Replace remote control battery. Check all LED strip connections. Re-pair or reconnect the app to the lights. |
| Charging station not working. | Power cable disconnected; Device not compatible; Port damaged. | Verify the bed frame's power cable is fully plugged in. Test with a different device and cable. If still not working, contact customer support. |
| Bed frame feels unstable or squeaks. | Loose screws/bolts; Uneven floor; Incorrect assembly. | Check and tighten all assembly screws and bolts. Ensure the bed is on a level surface. Review assembly instructions to confirm all parts are correctly installed. |
| LED strip detaching. | Adhesive weakening (older versions); Insufficient hooks. | For older versions (purchased before March), contact customer support for a new set of LED strips with improved adhesive and more hooks. For newer versions, ensure proper surface preparation before applying. |
Specifications
| Feature | Detail |
|---|---|
| Model Number | BMB021 |
| Size | Full |
| Product Dimensions (L x W x H) | 80.3"L x 53.9"W x 39"H |
| Color | Grey |
| Material | Metal frame with industrial wood grain headboard |
| Weight Capacity | 800 lbs |
| Under-Bed Clearance | 5.1 Inches |
| Recommended Mattress Thickness | 12" - 15" (or 8" - 14" if using mattress only, or mattress+box spring in total) |
| Charging Ports | 1 x Type-C, 1 x USB, 2 x AC Outlets |
| LED Lights | RGB, App/Remote Control, Music Modes, Timing Function |
| Assembly Required | Yes |

Figure 7: Key dimensions of the LUXOAK Full Floating Bed Frame.

Figure 8: Guidance on suitable mattress thickness for optimal fit and appearance.
Warranty and Customer Support
LUXOAK is committed to providing high-quality products. For any questions, concerns, or assistance with your bed frame, please contact our customer support team.
- Customer Support: For assistance, please refer to the contact information provided with your purchase or visit the LUXOAK store on Amazon.
- Returns: This product is eligible for 30-day easy returns.
- Protection Plans: Extended protection plans may be available for purchase separately.
For the most up-to-date warranty information and support options, please visit the official LUXOAK product page or contact the seller directly.
Ask a question about this manual
Ask about setup, troubleshooting, compatibility, parts, safety, or missing instructions. Manuals+ will review the question and use this page’s manual context to help answer it.