BBQration 720-0864R, 720-0864RA, 720-0864BA, 720-0864T
BBQration Grill Replacement Parts Kit Instruction Manual
For Nexgrill Deluxe 2-Burner 720-0864R, 720-0864RA, 720-0864BA & Expert Grill 720-0864T
Introduction
This instruction manual provides detailed information for the installation, maintenance, and troubleshooting of your BBQration Grill Replacement Parts Kit. This kit is designed to restore the performance of your compatible Nexgrill Deluxe 2-Burner or Expert Grill 2-Burner gas grill.
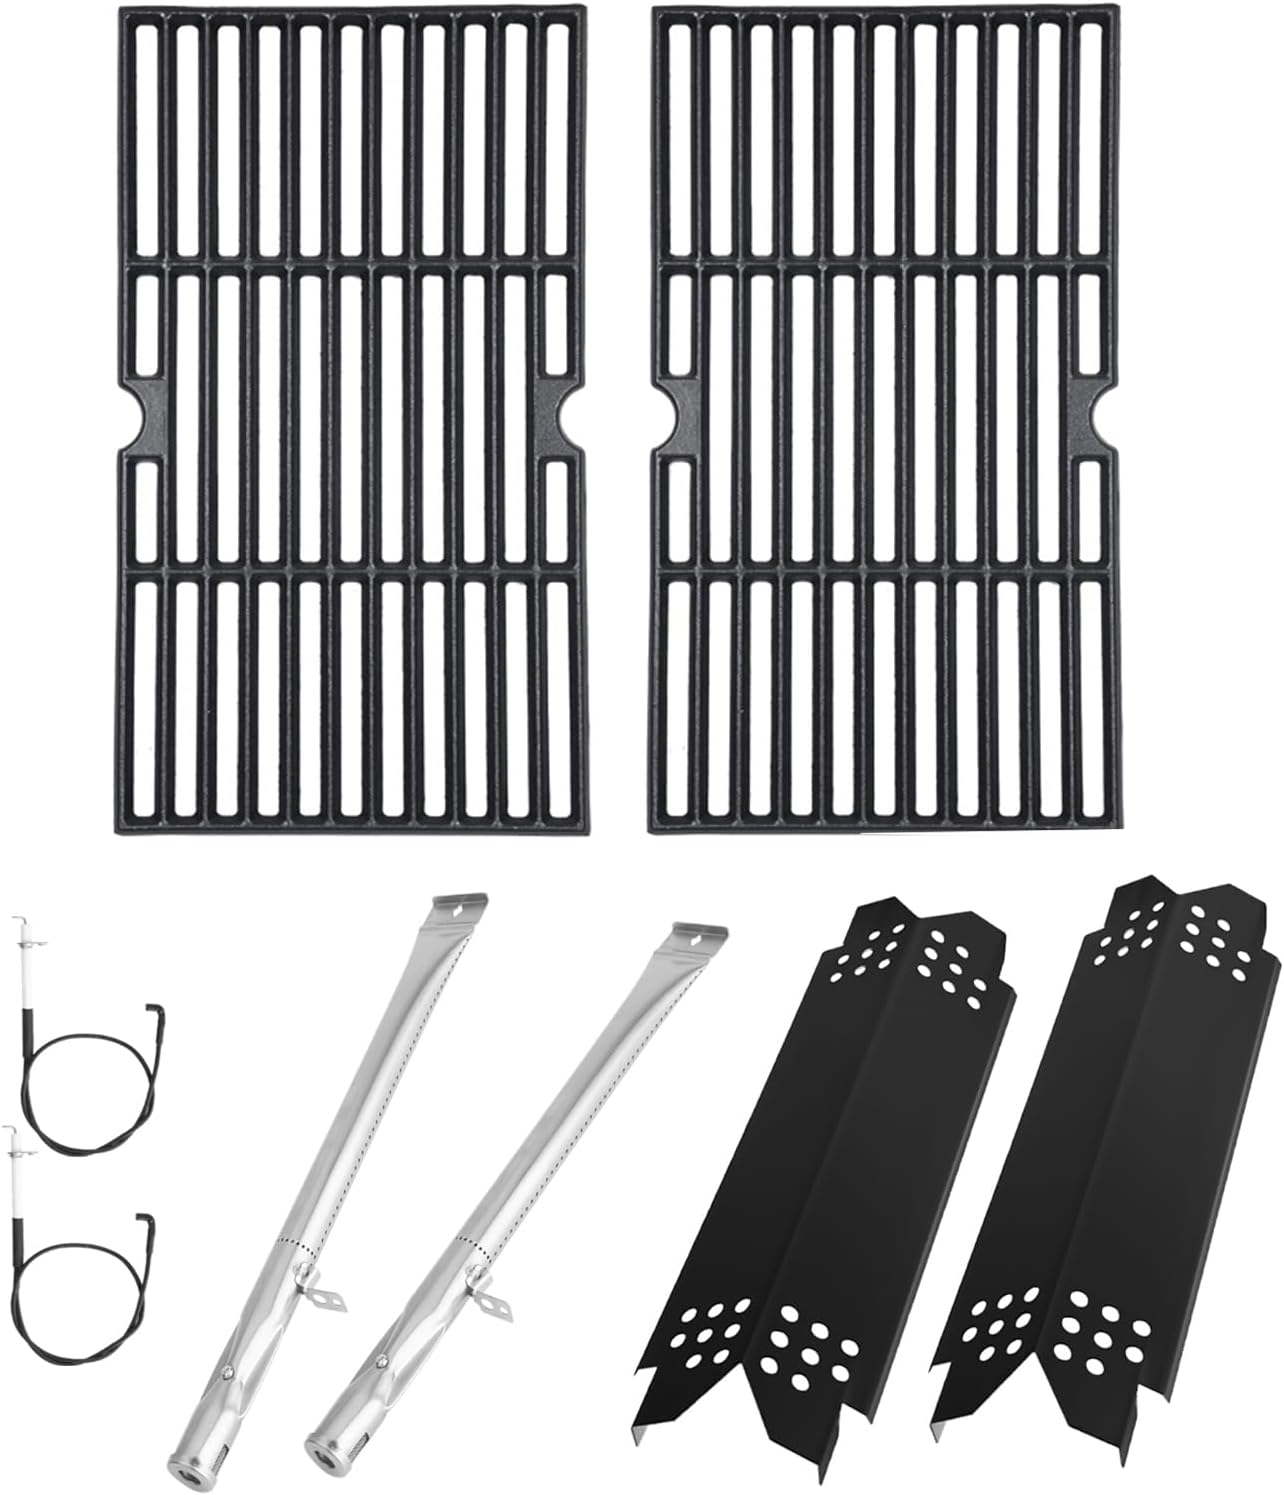
Image: Complete BBQration Grill Replacement Parts Kit, showing two cast iron cooking grates, two stainless steel burners, two porcelain steel heat plates, and two igniter electrodes with wires.
Package Contents
Your BBQration Grill Replacement Parts Kit includes the following components:
- 2 x Matte Cast Iron Cooking Grates
- 2 x Stainless Steel Burners
- 2 x Porcelain Steel Heat Plates
- 2 x Grill Igniters (electrodes with wires)

Image: A visual representation of the replacement parts kit, including cooking grates, burners, and heat plates, alongside a grill.
Compatibility
This replacement parts kit is specifically designed for the following grill models:
- Nexgrill Deluxe 2-Burner Grills: 720-0864R, 720-0864RA, 720-0864BL, 720-0864BA
- Expert Grill 2-Burner Grills: 720-0864T
Important Note:
This kit is not compatible with Nexgrill models 720-0864, 720-0864M, or 720-0864MA. Please verify your grill model number before purchase to ensure proper fitment.

Image: Depicts two compatible grill models, 720-0864R (red) and 720-0864RA (black), highlighting the correct burner connection type for compatibility.
Specifications
| Component | Dimension | Material |
|---|---|---|
| Cooking Grate (Each) | 16 15/16" x 8 5/16" | Matte Cast Iron |
| Cooking Grate (Total) | 16 15/16" x 16 5/8" | Matte Cast Iron |
| Heat Plate | 14 9/16'' x 4 3/16'' | Porcelain Steel |
| Burner | 14 7/8'' | Stainless Steel |
Overall Product Dimensions: 12 x 8 x 5 inches
Item Weight: 10.36 pounds
Manufacturer: BBQration
Country of Origin: China

Image: A detailed diagram illustrating the precise dimensions of the cooking grates, burners, and heat plates included in the kit.
Installation Guide
Safety First: Ensure your grill is completely cool and disconnected from its fuel source (propane tank or natural gas line) before beginning any installation or maintenance.
1. Remove Old Components:
Carefully remove the existing cooking grates, heat plates, and burners from your grill. Dispose of rusted or damaged parts responsibly.

Image: A side-by-side comparison showing heavily rusted old heat plates next to new, clean heat plates, illustrating the need for replacement.
2. Install New Burners:
Position the new stainless steel burners into their respective slots. Ensure the gas inlet end of each burner aligns correctly with the gas valve orifice. Secure them if your grill model requires fasteners.

Image: Detailed view of the new stainless steel burners, showing their construction and connection points.
3. Place Heat Plates:
Carefully place the porcelain steel heat plates over the newly installed burners. These plates help distribute heat evenly and protect the burners from drippings.

Image: The new porcelain steel heat plates positioned correctly above the burners inside the grill chamber.
4. Install Cooking Grates:
Place the matte cast iron cooking grates onto the grill supports above the heat plates. Ensure they sit securely and are level.

Image: The new cast iron cooking grates resting on the grill's internal supports, ready for use.
5. Connect Igniters:
If replacing igniters, connect the new igniter electrodes to the appropriate points on the burners and route the wires to the ignition module. Ensure all connections are secure.

Image: Close-up of the new igniter electrodes and their wiring, ready for installation into the grill's ignition system.
Operating Your Grill with New Parts
After installation, perform a leak test on all gas connections before first use. Refer to your grill's original manual for detailed operating instructions.
For optimal performance and longevity of your new cast iron grates, it is recommended to season them before first use. Apply a thin layer of high-heat cooking oil (like flaxseed or grapeseed oil) to the grates and heat the grill to a medium temperature for about 30-60 minutes. Allow to cool, then repeat the process 2-3 times.

Image: Various foods, including steaks, vegetables, and chicken, being cooked on a grill, demonstrating the use of the new grates.
Maintenance
Regular maintenance will extend the life of your replacement parts and ensure consistent grilling performance.
- Cooking Grates: Clean cast iron grates after each use with a grill brush. For deeper cleaning, remove and wash with warm, soapy water, then dry thoroughly and re-season to prevent rust.
- Heat Plates: Periodically remove and clean heat plates to remove accumulated grease and debris. This prevents flare-ups and maintains even heat distribution.
- Burners: Inspect burners regularly for blockages (e.g., spider webs, food debris) in the burner ports. Use a wire brush or a stiff wire to clear any obstructions.
- Igniters: Keep igniter electrodes clean and free of grease to ensure reliable ignition.
Troubleshooting
Here are some common issues and their potential solutions:
- Burner Not Lighting:
- Check gas supply: Ensure propane tank is full and valve is open, or natural gas line is active.
- Inspect igniter: Verify the igniter electrode is clean and properly positioned near the burner port. Check for a visible spark when the ignition button is pressed.
- Clear burner ports: Ensure burner holes are not clogged.
- Uneven Heating:
- Clean heat plates: Remove and clean heat plates to ensure proper heat distribution.
- Inspect burners: Check for clogged burner ports or damaged burners that may be affecting flame pattern.
- Parts Don't Fit:
- Double-check grill model: Confirm your grill model number matches the compatible models listed in this manual.
- Verify dimensions: Compare the dimensions of the received parts with the specifications provided.
Warranty & Support
BBQration is committed to providing high-quality products. While specific warranty details are not included in this manual, if you encounter any problems or have questions regarding this item, please do not hesitate to contact us. Our customer support team is ready to assist you.
For further assistance, please visit the official BBQration Store on Amazon: BBQration Amazon Store
Ask a question about this manual
Ask about setup, troubleshooting, compatibility, parts, safety, or missing instructions. Manuals+ will review the question and use this page’s manual context to help answer it.