Introduction
This manual provides essential instructions for the proper setup, operation, and maintenance of your AICase Phone Lanyard with Built-in 60W USB-C Charging Cable. This product is designed to offer convenient phone carrying and charging capabilities for Android phone users. Please read this manual thoroughly before use to ensure optimal performance and safety.
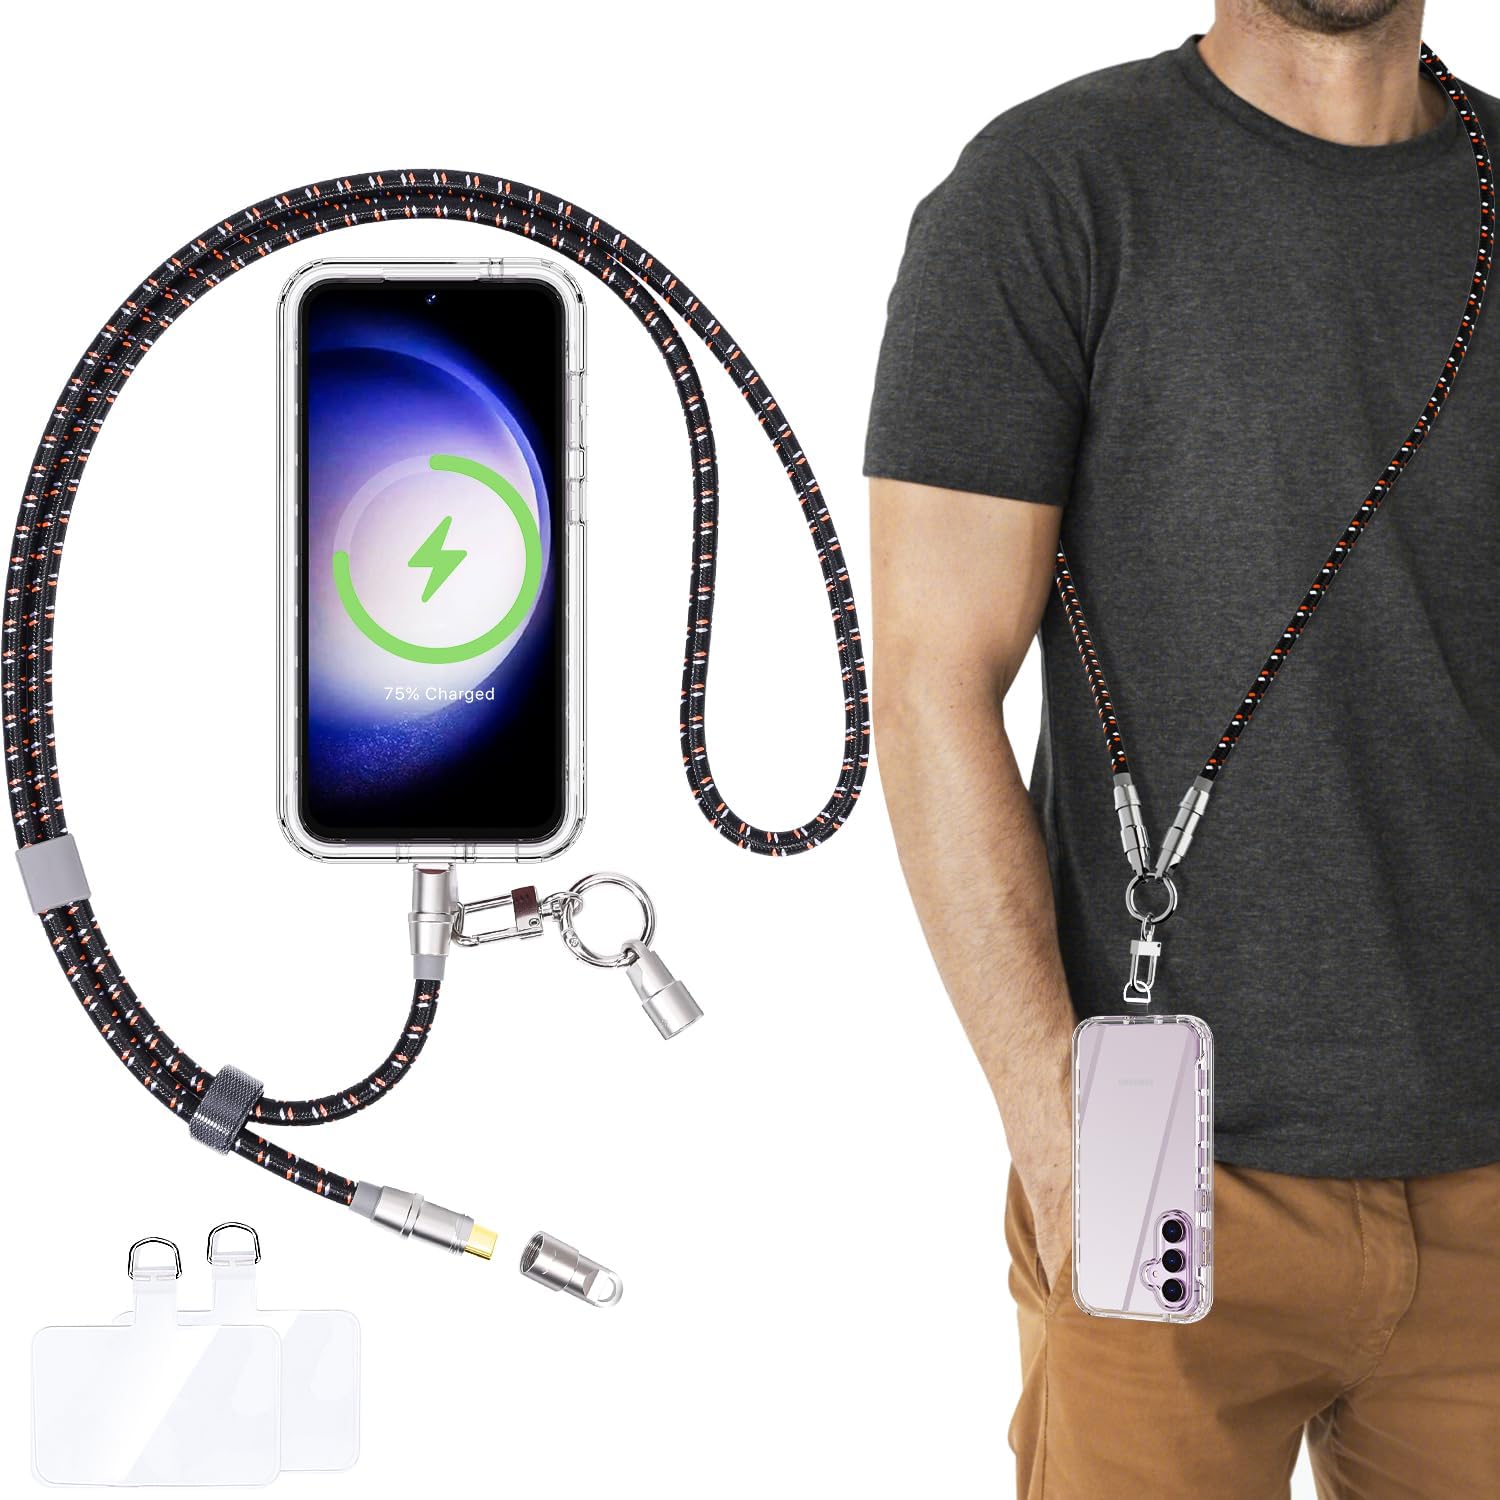
This image displays the AICase Phone Lanyard in use, worn across the body, alongside an exploded view of its components, including the USB-C charging cable, metal buckle, and phone attachment tabs.
1. Setup Instructions
Follow these steps to securely attach your phone to the lanyard:
- Prepare your phone case: Ensure your phone case is a full-coverage type, meaning it has a closed bottom with a charging port opening. Half or fully open phone cases are not compatible.
- Insert the TPU tab: Take one of the provided ultra-thin (0.6mm) TPU tabs. Insert the tab into the charging port opening of your phone case, ensuring the small loop protrudes from the charging port.
- Place your phone: Carefully place your phone into the case, making sure the TPU tab remains in position and does not interfere with the phone's fit.
- Attach the lanyard: Connect the metal spring O-ring or the 360-degree swivel snap of the lanyard to the protruding loop of the TPU tab. Ensure the connection is secure.
A three-step visual guide demonstrating how to insert the ultra-thin TPU tab into a full coverage phone case and attach the lanyard's metal buckle to secure the phone.
2. Operating Instructions
2.1 Wearing the Lanyard
The AICase Phone Lanyard offers adjustable wearing options for comfort and accessibility:
- Neck Wear: Place the lanyard around your neck, allowing your phone to hang at a comfortable height.
- Crossbody Wear: Wear the lanyard across your body, over one shoulder and diagonally across your torso, for enhanced security and hands-free convenience.
Adjust the length of the lanyard using the integrated slider to achieve your preferred fit.
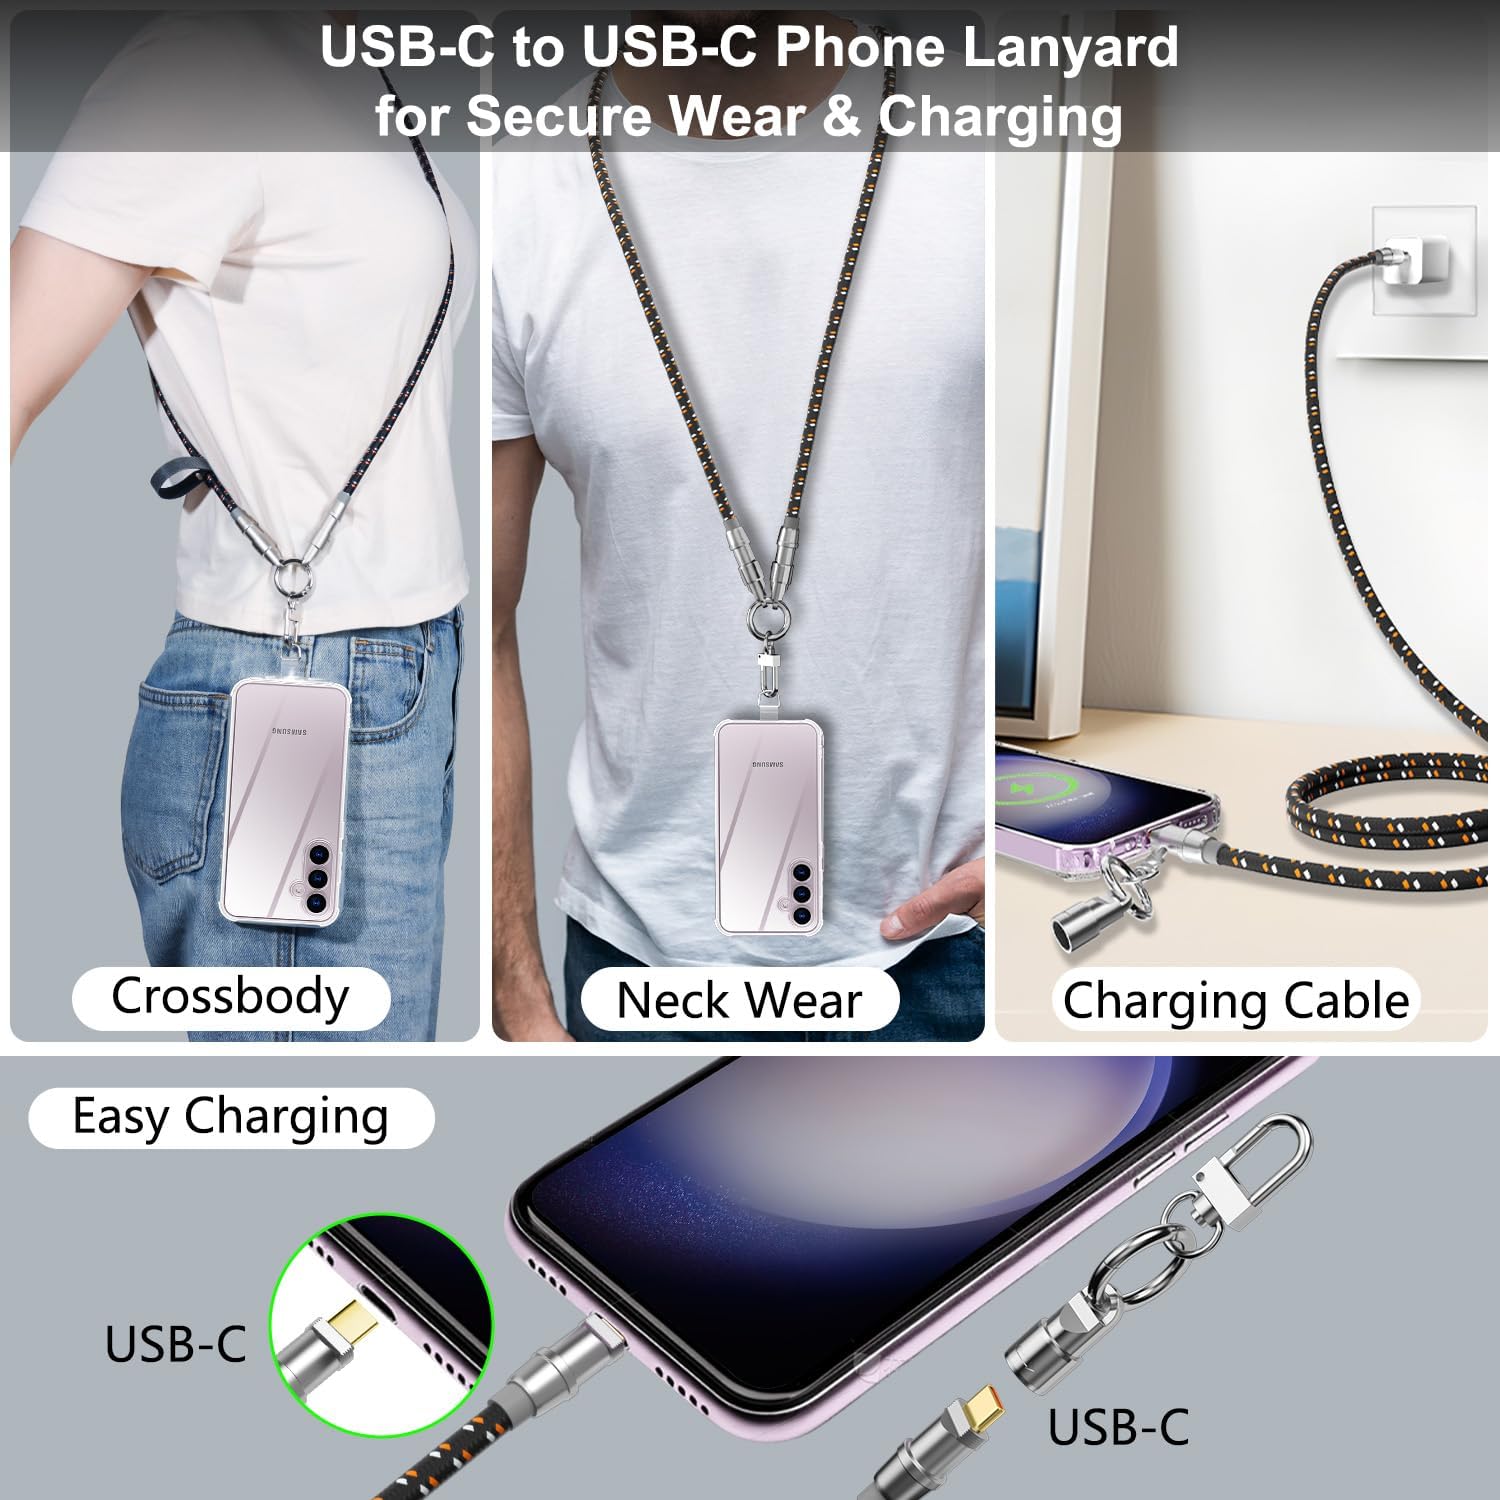
This image highlights the different ways to wear the lanyard (crossbody and neck) and its integrated USB-C charging cable function.
2.2 Charging Your Device
The lanyard integrates a 60W USB-C to USB-C fast charging cable:
- Access the charging cable: Unscrew the metal caps at the ends of the lanyard to reveal the USB-C connectors.
- Connect to phone: Plug one USB-C connector into your Android phone's charging port.
- Connect to power source: Plug the other USB-C connector into a compatible USB-C wall charger or power bank. Note: A USB-C charger is required for charging. USB-A chargers are not compatible.
- Secure after charging: After charging, disconnect the cable and screw the metal caps back onto the connectors to protect them and maintain the lanyard's integrity.

This image serves as a reminder that a USB-C charger is required for the 60W fast charging function of the lanyard.
2.3 Attaching Other Items
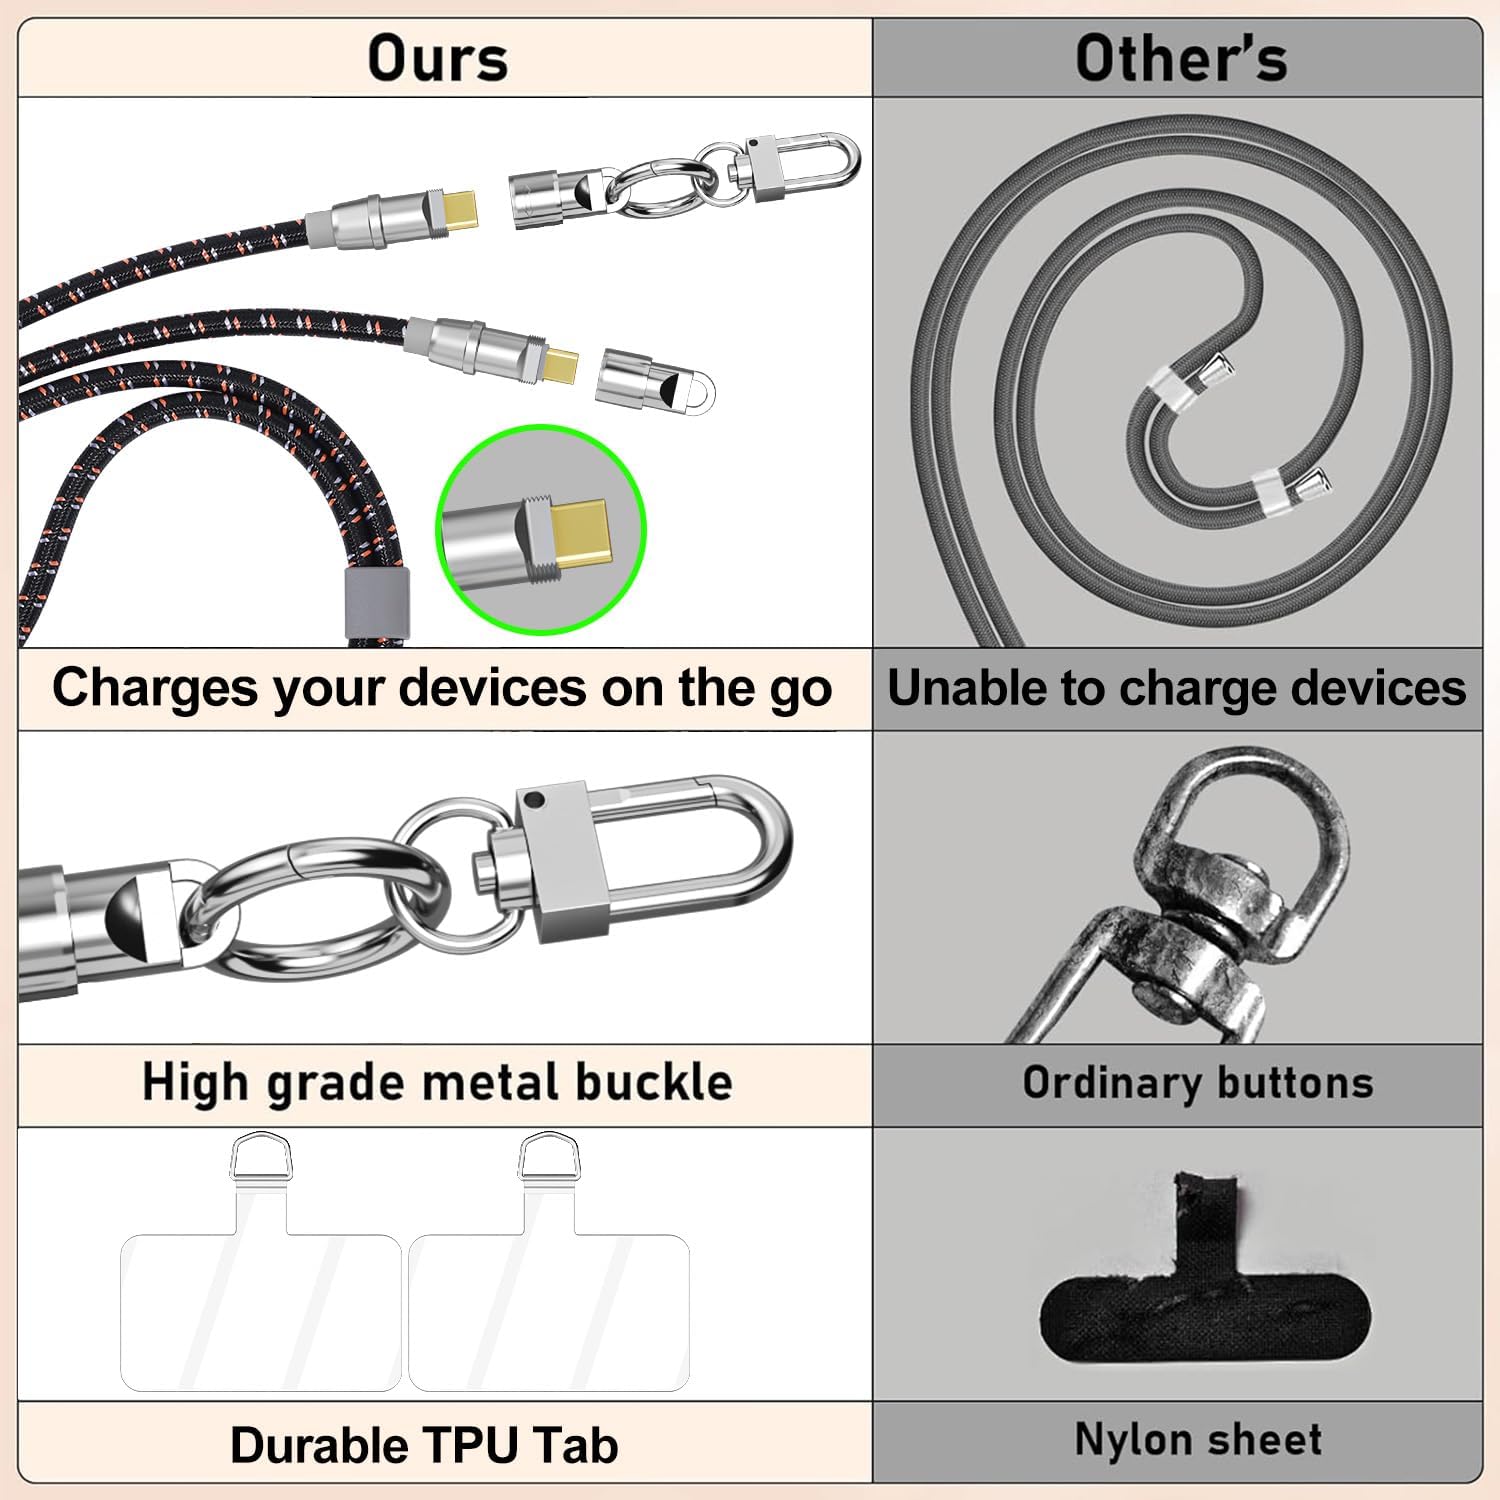
The premium metal buckle, featuring a 360-degree swivel snap and a metal spring O-ring, allows for secure attachment of various items:
- Key rings
- Car keys
- USB drives
- Small accessories

An illustration showing how the lanyard can simplify carrying multiple personal items, including a card holder, earbuds, keys, USB drive, camera, cell phone, and flashlight.
3. Maintenance
To ensure the longevity and optimal performance of your AICase Phone Lanyard, follow these maintenance guidelines:
- Storage: Store the lanyard in a cool, dry place when not in use.
- Cleaning: Wipe the lanyard with a soft, damp cloth to remove dirt or debris. Avoid using harsh chemicals or abrasive cleaners.
- Connector Protection: Always screw the metal caps back onto the USB-C connectors when not charging to protect them from dust and damage.
- Inspect TPU Tabs: Periodically inspect the TPU tabs for signs of wear or damage. Replace them if they show significant wear to prevent accidental phone detachment. The product includes two durable TPU tabs.
4. Troubleshooting
- Phone not charging:
- Ensure both USB-C connectors are fully inserted into your phone and the power source.
- Verify that your power source is a USB-C charger, not a USB-A charger.
- Check if the charging cable or connectors are damaged.
- Phone detaches from lanyard:
- Confirm that the TPU tab is correctly inserted and the lanyard's buckle is securely attached to its loop.
- Ensure your phone case is a full-coverage type. Half or open cases are not suitable.
- Inspect the TPU tab for wear and tear. Replace it if it appears damaged or stretched.
- Lanyard feels uncomfortable or too long/short:
- Use the adjustable slider on the lanyard to customize its length for neck or crossbody wear.
5. Specifications
- Product Name: AICase Phone Lanyard with Built-in Charging Cable
- Model: B0DB7HDWN6
- Charging Type: USB-C to USB-C
- Charging Power: Up to 60W Fast Charging
- Compatibility: Android Phones (Samsung, Google, OnePlus, Huawei, Xiaomi, Oppo, Vivo, Sony, Motorola, LG, Nokia, etc.)
- Lanyard Length: Adjustable, Max 55cm / 21.7 inches
- Material: Durable nylon braided exterior, zinc alloy metal components, TPU tabs
- Features: Adjustable strap, 360-degree swivel snap, metal spring O-ring
6. Warranty and Support
Warranty information for the AICase Phone Lanyard with Built-in 60W USB-C Charging Cable is not available in the provided product data. For specific warranty details or technical support, please contact AICase directly through their official website or the retailer where the product was purchased.
For further assistance, please refer to the contact information provided with your product packaging or visit the AICase brand store online.