Introduction
The Ledvion 1M 3 Railspots LED Track Lighting System offers a modern and flexible lighting solution for various indoor spaces. This system features a 1-meter single-phase track with three adjustable GU10 spots, allowing for customized illumination. This manual provides essential information for the safe installation, operation, and maintenance of your lighting system.
Safety Information
Please read all safety instructions carefully before installation and use. Failure to follow these instructions may result in electric shock, fire, or other hazards.
- Always disconnect power at the main circuit breaker before attempting any installation, maintenance, or bulb replacement.
- Consult a qualified electrician if you are unsure about the installation process.
- Do not exceed the specified voltage of 230 Volts.
- Ensure proper grounding of the electrical system.
- This product is designed for indoor use only. Do not expose to moisture or extreme temperatures.
- Do not touch the bulbs immediately after use, as they may be hot.
- Use only GU10 LED bulbs with this system.
Package Contents
Verify that all components are present and undamaged before proceeding with installation.
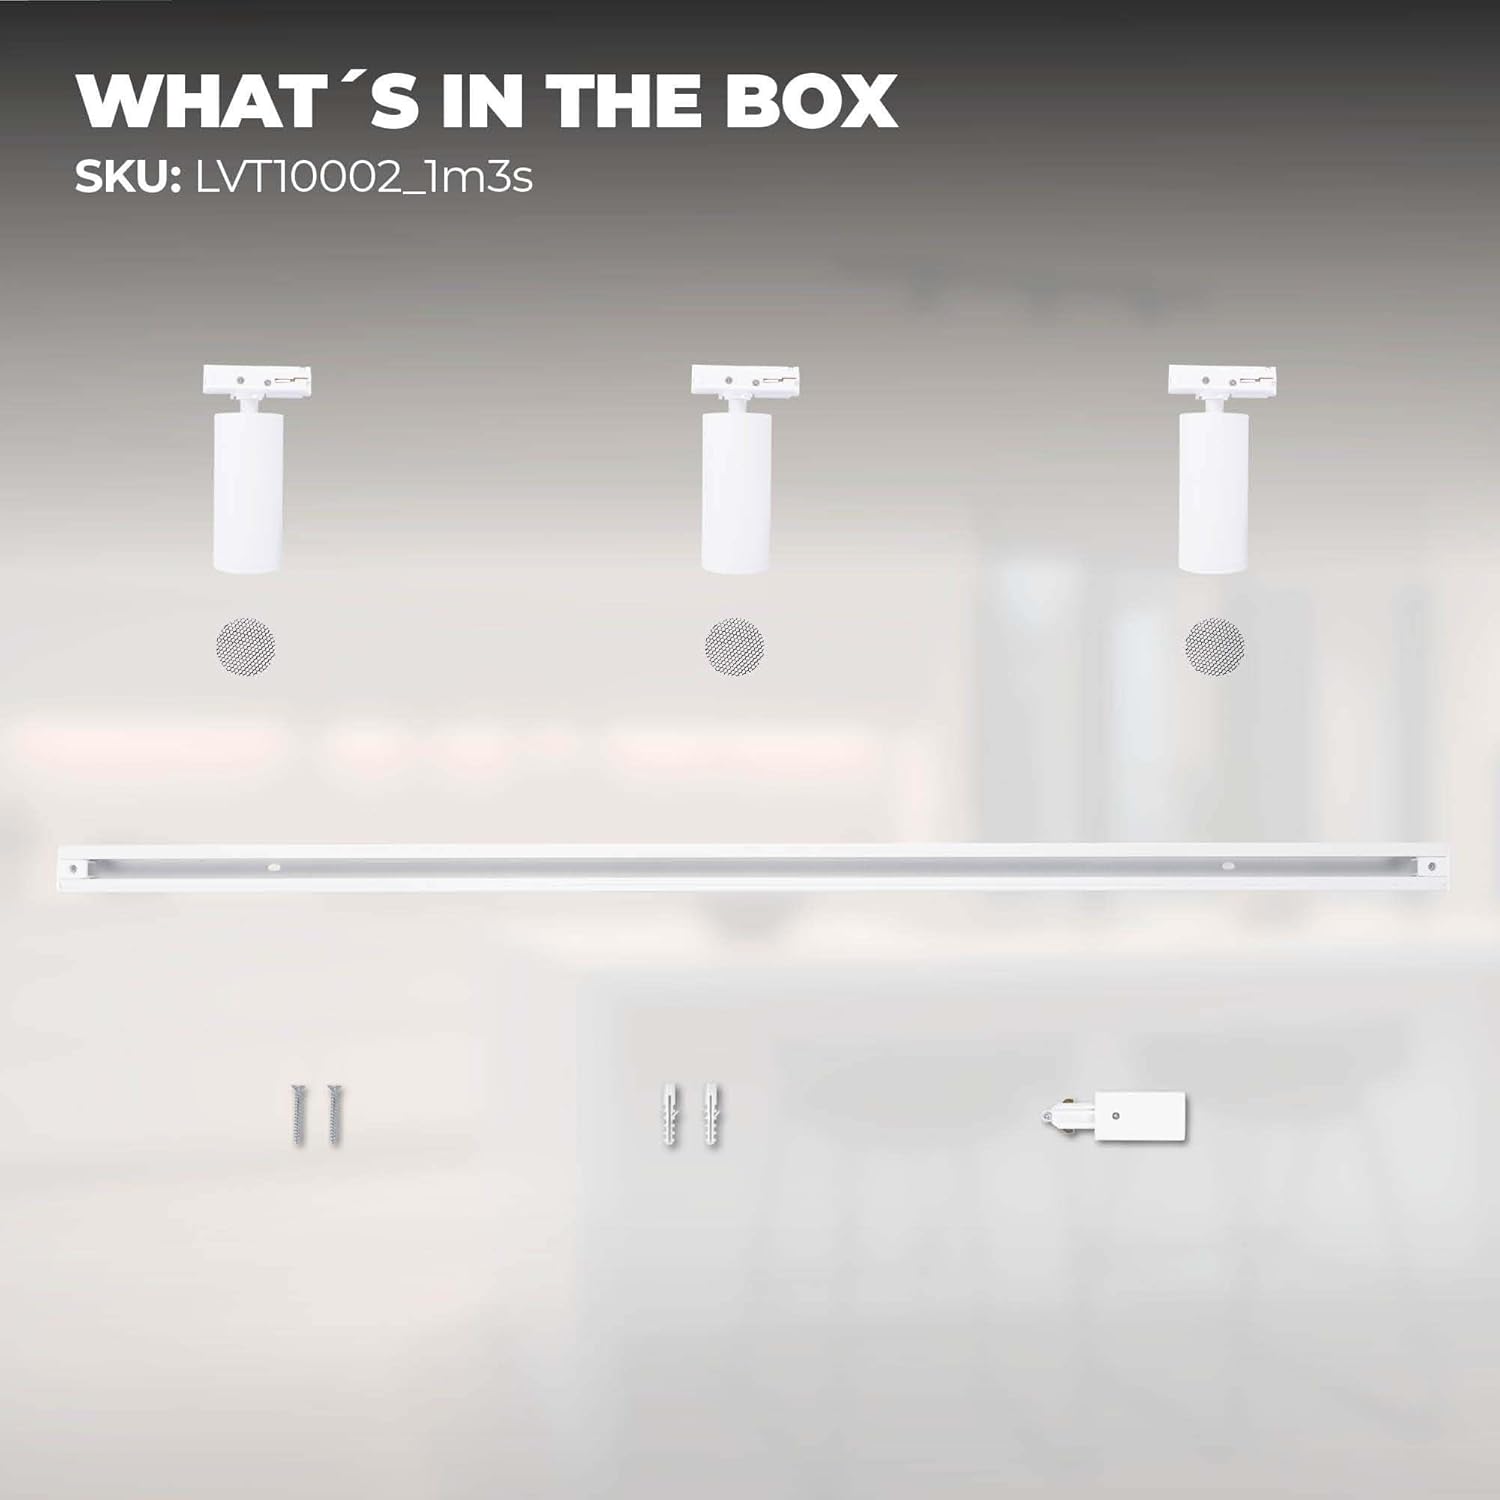
The image shows the components included in the Ledvion 1M 3 Railspots LED Track Lighting System package. It includes the 1-meter track, three GU10 spot holders, mounting hardware (screws and wall plugs), and a power connector.
- 1x 1-meter Single-Phase Track
- 3x GU10 Spot Holders
- Mounting Hardware (screws, wall plugs)
- 1x Power Connector
- Note: GU10 LED bulbs are not included and must be purchased separately.
Setup and Installation
Follow these steps for safe and correct installation of your Ledvion track lighting system.
- Preparation: Ensure the main power supply to the installation area is disconnected at the circuit breaker.
- Mounting the Track:
- Mark the desired mounting location on the ceiling or wall.
- Drill appropriate holes and insert wall plugs if required.
- Securely fasten the 1-meter track to the surface using the provided screws.
- Connecting Power:
- Connect the electrical wiring from your power source to the track's power connector.
- Ensure all electrical connections are tight, secure, and properly insulated according to local electrical codes.
- Installing Spot Holders:

This image illustrates the plug-and-play installation mechanism for the spot holders on the track. The locking system allows for easy addition, removal, and repositioning of the spotlights.
- Align each spot holder with the track.
- Insert the spot holder into the track and rotate the locking mechanism to secure it firmly in place.
- You can easily add, remove, or reposition spotlights along the track as needed.
- Inserting GU10 Bulbs:
- Carefully insert GU10 LED bulbs (not included) into each spot holder.
- Twist the bulb gently to lock it into the GU10 socket.
- Adjusting Spots:
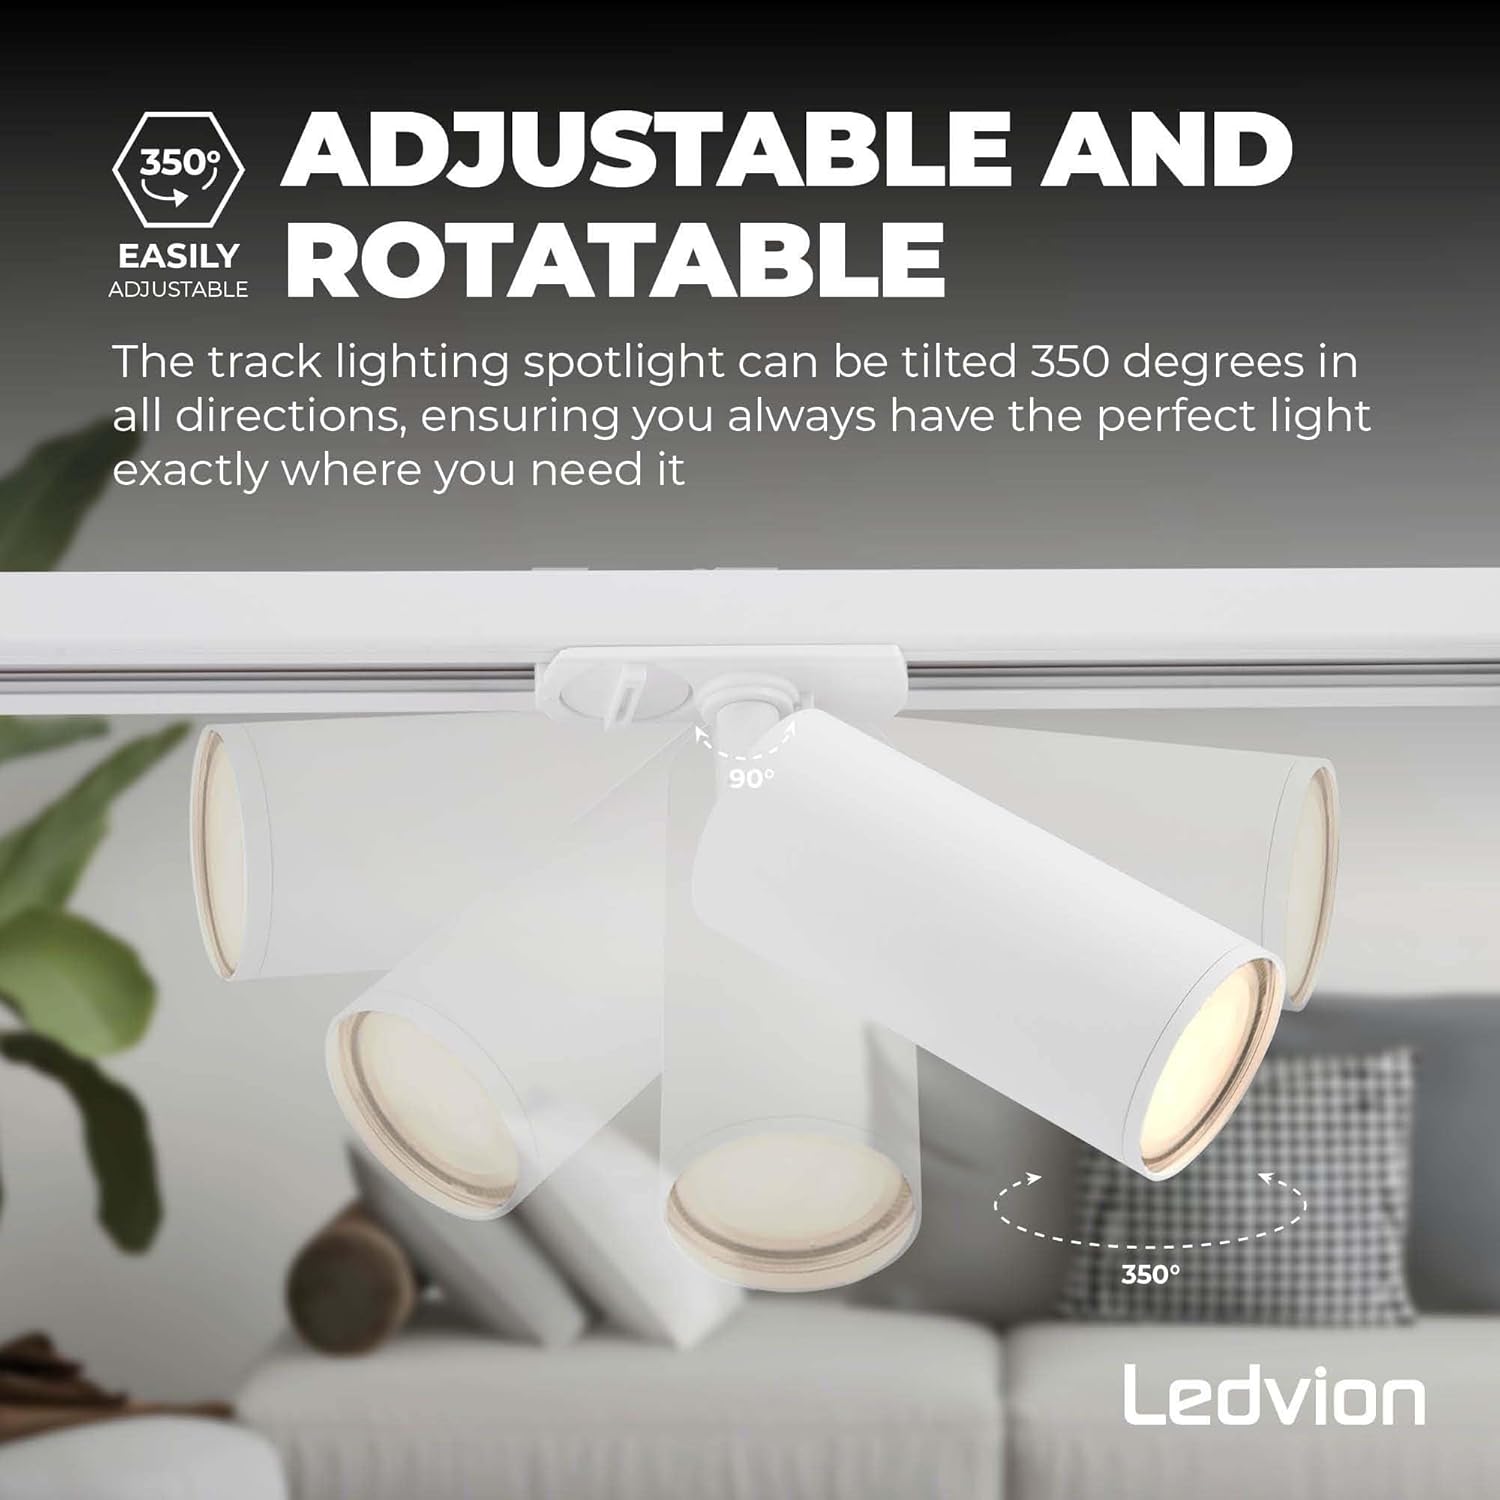
This image demonstrates the 350-degree tilt and rotation capability of the track lighting spotlights, allowing precise light direction.
- Once installed, the spotlights can be tilted up to 350 degrees and rotated to direct light precisely where it is needed.
- Power On: Restore power at the main circuit breaker and test the system.
Operating Instructions
Operating your Ledvion track lighting system is straightforward:
- Turning On/Off: Use your wall switch or connected power control to turn the track lighting system on or off.
- Adjusting Light Direction: Gently tilt and rotate each individual spot holder to direct the light beam to your desired area.
Maintenance
Regular maintenance ensures the longevity and optimal performance of your lighting system.
- Cleaning: Always disconnect power before cleaning. Use a soft, dry, lint-free cloth to wipe the track and spot holders. Do not use liquid cleaners, abrasive materials, or solvents, as these may damage the finish.
- Bulb Replacement:
- Disconnect power to the fixture.
- Allow the old bulb to cool completely before touching it.
- Gently twist and pull out the old GU10 bulb from the spot holder.
- Insert a new GU10 LED bulb into the socket and twist to secure it.
- Restore power and test the new bulb.
Troubleshooting
If you encounter issues with your track lighting system, refer to the following common solutions:
| Problem | Possible Cause | Solution |
|---|---|---|
| Lights not turning on | No power supply, faulty bulb, loose connection | Check circuit breaker. Ensure power is on. Replace bulb. Verify all electrical connections are secure. |
| Lights flickering | Loose bulb, unstable power, faulty bulb | Ensure bulbs are fully seated. Check for loose wiring connections. Replace flickering bulb. |
| Spot not adjusting direction | Locking mechanism overtightened, obstruction | Gently loosen the locking mechanism if applicable. Ensure no physical obstructions prevent movement. |
Specifications
Detailed technical specifications for the Ledvion 1M 3 Railspots LED Track Lighting System.
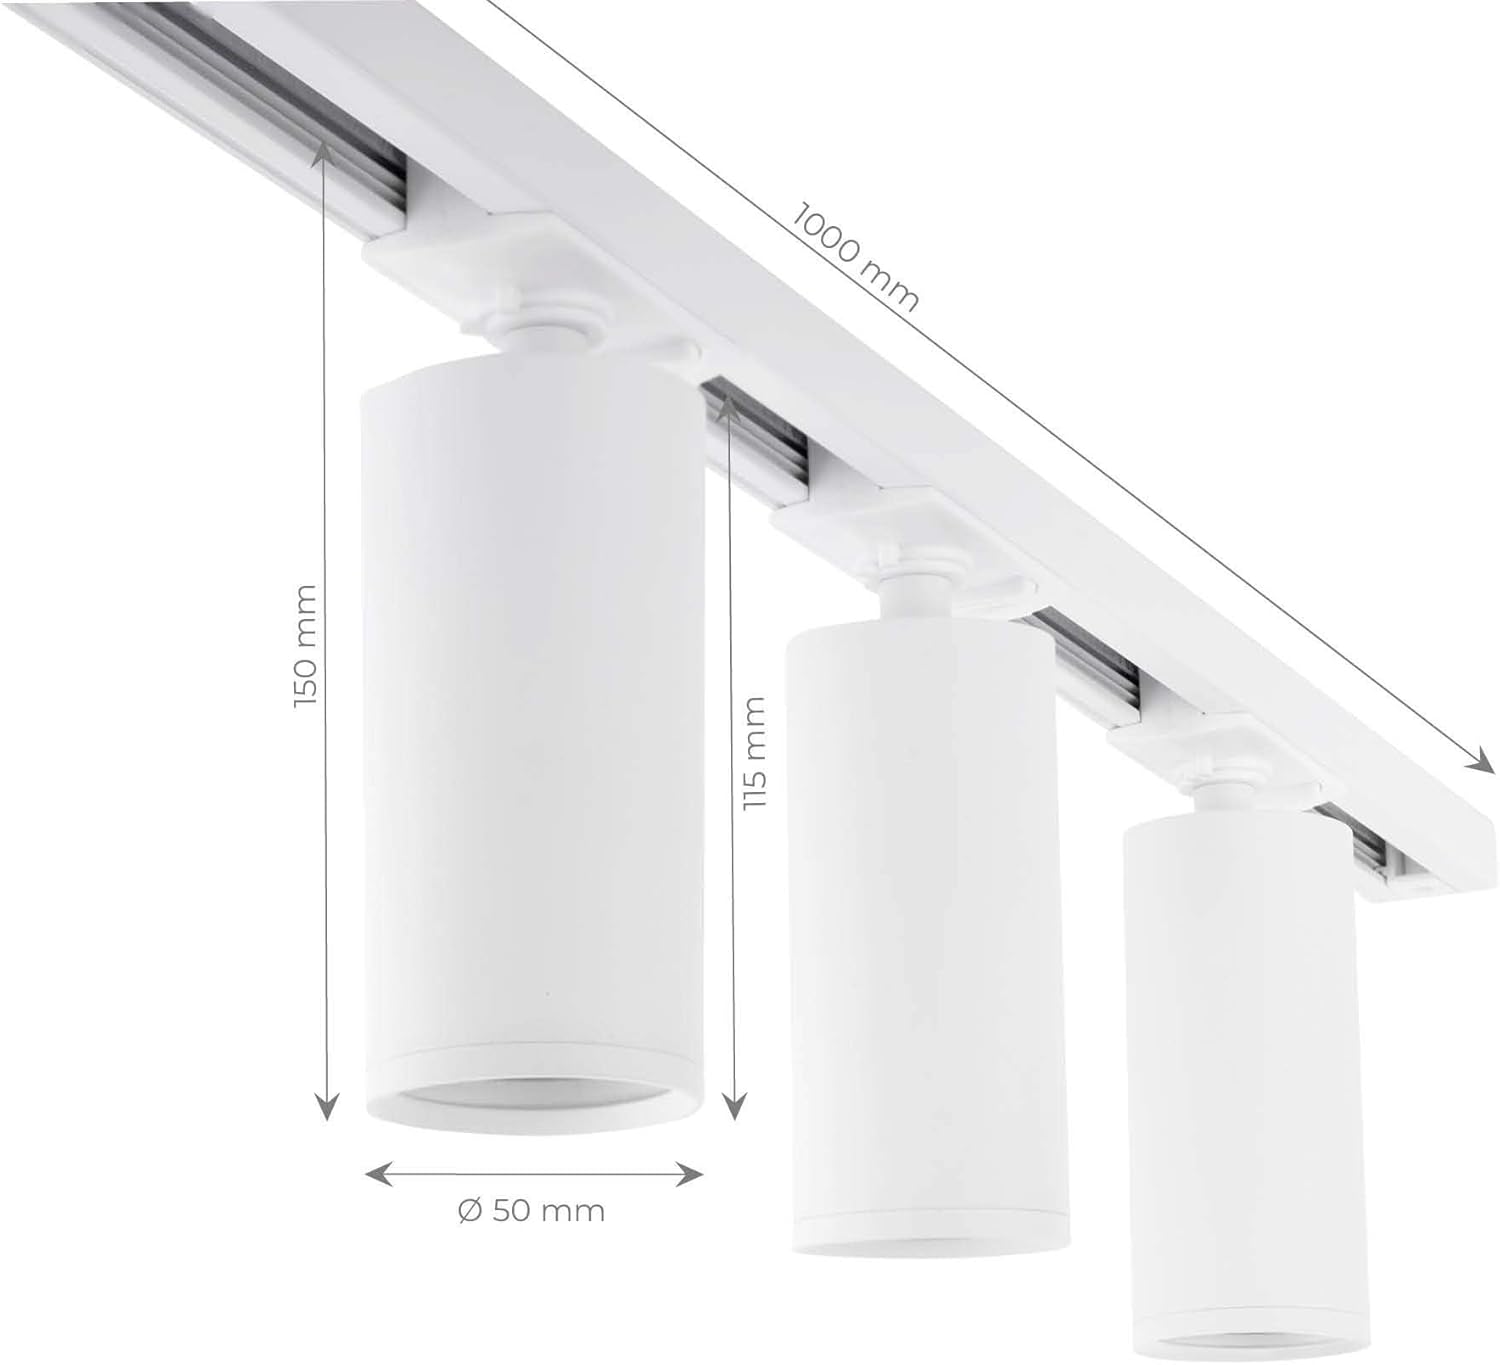
Diagram showing the dimensions of the Ledvion 1M 3 Railspots LED Track Lighting System, including the 1000 mm track length, 150 mm spot height, 115 mm spot height from track, and 50 mm spot diameter.
| Feature | Detail |
|---|---|
| Brand | Ledvion |
| Model Number | LVT10002_1m3s |
| Product Dimensions (L x W x H) | 105 x 15 x 10 cm |
| Item Weight | 1.19 Kilograms |
| Material | Aluminum |
| Number of Bulbs | 3 (GU10, not included) |
| Voltage | 230 Volts |
| Power Source | Electrical |
| Compatible Bulb Type | LED (GU10) |
| Color | White |
| Country of Origin | China |
Optional Upgrades and Accessories
Enhance your track lighting system with these optional accessories (sold separately).

This image displays various optional accessories for expanding the track system, including a power feeder with cover plate, power feeder with I-connector, X-connector, T-connector, and a pendant spot with adjustable cord.
- Power Feeder with Cover Plate: SKU: LVT10019
- Power Feeder with I-Connector: SKU: LVT10021
- X-Connector: SKU: LVT10017 (for creating cross-shaped track layouts)
- T-Connector: SKU: LVT10015 (for creating T-shaped track layouts)
- Pendant Spot with Adjustable Cord: SKU: LVT10005

This image shows an optional anti-glare grid accessory that can be easily added or removed from the spotlights to prevent glare.
- Anti-Glare Grid: An optional accessory designed to reduce glare from the spotlights. Easy to add and remove.
Warranty and Support
This Ledvion product comes with a standard manufacturer's warranty. For detailed warranty terms, product support, and to access the latest documentation, please visit the official Ledvion website or scan the QR code below.

Back of the product box showing the Ledvion logo, CE mark, and a QR code for documentation.
Scan for documentation: https://qr.ledvion.com/DOC