1. Introduction
Thank you for choosing the Thermalright TL-E12B V3 120mm PWM Case Fan. This manual provides essential information for the proper installation, operation, and maintenance of your new fan. Please read this manual thoroughly before installation to ensure optimal performance and longevity of your product.
The TL-E12B V3 is engineered for high performance, featuring a 120mm design with PWM speed control, an S-FDB bearing for quiet and stable operation, and optimized airflow for effective cooling of your computer components.
2. Safety Information
- Ensure your computer system is powered off and unplugged from the wall outlet before installation or maintenance.
- Handle the fan by its frame to avoid damaging the blades.
- Do not attempt to disassemble the fan motor or bearing. The S-FDB bearing is designed to be maintenance-free.
- Keep the fan away from liquids and excessive dust.
- Use only the provided cables and connectors.
- The fan blades are designed with anti-misfiring features, but exercise caution to prevent finger injury during handling or operation.
3. Package Contents
- 1x Thermalright TL-E12B V3 120mm Case Fan
4. Specifications
| Feature | Specification |
|---|---|
| Model | TL-E12B V3 |
| Dimensions | 120mm (L) x 120mm (W) x 25mm (H) |
| Rotational Speed | 2000 RPM ±10% (Max) |
| Noise Level | ≤27.7 dBA |
| Air Flow Capacity | 72.37 CFM |
| Air Pressure | 2.87 mm H2O (Max) |
| Power Connector Type | 4-Pin PWM |
| Voltage | 12 Volts |
| Current | 0.18 A |
| Wattage | 2.16 Watts |
| Bearing Type | S-FDB (Fluid Dynamic Bearing) |
| Material | PBT+PC (Insulation Grade) |
| Cable Length | Up to 55cm |
5. Setup & Installation
5.1 General Installation
The Thermalright TL-E12B V3 fan is designed for versatile use, suitable for computer cases, CPU coolers, and water cooling radiators. Ensure proper airflow direction for optimal cooling performance.
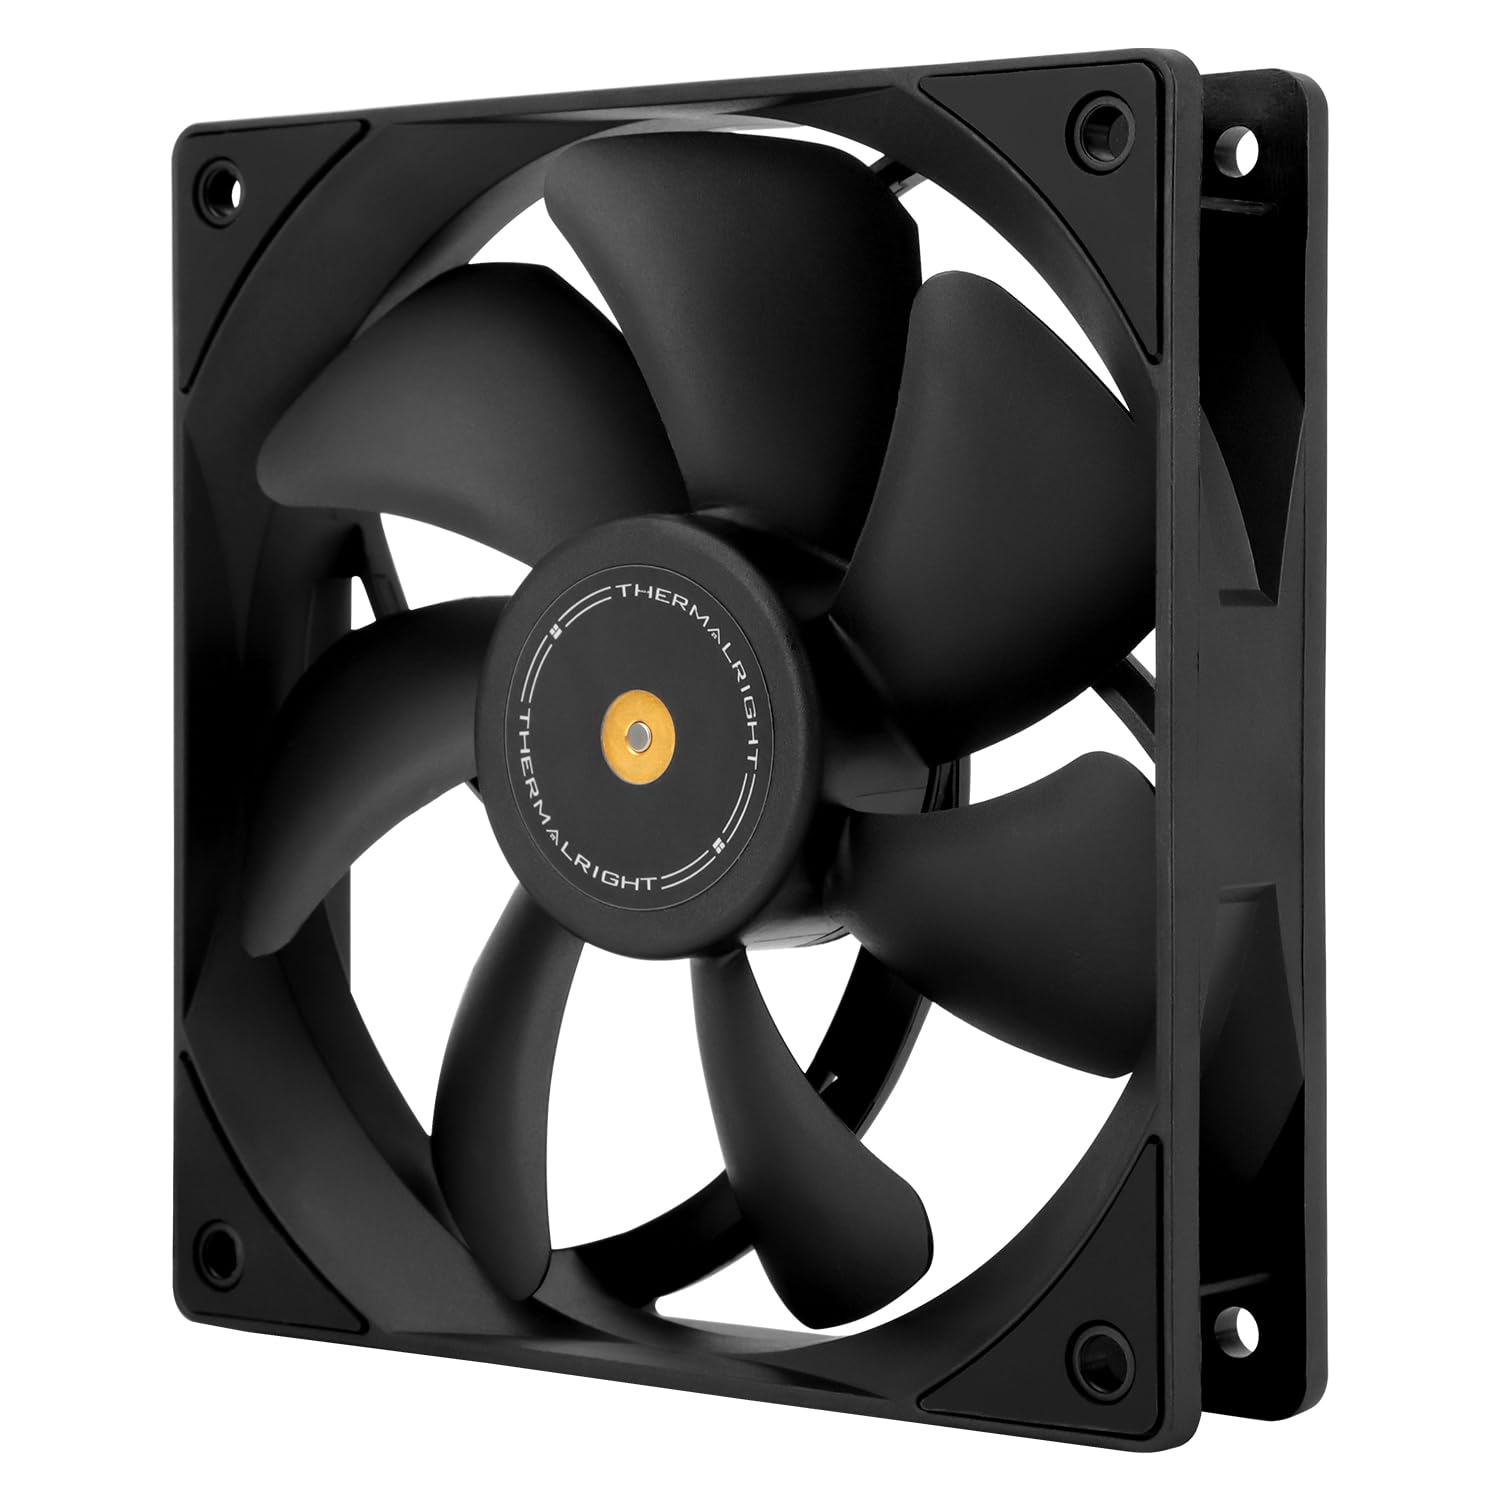
Image: Front view of the Thermalright TL-E12B V3 fan, highlighting its balanced performance design.
5.2 Physical Installation Steps
- Prepare Mounting Location: Identify the desired mounting location within your PC case, on a CPU cooler, or a radiator. Ensure there is sufficient space and that the mounting holes align with the fan's dimensions (120x120mm).
- Orient the Fan: Determine the desired airflow direction. Fans typically have an arrow indicating airflow direction on the side of the frame. Position the fan to draw cool air in or exhaust hot air out, depending on your system's cooling strategy.
- Secure the Fan: Use the provided screws to secure the fan to the mounting location. The fan features shock-absorbing corner pads to reduce noise and vibration. Tighten screws evenly but do not overtighten.

Image: Rear view of the TL-E12B V3 fan, showing the S-FDB bearing label and the soft-touch rubber pads on the corners designed for vibration absorption.
5.3 Wiring Connections
The TL-E12B V3 fan uses a 4-pin PWM connector for power and speed control.
- Connect to Motherboard: Locate an available 4-pin fan header on your motherboard (often labeled 'CHA_FAN' or 'SYS_FAN').
- Secure Connection: Carefully align the 4-pin connector from the fan with the pins on the motherboard header and push firmly until it is seated. The connector is keyed to prevent incorrect insertion.

Image: The Thermalright TL-E12B V3 fan with a close-up of its 4-pin PWM connector, which allows for automatic speed control via the motherboard.
6. Operating Instructions
The Thermalright TL-E12B V3 fan operates via PWM (Pulse Width Modulation) signal control. Once connected to a compatible 4-pin PWM header on your motherboard, the fan speed will automatically adjust based on the system's temperature, as determined by your motherboard's BIOS settings or fan control software.
- Automatic Speed Control: The motherboard will detect the fan and regulate its speed from idle to a maximum of 2000 RPM, providing efficient cooling only when needed, thus reducing noise during lighter loads.
- BIOS/Software Configuration: You can typically adjust fan curves and profiles within your motherboard's BIOS/UEFI settings or through manufacturer-provided software to customize the fan's behavior according to your preferences.

Image: The TL-E12B V3 fan shown installed in a PC case for exhaust and mounted on a water cooling radiator, demonstrating its versatile application in different cooling setups.
7. Maintenance
Regular maintenance helps ensure optimal performance and extends the lifespan of your fan.
- Cleaning: Periodically clean the fan blades and frame to remove dust buildup. Use compressed air or a soft brush. Ensure the fan is powered off and unplugged before cleaning.
- Inspection: Check for any obstructions around the fan blades or unusual noises during operation.
- Bearing: The S-FDB (Fluid Dynamic Bearing) is designed for long-lasting, maintenance-free operation. Do not attempt to lubricate or disassemble the bearing, as this may damage the fan and void the warranty.
8. Troubleshooting
| Problem | Possible Cause | Solution |
|---|---|---|
| Fan not spinning | No power, loose connection, faulty header | Ensure 4-pin PWM cable is securely connected to the motherboard. Check BIOS settings for fan control. Try a different fan header. |
| Fan spinning too fast/slow | Incorrect BIOS settings, fan control software issue | Adjust fan speed settings in your motherboard's BIOS/UEFI or fan control software. Ensure PWM mode is enabled. |
| Unusual noise/vibration | Loose mounting screws, obstruction, faulty bearing | Check and tighten mounting screws. Ensure no cables or objects are hitting the fan blades. If noise persists and no obstruction is found, contact support. |
| Low airflow | Dust buildup, incorrect fan orientation | Clean fan blades and surrounding area. Verify fan is oriented correctly for desired airflow (intake or exhaust). |
9. Warranty & Support
Thermalright products are manufactured to the highest quality standards. This product is covered by a limited warranty against defects in materials and workmanship. For specific warranty terms and conditions, please refer to the warranty information provided with your purchase or visit the official Thermalright website.
For technical support, troubleshooting assistance, or warranty claims, please contact Thermalright customer service through their official website or the retailer from whom you purchased the product. Please have your product model number (TL-E12B V3) and proof of purchase ready when contacting support.


