Introduction
This manual provides instructions for the assembly, operation, and maintenance of your Andoer Dual Handle Camera Diving Rig. This rig is designed to enhance stability and control for underwater photography and videography, compatible with various camera housings.
Package Contents
Before proceeding, please verify that all components are present:
- 2 x Handles
- 1 x Bottom Plate (Tray)
- 5 x Screws
- 5 x Mini Wrenches
- 1 x Shutter Release Lever (if included with your model)

Image: All components of the Andoer Dual Handle Camera Diving Rig, including the bottom plate, two handles, screws, and wrenches.
Setup and Assembly
- Attach Handles to the Bottom Plate:
Align the base of each handle with the designated slots on the bottom plate. Secure them using the provided screws and mini wrenches. Ensure they are tightened firmly but do not overtighten.

Image: The adjustable handle position mechanism, showing how handles can be moved along the tray to fit different equipment sizes.
The handles feature a telescopic design, allowing you to adjust their position along the bottom plate. Loosen the securing screws, slide the handles to your desired width, and re-tighten the screws. This adjustment accommodates various camera housing sizes and user preferences.

Image: Diagram illustrating the adjustable dimensions of the diving rig, including handle width (280-330mm / 11-13in) and handle height (185mm / 7.3in).
- Mount Your Camera Housing:
Place your camera's waterproof housing onto the central platform of the bottom plate. Secure it using the 1/4" screw provided on the rig. Ensure the housing is firmly attached and stable.

Image: A camera waterproof housing (TG-7 model shown) mounted onto the diving rig's bottom plate, secured by a 1/4" screw.
The bottom plate includes an anti-slip rubber pad to prevent your camera housing from shifting during use.

Image: A close-up view of the anti-slip rubber pad located on the central platform of the diving rig's bottom plate.
- Attach Accessories (Optional):
Each handle is equipped with a dual ball head, allowing for the attachment of various accessories such as fill lights, strobes, or extension arms. These accessories can be mounted directly onto the ball heads to expand your underwater photography setup.
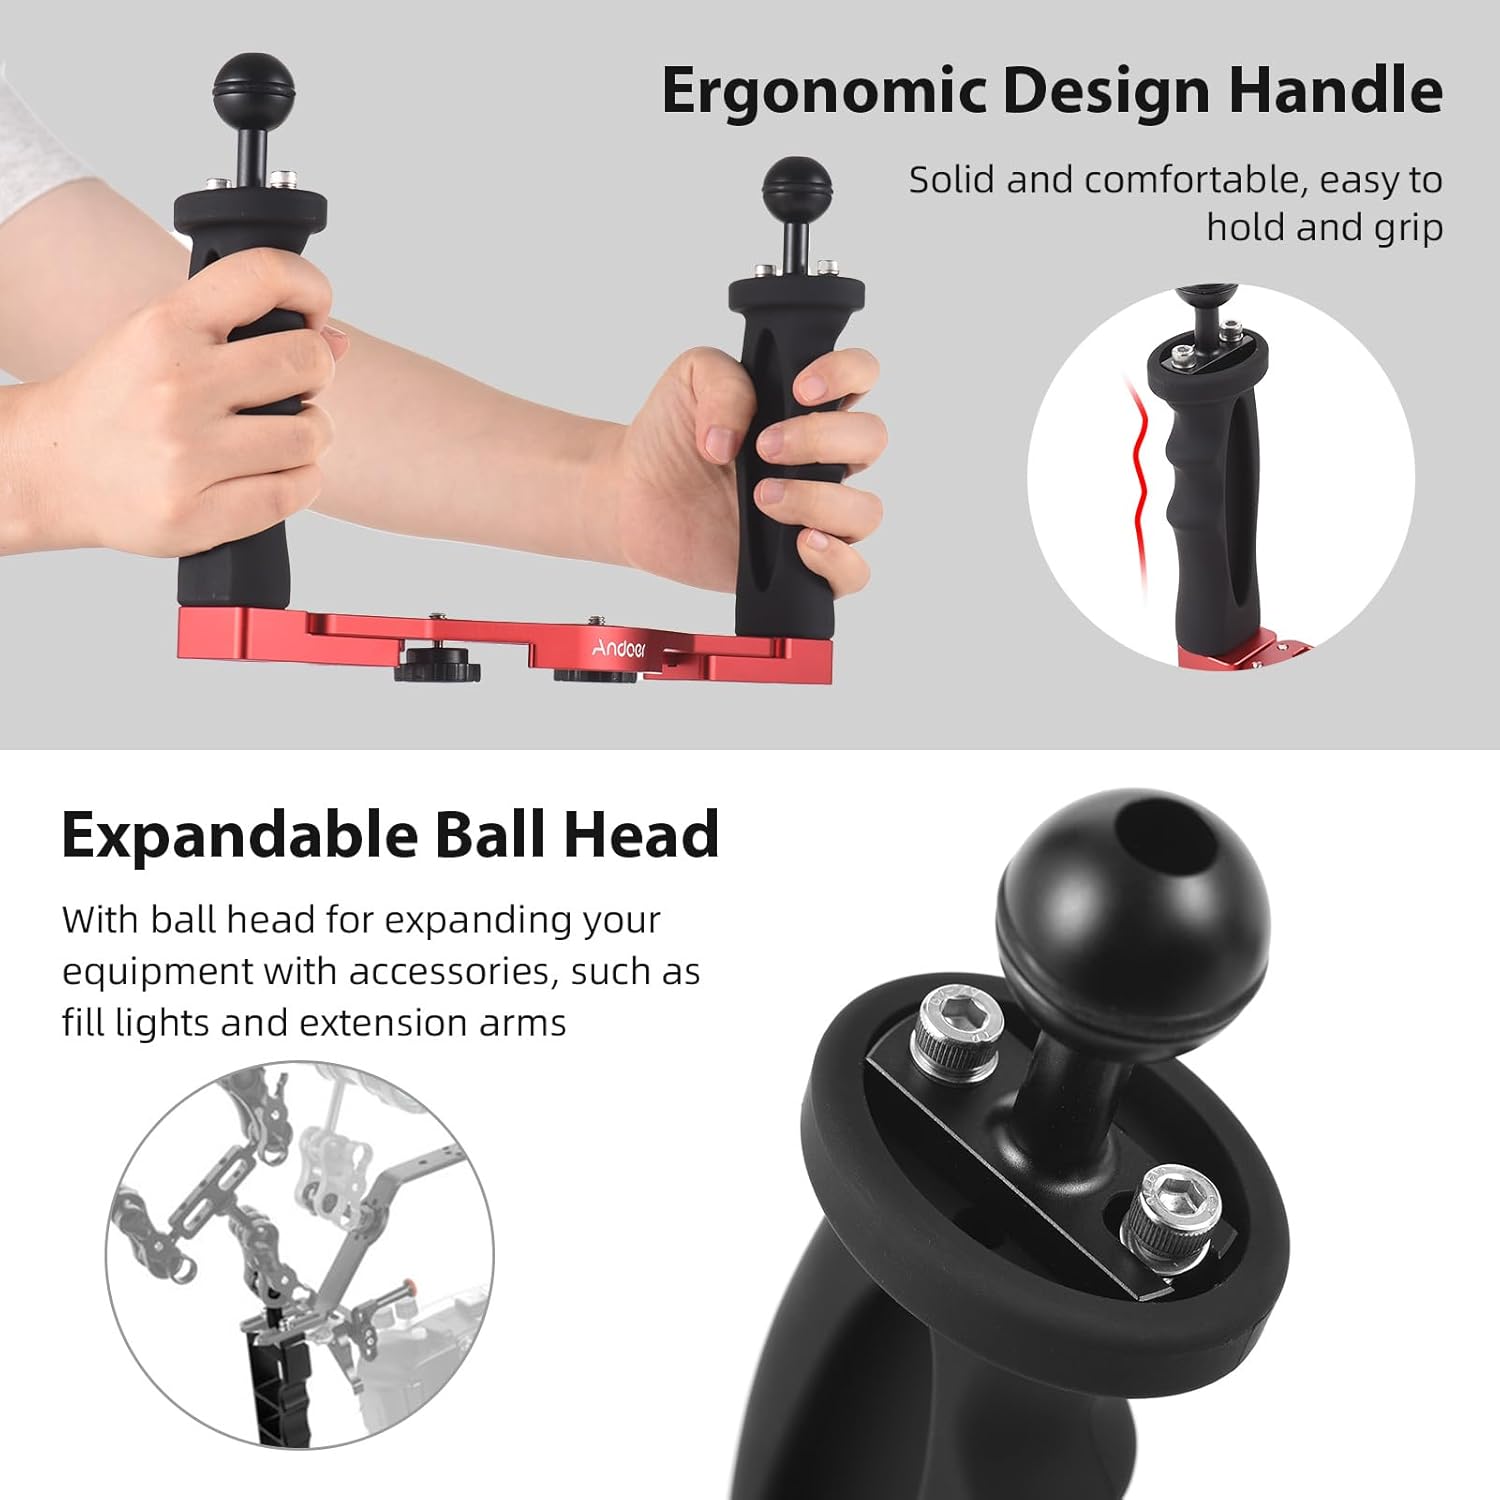
Image: Illustration of the ergonomic handle design and the expandable ball head, highlighting its use for attaching additional equipment.
Operating Instructions
The Andoer Dual Handle Camera Diving Rig provides enhanced stability and control for underwater imaging. Hold the rig by both ergonomic handles to maintain a steady platform for your camera.
- Stability: The dual-handle design significantly reduces camera shake, leading to clearer photos and smoother video footage underwater.
- Control: The ergonomic handles offer a comfortable and secure grip, even in wet conditions, allowing for precise camera movements.
- Accessory Integration: Utilize the ball heads to position external lights or other accessories for optimal illumination and creative shots.
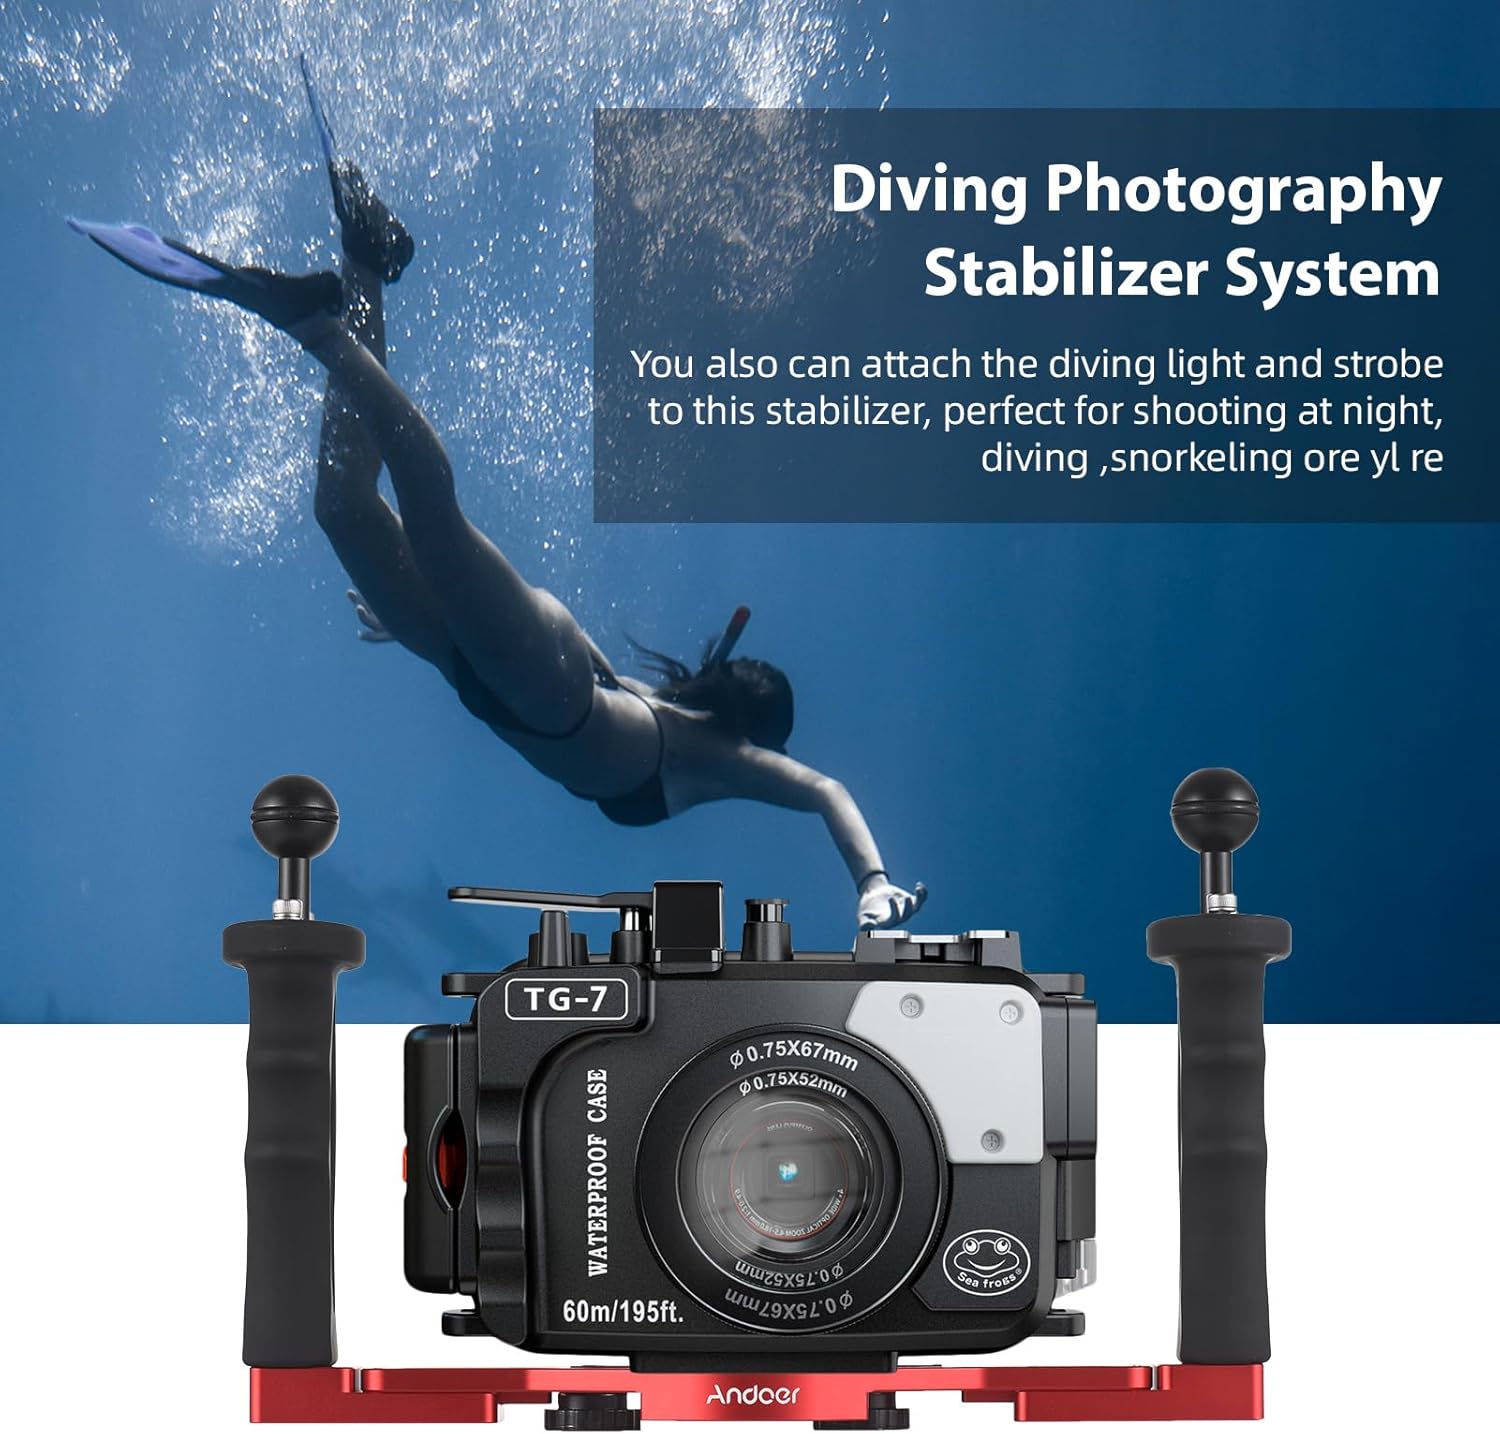
Image: A diver using the Andoer Dual Handle Camera Diving Rig with a camera housing and an attached diving light, demonstrating its application for underwater photography.
This rig is suitable for various waterproof housings from brands like Sony, Nikon, Canon, Fujifilm, and Olympus.

Image: The diving rig shown with a camera housing, indicating its compatibility with multiple camera brands and waterproof lights.
Maintenance
Proper maintenance ensures the longevity and performance of your diving rig:
- Rinse After Use: After each use in saltwater, thoroughly rinse the entire rig with fresh water. This helps prevent corrosion.
- Dry Thoroughly: Allow the rig to air dry completely in a shaded area before storage. Avoid direct sunlight.
- Inspect Components: Regularly check all screws and connections for tightness. Inspect the plastic handles and aluminum alloy frame for any signs of wear or damage.
- Storage: Store the rig in a cool, dry place away from direct sunlight and corrosive chemicals.
Troubleshooting
- Issue: Handles feel loose or wobbly.
Solution: Ensure the screws securing the handles to the bottom plate are fully tightened using the provided mini wrenches. If the issue persists, check for any damage to the screw threads or mounting points.
- Issue: Camera housing is not stable on the tray.
Solution: Verify that the 1/4" mounting screw is securely fastened to your camera housing. Ensure the housing is centered on the anti-slip rubber pad. If the housing still moves, check if the rubber pad is damaged or missing.
- Issue: Accessories attached to ball heads are not secure.
Solution: Confirm that the accessory is correctly mounted and tightened onto the ball head. Inspect the ball head and accessory mounting point for any wear or damage that might prevent a secure fit.
Specifications
| Material | Aluminum Alloy + Plastic + Stainless Steel |
| Item Weight | 485g |
| Compatible Devices | Camera (with waterproof housing) |
| Adjustable Handle Width | Approximately 280-330mm (11-13 inches) |
| Handle Height | Approximately 185mm (7.3 inches) |