
1. Introduction
Thank you for purchasing the AOZOY QB401 Bike Light Set. This manual provides essential information for the safe and efficient operation, installation, and maintenance of your new bike light set. Please read this manual thoroughly before use and retain it for future reference.

Figure 1: AOZOY QB401 Bike Light Set
2. Safety Information
- Always ensure lights are securely mounted before riding.
- Do not look directly into the headlight beam to avoid temporary vision impairment.
- Adjust headlight angle to avoid dazzling oncoming traffic or pedestrians.
- Regularly check battery levels to ensure sufficient power for your ride.
- While the lights are waterproof, avoid prolonged submersion.
3. Package Contents
- AOZOY QB401 Headlight (4 LED, 9500 Lumen)
- USB Rechargeable Taillight
- Headlight Mounting Bracket
- Taillight Mounting Strap
- USB Type-C Charging Cable (for Headlight)
- USB Micro-B Charging Cable (for Taillight)
- User Manual
4. Setup & Installation
4.1 Headlight Installation
- Place the headlight mounting bracket on your bicycle handlebar.
- Tighten the screws on the bracket to secure it firmly to the handlebar.
- Slide the headlight onto the mounted bracket until it clicks into place.
- Adjust the angle of the headlight as needed for optimal visibility.

Figure 2: Headlight Installation Steps
4.2 Taillight Installation
- Attach the rubber mounting strap to the taillight.
- Wrap the strap around your bicycle's seat post or rear frame.
- Secure the strap by hooking it into the appropriate notch for a snug fit.
- Ensure the taillight is facing directly backward for maximum visibility.

Figure 3: Taillight Installation Steps
5. Operating Instructions
5.1 Headlight Operation & Modes
The headlight features 9 lighting modes. Use the dedicated buttons for High Beam and Low Beam control.

Figure 4: Headlight Modes
- High Beam Button:
- Click once: High Light
- Click twice: Medium Light
- Click three times: Low Light
- Click four times: Turn off the light
- Low Beam Button:
- Click once: High Light
- Click twice: Medium Light
- Click three times: Low Light
- Click four times: Turn off the light
- Emergency Mode:
- Double click in High Beam: Fast Flash
- Double click in Low Beam: Slow Flash
5.2 Taillight Operation & Modes
The taillight offers 5 modes and 2 color options (red and blue) for enhanced rear visibility.

Figure 5: Taillight Modes
- Press the power button on the taillight to cycle through the 5 available modes.
- Hold the button to turn the taillight off.
5.3 Digital Display
The headlight features a digital display that shows the remaining battery percentage and estimated runtime for the selected mode.
5.4 Power Bank Function
The headlight can also function as a power bank to charge your mobile devices via its USB output port.
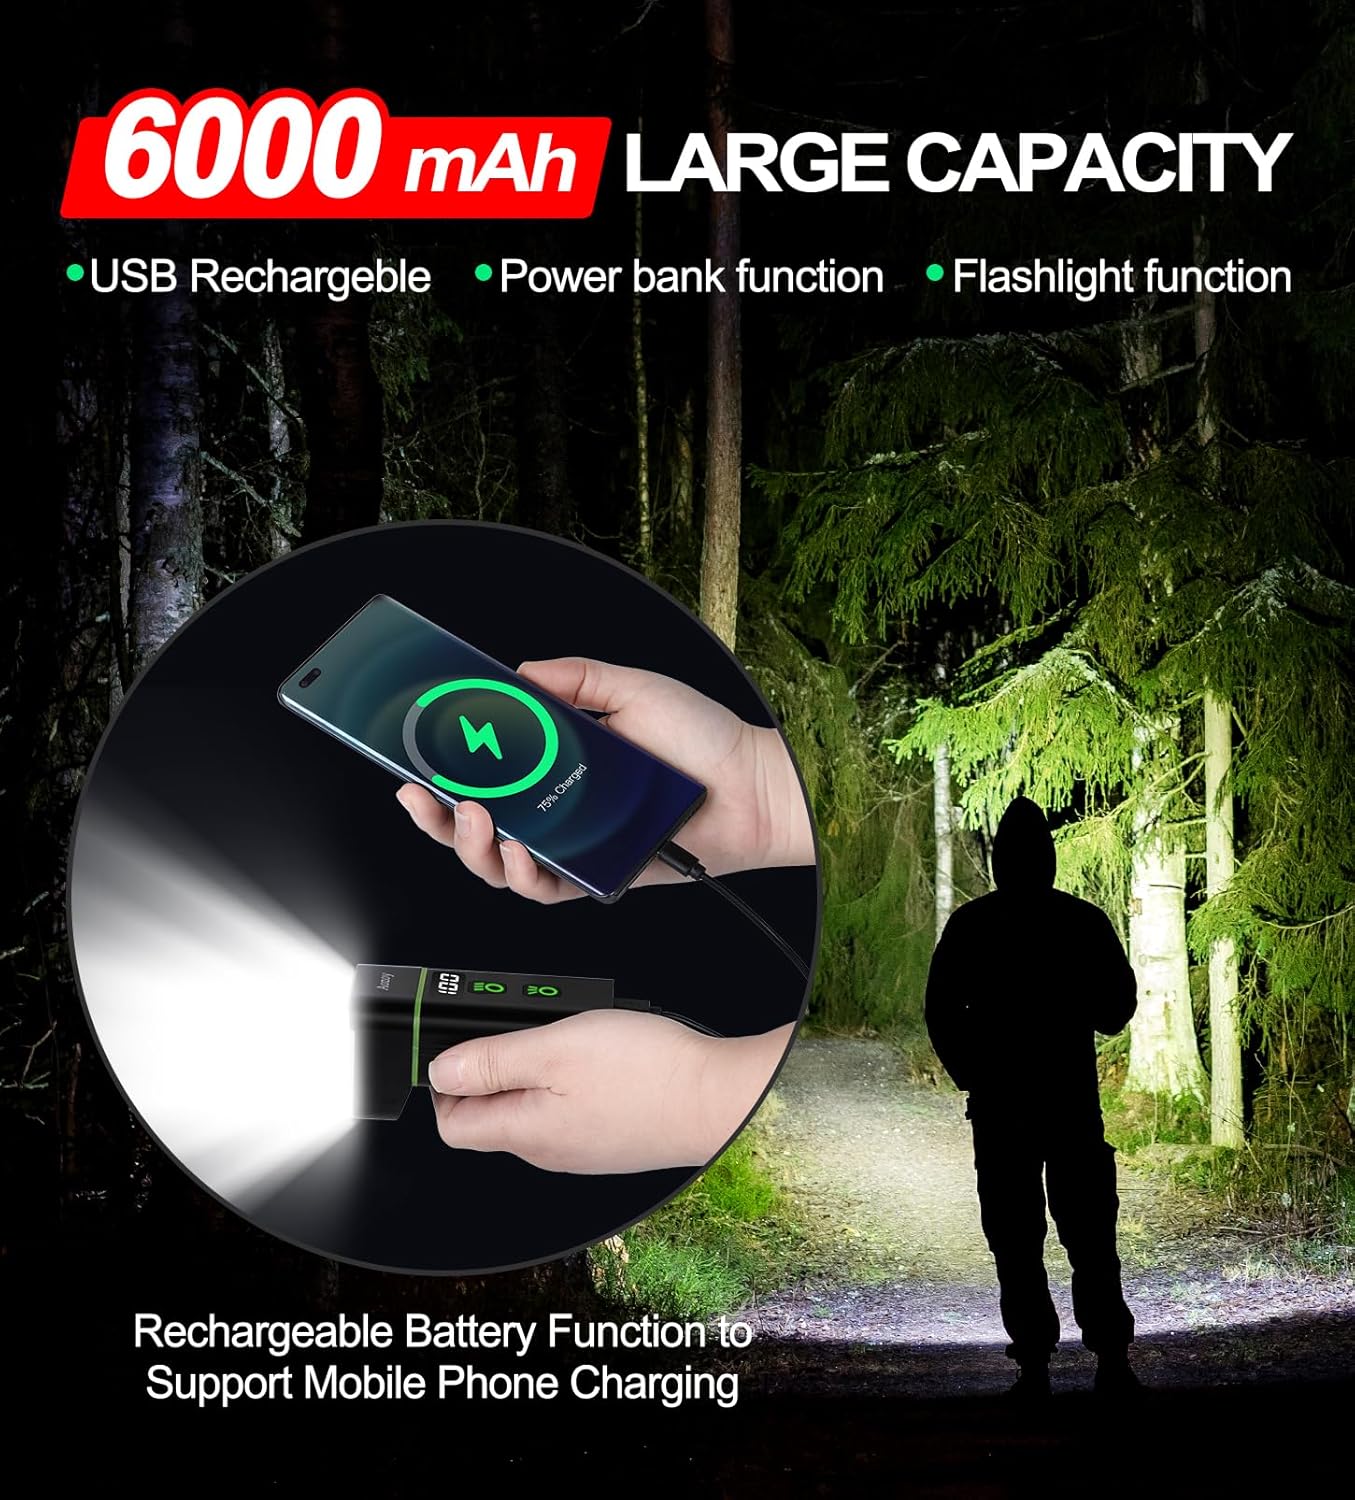
Figure 6: Headlight as Power Bank
6. Charging
Both the headlight and taillight are USB rechargeable.
- Headlight: Connect the provided USB Type-C cable to the headlight's input port and a suitable USB power source.
- Taillight: Connect the provided USB Micro-B cable to the taillight's input port and a suitable USB power source.
- The digital display on the headlight will indicate charging status. The taillight will typically show a solid light when charging and turn off or change color when fully charged.
Video 1: Demonstration of charging and light modes for the KX3-A Bike Lights (similar to QB401).
7. Maintenance
7.1 Cleaning
Wipe the lights with a soft, damp cloth. Do not use abrasive cleaners or solvents.
7.2 Water Resistance
The lights are rated IP65 waterproof, meaning they are protected against dust ingress and low-pressure water jets from any direction. They can withstand rain and splashes but should not be submerged in water.

Figure 7: Waterproof Design
7.3 Storage
Store the lights in a cool, dry place when not in use. If storing for extended periods, charge the batteries periodically to maintain their health.
8. Troubleshooting
- Light not turning on: Ensure the battery is charged. Press and hold the power button for a few seconds.
- Light not charging: Check the charging cable connection and the power source. Ensure the charging port cover is fully open.
- Lights falling off mount: Ensure mounting brackets are tightened securely and the light is properly clicked into place.
9. Specifications
| Feature | Detail |
|---|---|
| Brand | AOZOY |
| Model Name | QB401 |
| Light Output (Headlight) | 9500 Lumens (Max) |
| LED Beads (Headlight) | 4 LED |
| Headlight Modes | 9 (High/Med/Low for High Beam, High/Med/Low for Low Beam, Fast Flash, Slow Flash, Custom) |
| Battery Capacity | 6000mAh (Headlight) |
| Charging Port (Headlight) | USB Type-C |
| Output Port (Headlight) | USB (Power Bank Function) |
| Taillight Modes | 5 (Red Light, Blue Light, Red Fast Flash, Red Slow Flash, Red & Blue Flash) |
| Water Resistance Rating | IP65 |
| Material | Plastic |
10. Warranty & Support
The AOZOY QB401 Bike Light Set comes with a 2-year manufacturer warranty. For any warranty claims or technical support, please contact AOZOY customer service through your purchase platform.