
Sharutia 7056
Pool Check Valve Flapper Cover Assembly Replacement User Manual
Model: 7056
1. Introduction
This manual provides detailed instructions for the installation, operation, and maintenance of the Sharutia Pool Check Valve Flapper 7236 Cover Assembly Replacement. This component is designed to address common pool and spa backflow issues, ensuring proper water flow direction and preventing spa drainage.
1.1 Product Overview
The Sharutia Pool Check Valve Flapper Cover Assembly is a crucial replacement part for maintaining the integrity of your pool or spa's plumbing system. It effectively prevents water from draining back into the pool from the spa, which can lead to water loss and operational inefficiencies. The assembly features upgraded stainless steel springs and pins for enhanced durability and a crack-resistant cover structure.
1.2 Compatibility
This replacement assembly is compatible with the following Jandy Standard Spring Check Valve models:
- 7235
- 7236
- 7305
- 7511
- 7512
It is also compatible with Hayward PSCV2S2DGR models.
2. Included Components
The Sharutia Pool Check Valve Flapper 7236 Cover Assembly Replacement package includes all necessary parts for a complete replacement:
- Round clear cover
- 7451 sealing flap
- 7304 pin
- 7302 stainless steel springs
- New 1132 O-ring

Figure 2.1: Front view of the Sharutia Pool Check Valve Flapper Cover Assembly, showing the clear cover and internal components.

Figure 2.2: Back view of the assembly, highlighting the flapper and spring mechanism.

Figure 2.3: Side view of the assembly, showing the O-ring for sealing.
3. Installation (Setup)
Installation of the check valve flapper assembly is a straightforward process. Follow these steps carefully to ensure proper function and a leak-free seal.
- Preparation: Before beginning, ensure your pool or spa pump is turned off and the system is depressurized. If necessary, drain water from the relevant plumbing lines to prevent spills.
- Remove Old Assembly: Locate the existing check valve. Carefully unscrew or unclamp the old cover assembly. Note the orientation of the old flapper to ensure the new one is installed correctly for one-way flow.
- Clean the Area: Thoroughly clean the mating surfaces of the check valve body. Important Tip: Check for any residue buildup, debris, or old sealant that might prevent a proper seal. Clean the area completely.
- Apply Silicone: Apply a thin, even layer of pool-grade silicone sealant around the O-ring and the sealing flap of the new assembly. This helps ensure a watertight seal and prolongs the life of the O-ring.
- Install New Assembly: Carefully place the new Sharutia flapper cover assembly onto the check valve body, ensuring the flapper is oriented correctly to allow water flow in the desired direction (typically away from the spa and towards the pool). The transparent cover allows for visual confirmation of water flow.
- Secure the Cover: Fasten the cover assembly securely using the existing screws or clamps. Do not overtighten, as this can damage the cover or O-ring.
- Test the System: Once installed, slowly repressurize your pool or spa system and check for any leaks around the newly installed assembly. Observe the flapper's movement to confirm it opens and closes correctly with water flow.
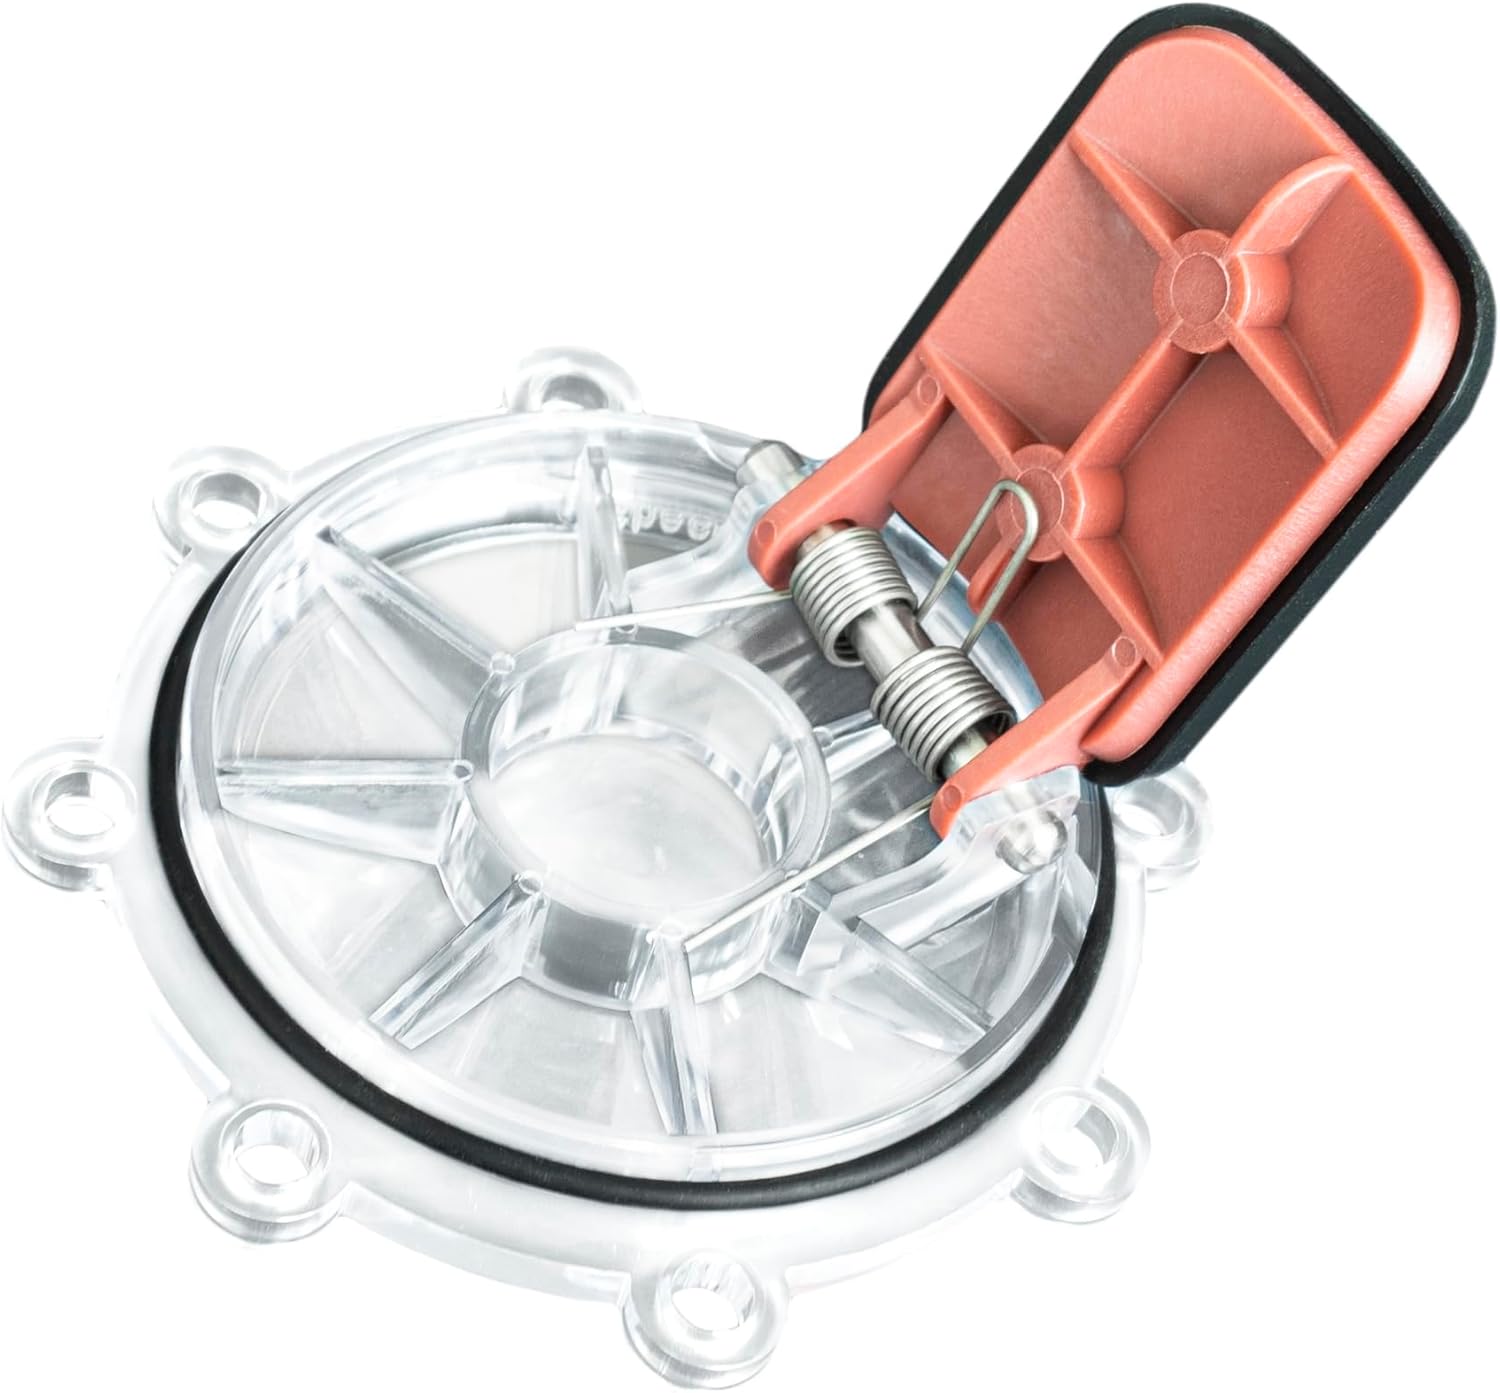
Figure 3.1: View of the flapper assembly showing the flapper in an open position, ready for installation.

Figure 3.2: Example of a check valve assembly installed within a pool/spa plumbing system.
4. Operation
The Sharutia Pool Check Valve Flapper Assembly operates automatically based on water flow. Its primary function is to allow water to flow in one direction while preventing backflow.
- When the pump is running and water is flowing in the correct direction (e.g., from the pool to the spa or vice-versa, depending on valve placement), the water pressure pushes the flapper open, allowing unimpeded flow.
- When the pump is off or water attempts to flow in the reverse direction (e.g., spa water draining back into the pool), the flapper automatically closes due to gravity and spring tension, creating a seal that prevents backflow.
The transparent cover allows for visual inspection of the flapper's operation and water flow, ensuring it is functioning as intended.
5. Maintenance
Regular maintenance helps ensure the longevity and optimal performance of your check valve flapper assembly.
- Periodic Inspection: Periodically inspect the transparent cover for any signs of cracking or damage. Also, visually check the flapper's movement to ensure it opens and closes freely without obstruction.
- Cleanliness: Over time, residue, debris, or mineral buildup can accumulate around the flapper and O-ring, potentially hindering its sealing ability. If you notice any issues, turn off the pump, remove the cover assembly, and thoroughly clean all components.
- O-Ring Condition: Inspect the O-ring for cracks, dryness, or flattening. A damaged O-ring can lead to leaks. Replace the O-ring if it shows signs of wear. Applying a small amount of silicone lubricant to the O-ring during reassembly can help maintain its flexibility and sealing properties.
- Spring Tension: The upgraded stainless steel springs are designed for durability, but ensure they provide adequate tension to close the flapper when there is no forward flow.
6. Troubleshooting
This section addresses common issues you might encounter with your check valve flapper assembly.
| Problem | Possible Cause | Solution |
|---|---|---|
| Spa draining back into the pool (backflow) |
|
|
| Visible leaks around the cover |
|
|
| Reduced water flow or suction issues |
|
|
7. Specifications
- Product Dimensions: 5 x 5 x 2 inches
- Item Weight: 1.38 pounds
- Manufacturer: Sharutia
- Model Number: 7056
- Compatibility: Jandy Standard Spring Check Valve models 7235, 7236, 7305, 7511, 7512; Hayward PSCV2S2DGR
- Material: Transparent cover, stainless steel springs and pins, durable sealing flap.
8. Warranty Information
For specific warranty details regarding your Sharutia Pool Check Valve Flapper Cover Assembly, please refer to the product packaging or contact Sharutia customer support directly. Generally, products are covered against manufacturing defects for a specified period from the date of purchase.
9. Customer Support
If you have any questions, require assistance with installation, or need to troubleshoot an issue not covered in this manual, please contact Sharutia customer support. Please have your product model number (7056) and purchase information ready when contacting support.
For the most up-to-date contact information, please visit the official Sharutia website or refer to your product packaging.
Ask a question about this manual
Ask about setup, troubleshooting, compatibility, parts, safety, or missing instructions. Manuals+ will review the question and use this page’s manual context to help answer it.