Introduction
Thank you for choosing the LUCYPAL Slim Metal Shoe Cabinet. This manual provides detailed instructions for the assembly, installation, operation, and maintenance of your new shoe cabinet. Designed for entryways, hallways, and living rooms, this cabinet offers a space-saving solution for organizing your footwear. Please read this manual thoroughly before beginning assembly to ensure safe and correct installation and use.
Safety Information
Important Safety Warnings:
- Always use appropriate safety gear when installing.
- Ensure the wall can support the weight of the cabinet.
- For heavy cabinets, consider using a helper to prevent injuries.
- Do not attempt to install the cabinet by yourself if you are not comfortable with the weight.
- Securely mount the cabinet to the wall using the provided anti-tip hardware to prevent accidental tipping, especially in households with children or pets.

Image Description: This image displays a safety diagram emphasizing the importance of securing the shoe cabinet to the wall to prevent tip-over incidents, especially with children present. It shows a correct installation with an anchor and an incorrect, unsecured setup.
Parts List
Before assembly, please verify that all components are present and undamaged. If any parts are missing or damaged, please contact customer support.
- Cabinet Panels (Top, Bottom, Sides, Back)
- Flip Drawers (3 units)
- Drawer Mechanisms/Hinges
- Adjustable Shoe Baffles/Dividers
- Assembly Hardware (Screws, Dowels, Connectors)
- Wall Mounting Hardware (Anchors, Screws, Brackets)
- Instruction Manual
Assembly Instructions
Assembly is required for this product. Follow the steps carefully. It is recommended to have a second person assist with assembly and installation.
- Unpack and Identify Parts: Lay out all components on a clean, soft surface to prevent scratches. Refer to the included parts diagram to identify each piece.
- Assemble the Main Frame: Connect the side panels to the top and bottom panels using the provided hardware. Ensure all connections are secure.
- Install Back Panel: Attach the back panel to the assembled frame.
- Assemble Flip Drawers: Construct each of the three flip drawers. Attach the drawer mechanisms/hinges to the drawer panels.
- Attach Drawers to Frame: Carefully attach the assembled flip drawers to the main cabinet frame. Ensure they open and close smoothly.
- Insert Adjustable Baffles: Place the adjustable shoe baffles inside each drawer. These can be moved or removed to accommodate different shoe sizes and types.
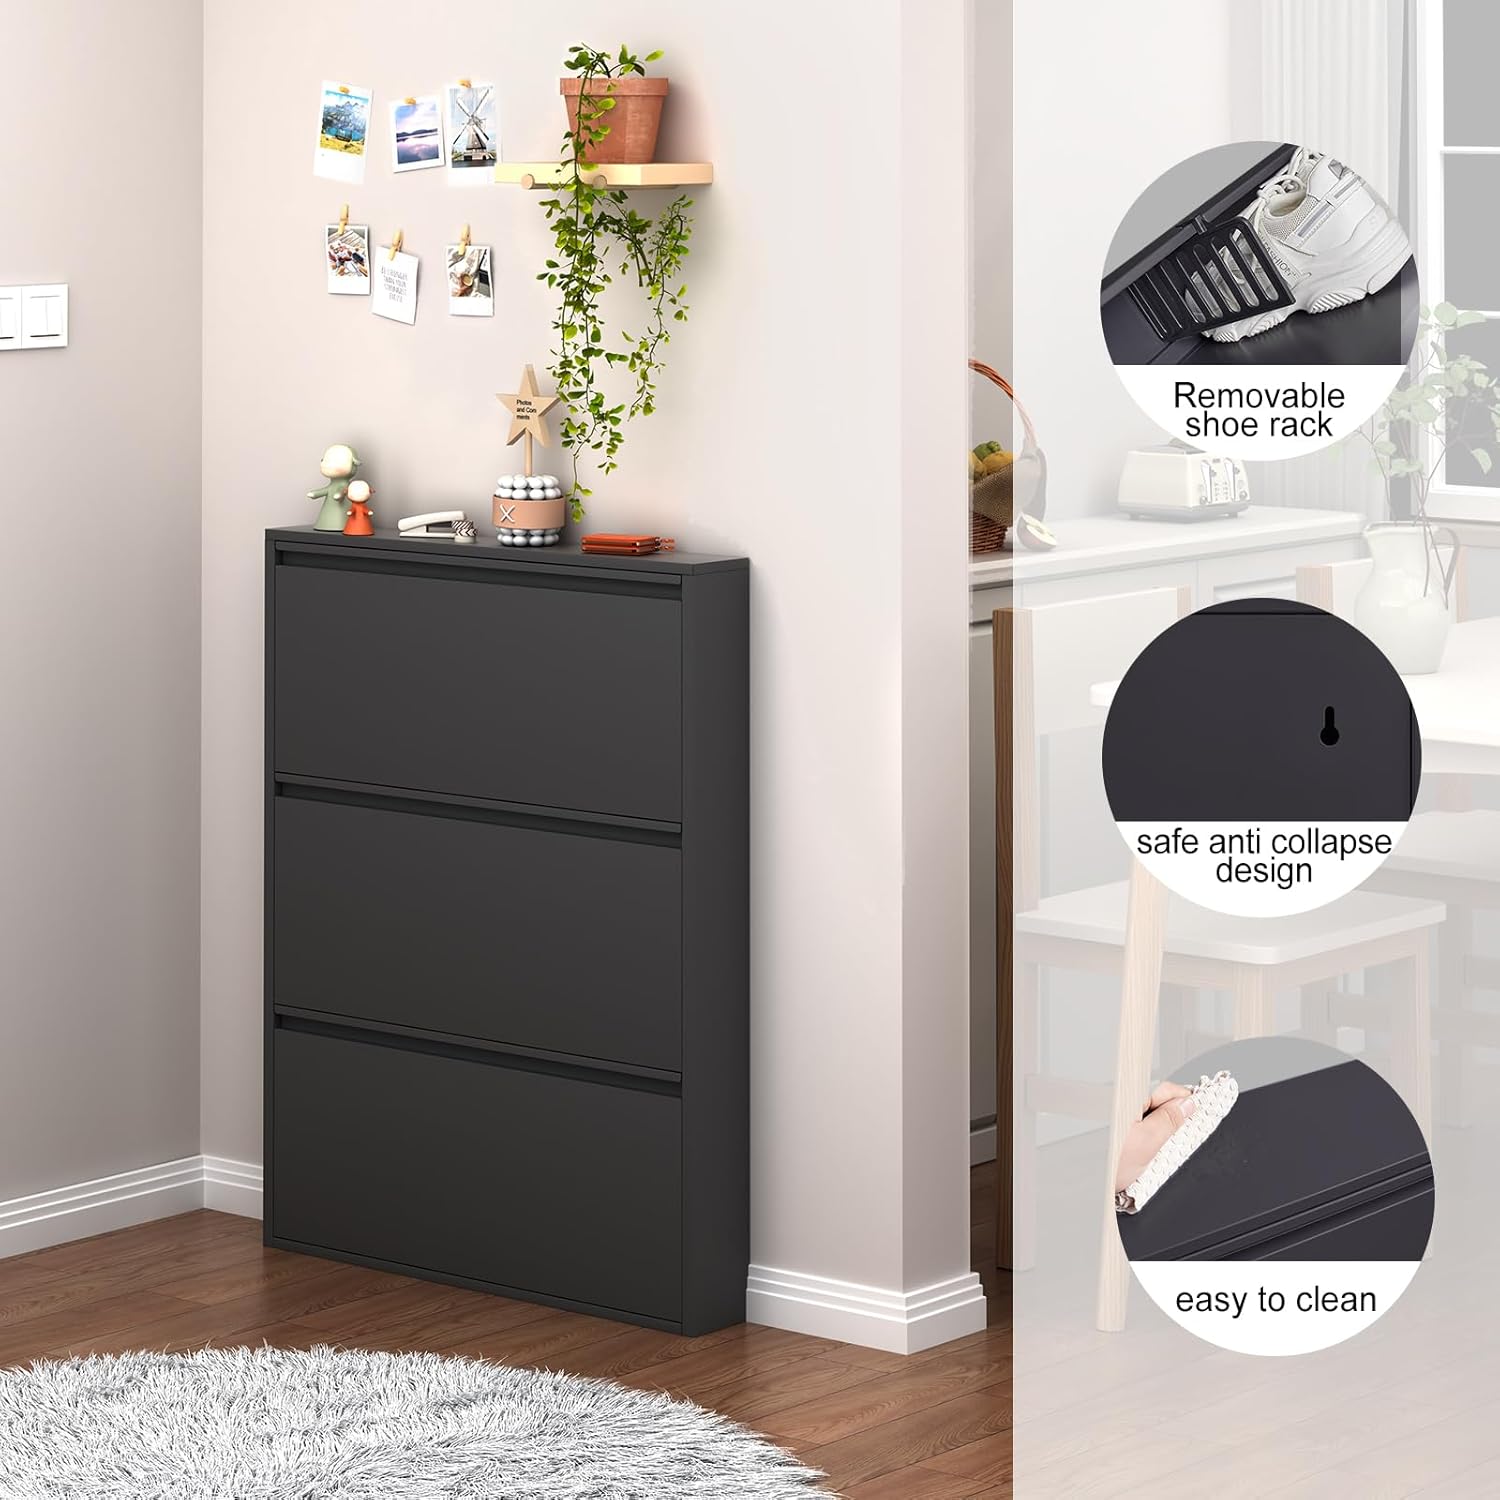
Image Description: The image presents the LUCYPAL shoe cabinet in a closed position, showcasing its sleek, minimalist design. Insets highlight key features: a removable shoe rack for versatility, a safe anti-collapse design for stability, and the easy-to-clean surface.
Setup and Installation
The LUCYPAL shoe cabinet is designed for wall mounting to ensure stability and safety. It is not intended for freestanding use without being secured to a wall.
- Choose Location: Select a suitable wall in your entryway, hallway, or living room. Ensure there are no electrical wires or plumbing behind the drilling area.
- Mark Drilling Points: Hold the assembled cabinet against the wall at the desired height. Mark the positions for the wall mounting brackets. Refer to the product dimensions for optimal placement.
- Drill Pilot Holes: Using an appropriate drill bit for your wall type (e.g., drywall, concrete), drill pilot holes at the marked positions. Insert wall anchors if necessary.
- Attach Mounting Brackets: Secure the wall mounting brackets to the wall using the provided screws.
- Mount the Cabinet: Carefully lift the cabinet and align it with the wall mounting brackets. Secure the cabinet to the brackets. Double-check that the cabinet is level and firmly attached to the wall.

Image Description: A technical diagram illustrating the dimensions of the LUCYPAL shoe cabinet. It highlights the overall width (31.5 inches), depth (5.98 inches), and height (43.01 inches), along with internal drawer depth (13.7 inches) and height (13.78 inches), crucial for installation planning.
Operating Instructions
The LUCYPAL shoe cabinet features three flip-down drawers for easy access and storage.
- Opening Drawers: Gently pull the top edge of each drawer outwards to flip it down. The drawer will open to reveal the shoe compartments.
- Storing Shoes: Place shoes into the compartments. The adjustable baffles allow you to customize the space for different shoe types. For larger shoes or boots, you may remove a baffle. The cabinet can store approximately 8-12 pairs of shoes depending on size and type.
- Closing Drawers: Push the drawer upwards until it clicks securely into the closed position.

Image Description: This image shows the LUCYPAL Slim Metal Shoe Cabinet with its three flip-down drawers open, revealing shoes stored inside. The cabinet is mounted against a light-colored wall in an entryway setting, demonstrating its functional design.
Maintenance
To keep your LUCYPAL shoe cabinet in optimal condition, follow these maintenance guidelines:
- Cleaning: Wipe the cabinet surfaces with a soft, damp cloth. Avoid abrasive cleaners or harsh chemicals that could damage the finish.
- Dusting: Regularly dust the cabinet to prevent buildup.
- Inspection: Periodically check all screws and connections to ensure they remain tight. Retighten if necessary.
- Drawer Mechanisms: If drawers become stiff, a small amount of silicone spray can be applied to the moving parts of the hinges, avoiding contact with the cabinet's exterior finish.
Troubleshooting
If you encounter any issues during assembly or use, refer to the following common problems and solutions:
| Problem | Possible Cause | Solution |
|---|---|---|
| Misaligned screw holes during assembly. | Manufacturing variance or incorrect alignment during initial steps. | Ensure all panels are correctly oriented before tightening screws. If holes are slightly off, gently adjust panel position or use a drill to slightly widen pilot holes if necessary (exercise caution). |
| Drawers do not hold shoes securely or fall open. | Incorrect assembly of drawer mechanism or rubber stoppers. Overloading the drawer. | Recheck the assembly of the drawer mechanisms and ensure any rubber stoppers or tension springs are correctly installed. Avoid exceeding the recommended capacity for each drawer. |
| Cabinet feels unstable after wall mounting. | Improper wall anchors, insufficient screws, or wall material not strong enough. | Verify that appropriate wall anchors were used for your specific wall type. Ensure all mounting screws are fully tightened. If the wall material is weak, consider reinforcing the mounting area or consulting a professional. |
| Difficulty understanding assembly instructions. | Illustrations may be sparse or unclear. | Review all diagrams carefully. If still unclear, search for online assembly videos for similar furniture types or contact customer support for clarification. |
Specifications
| Feature | Detail |
|---|---|
| Brand | LUCYPAL |
| Model Name | 3 Flip Black |
| Item Model Number | 5370 |
| Color | Black |
| Product Dimensions | 5.98"D x 31.5"W x 43.01"H |
| Item Weight | 31 Pounds |
| Mounting Type | Wall Mount |
| Number of Drawers | 3 |
| Material | Metal (Top, Back), Engineered Wood (Frame) |
| Assembly Required | Yes |
| Recommended Uses | Entryway, Living Room |
Warranty and Support
For any product-related inquiries, missing parts, or assistance with assembly, please contact LUCYPAL customer support. All problems will be addressed within 24 hours. Please refer to your purchase documentation for specific warranty details.
Contact information can typically be found on the packaging or through the retailer where the product was purchased.