
1. Introduction
This manual provides essential instructions for the safe operation, setup, maintenance, and troubleshooting of your GoAssemb YU Xiang F11 AH64 1/32 Scale RC Helicopter. Please read this manual thoroughly before operating the helicopter to ensure proper function and to prevent damage or injury.
The YU Xiang F11 AH64 is a highly detailed 1:32 scale model of the AH-64 Apache helicopter, designed for enthusiasts. It features a no-tail rotor design with a dual-axis driven motor and an electronic stability system for precise control. The aerodynamic propeller design, made from durable nylon and carbon fiber composite blades, ensures strong power and stable flight characteristics.
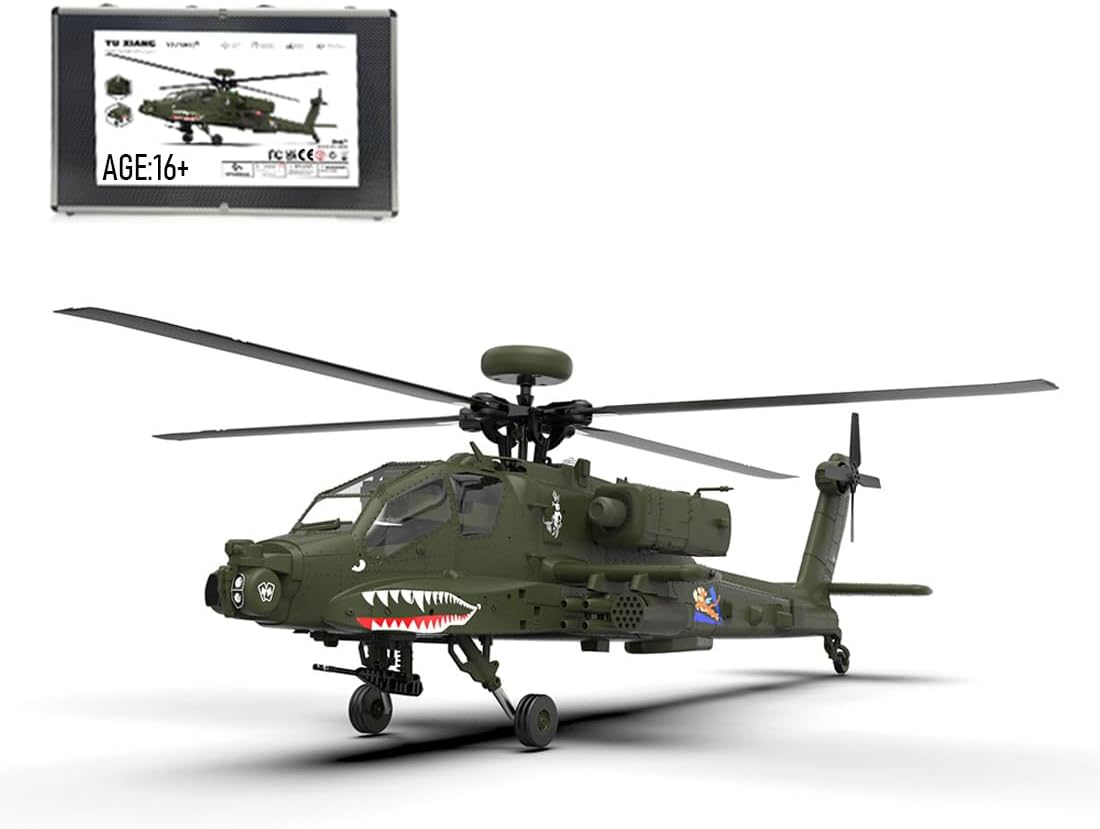
Figure 1: The GoAssemb YU Xiang F11 AH64 RC Helicopter, showcasing its detailed design and main rotor system.
2. Package Contents
Verify that all components listed below are present in your package:
- Helicopter (YU Xiang F11 AH64) x1
- Remote Control x1
- Dedicated Charger x1
- Instructions Manual x1
- Main Propellers x4
- Tail Propellers x1
- Fuselage Battery (3S 11.1V 1800mAh 30C Smart LIPO) x1
3. Setup
Follow these steps to prepare your helicopter for its first flight:
- Unpacking: Carefully remove all components from the packaging. Inspect the helicopter and remote control for any visible damage.
- Battery Charging: Connect the provided 3S 11.1V 1800mAh LIPO battery to the dedicated charger. Plug the charger into a suitable power outlet. The charging time is approximately 90 minutes. Do not leave the battery unattended while charging.
- Battery Installation: Once fully charged, disconnect the battery from the charger. Open the battery compartment on the helicopter and carefully insert the battery, ensuring proper polarity. Secure the compartment cover.
- Remote Control Setup: Install the required batteries (not included) into the remote control. Power on the remote control.
- Binding (First Use):
- Ensure the helicopter's throttle stick is at its lowest position.
- Power on the helicopter. The indicator lights will flash.
- Within 5 seconds, power on the remote control.
- The remote control will emit a 'beep' sound, and the helicopter's indicator lights will become solid, indicating successful binding.
- Pre-Flight Check: Before each flight, ensure all propellers are securely attached, the battery is fully charged, and the remote control is functioning correctly. Check for any loose wires or components.

Figure 2: The helicopter alongside its remote control, ready for setup and binding.
4. Operating Instructions
Familiarize yourself with the controls and follow these guidelines for safe and effective operation.
4.1 Basic Flight Controls
- Throttle (Left Stick Up/Down): Controls the main rotor speed, dictating ascent and descent.
- Yaw (Left Stick Left/Right): Controls the helicopter's rotation around its vertical axis (turning left or right).
- Elevator (Right Stick Up/Down): Controls forward and backward movement.
- Aileron (Right Stick Left/Right): Controls side-to-side movement (strafe left or right).
4.2 Flight Modes (6G/3D Stunt)
The F11 AH64 supports both 6G (stabilized) and 3D (acrobatic) flight modes. The 6-axis gyro ensures stable flight in 6G mode, ideal for beginners. 3D mode allows for advanced maneuvers and stunts.
- Switching Modes: Refer to your remote control's specific button layout for switching between 6G and 3D modes. Typically, a dedicated button or switch is used.
- 6G Mode: Provides electronic stability, making it easier to control and maintain a steady hover. Recommended for new pilots.
- 3D Mode: Disables some stabilization, allowing for inverted flight and complex aerobatics. Requires advanced piloting skills.
4.3 Safety Guidelines
- Always operate in an open area, away from people, animals, and obstacles.
- Do not fly near power lines, buildings, or water.
- Maintain a clear line of sight with the helicopter at all times.
- Avoid flying in strong winds or adverse weather conditions.
- Ensure the battery is fully charged before flight to avoid unexpected power loss.
- Never attempt to catch a flying helicopter.
- Turn off the helicopter and remote control after each use.

Figure 3: A detailed view of the helicopter's underside, highlighting the landing gear and weapon pylons.
5. Maintenance
Regular maintenance ensures the longevity and optimal performance of your helicopter.
- Cleaning: After each flight, gently wipe down the helicopter with a soft, dry cloth to remove dust and debris. Avoid using water or harsh chemicals.
- Propeller Inspection: Regularly check the main and tail propellers for cracks, bends, or damage. Replace any damaged propellers immediately using the provided spares or genuine replacement parts.
- Battery Care: Store the LIPO battery in a cool, dry place, away from direct sunlight and extreme temperatures. Do not overcharge or over-discharge the battery. If storing for extended periods, charge the battery to approximately 50% capacity.
- Motor Inspection: Periodically check the brushless motors for any obstructions or signs of wear. Ensure they spin freely.
- Storage: When not in use, store the helicopter and remote control in a safe place, preferably in its original packaging or a protective case, to prevent damage.

Figure 4: Front-side view of the helicopter, highlighting the cockpit and front-mounted sensors.
6. Troubleshooting
This section addresses common issues you might encounter and their potential solutions.
| Problem | Possible Cause | Solution |
|---|---|---|
| Helicopter does not power on. | Battery not charged or incorrectly installed. | Ensure battery is fully charged and correctly connected. Check battery compartment for secure fit. |
| Remote control does not respond. | Remote control batteries are low or dead; not bound to helicopter. | Replace remote control batteries. Re-perform the binding procedure (Section 3.5). |
| Helicopter is unstable or drifts during flight. | Propellers damaged; trim settings incorrect; gyroscope needs calibration. | Inspect and replace damaged propellers. Adjust trim settings on the remote control. Refer to remote control manual for gyro calibration. |
| Short flight time. | Battery not fully charged; battery degradation. | Ensure battery is fully charged before flight. If battery is old, consider replacing it. |
| Helicopter does not lift off. | Throttle too low; main rotor obstruction; motor issue. | Increase throttle gradually. Check main rotors for obstructions. If issue persists, contact support. |

Figure 5: Rear-side view of the helicopter, showing the tail rotor and rear fuselage details.
7. Specifications
Detailed technical specifications for the YU Xiang F11 AH64 RC Helicopter:
| Feature | Detail |
|---|---|
| Model Name | YU Xiang F11 AH64 (RTF Version) |
| Scale | 1/32 |
| Rotor Diameter | 455mm |
| Fuselage Length | 485mm |
| Height | 155mm |
| Fuselage Weight | 558g |
| Drive Motor | 4306 560KV Brushless Motor |
| Tail Lock Motor | 1204 5200KV Brushless Motor |
| Remote Controller | 2.4G/8CH (Included in RTF Version) |
| RC Distance | More than 300m |
| Body Battery | 3S 11.1V 1800mAh 30C Smart LIPO Battery |
| Charger | Dedicated Charger |
| Charging Time | Approximately 90 minutes |
| Usage Time | Approximately 12 minutes |
| Product Dimensions | 48.5 x 18 x 15.5 cm (19.09 x 7.09 x 6.1 inches) |
| Product Weight | 1500g (3.31 pounds) |
| Material | High-strength Composite Engineering |
| Item Model Number | MS64NVIY58L4710U64NSI |
| Manufacturer Recommended Age | 12 months - 17 years (Note: Product is complex, adult supervision recommended for younger users) |

Figure 6: Top-down view of the helicopter, showing the main rotor blades and overall fuselage shape.
8. Warranty and Support
For warranty information, technical support, or replacement parts, please contact the manufacturer, GoAssemb, directly through their official website or the retailer where the product was purchased. Keep your proof of purchase for warranty claims.
For additional assistance, you may visit the GoAssemb Store on Amazon.