1. Introduction
This manual provides detailed instructions for the Handeful Digital Hand Dynamometer and Grip Trainer Set. This product is designed for accurate grip strength measurement and effective hand and forearm training. It is suitable for individuals of all ages and fitness levels, from beginners to experienced athletes, and can be used for home fitness, sports training, and health management.
2. Package Contents
Please verify that all items listed below are included in your package:
- Digital Hand Dynamometer x 1
- Grip Trainer x 1
- Waterproof Storage Case x 1
- Batteries x 2 (for Digital Hand Dynamometer)
- User Manual x 1

Description: This image displays all components included in the Handeful Digital Hand Dynamometer and Grip Trainer Set. It features the digital dynamometer, the adjustable grip trainer, two AAA batteries, and a compact waterproof storage case, alongside the instruction manual.
3. Product Overview
3.1 Digital Hand Dynamometer
The Digital Hand Dynamometer features a high-precision sensor capable of measuring grip strength up to 90kg. Its large LCD display provides clear readings and indicators for your grip strength level.

Description: This diagram illustrates the various parts of the digital hand dynamometer. Key components labeled include the display panel, the ON/SET button for power and settings, UP and USER buttons for navigation and user selection, the START button for measurement, the handle adjustment display, the adjustment dial, and the main handle.
- Display Panel: Shows grip strength readings, user ID, and strength indicators (weak, normal, strong).
- ON/SET Button: Powers the device on/off and enters setting mode.
- UP / USER Buttons: Used to navigate menus and select user profiles.
- START Button: Initiates a grip strength measurement.
- Handle Adjustment Display: Indicates the current handle position.
- Adjustment Dial: Rotates to adjust the handle width for comfortable grip.
- Handle: The part gripped during measurement.
3.2 Grip Trainer
The Grip Trainer is designed for strengthening hand and forearm muscles. It features adjustable resistance and an automatic counting function to track your repetitions.

Description: This image highlights the versatility of the grip trainer, showing it in the center surrounded by various sports activities such as boxing, basketball, golf, rock climbing, general fitness, and baseball, illustrating its application for improving grip strength relevant to these activities.
- Adjustable Resistance: Allows you to increase or decrease the training intensity up to 60kg.
- Automatic Counting Function: Tracks your repetitions during training sessions.
- Comfortable Grip: Ergonomically designed for a secure and comfortable hold.
- Durable Construction: Built with robust materials for long-lasting use.
4. Setup
4.1 Inserting Batteries (Digital Hand Dynamometer)
- Locate the battery compartment on the back of the Digital Hand Dynamometer.
- Open the battery compartment cover.
- Insert the two included AAA batteries, ensuring correct polarity (+/-).
- Close the battery compartment cover securely.
4.2 Adjusting Handle Width (Digital Hand Dynamometer)
Before taking a measurement, adjust the handle to a comfortable width that allows for a full grip.
- Rotate the Adjustment Dial located at the bottom of the dynamometer.
- Turn the dial clockwise to narrow the grip or counter-clockwise to widen it.
- Ensure the handle is set to a position that feels natural and secure in your hand.
5. Operating Instructions
5.1 Digital Hand Dynamometer Operation
- Power On: Press the ON/SET button to turn on the device.
- User Selection: Press the USER button to cycle through user profiles (up to 19 users). Use the UP and DOWN arrows to select a user. In setting mode, you can input age and gender for each user to enable comparative analysis.
- Taking a Measurement: Once a user is selected and the handle is adjusted, firmly grip the dynamometer and press the START button. Squeeze the handle with maximum effort. The peak grip strength will be displayed on the LCD screen.
- Reading Results: The display will show your grip strength in kilograms (kg) or pounds (lb). It will also indicate your strength level as "weak," "normal," or "strong" based on age and gender averages.
- Viewing Records: The device automatically saves the highest grip strength for each user. You can review past records by navigating through user profiles.
- Power Off: Press and hold the ON/SET button to turn off the device. It will also automatically power off after a period of inactivity.
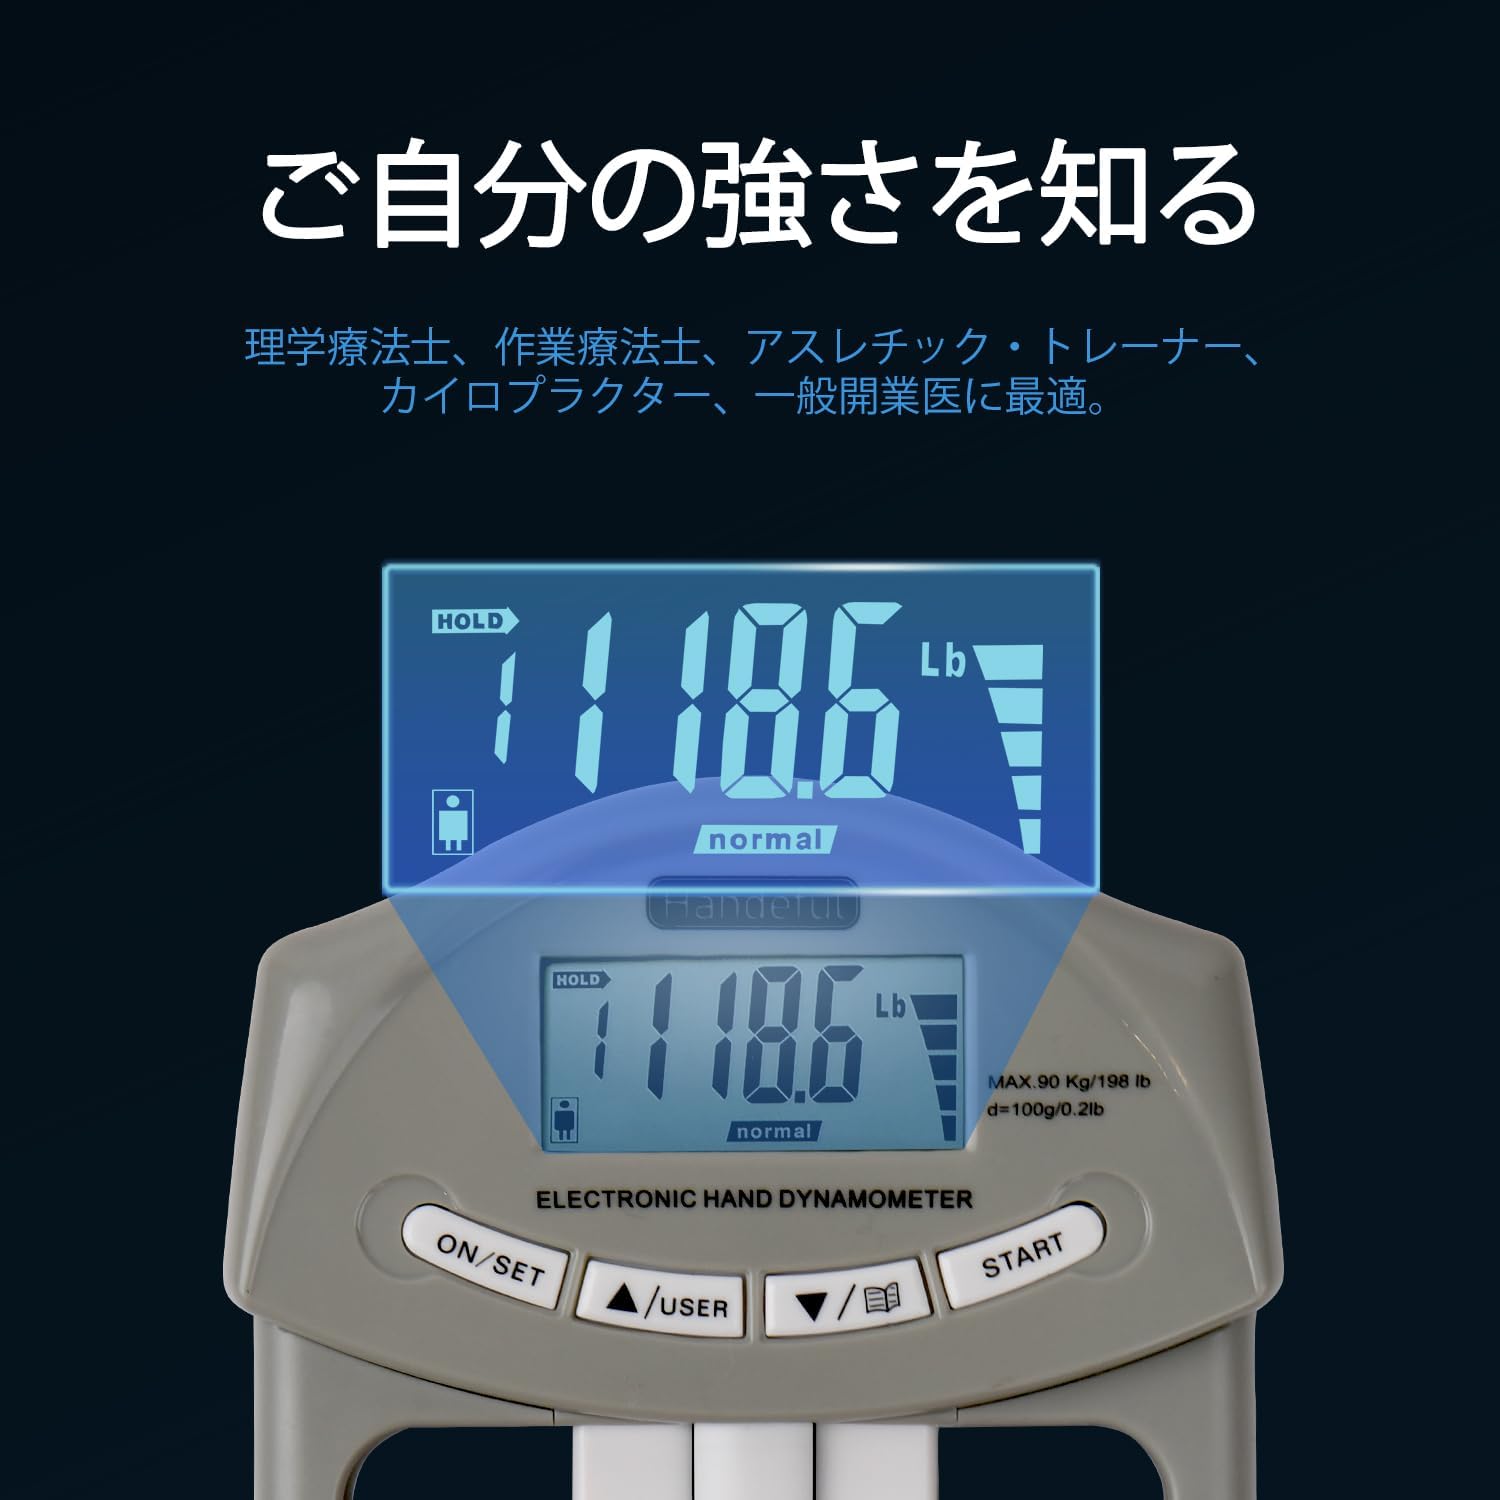
Description: This image provides a close-up view of the digital display on the hand dynamometer. It shows a reading of 118.6 lbs, with a clear 'normal' indicator, demonstrating how the device presents grip strength results and categorizes them.
5.2 Grip Trainer Operation
- Adjusting Resistance: Rotate the knob at the base of the spring to adjust the resistance level. Turn clockwise for higher resistance and counter-clockwise for lower resistance.
- Training: Grip the handles and squeeze firmly. The automatic counter will track each repetition.
- Resetting Counter: Press the reset button on the grip trainer to clear the count.
6. Maintenance
- Cleaning: Wipe the device with a soft, dry cloth. Do not use abrasive cleaners or immerse in water.
- Storage: Store the Digital Hand Dynamometer and Grip Trainer in the provided waterproof storage case when not in use. Keep in a cool, dry place away from direct sunlight and extreme temperatures.
- Battery Replacement: If the display becomes dim or the device does not power on, replace the AAA batteries in the dynamometer.

Description: This image shows the digital hand dynamometer and the grip trainer securely stored within the waterproof carrying case. The case features elastic straps and mesh pockets to keep the items organized and protected during transport or storage.
7. Troubleshooting
- Device does not power on: Check if the batteries are inserted correctly and are not depleted. Replace batteries if necessary.
- Inaccurate readings: Ensure the handle is adjusted properly for your hand size. Make sure to grip firmly and consistently during measurement.
- Display is dim or flickering: This usually indicates low battery power. Replace the batteries.
- Grip trainer counter not working: Ensure the counter mechanism is not obstructed. If issues persist, contact customer support.
8. Specifications
| Feature | Detail |
|---|---|
| Brand | Handeful |
| Model | Standard |
| Color | Grey |
| Material | Plastic |
| Digital Dynamometer Max Measurement | 90 kg |
| Grip Trainer Max Resistance | 60 kg |
| Product Dimensions | 22 x 14 x 0.1 cm |
| Product Weight | 8.99 g |
| Batteries Included | Yes (2x AAA for dynamometer) |
9. Warranty and Support
Handeful provides a 12-month free exchange warranty for any product issues. If you encounter any problems with your Digital Hand Dynamometer and Grip Trainer Set, please do not hesitate to contact our customer support. We are committed to ensuring your satisfaction.
For support, please refer to the contact information provided with your purchase or visit the official Handeful store on Amazon.


