
1. Important Safety Information
Please read and understand this entire manual before attempting to assemble, operate, or install the product. Failure to follow these instructions could result in electric shock, fire, or serious injury.
- Ensure all electrical connections comply with local codes, ordinances, and the National Electrical Code (NEC).
- Consult a qualified electrician if you are unfamiliar with electrical wiring.
- Turn off power at the circuit breaker before beginning installation to prevent electrical shock.
- The mounting structure must be capable of supporting a minimum of 35 lbs (15.9 kg).
- Do not operate the fan with damaged power cords or plugs.
- Keep hands, clothing, and other objects clear of the fan blades when the fan is in operation.
- This fan is suitable for indoor and covered outdoor use. Avoid direct water contact.
2. Package Contents
Verify that all components listed below are included in your package:
- Ceiling Fan Motor Assembly
- Fan Blades (3)
- Light Kit
- Downrods (5", 10", 15")
- Mounting Bracket
- Canopy
- Remote Control with Wall Mount
- Hardware Pack (screws, wire nuts, washers)
- Instruction Manual
3. Installation
Follow these steps for proper installation of your BOOSANT ceiling fan. It is recommended to have two people for installation.
3.1 Mounting the Fan
- Prepare the Mounting Location: Ensure the electrical box is securely attached to the building structure and can support the fan's weight. Turn off power at the circuit breaker.
- Install the Mounting Bracket: Attach the mounting bracket to the outlet box using the screws provided. Ensure the bracket is level and secure.
- Assemble Downrod and Canopy: Select the appropriate downrod length (5", 10", or 15") for your ceiling height. Feed the fan wires through the downrod and canopy. Secure the downrod to the fan motor assembly.
- Hang the Fan: Carefully lift the fan assembly and place the downrod ball into the mounting bracket. Ensure the tab on the mounting bracket aligns with the slot on the downrod ball.

Figure 3.1: Fan dimensions and compatibility with flat or sloped ceilings (up to 15 degrees). Minimum height requirement is 8 feet, suitable for average rooms of 400 sq. ft. with an airflow of 7230 CFM.
3.2 Electrical Wiring
Connect the fan's electrical wires to the household wiring according to the wiring diagram in the full manual. The remote receiver box must be wired between the household supply and the fan motor. Ensure all connections are secure with wire nuts.

Figure 3.2: A person installing the ceiling fan, demonstrating the universal compatibility with 5", 10", and 15" downrod options and support for sloped ceilings.
3.3 Attaching Blades and Light Kit
- Attach the fan blades to the motor housing using the provided screws. Ensure they are firmly secured.
- Connect the light kit wires to the corresponding wires from the fan motor assembly. Secure the light kit to the fan.
4. Operating Instructions
Your BOOSANT smart ceiling fan offers multiple control options for convenience.
4.1 Remote Control Operation
The included remote control allows for full functionality of the fan and light.
- Fan ON/OFF: Press the power button to turn the fan on or off.
- Fan Speed: Use buttons 1-6 to select desired fan speed.
- Light ON/OFF: Press the light button to turn the light on or off.
- Brightness Adjustment: Use the brightness +/- buttons to dim or brighten the light (10% to 100%).
- Color Temperature: Cycle through 3000K (Warm White), 4000K (Neutral White), and 6000K (Daylight) light colors. The fan features a memory function for light settings.
- Timer: Set the fan to turn off after 1H, 4H, or 8H.
- Reversible Function: Press the reverse button to change airflow direction (Summer: downward airflow; Winter: upward airflow).
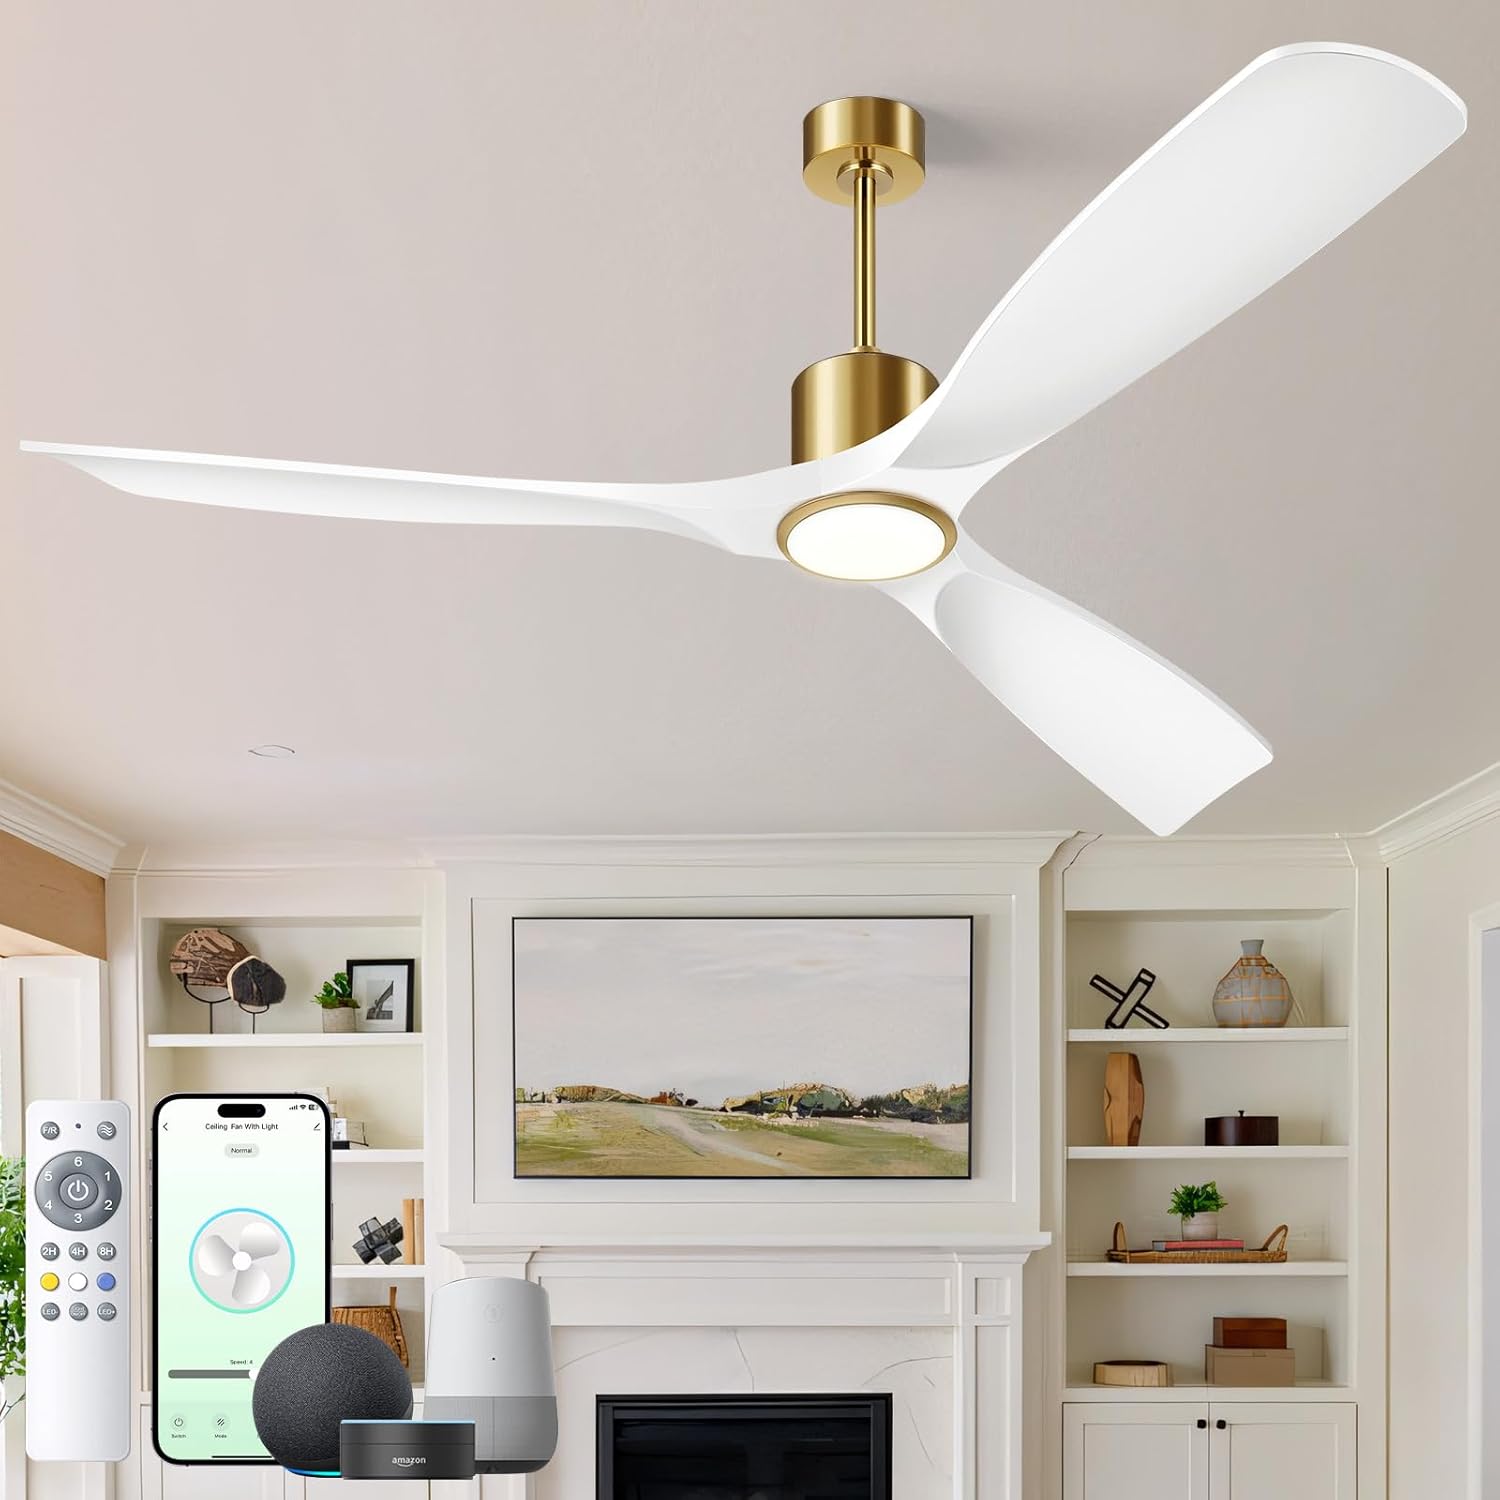
Figure 4.1: Overview of control options including remote, smartphone app, and voice control via Alexa or Google Assistant.

Figure 4.2: The fan's reversible airflow feature, showing downward airflow for cooling in summer and upward airflow for circulating warm air in winter, activated by the remote control.
Video 4.1: Demonstrates the smart features of the BOOSANT ceiling fan, including effortless light control and app/voice commands.
4.2 App Control
Download the BOOSANT app to control your fan from your smartphone.
- Download App: Search for the BOOSANT app in your device's app store.
- Pair Device: Follow the in-app instructions to pair your ceiling fan. Ensure your phone and fan are connected to a 2.4GHz Wi-Fi network.
- Control Functions: Use the app to adjust fan speed, light settings, set timers, and change airflow direction.

Figure 4.3: A user interacting with the smart ceiling fan using voice control, compatible with Amazon Alexa and Google Assistant.
Video 4.2: Illustrates the app control features of the BOOSANT 102 Series Smart Ceiling Fan, showing how to connect and manage settings.
4.3 Voice Control (Alexa/Google Assistant)
Integrate your BOOSANT fan with Amazon Alexa or Google Assistant for hands-free control.
- Enable Skill: In your Alexa or Google Home app, enable the BOOSANT skill/service.
- Discover Devices: Allow the smart home app to discover your BOOSANT ceiling fan.
- Voice Commands: Use commands such as "Alexa, turn on the bedroom fan" or "Hey Google, set fan speed to 3."
Video 4.3: Highlights the smart app performance and voice control capabilities of the BOOSANT ceiling fan.
4.4 Light Functions
The integrated LED light offers customizable illumination.
- 3-Color Temperature: Switch between 3000K (Warm White), 4000K (Neutral White), and 6000K (Daylight) to suit your preference.
- Dimmable: Adjust brightness from 10% to 100%.
- Memory Function: The light remembers your last setting when turned off and on.
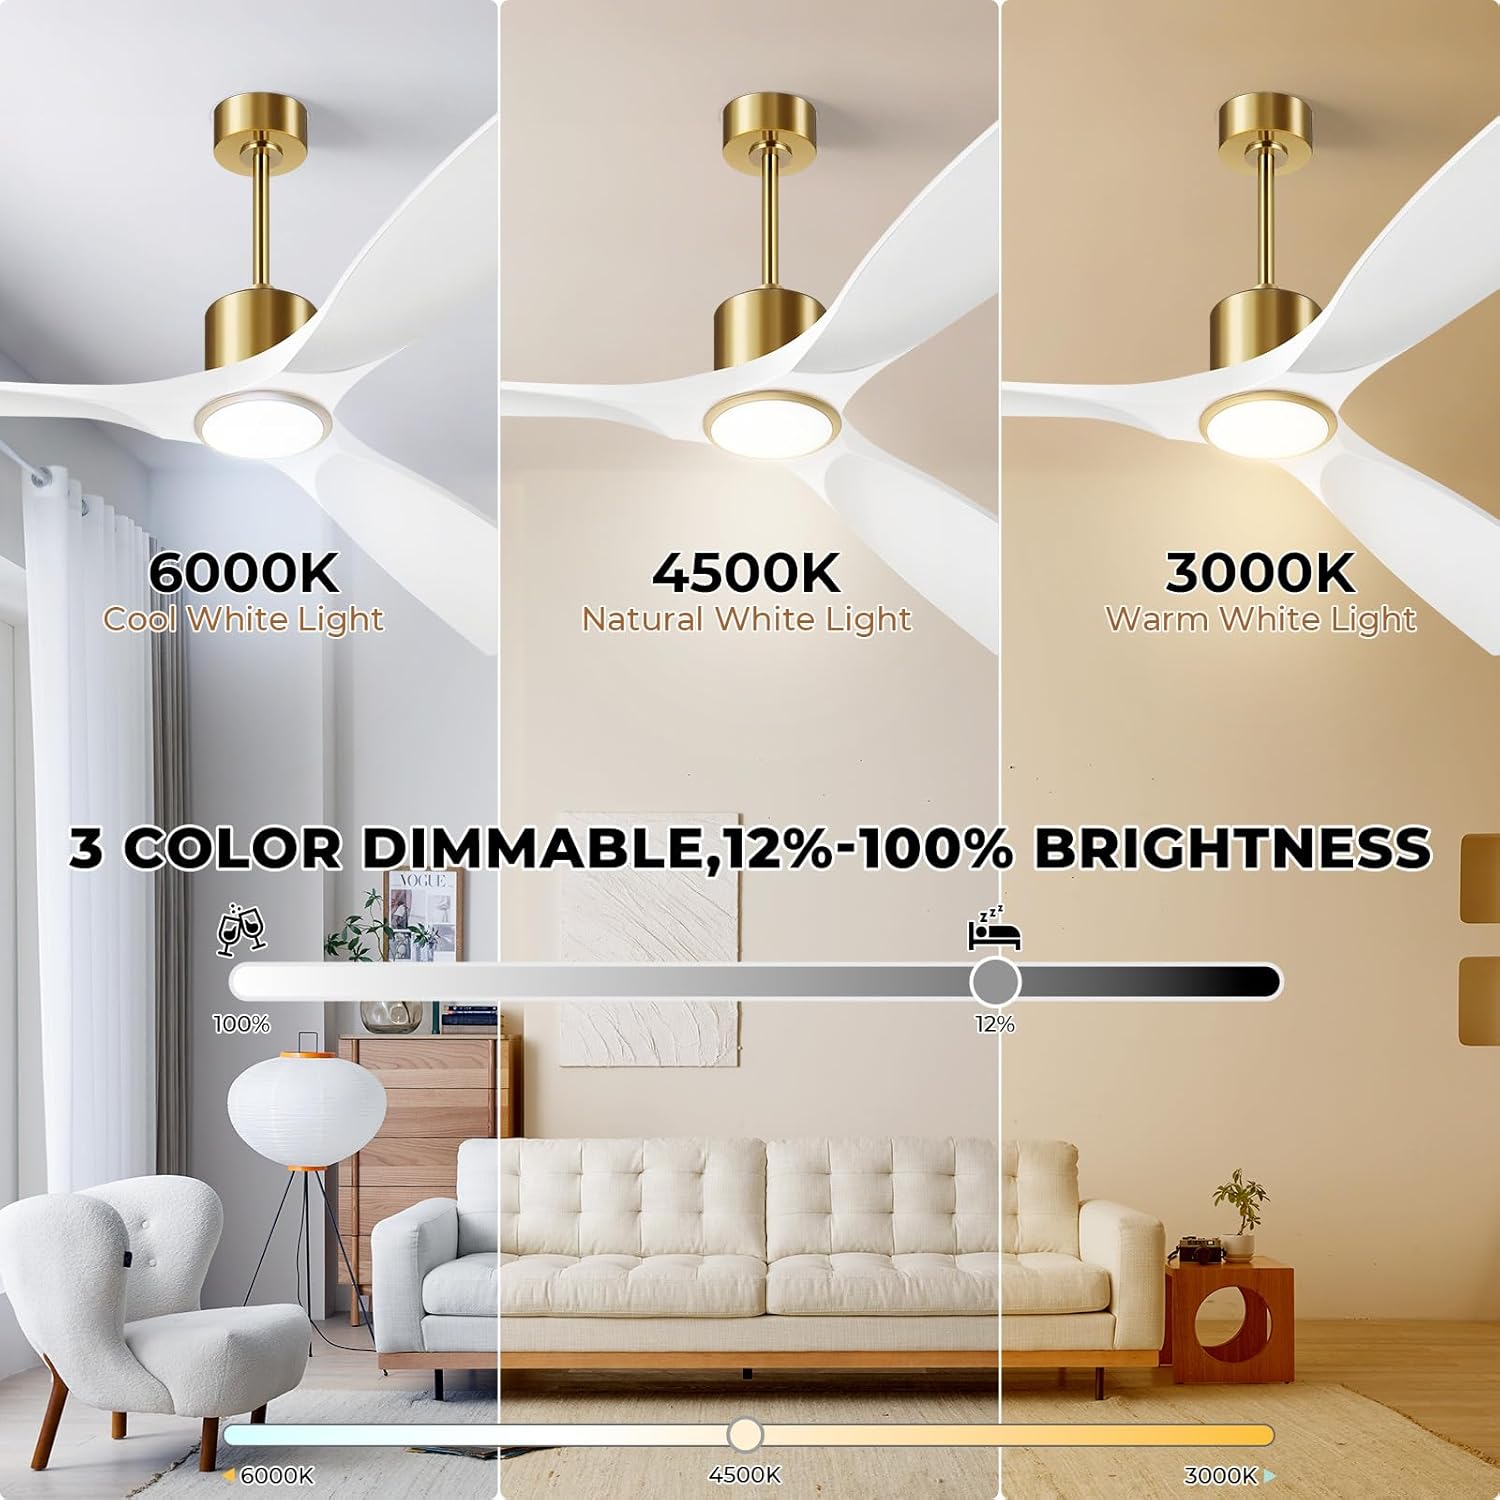
Figure 4.4: Demonstrates the three color temperature options (Cool White, Natural White, Warm White) and dimmable brightness range of the fan's integrated light.
4.5 Fan Speed and Airflow
The fan features a 6-speed DC motor for powerful yet quiet airflow.
- 6 Speeds: Choose from gentle breeze (Speed 1-2) to high winds (Speed 5-6) for optimal comfort.
- Quiet Operation: The DC motor operates at less than 30dB, ensuring minimal noise.
- High Airflow: Delivers up to 7230 CFM for effective cooling.

Figure 4.5: Details the 6-speed settings and airflow capacity, ranging from gentle breeze for sleep to high winds for cooling.

Figure 4.6: Highlights the fan's gentle airflow and quiet operation (less than 30dB), designed for silent comfort and deeper sleep, with timer settings available.
5. Maintenance
Regular maintenance ensures optimal performance and longevity of your ceiling fan.
- Cleaning: Use a soft, damp cloth to clean the fan blades and motor housing. Do not use abrasive cleaners or solvents.
- Blade Inspection: Periodically check the fan blades for any cracks or damage. Ensure all blade screws are tight.
- Light Kit: The integrated LED light is designed for long life and typically does not require replacement. If issues occur, contact customer support.
- Dusting: Regularly dust the fan to prevent accumulation, which can affect performance and balance.
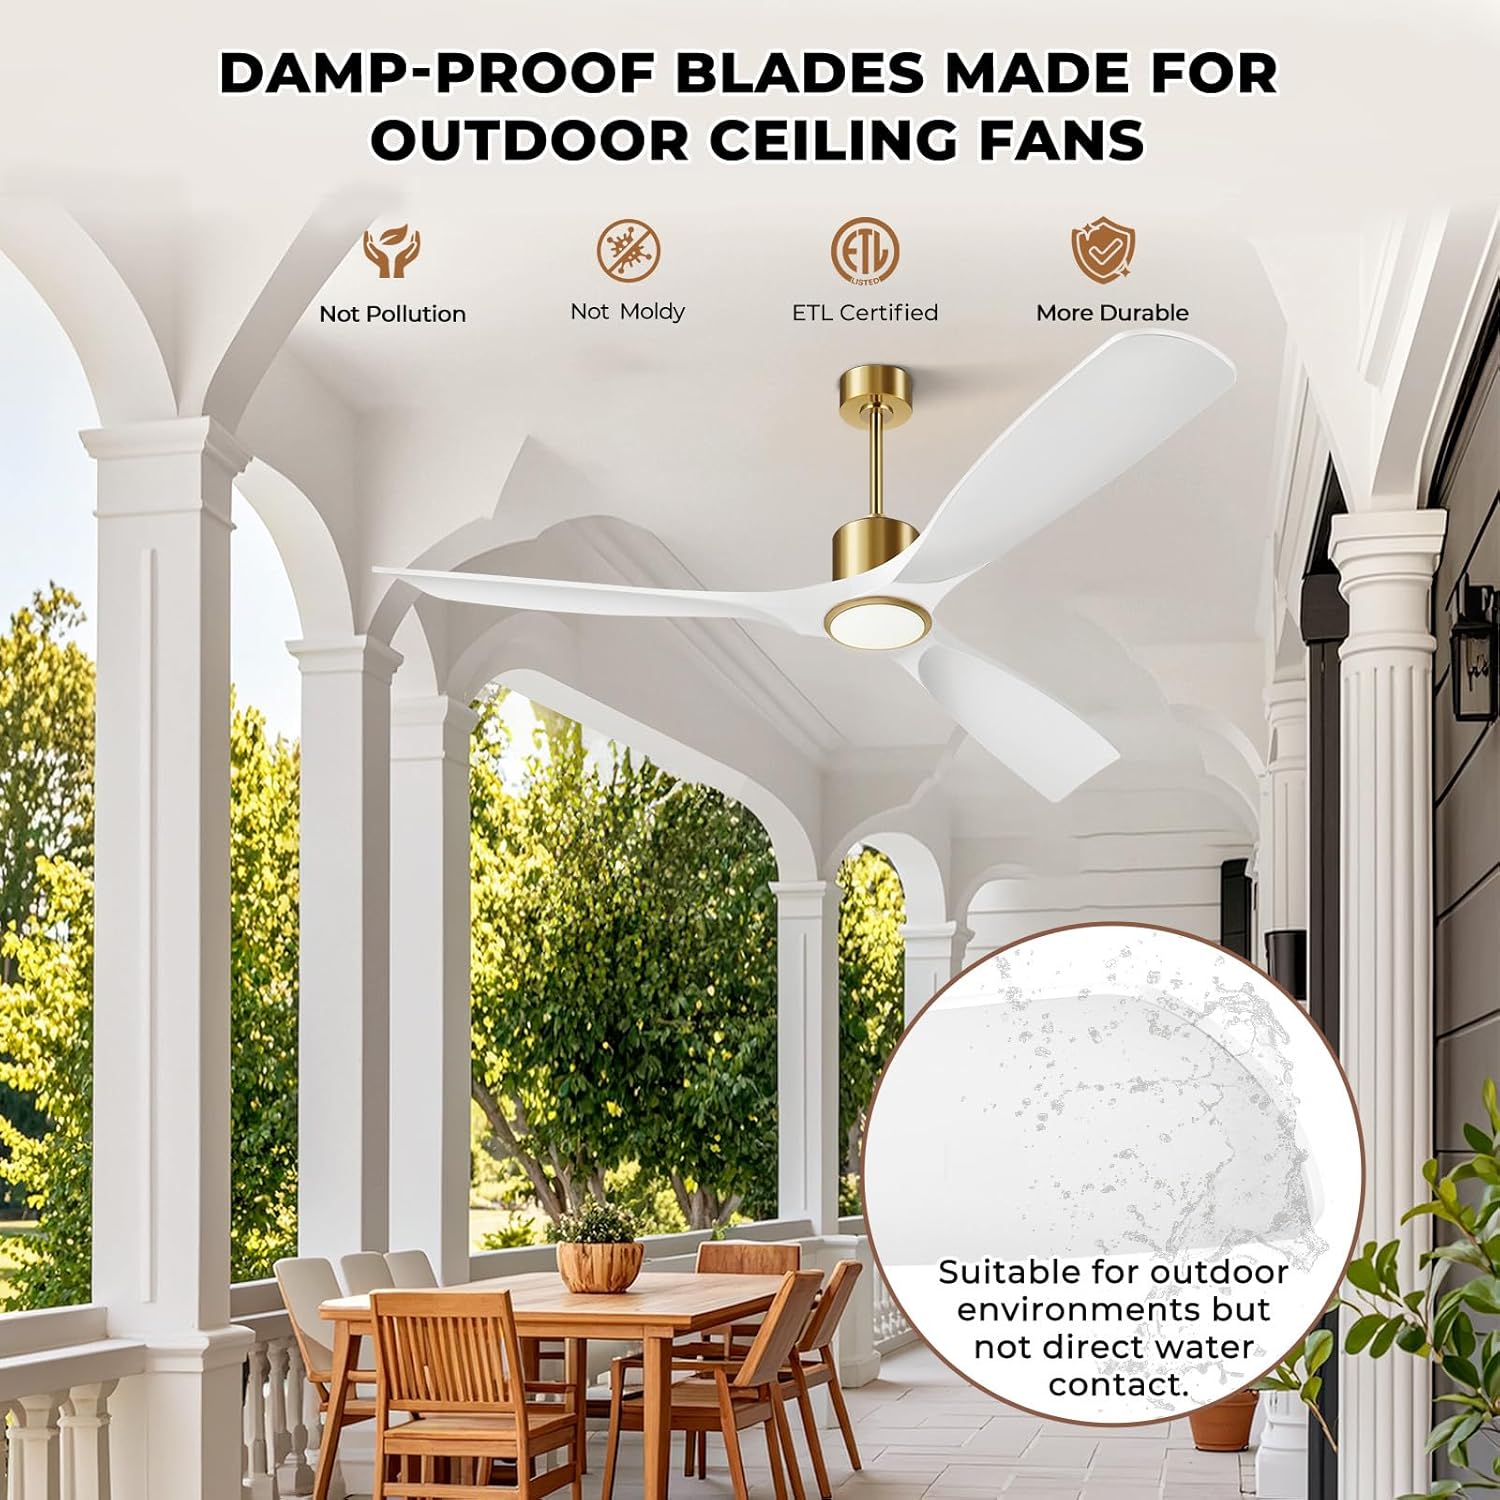
Figure 5.1: Illustrates the damp-proof blades, indicating their suitability for outdoor environments (covered patios/porches) and resistance to pollution and mold, along with ETL certification for durability.
6. Troubleshooting
If you experience issues with your fan, refer to the following common troubleshooting steps:
| Problem | Possible Cause | Solution |
|---|---|---|
| Fan does not start | No power to the fan; Loose wire connections; Remote control battery low. | Check circuit breaker; Ensure all wiring is secure; Replace remote control battery. |
| Light does not work | Loose wire connection to light kit; Light kit failure. | Check light kit wiring; Contact customer support if light kit is faulty. |
| Fan is noisy | Loose fan blades; Mounting bracket not secure; Motor issue. | Tighten all blade screws; Ensure mounting bracket is firm; Contact customer support if motor noise persists. |
| Remote/App not responding | Remote battery low; Fan not paired with app; Wi-Fi connectivity issues. | Replace remote battery; Re-pair fan with app; Check 2.4GHz Wi-Fi connection. |
If problems persist after attempting these solutions, please contact BOOSANT customer support.
7. Specifications
| Feature | Specification |
|---|---|
| Brand | BOOSANT |
| Model Name | 102L-60 |
| Size | 60 INCH |
| Color | Gold White |
| Motor Type | DC Motor |
| Number of Speeds | 6 |
| Air Flow Capacity | 7230 Cubic Feet Per Minute |
| Noise Level | 35 Decibels (typically <30dB in operation) |
| Wattage | 50 watts |
| Voltage | 120 Volts |
| Light Kit | Integrated LED, 3-Color (3000K/4000K/6000K), Dimmable (10%-100%) |
| Control Method | App, Remote, Voice (Alexa/Google Assistant) |
| Indoor/Outdoor Usage | Indoor, Covered Outdoor |
| Material | Polymer, Metal (Reinforced ABS blades) |
| Certification | ETL Listed |
8. Warranty
BOOSANT provides a manufacturer's warranty for this product. Please refer to the warranty card included in your package or contact BOOSANT customer support for detailed warranty terms and conditions. Keep your proof of purchase for warranty claims.
9. Customer Support
For any questions, technical assistance, or support regarding your BOOSANT ceiling fan, please contact our customer service team:
- Phone: +1-7712322914 (US)
- Operating Hours: Monday to Friday, 9 AM - 5 PM (PT)
- Online Support: Refer to the official BOOSANT website or the product page for additional resources and contact options.