Introduction
The RovyVon GL5 is a versatile tactical weaponlight designed for various applications, featuring a powerful 1000-lumen white LED, a green laser, and an IR beam. This compact and robust device is USB-C rechargeable and compatible with both GL and Picatinny rail systems. This manual provides detailed instructions for the proper setup, operation, and maintenance of your GL5 weaponlight.

Image: The RovyVon GL5 weaponlight, showcasing its compact design and the green laser beam in action.
What's in the Box
Upon unboxing your RovyVon GL5, please verify that all the following components are included:
- GL5 Weaponlight Unit
- USB-C Charging Cable
- 1913 Rail Adapter
- GL Rail Adapter (pre-installed)
- Zeroing Coin
- L Wrench
- User Manual
- RovyVon Card
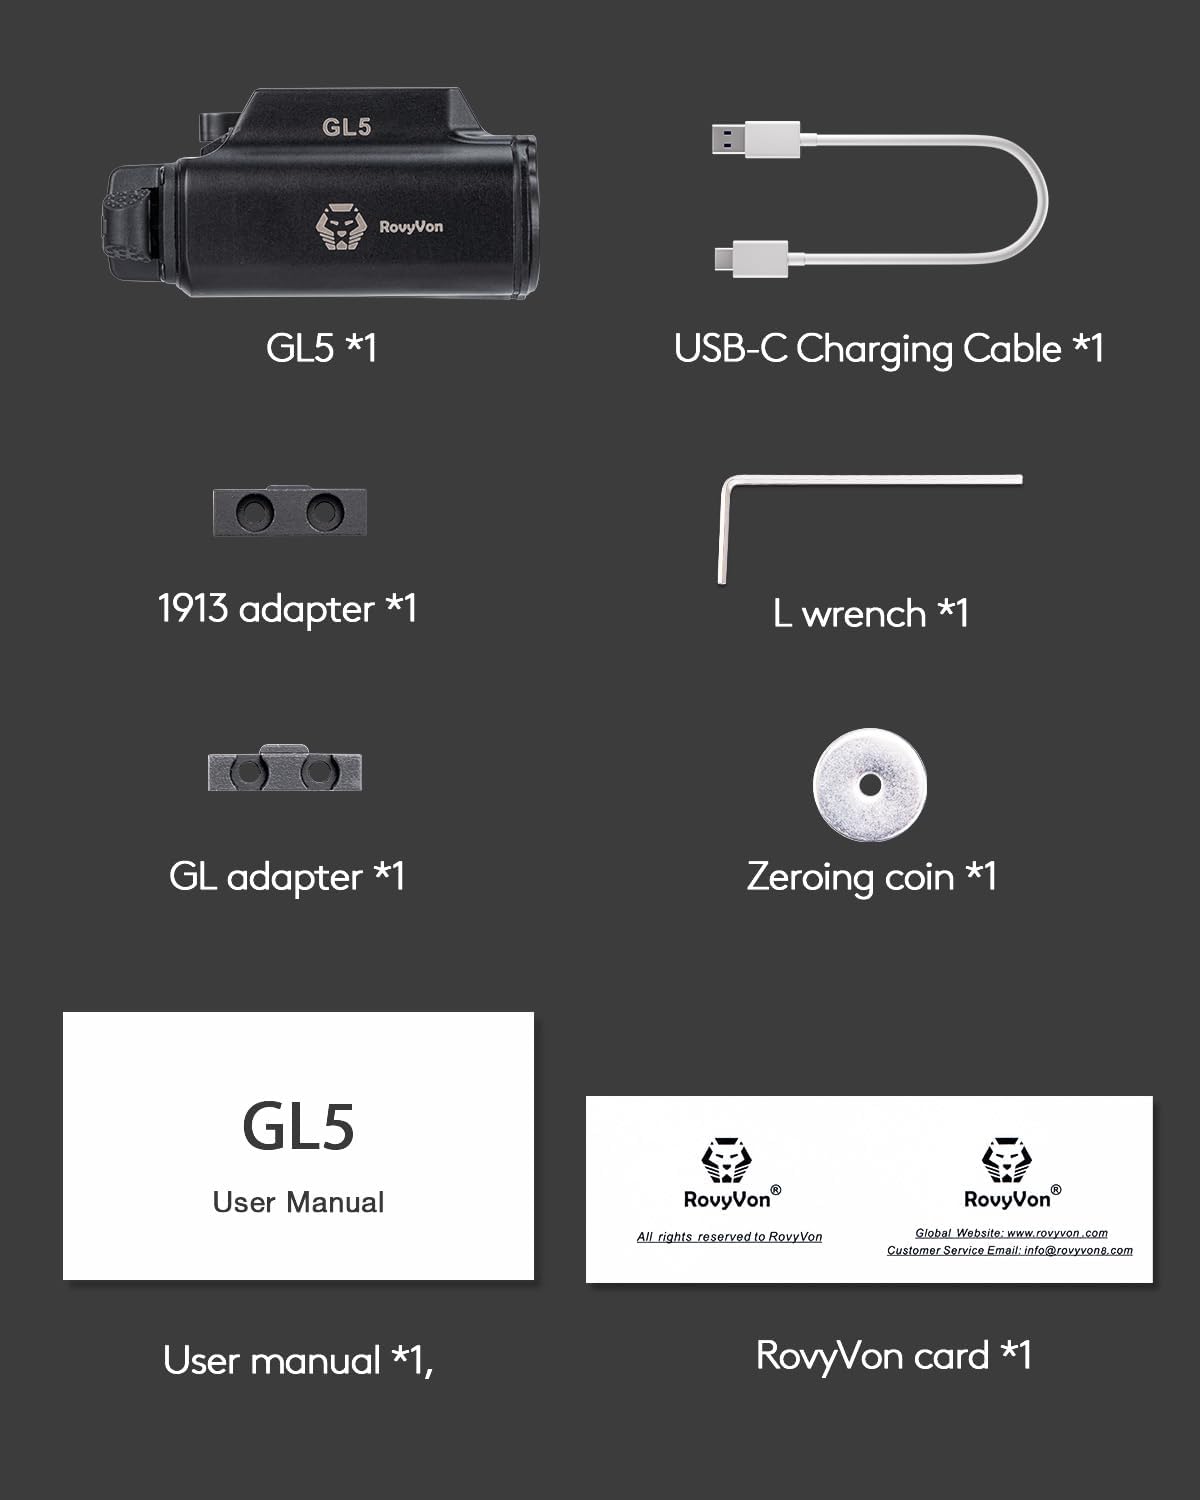
Image: A visual representation of all items included in the RovyVon GL5 package, including the weaponlight, cables, adapters, and tools.
Setup
1. Attaching to Rail
The GL5 weaponlight is designed to fit most GL or Picatinny rails. The 'GL' adapter is pre-installed. If your firearm uses a Picatinny rail, you will need to replace the pre-installed GL adapter with the included 1913 adapter using the provided L wrench.
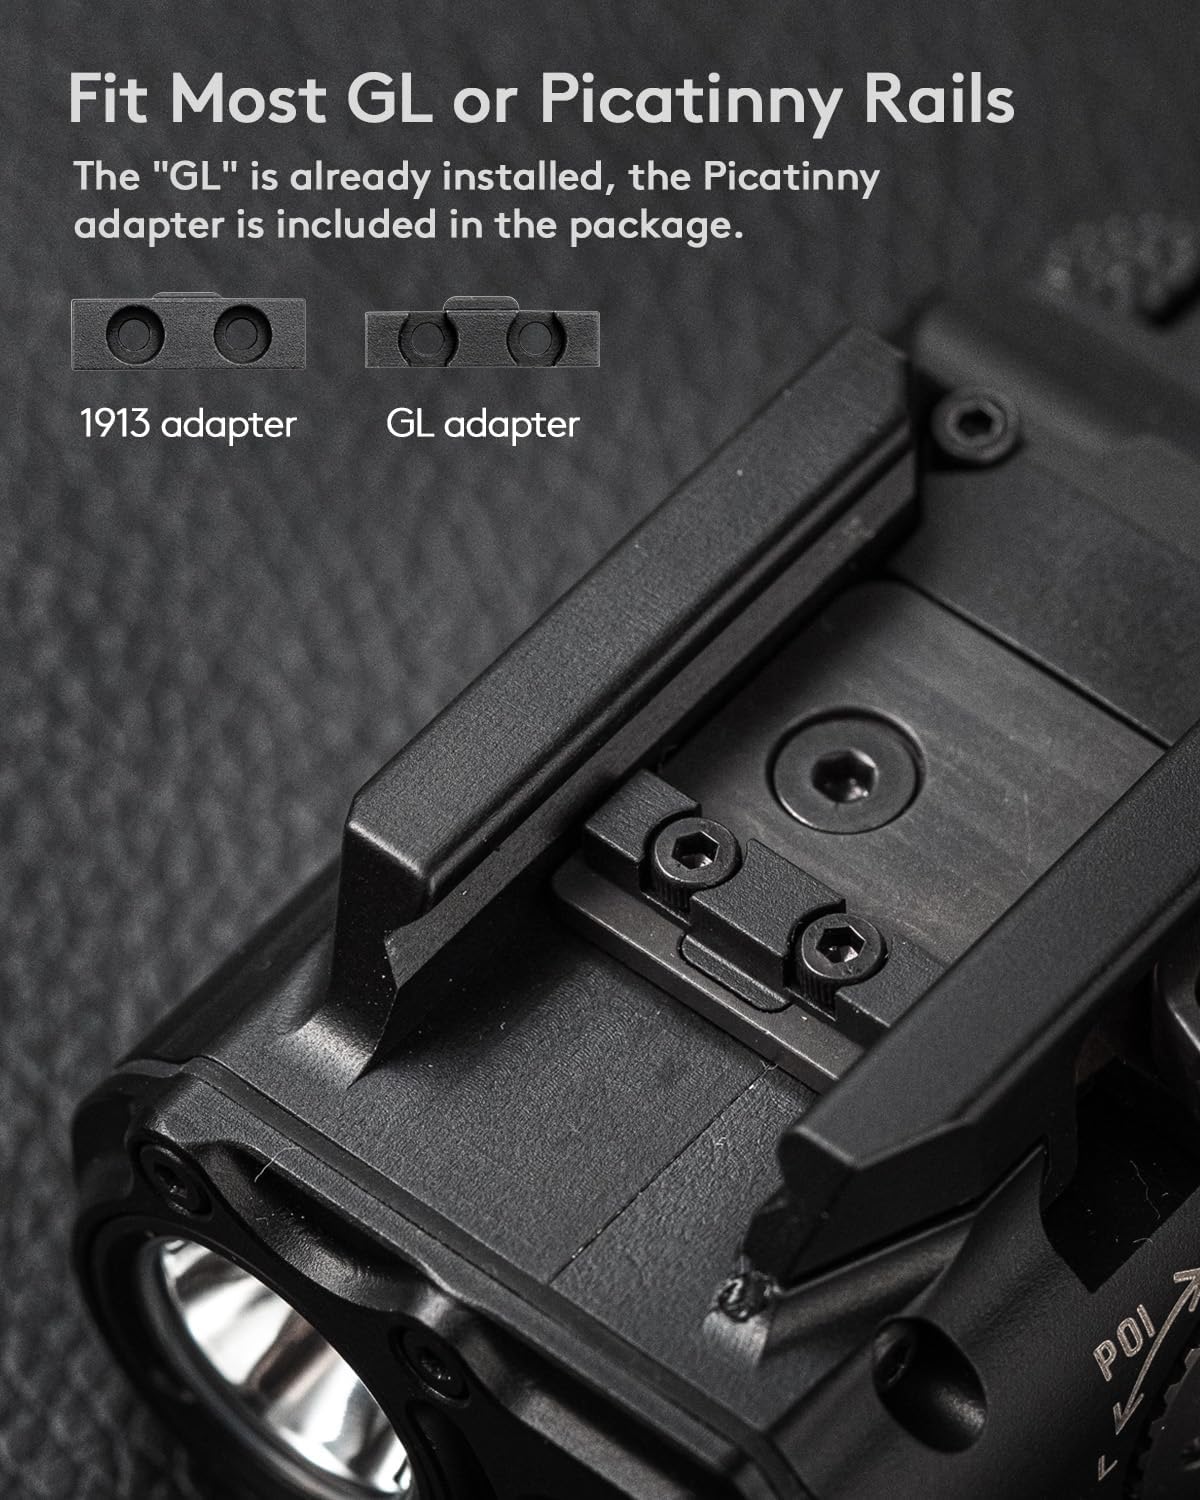
Image: Close-up view of the GL5 weaponlight demonstrating the interchangeable GL and 1913 Picatinny rail adapters for broad compatibility.
2. Charging the Battery
The GL5 features a USB-C charging port for convenient recharging. Connect the provided USB-C cable to the port on the device and to a power source. A red indicator light signifies that the device is charging. Once charging is complete, the indicator light will turn green. A full charge typically takes approximately 1.5 hours.

Image: The USB-C charging port and charging indicator lights on the GL5 weaponlight. Red indicates charging, green indicates charging completed.
3. Adjusting Windage and Elevation
The GL5 allows for precise adjustment of the laser's windage (horizontal) and elevation (vertical) to align with your point of aim. Use the included zeroing coin or a flat-head tool to turn the adjustment screws located on the side and bottom of the unit. Turn the screws incrementally to achieve desired accuracy.

Image: A diagram illustrating how to adjust the windage and elevation of the GL5's laser using the adjustment screws.
4. Remote Control Port
The GL5 is equipped with a remote control port for optional accessories, such as a remote tape switch (not included). This port allows for external control of the weaponlight's functions.

Image: A detailed view of the remote control port on the GL5 weaponlight, indicating where an optional remote tape switch can be connected.
Operating Instructions
The RovyVon GL5 features a multi-function tail switch for easy operation and mode selection. The device offers several lighting and laser modes:
- Momentary On Mode: Press and hold the tail switch for temporary illumination. Release to turn off.
- Constant On Mode: Click the tail switch to activate constant illumination. Click again to turn off.
- White Light Mode: Activates the 1000-lumen white LED.
- Green Beam Mode: Activates the green laser.
- White Light + Green Beam Combo Mode: Activates both the white LED and the green laser simultaneously.
- IR Beam Mode: Activates the Infrared laser, visible only with night vision devices.
To cycle through the different modes, use the mode selector dial or specific button presses as indicated on the device or in the quick start guide. The GL5 provides a maximum output of 1000 lumens with a beam distance of up to 150 meters.

Image: Visual demonstration of the GL5's various output modes: white light, green beam, combined white light and green beam, and IR beam.
Video: An official RovyVon video demonstrating the operational features and different light/laser modes of the GL5 weaponlight.
Maintenance
To ensure the longevity and optimal performance of your RovyVon GL5 weaponlight, follow these maintenance guidelines:
- Cleaning: Regularly wipe the exterior of the device with a soft, damp cloth. For the lens, use a lens cleaning cloth and solution to avoid scratches.
- Battery Care: Recharge the battery regularly, even if the device is not in frequent use, to maintain battery health. Avoid fully discharging the battery for extended periods.
- Storage: Store the weaponlight in a cool, dry place away from direct sunlight and extreme temperatures.
- Inspection: Periodically inspect the rail mount and screws for tightness. Ensure the USB-C port cover is securely closed when not charging to prevent dust and moisture ingress.
Troubleshooting
If you encounter issues with your RovyVon GL5, please refer to the following common problems and solutions:
| Problem | Possible Cause | Solution |
|---|---|---|
| Device does not turn on | Battery is depleted or not charged. | Ensure the device is fully charged using the provided USB-C cable. Check the charging indicator light. |
| Light output is dim or inconsistent | Low battery or dirty lens. | Recharge the battery. Clean the lens with a soft, lint-free cloth. |
| Laser is not visible or misaligned | Incorrect mode selected or laser needs zeroing. | Ensure the correct laser mode (Green Beam or IR Beam) is selected. Adjust windage and elevation as described in the Setup section. |
| Device feels loose on the rail | Mounting screws are loose or incorrect adapter used. | Tighten the mounting screws. Verify that the correct rail adapter (GL or 1913 Picatinny) is installed for your firearm. |
Specifications
| Feature | Detail |
|---|---|
| Model | GL5WGRX |
| Light Source Type | LED (White), Green Laser, IR Laser |
| White Brightness | Max 1000 Lumens |
| Beam Distance | Up to 150 meters |
| Green Beam Output | <5mW (Class 3R) |
| Power Source | Rechargeable Lithium Polymer Battery |
| Charging Port | USB-C |
| Charging Time | Approx. 1.5 hours |
| Runtime (White Light) | Approx. 30 minutes (at max output) |
| Material | Aluminum |
| Dimensions (L x W x H) | 2.71" x 1.68" x 1.39" |
| Weight | Approx. 5.44 ounces (150.8g) |
| Water Resistance Level | Water Resistant |

Image: Detailed view of the GL5 weaponlight with its dimensions labeled, and an illustration of the rail lock and unlock mechanism.
Warranty and Support
RovyVon products are manufactured to high-quality standards. For warranty information, technical support, or service inquiries, please refer to the RovyVon official website or contact their customer service directly. Keep your purchase receipt as proof of purchase for warranty claims.
Official RovyVon Website: www.rovyvon.com
Customer Service Email: info@rovyvon.com


