Netzu 6208D
Netzu Loud Alarm Clock User Manual
Model: 6208D | Brand: Netzu
1. Introduction
Thank you for choosing the Netzu Loud Alarm Clock. This digital alarm clock is designed to provide a reliable and customizable wake-up experience, featuring a loud alarm, adjustable brightness, and dual alarm settings. Please read this manual carefully to ensure proper setup and operation of your new alarm clock.

Image: The Netzu Loud Alarm Clock in blue, displaying the time 12:35 with vibrant RGB digits.
2. Package Contents
Ensure all items are present in the package:
- Netzu Loud Alarm Clock x 1
- Power Cable x 1
- Power Adapter x 1
- User Manual x 1

Image: A visual representation of the package contents, including the alarm clock, power cable, power adapter, and the user manual.
3. Product Features
3.1 RGB Display with Customizable Colors
The Netzu alarm clock features a vibrant RGB display, allowing you to customize the color of the digits to match your preference or room decor. Choose from a variety of colors to create a personalized visual experience.
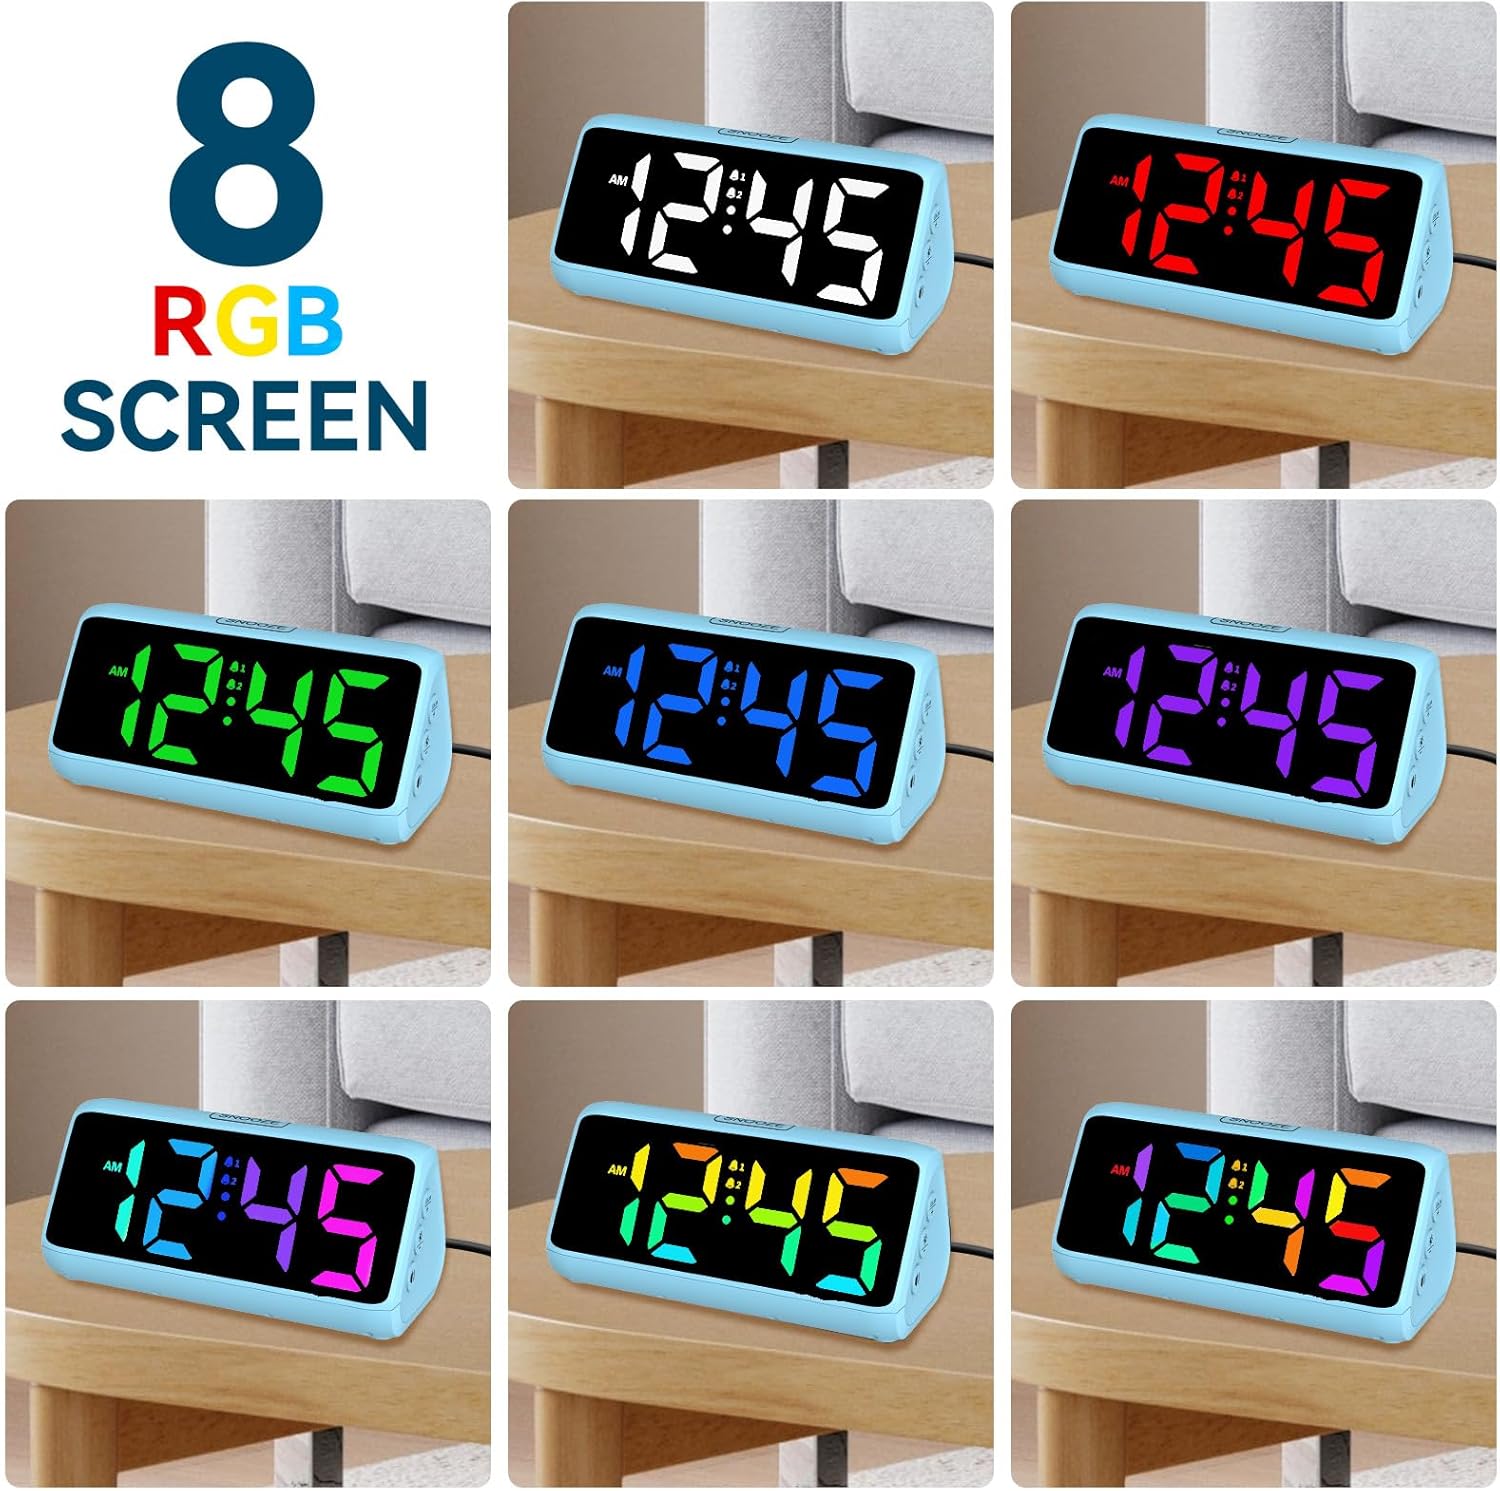
Image: A collage showing the alarm clock display in eight different RGB color modes, demonstrating the customizable color feature.
3.2 Super Loud Alarm
Designed for heavy sleepers, this alarm clock delivers a powerful sound output of up to 115 decibels, ensuring you wake up on time. The loud and clear alarm is effective even for deep sleepers.

Image: A graphic depicting the "Super Loud Alarm" feature, highlighting its 115dB capability with a visual representation of sound waves.
3.3 Dual Alarm Settings & Snooze Function
Set two independent alarms to accommodate different schedules. The convenient snooze button, located on top of the clock, allows for an additional 9 minutes of sleep before the alarm sounds again.

Image: Two panels illustrating the dual alarm feature: one showing a person waking up at 7:00 AM, and another showing a person exercising at 7:30 AM, demonstrating flexible scheduling.
3.4 Adjustable Brightness Levels
The display offers 5 levels of brightness, from very bright to completely off, allowing you to adjust it for optimal visibility during the day and minimal disturbance at night.

Image: A visual comparison of the clock's display at five different brightness levels, including an "OFF" setting, to illustrate the adjustable brightness feature.
3.5 Power Source and Battery Backup
The clock operates via a corded electric power source. It also includes a battery backup function (requires 2*AAA batteries, not included) to preserve your time and alarm settings during power outages. The display will not be lit during battery backup mode, but the alarm will still function.

Image: A diagram illustrating the clock's power options, showing it as a plug-in device with an adapter and cable, and also detailing the battery backup function (2*AAA batteries not included) for memory preservation during power loss.
3.6 12H/24H Time Format
Easily switch between 12-hour (AM/PM) and 24-hour (military time) display formats to suit your preference.

Image: A side-by-side comparison of the clock display showing both 12-hour (standard time) and 24-hour (military time) formats.
4. Setup
4.1 Initial Power On
- Unpack the alarm clock and all accessories.
- Insert 2*AAA batteries (not included) into the battery compartment on the bottom of the clock. This is for backup only.
- Connect the power cable to the clock and then plug the power adapter into a standard electrical outlet. The display will light up.

Image: The Netzu alarm clock connected to a power outlet, positioned on a nightstand, illustrating the plug-in setup.
5. Operating Instructions
5.1 Setting the Time
- Press and hold the "SET / 12/24HR" button (located on the left side of the clock) for 3 seconds to enter time setting mode. The hour digits will flash.
- Press the "+" or "-" buttons (located on the right side of the clock) to adjust the hour.
- Press the "SET / 12/24HR" button again to confirm the hour and move to minute setting. The minute digits will flash.
- Press the "+" or "-" buttons to adjust the minute.
- Press the "SET / 12/24HR" button one more time to save the time and exit setting mode.
5.2 Switching 12H/24H Format
In normal time display mode, short press the "SET / 12/24HR" button to toggle between 12-hour and 24-hour time formats.
5.3 Setting Alarms (Alarm 1 and Alarm 2)
The clock supports two independent alarms.
- Short press the "Alarm 1" or "Alarm 2" button (located on the left side of the clock) to view the current alarm time.
- To set an alarm, press and hold the respective "Alarm 1" or "Alarm 2" button for 3 seconds. The hour digits will flash.
- Use the "+" or "-" buttons to adjust the hour.
- Press the "Alarm 1" or "Alarm 2" button again to confirm the hour and move to minute setting.
- Use the "+" or "-" buttons to adjust the minute.
- Press the "Alarm 1" or "Alarm 2" button one more time to save the alarm time. The alarm icon (bell 1 or bell 2) will appear on the display, indicating the alarm is active.
To deactivate an alarm, short press the corresponding "Alarm 1" or "Alarm 2" button until the alarm icon disappears from the display.
5.4 Using the Snooze Function
When the alarm sounds, press the large "SNOOZE" button on the top of the clock. The alarm will pause for 9 minutes and then sound again. To turn off the alarm completely, press any other button on the clock.
5.5 Adjusting Display Brightness
In normal time display mode, short press the "Brightness" button (sun icon, located on the right side of the clock) to cycle through the 5 brightness levels (Lv.4, Lv.3, Lv.2, Lv.1, OFF). Select the level that best suits your environment.
5.6 Adjusting Alarm Volume
While the alarm is sounding, short press the "Volume" button (speaker icon, located on the right side of the clock) to adjust the alarm volume. There are 4 volume levels.
6. Maintenance
- Clean the clock with a soft, dry cloth. Do not use abrasive cleaners or solvents.
- Keep the clock away from direct sunlight, high temperatures, and high humidity.
- If the clock will not be used for an extended period, remove the AAA backup batteries to prevent leakage.
7. Troubleshooting
| Problem | Possible Cause | Solution |
|---|---|---|
| Display is off or not lighting up. | No power connection or power outage. Brightness set to OFF. | Ensure the power adapter is securely plugged in. Check the power outlet. Press the Brightness button to increase display brightness. |
| Alarm does not sound. | Alarm is not activated. Alarm volume is too low. Incorrect alarm time set. | Ensure the alarm icon is visible on the display. Increase alarm volume using the Volume button. Verify the alarm time is set correctly. |
| Time/Alarm settings reset after power outage. | No backup batteries installed or batteries are dead. | Install 2*AAA fresh batteries for backup. Replace old batteries if necessary. |
| Cannot change time/alarm settings. | Not in setting mode. | Press and hold the appropriate SET or Alarm button for 3 seconds to enter setting mode. |
8. Specifications
| Brand | Netzu |
| Model Number | 6208D |
| Color | Blue |
| Display Type | Digital |
| Style | Modern |
| Special Features | Adjustable Brightness, LED Display, Large Display, Loud Alarm, Silent Clock |
| Product Dimensions | 6.3"W x 2.9"H |
| Power Source | Corded Electric |
| Material | Plastic |
| Item Weight | 0.28 Kilograms (9.9 ounces) |
| Mounting Type | Tabletop |
| Batteries Required | 2*AAA (for backup, not included) |
9. Warranty and Support
For warranty information or technical support, please refer to the contact details provided on the product packaging or visit the official Netzu website. Keep your purchase receipt for warranty claims.