1. Introduction
Thank you for choosing the HayWHNKN Commercial Countertop Convection Spray Oven. This manual provides essential information for the safe and efficient operation, installation, maintenance, and troubleshooting of your new appliance. Please read this manual thoroughly before use and retain it for future reference.
2. Important Safety Instructions
WARNING: To reduce the risk of fire, electric shock, or injury, read and understand all instructions before operating this appliance.
- Ensure the oven is connected to a properly grounded 220V, 5.5kW electrical supply. Consult a qualified electrician if unsure.
- Do not immerse the appliance, cord, or plug in water or other liquids.
- Always unplug the oven from the power outlet before cleaning or performing maintenance.
- Exercise extreme caution when opening the oven door during or after cooking, as hot steam or air may escape.
- Do not touch hot surfaces. Use oven mitts or gloves when handling hot items.
- Keep children and pets away from the appliance during operation.
- Do not operate the oven if the power cord or plug is damaged, or if the appliance malfunctions or has been damaged in any manner.
- Ensure adequate ventilation around the oven during operation.
3. Product Overview
The HayWHNKN Commercial Countertop Convection Spray Oven is a versatile 60-liter appliance designed for commercial use, featuring a stainless steel interior and exterior. It offers precise temperature control, a timing function, and a unique water spray feature to enhance cooking results.
Key Features:
- 60L capacity, accommodating four 15.75" x 15.75" baking trays.
- Independent temperature control for upper, middle, and lower heating elements.
- Double fan hot air circulation for uniform baking.
- Temperature range: 0°C to 350°C (32°F to 662°F).
- Timing range: 0 to 120 minutes.
- Integrated water spray function to maintain food moisture and taste.
Components:
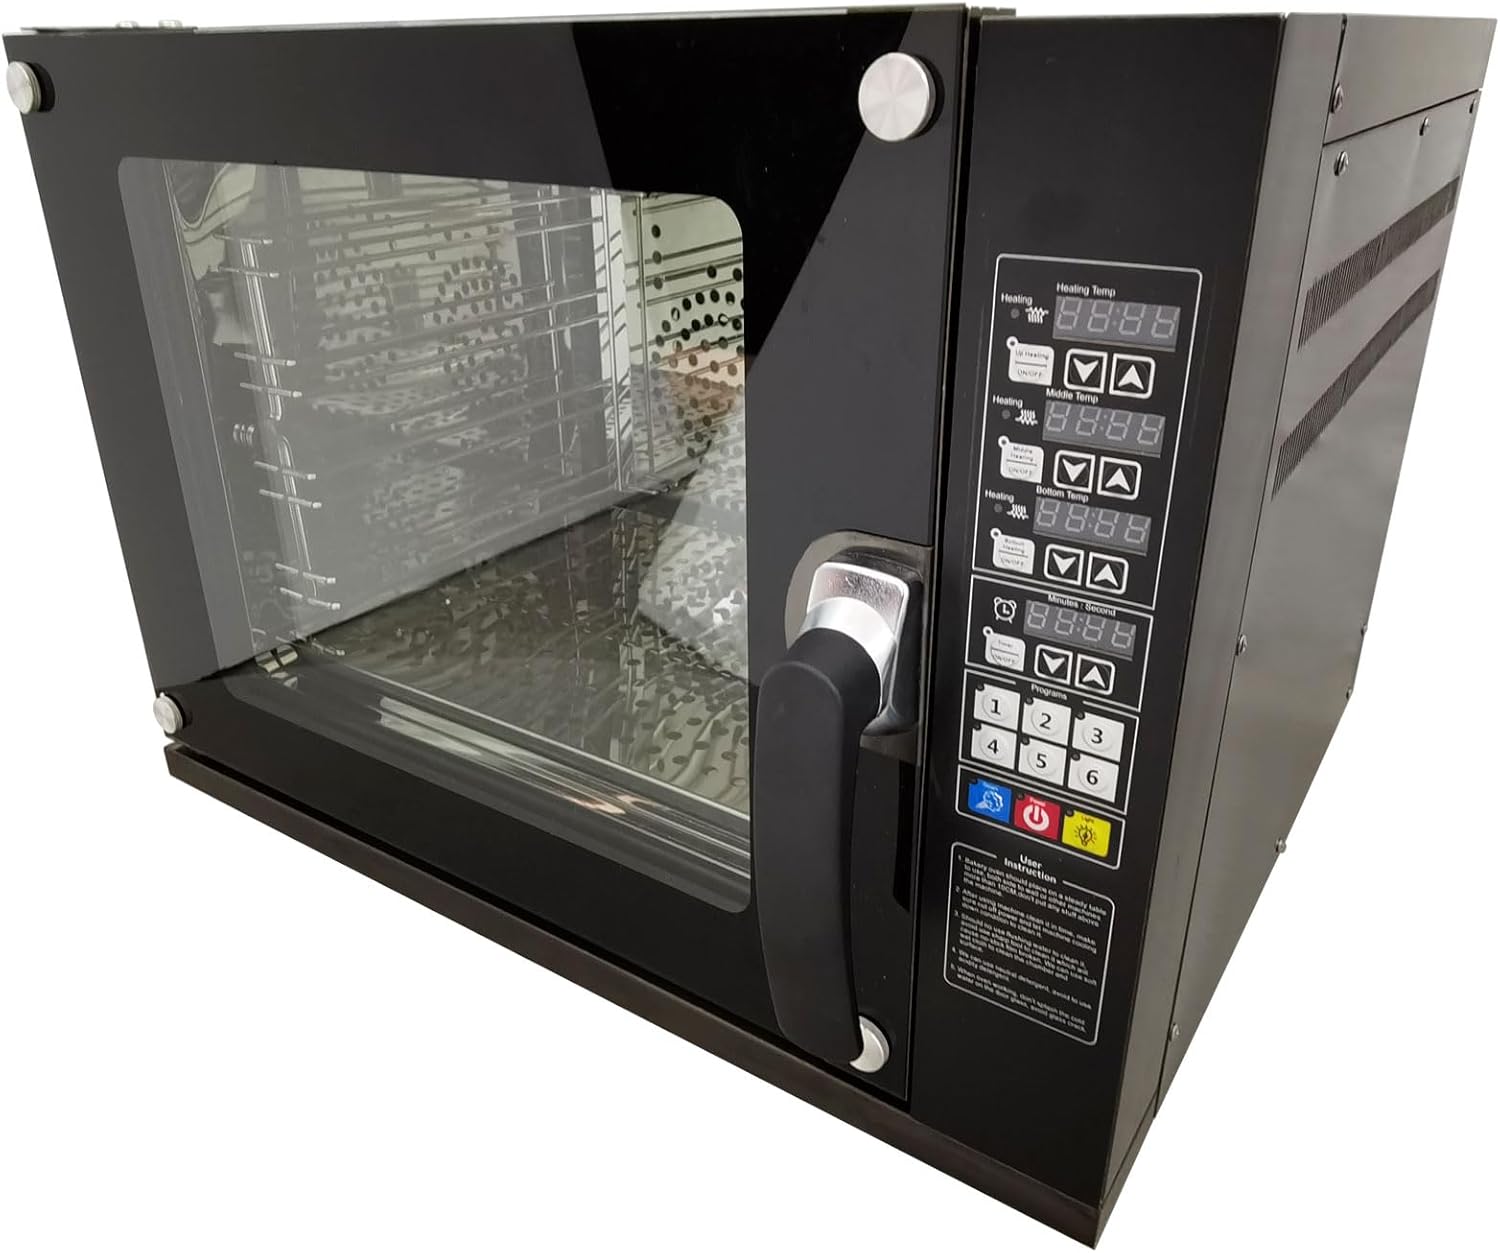
Figure 3.1: Front-right view of the HayWHNKN Commercial Convection Spray Oven, showing the control panel, door handle, and glass door.

Figure 3.2: Interior view of the oven with the door open, displaying the four stainless steel racks and internal heating elements.

Figure 3.3: Rear view of the oven, highlighting the cooling fans, electrical wiring connection point, water inlet, and exhaust valve.
4. Setup and Installation
4.1 Unpacking
Carefully remove the oven from its packaging. Inspect the appliance for any signs of damage during transit. Retain packaging materials for potential future transport or service.
4.2 Placement
Place the oven on a stable, level, and heat-resistant surface. Ensure there is adequate clearance around the oven for proper ventilation (minimum 10 cm on all sides and top). Do not place the oven near flammable materials or heat-sensitive surfaces.
4.3 Electrical Connection
This oven requires a 220V, 5.5kW, single-phase electrical supply. It is crucial to connect the oven to a dedicated, properly grounded circuit. If you are unsure about the electrical requirements or installation, consult a qualified electrician.
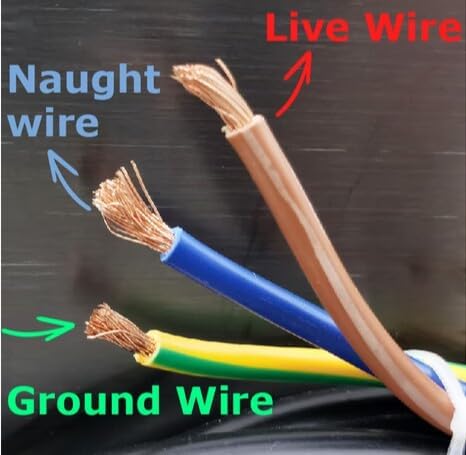
Figure 4.1: Electrical wiring diagram showing Live (brown), Naught (blue), and Ground (green/yellow) wires for proper connection.
4.4 Water Connection (for Spray Function)
The oven features a water inlet valve on the back for connection to a tap water supply. This is essential for the spray function. Ensure the water connection is secure and leak-free. An exhaust valve is also present for safe operation.
5. Operating Instructions
5.1 Control Panel Overview
The control panel integrates functions for temperature regulation, timing, spray, and lighting. It features digital displays for heating temperature and timing, along with control buttons.
5.2 Power On/Off
Press the power button (usually marked with a universal power symbol) to turn the oven on or off.
5.3 Setting Temperature
- The oven allows independent temperature control for upper, middle, and lower heating zones.
- Use the dedicated temperature adjustment buttons (up/down arrows) for each zone to set the desired temperature between 0°C and 350°C.
- Allow the oven to preheat to the set temperature before placing food inside for optimal results.
5.4 Setting Timer
- Use the timer adjustment buttons to set the desired cooking duration, up to 120 minutes.
- The oven will automatically shut off or signal completion once the timer expires.
5.5 Using the Spray Function
The flexible water spray function can be activated at any time by pressing the dedicated spray button. This feature helps increase food moisture and maintain taste, particularly beneficial for baking bread or roasting meats, resulting in a crisp exterior and tender interior.
5.6 Convection Baking
The double fan hot air circulation system ensures even heat distribution throughout the oven cavity, promoting uniform baking and cooking. This feature is automatically engaged during operation.
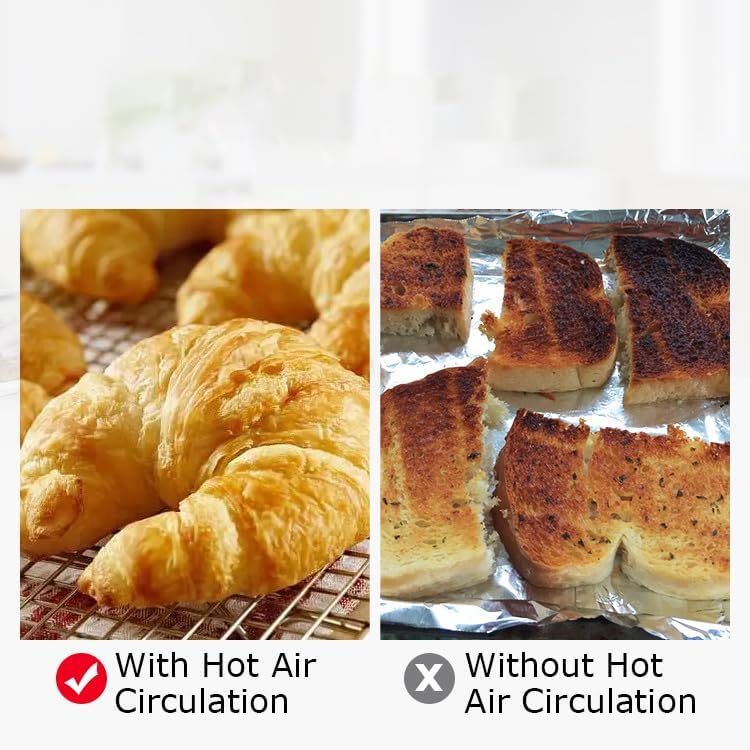
Figure 5.1: Visual comparison illustrating the benefits of hot air circulation for even baking (left) versus baking without it (right).
6. Maintenance and Cleaning
Regular cleaning and maintenance will prolong the life of your oven and ensure optimal performance.
6.1 Daily Cleaning
- After each use, allow the oven to cool completely.
- Wipe the interior and exterior surfaces with a damp cloth and mild detergent. Avoid abrasive cleaners or scouring pads.
- Remove and clean the baking trays and racks with warm, soapy water.
6.2 Deep Cleaning
- Periodically, perform a more thorough cleaning of the oven interior to remove baked-on residue.
- For stubborn stains, use a non-abrasive oven cleaner suitable for stainless steel, following the product instructions carefully.
- Ensure all cleaning agents are thoroughly rinsed from the oven before next use.
6.3 Water System Maintenance
Regularly check the water inlet and exhaust valves for any blockages or leaks. Clean any mineral deposits that may accumulate in the water spray nozzle to ensure proper function.
7. Troubleshooting
This section addresses common issues you might encounter with your oven. If the problem persists, contact customer support.
| Problem | Possible Cause | Solution |
|---|---|---|
| Oven does not power on. | No power supply; power cord not connected; circuit breaker tripped. | Check power outlet; ensure cord is securely plugged in; reset circuit breaker. |
| Oven not heating. | Temperature not set; heating element malfunction. | Verify temperature settings; if problem persists, contact service. |
| Uneven baking results. | Improper rack placement; oven not preheated; excessive food load. | Ensure proper rack spacing; preheat oven fully; avoid overcrowding. |
| Spray function not working. | Water supply not connected; water inlet blocked. | Check water connection; inspect water inlet for blockages. |
| Excessive smoke during operation. | Food spills or residue inside oven. | Clean oven interior thoroughly. |
8. Specifications
Detailed technical specifications for the HayWHNKN Commercial Countertop Convection Spray Oven Model S056185.
| Parameter | Value |
|---|---|
| Model | S056185 |
| Voltage | 220V |
| Power | 5.5kW |
| Phase Number | 1 |
| Capacity | 60 Liters (15.85 Gallons) |
| Liner Material | 304 Stainless Steel |
| Heating Range | 0°C - 350°C (32°F - 662°F) |
| Timing Range | 0 - 120 minutes |
| Baking Tray Size | 40cm x 40cm (15.75" x 15.75") |
| Number of Racks | 4 |
| Product Dimensions (D x W x H) | 25.6" x 26.8" x 20" (65cm x 68cm x 51cm) |
| Net Weight | 40 kg (88.18 lbs) |
| Gross Weight | 48 kg (105.82 lbs) |
| UPC | 840403749645 |

Figure 8.1: Diagram illustrating the external dimensions of the oven: 25.6" (65cm) depth, 26.8" (68cm) width, and 20.1" (51cm) height.
9. Warranty and Customer Support
This product is covered by a manufacturer's warranty. For specific warranty terms and conditions, please refer to the documentation provided with your purchase or contact the seller directly. If you encounter any issues or require technical assistance, please reach out to HayWHNKN customer support through your purchase platform or the contact information provided by the seller.
Protection plans may be available for extended coverage. Please check your purchase details for options such as 3-Year or 4-Year Protection Plans.