
Introduction
Thank you for choosing the GIGA PUMP Mini Bike Pump. This compact and powerful tire inflator is designed for portability and efficiency, ensuring you're always prepared for your cycling adventures. Featuring a digital pressure gauge, auto shut-off, and versatile valve compatibility, it provides a safe and convenient solution for maintaining optimal tire pressure.
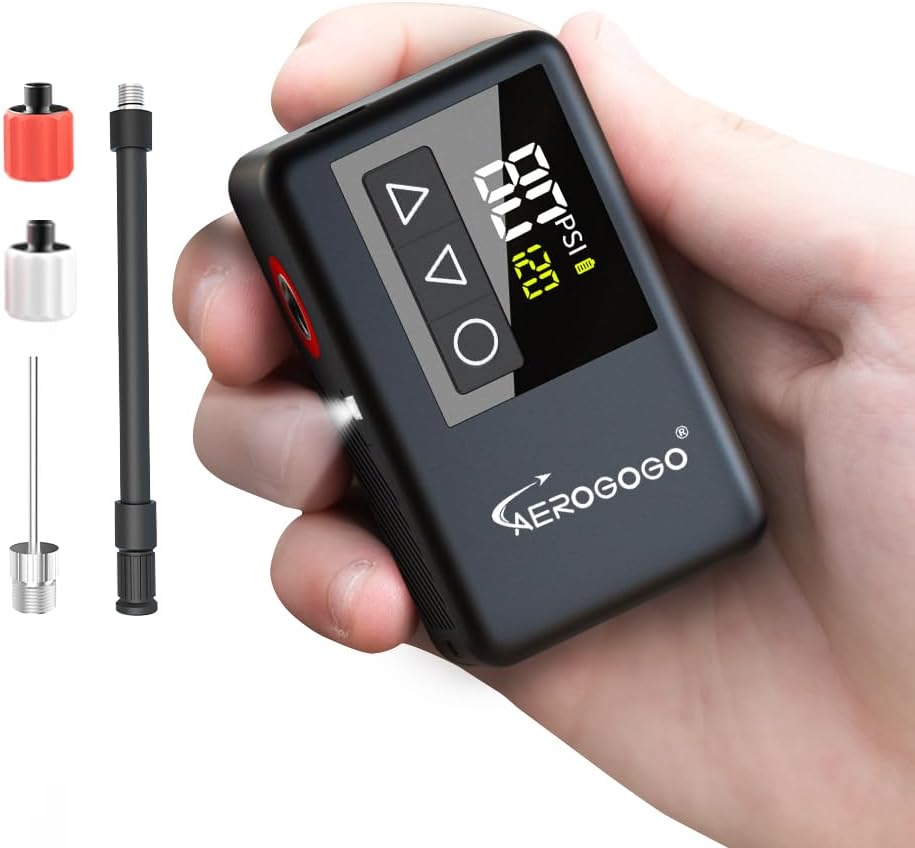
Figure 1: GIGA PUMP Mini Bike Pump with accessories.
Key Features
- Ultra-Portable Design: Weighing just 3.8oz and measuring 1.7 x 1.2 x 2.8 inches, this pump is designed for easy transport in a pocket or backpack.
- High-Efficiency Inflation: Achieves a maximum output of 120 PSI, capable of inflating a 700x45C tire from 30 to 50 PSI in approximately 25 seconds.
- Digital Pressure Gauge & Auto Shut-Off: LCD display provides real-time pressure readings up to 120 PSI. The pump automatically stops when the preset pressure is reached, preventing over-inflation.
- Versatile Compatibility: Includes Presta Valve Adapter, Schrader Valve Adapter, Flexible Air Hose, and Ball Inflator Needle, making it suitable for road bikes, mountain bikes, and sports balls.
- Built-in LED Light: An LED light located beneath the valve enhances visibility for night use or emergency lighting.
- Rechargeable Battery: Equipped with a 500mAh battery, ensuring multiple inflations and peace of mind during long rides.
Package Contents
Verify that all items are present in your package:
- 1 x GIGA PUMP Electric Bike Pump
- 1 x Presta Valve Adapter
- 1 x Schrader Valve Adapter
- 1 x Flexible Air Hose
- 1 x Ball Inflator Needle
- 1 x Type-C Charging Cable
- 1 x Storage Bag
- 1 x Wrist Lanyard

Figure 2: All components included in the package.
Setup
Charging the Pump
Before first use, fully charge the GIGA PUMP. Connect the provided Type-C charging cable to the pump's charging port and plug the other end into a compatible USB power source (e.g., wall adapter, power bank). The battery indicator on the display will show charging status.

Figure 3: Charging the GIGA PUMP via Type-C port.
Attaching Nozzles
The pump supports Presta and Schrader valves directly or via the extension hose, and includes a ball needle for sports equipment.

Figure 4: Attaching different valve adapters and the extension hose.
- For Schrader Valve: The pump can connect directly to a Schrader valve. Ensure a firm press to prevent air leaks.
- For Presta Valve: Use the included Presta valve adapter. Attach the adapter to the pump, then connect to the Presta valve. Alternatively, the extension hose can be used with the Presta valve.
- For Sports Balls: Attach the ball inflator needle to the pump.
Operating Instructions
Powering On/Off
To power on the pump, long press the "O" button. The display will illuminate. To power off, long press the "O" button again.
Setting Desired Pressure (PSI)
Once powered on, use the "△" (up) and "▽" (down) buttons to adjust the desired PSI. The current pressure will be displayed, along with the preset target pressure.

Figure 5: Digital display and controls for setting pressure.
Inflating Tires/Balls
- Attach the appropriate nozzle or extension hose firmly to the tire valve or ball.
- Ensure the pump is powered on and the desired PSI is set.
- Press the "O" button once to start the inflation. The pump will begin to operate, and the real-time pressure will be displayed.
- The pump will automatically shut off once the preset pressure is reached.
- Carefully detach the pump from the valve.

Figure 6: Inflation process for bike tires.

Figure 7: Inflation process for sports balls.
Using the LED Light
The pump features a built-in LED light for convenience in low-light conditions.
- To turn the LED light on or off, double press the "△" (up) button.

Figure 8: Using the integrated LED light.
Maintenance
- Keep the pump clean and free from dust and debris. Wipe with a soft, dry cloth.
- Store the pump and its accessories in the provided storage bag when not in use to protect them.
- Recharge the pump regularly, especially if it has not been used for an extended period, to maintain battery health.
- Avoid exposing the pump to extreme temperatures or direct sunlight for prolonged periods.
Troubleshooting
| Problem | Possible Cause | Solution |
|---|---|---|
| Pump does not turn on. | Low battery or not powered on correctly. | Charge the pump fully. Long press the "O" button to power on. |
| Air leaks during inflation. | Nozzle not firmly attached to the valve. | Ensure the nozzle is pressed firmly onto the valve. For direct connection, apply sufficient pressure. |
| Pump does not inflate to desired PSI. | Incorrect PSI setting or low battery. | Verify the preset PSI. Recharge the pump if battery is low. |
| Real-time pressure indicator not working. | Internal sensor issue or connection problem. | Ensure the pump is securely connected to the valve. If issue persists, contact customer support. |
Specifications
| Feature | Detail |
|---|---|
| Brand | GIGA PUMP |
| Model Name | GPBK01 |
| Color | Black |
| Material | Plastic |
| Item Weight | 0.19 Kilograms (3.8 oz) |
| Product Dimensions (LxWxH) | 2.1" x 1.7" x 2.8" |
| Power Source | Battery Powered |
| Air Flow Capacity | 14 LPM |
| Maximum Pressure | 120 PSI |
| Operation Mode | Automatic |
| Battery Capacity | 500mAh (Internal) |
Warranty
The GIGA PUMP Mini Bike Pump comes with a 1-year manufacturer's warranty from the date of purchase. This warranty covers defects in materials and workmanship under normal use. Please retain your proof of purchase for warranty claims. The warranty does not cover damage caused by misuse, accident, unauthorized modification, or normal wear and tear.
Customer Support
For any questions, technical assistance, or warranty claims, please contact GIGA PUMP customer support through the retailer's platform or visit the official GIGA PUMP store page on Amazon:
Visit the GIGA PUMP Store on Amazon
Our team is dedicated to providing you with the best possible experience.