
Introduction
The XUMIUZIY 12 Key Macro Pad is a compact, programmable mechanical keyboard designed for enhanced productivity and gaming. Featuring 12 customizable keys and RGB backlighting, it offers versatile functionality for various applications. This manual provides essential information for setting up, operating, and maintaining your macro pad.
Package Contents
Please verify that all items are present in your package:
- 1 x XUMIUZIY 12 Key Macro Pad
- 1 x Type-C USB Cable
- 1 x Keycap Puller

Image: The XUMIUZIY 12 Key Macro Pad shown alongside its included Type-C USB cable and keycap puller.
Setup Instructions
- Connect the Macro Pad: Insert the Type-C end of the provided USB cable into the port on the side of the macro pad.
- Connect to Computer: Plug the standard USB-A end of the cable into an available USB port on your computer (PC or Laptop).
- Plug and Play: The macro pad is designed for plug-and-play functionality. No additional drivers are required for basic operation. It is compatible with Linux, OS X, Windows, and Raspberry Pi systems.
- Initial Power On: The RGB backlighting should illuminate upon successful connection, indicating the device is powered on.

Image: A close-up view of the Type-C USB port located on the side of the macro pad.
Operating Instructions
Key Customization and Programming
The XUMIUZIY 12 Key Macro Pad features programmable keys, allowing you to assign various functions and shortcuts. The device has a memory function, retaining your settings even after disconnection.
Supported Functions:
- Keyboard Functions: Assign standard key presses (e.g., A, B, C, Shift, Ctrl).
- Mouse Functions: Assign mouse clicks (left, right, middle) or scroll actions.
- Multimedia Functions: Control media playback (play, pause, stop, next, previous), volume (up, down, mute).
- String Functions: Input predefined text strings.
- Game Functions: Assign specific in-game commands or macros.
- Macro Definition Functions: Create complex sequences of key presses and delays.

Image: A visual representation of the six main programmable function categories: Keyboard, Mouse, Multimedia, String, Game, and Macro Definition.
Programming Software: To customize the keys, dedicated software is typically required. Please refer to the manufacturer's official website or product page for information on downloading the appropriate programming software. Once installed, the software will guide you through assigning functions to each of the 12 keys.
RGB Lighting
The macro pad features RGB backlighting with multiple adjustable modes. The programming software usually provides options to change lighting effects, colors, and brightness, or to turn the lighting off entirely.
Hot-Swappable Mechanical Switches
The macro pad is equipped with hot-swappable mechanical switches, allowing you to easily change the switches without soldering. This enables customization of the typing feel and sound.
- Removing Keycaps: Use the provided keycap puller to gently remove the desired keycap.
- Removing Switches: Once the keycap is off, use a switch puller (not included, but often comes with replacement switches) to carefully unclip and pull out the mechanical switch.
- Installing New Switches: Align the pins of the new mechanical switch with the holes on the PCB and press firmly until it clicks into place. Ensure the pins are straight to avoid bending.
- Installing Keycaps: Place the desired keycap onto the new switch stem and press down gently until it is secure.
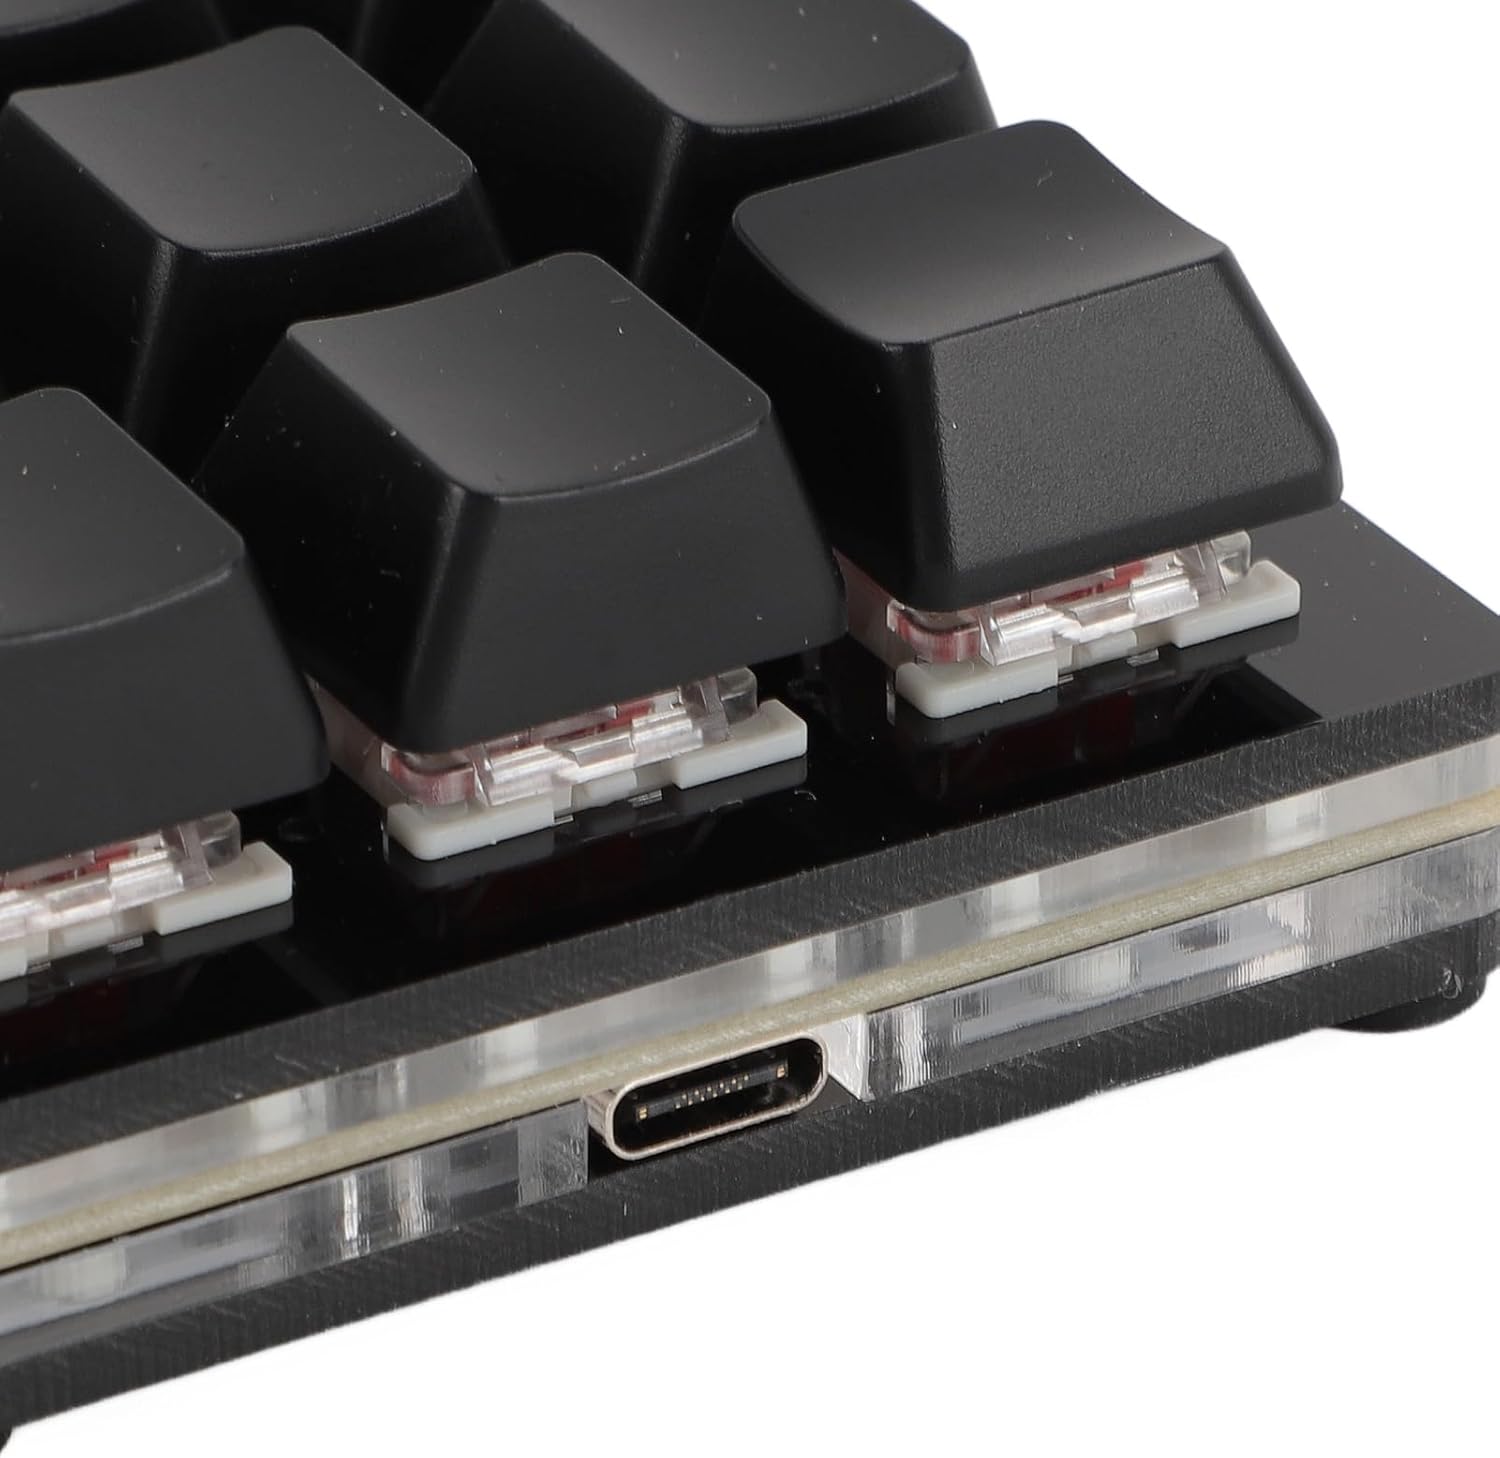
Image: A keycap being carefully removed from the macro pad, revealing the mechanical switch underneath.

Image: A red mechanical switch detached from the macro pad, with a black keycap shown separately.
Maintenance
- Cleaning: Use a soft, dry cloth to wipe the surface of the macro pad. For deeper cleaning, remove keycaps and use compressed air to clear dust and debris from between the switches.
- Cable Care: Avoid sharp bends or excessive pulling on the USB cable to prevent damage.
- Storage: Store the macro pad in a cool, dry place away from direct sunlight and extreme temperatures.
Troubleshooting
- Macro Pad is not recognized by the computer:
- Check the USB cable connection at both the macro pad and the computer. Try a different USB port or cable.
- Ensure your computer's operating system is up to date.
- Restart your computer.
- Keys are not responding or performing incorrect actions:
- Verify that the keys have been correctly programmed using the customization software.
- Ensure mechanical switches are properly seated if they have been replaced.
- If a specific key is not working, try swapping its switch with a known working switch to diagnose if the issue is with the switch or the PCB.
- RGB lighting is not working or behaving unexpectedly:
- Check the lighting settings within the programming software.
- Ensure the macro pad is receiving sufficient power from the USB port.
- Difficulty finding or using programming software:
- The manufacturer's product page or official website is the primary source for programming software. Search for "XUMIUZIY 12 Key Macro Pad software" or "XUMIUZIYopxetr51mw-12 software" online.
- If official software is unavailable, some generic macro pad programming tools might be compatible, but compatibility is not guaranteed. Refer to online communities or forums for potential third-party solutions if official support is not found.
Specifications
| Feature | Detail |
|---|---|
| Brand | XUMIUZIY |
| Model Number | XUMIUZIYopxetr51mw-12 |
| Key Number | 12 |
| Switch Type | Mechanical (Red Switches) |
| Connectivity | Type-C Wired |
| Backlighting | RGB |
| Special Features | Hot-Swappable, Programmable Keys |
| Compatible OS | Linux, OS X, Windows, Raspberry Pi |
| Material | Acrylic + ABS |
Warranty and Support
For warranty information or technical support, please refer to the official XUMIUZIY website or contact their customer service directly. Details are typically provided with your purchase documentation or on the product's online listing.