1. Product Overview
The MKEOLGE X1 Trail Camera is designed for outdoor scouting, wildlife monitoring, and home security. It features high-resolution imaging, rapid motion detection, and night vision capabilities. This manual provides instructions for setting up, operating, and maintaining your camera.

Image 1.1: MKEOLGE X1 Trail Camera with included solar panel, showcasing its outdoor application.
Key Features:
- 64 Megapixel (MP) image resolution and 2.7K video recording.
- 0.2-second trigger speed for capturing fast-moving subjects.
- Night vision with 8 IR LEDs, providing an effective range of up to 65 feet (20 meters).
- 120° wide-angle lens for broad field of view.
- IP66 waterproof rating for outdoor use.
- Integrated solar panel for continuous power.
- WiFi hotspot connectivity for app control and media access (within 30m/98ft).
- 2.0-inch LCD color screen for on-site viewing and settings adjustment.
2. Package Contents
Verify that all items are present in the package:

Image 2.1: Included components with the MKEOLGE X1 Trail Camera.
- Trail Camera (x1)
- Solar Panel (x1)
- 32GB Micro SD Card (x1)
- Solar Panel Mounting Bracket (x1)
- Camera Mounting Bracket (x1)
- Camera Mounting Bracket Base (x1)
- Mounting Strap (x1)
- Type-C USB Cable (x1)
- User Manual (x1)
- Screws (x1 set)
- AA Battery (x1, pre-installed or included for initial setup/backup)
3. Camera Components
Familiarize yourself with the camera's physical components:

Image 3.1: Detailed diagram of the MKEOLGE X1 Trail Camera's external and internal components.
- Status Indicator
- Light Sensor
- Camera Lens
- IR LEDs (Hidden)
- Microphone
- PIR Motion Sensor (front)
- PIR Motion Sensor (side)
- 2-inch LCD Monitor
- Control Buttons
- Menu On/Off Button
- Start Key
- Memory Card Slot
- Reset Button
- Power Switch
- Rear Cover
4. Setup Guide
4.1. Power Source Installation
- The camera is primarily powered by the integrated solar panel. Ensure the solar panel is positioned to receive adequate sunlight.
- An AA battery is included, likely for backup or initial setup. Install it into the designated battery compartment if not already present.
- Connect the solar panel to the camera using the provided cable.
4.2. Micro SD Card Installation
- Locate the memory card slot (refer to Image 3.1, item 12).
- Insert the included 32GB Micro SD card into the slot with the contacts facing the correct direction. The camera supports up to 256GB Micro SD cards.
- Ensure the card clicks into place. To remove, push it in gently until it springs out.
4.3. Mounting the Camera
The camera offers multiple mounting options:

Image 4.1: Illustration of two common mounting methods for trail cameras, including the solar panel setup.
- Strap Mounting: Use the provided mounting strap to secure the camera to a tree or pole. Thread the strap through the camera's mounting points and tighten securely.
- Bracket Mounting: Utilize the camera mounting bracket and screws to attach the camera to a flat surface. The solar panel can be mounted separately using its own bracket to optimize sun exposure.
- Position the camera to capture the desired area, considering the 120° wide-angle lens and 65ft night vision range.
5. Operating Instructions
5.1. Powering On/Off
- To power on the camera, slide the Power Switch (refer to Image 3.1, item 14) to the "ON" position.
- The LCD screen will activate, and the status indicator will light up.
- To power off, slide the Power Switch to the "OFF" position.
5.2. Menu Navigation and Settings
- Press the Menu On/Off Button (Image 3.1, item 10) to access the camera's settings menu on the 2.0-inch LCD screen.
- Use the Control Buttons (Image 3.1, item 9) to navigate through menu options and adjust settings.
- Common settings include:
- Mode: Select between Photo, Video, or Photo+Video modes.
- Resolution: Set image resolution (e.g., 64MP) and video resolution (e.g., 2.7K).
- PIR Sensitivity: Adjust motion sensor sensitivity.
- Time Switch: Schedule specific operating times for the camera.
- Timer: Set intervals for photo/video capture.
- Time Stamp: Enable or disable date and time stamps on captured media.
- Press the Start Key (Image 3.1, item 11) to confirm selections or exit the menu.
5.3. Motion Detection and Capture

Image 5.1: The camera's 0.2-second trigger speed captures fast-moving subjects effectively.
- The camera utilizes front and side PIR motion sensors (Image 3.1, items 6 & 7) to detect movement.
- Upon detection, the camera triggers within 0.2 seconds to capture images or video according to your settings.
- The 120° wide-angle lens ensures a broad detection and capture area.
5.4. Night Vision Operation
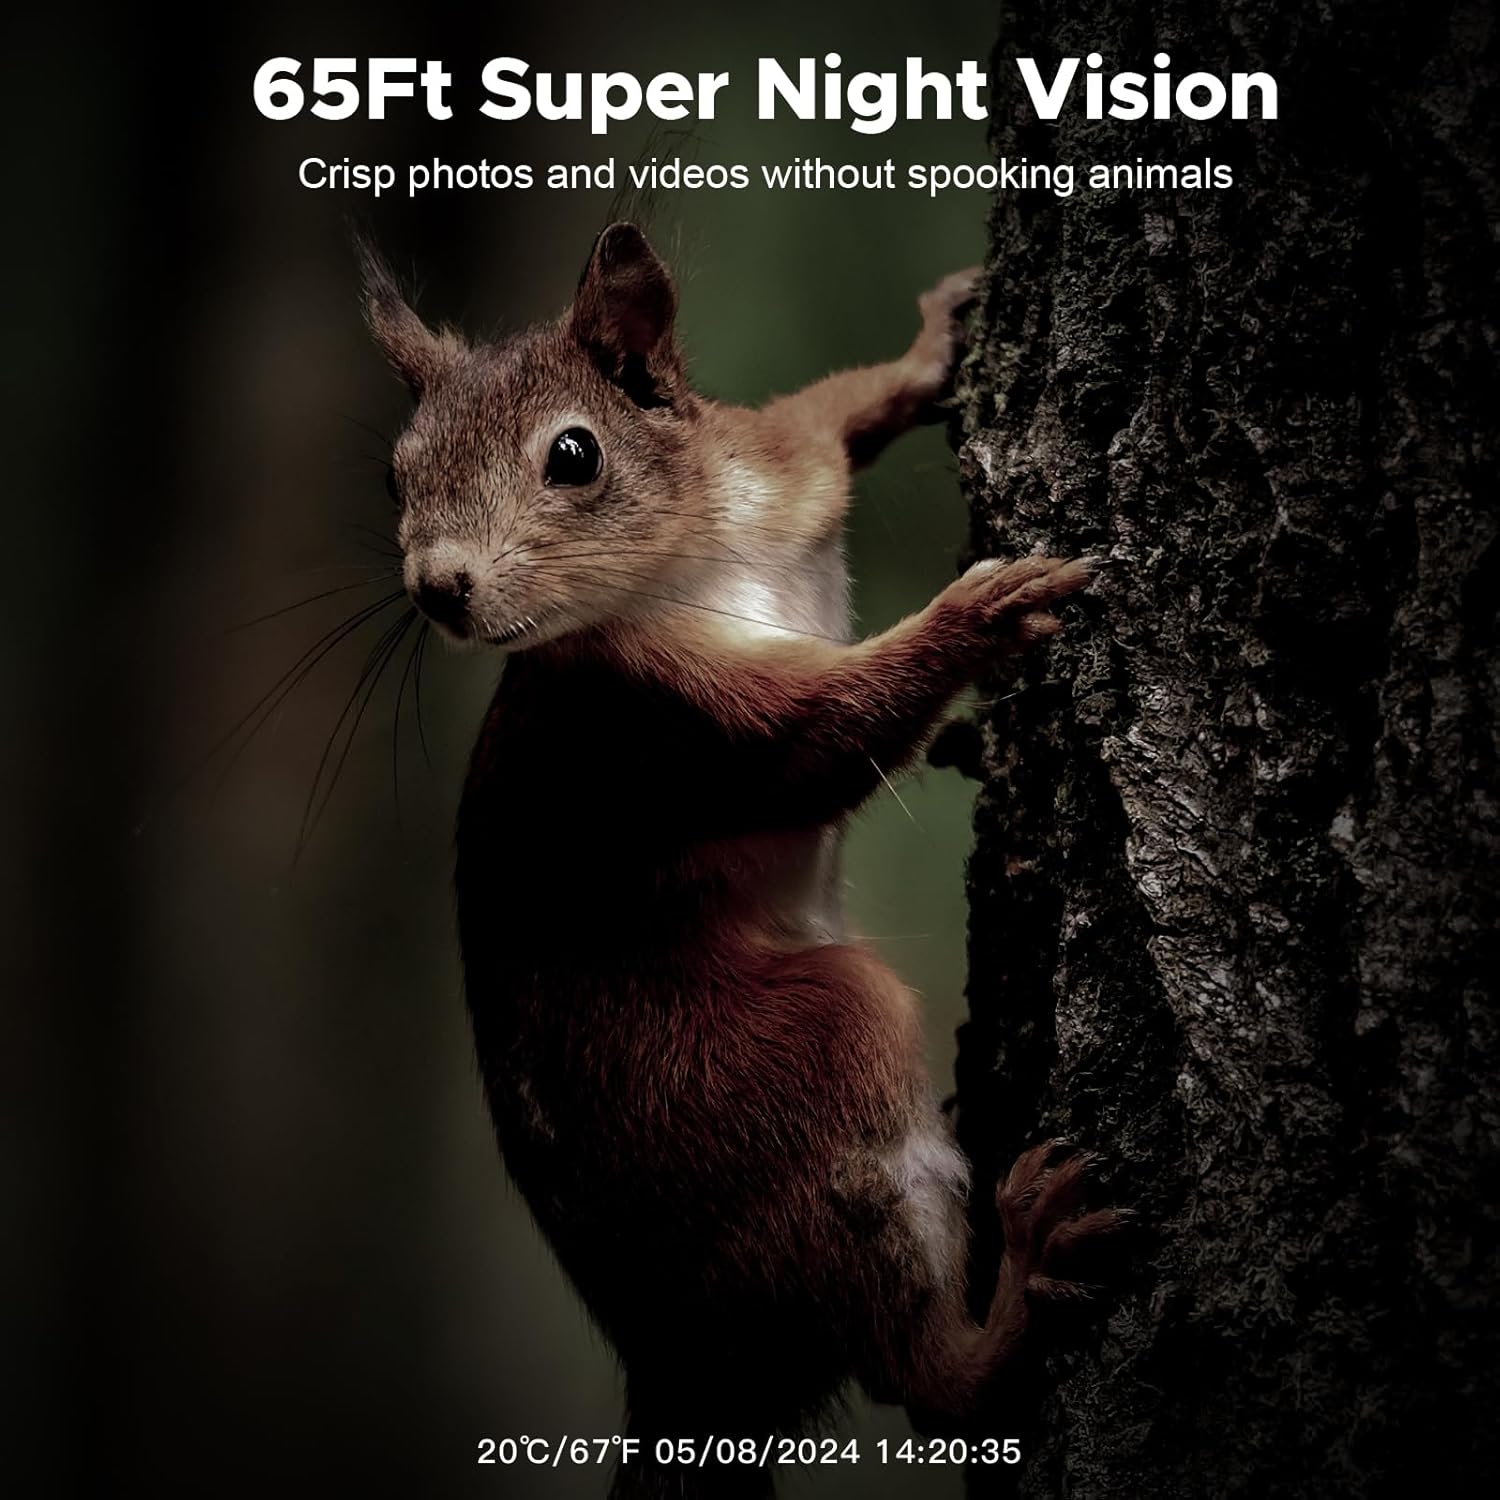
Image 5.2: Example of night vision capture, showing clear images in low-light conditions.
- The camera automatically switches to night vision mode in low-light conditions.
- Hidden IR LEDs (Image 3.1, item 4) illuminate the area up to 65 feet (20 meters) without disturbing wildlife.
- Captured images and videos in night mode will be in black and white.
5.5. WiFi Connection and App Control

Image 5.3: The camera connects to a smartphone via its hotspot WiFi for app control and media access.

Image 5.4: Remote phone access allows viewing of live feed and captured media.
- The camera supports connection via its own WiFi hotspot, allowing control and media download through a dedicated app (e.g., CloudEdge, as mentioned in specifications).
- Note: This camera does not support connection to home WiFi networks. You must be within approximately 30 meters (98 feet) of the camera to establish a WiFi connection.
- Steps to Connect the App:
- Install the recommended app (e.g., CloudEdge) on your smartphone.
- Register an account within the app.
- Turn on the camera.
- Follow the in-app instructions to connect to the camera's WiFi hotspot.
6. Maintenance
6.1. Cleaning
- Wipe the camera lens and PIR sensors regularly with a soft, dry cloth to ensure clear images and proper motion detection.
- The camera has an IP66 waterproof rating, but avoid submerging it in water or using harsh cleaning chemicals.
6.2. Power Management
- Ensure the solar panel is free from obstructions (leaves, dirt) to maximize charging efficiency.
- Periodically check the status of the internal battery and the AA backup battery. Replace the AA battery as needed.
6.3. Storage Management
- Regularly download and back up captured media from the Micro SD card to prevent data loss and free up storage space.
- Format the Micro SD card periodically through the camera's menu to maintain optimal performance.
7. Troubleshooting
| Problem | Possible Cause | Solution |
|---|---|---|
| Camera does not power on. | Low battery, incorrect battery installation, power switch off. | Ensure solar panel is exposed to sunlight. Check AA battery installation and charge level. Verify power switch is in "ON" position. |
| No images/videos captured. | PIR sensitivity too low, SD card full/corrupt, incorrect mode setting, camera not armed. | Increase PIR sensitivity. Format or replace SD card. Check camera mode (Photo/Video). Ensure camera is in active monitoring state. |
| Poor image/video quality. | Dirty lens, low light conditions, incorrect resolution settings. | Clean the camera lens. Ensure adequate lighting or proper night vision activation. Set resolution to 64MP/2.7K in settings. |
| Cannot connect via WiFi/App. | Out of range, incorrect app, camera WiFi not enabled. | Move closer to the camera (within 30m/98ft). Ensure the correct app (e.g., CloudEdge) is installed. Verify camera's WiFi hotspot is active. |
| Short battery life. | Insufficient sunlight for solar panel, high activity, frequent WiFi connection. | Relocate solar panel for better sun exposure. Reduce PIR sensitivity if capturing too many unnecessary events. Minimize frequent WiFi connections. |
8. Specifications
| Feature | Detail |
|---|---|
| Model | X1 |
| Image Resolution | 64 Megapixels |
| Video Resolution | 2.7K (ASF format) |
| Trigger Speed | 0.2 seconds |
| Night Vision Range | Up to 65 feet (20 meters) with 8 IR LEDs |
| Field of View | 120° Wide Angle |
| Display Screen | 2.0-inch LCD Color Screen |
| Waterproof Rating | IP66 |
| Connectivity | WiFi Hotspot (30m/98ft range), Type-C USB |
| Compatible App | CloudEdge (as per specifications) |
| Storage | Micro SD card, up to 256GB (32GB included) |
| Power Source | Solar Powered, 1 AA battery (included) |
| Dimensions | 7 x 3 x 5 inches |
| Weight | 1.9 pounds |
| Indoor/Outdoor Usage | Outdoor |
9. Warranty and Support
MKEOLGE products are designed for reliability and performance. For warranty information or technical support, please refer to the contact details provided with your purchase documentation or visit the official MKEOLGE website.
For further assistance, you may also refer to the MKEOLGE Store on Amazon.