1. Introduction
This manual provides detailed instructions for the installation, operation, maintenance, and troubleshooting of your TANIQIACA S966 Electric Bike LCD Display Panel. This display is designed to provide essential riding information for electric bicycles operating on 24-72V systems and is compatible with 22.2mm handlebars. Please read this manual thoroughly before use to ensure proper function and safety.
2. Safety Information
- Always ensure the electric bicycle is powered off before installing or removing the display panel.
- Do not attempt to disassemble or modify the display panel, as this may void the warranty and cause damage.
- Keep the display panel away from extreme temperatures, direct sunlight for prolonged periods, and corrosive substances.
- While the display is waterproof, avoid submerging it in water.
- Ensure all connections are secure to prevent electrical shorts or malfunctions.
- Regularly check the mounting bracket for tightness to prevent the display from falling during operation.
3. Product Overview
The TANIQIACA S966 LCD Display Panel is a lightweight and durable unit made from ABS material, designed to enhance your electric biking experience by providing clear, real-time data. It features a large screen for easy readability and an integrated control button panel.

Image: The TANIQIACA S966 LCD Display Panel showing the main screen and the wired remote control unit.

Image: Front view of the S966 display panel, highlighting the screen interface.
4. Setup
4.1. Installation
- Prepare Handlebars: Ensure your electric bicycle handlebars have a diameter of 22.2mm for proper fitment. Clean the mounting area.
- Mount the Display: Attach the LCD display panel to the desired position on your handlebars using the provided bracket. Secure it firmly with the screws, ensuring it does not obstruct your view or control of the bicycle.
- Mount the Remote Control: Attach the wired remote control unit to a convenient location on your handlebars, typically near the left grip, for easy access during riding.
- Connect Wiring: Connect the display panel's cable to your electric bicycle's controller. This display requires a controller that supports communication protocol 2 for optimal functionality. Ensure the connectors are fully seated and secure.
- Cable Management: Route the cables neatly along the handlebars and frame, securing them with cable ties to prevent interference with moving parts and to protect them from damage.

Image: Side view of the S966 display panel, illustrating the handlebar mounting mechanism.

Image: Rear view of the S966 display panel, showing the cable connections and mounting points.
5. Operating Instructions
5.1. Power On/Off
- Power On: Press and hold the 'M' button on the remote control for approximately 2 seconds to power on the display.
- Power Off: Press and hold the 'M' button again for approximately 2 seconds to power off the display.
5.2. Display Functions
The S966 display provides various real-time riding data:
- Speed: Current riding speed (km/h or mph).
- Battery Level: Indication of remaining battery charge.
- Error Code: Displays 'ERROR' with a code if a system fault is detected.
- Gear/Assist Level: Shows the current pedal assist level (e.g., GEAR 1-9).
- ODO (Odometer): Total distance traveled.
- TRIP: Distance traveled for the current ride.
- AVG (Average Speed): Average speed of the current ride.
- MAX (Maximum Speed): Maximum speed achieved during the current ride.
- VWh/Ah: Displays voltage, watt-hours, or amp-hours depending on configuration.

Image: The S966 display showing speed, battery, error, gear, and trip information.
5.3. Mode Selection and Settings
Use the UP and DOWN arrow buttons on the remote control to navigate through modes and adjust settings.
- Adjust Assist Level: Press the UP or DOWN arrow buttons to increase or decrease the pedal assist level (GEAR).
- Cycle Display Information: Short press the 'M' button to cycle through different display information such as ODO, TRIP, AVG, MAX.
- Select Riding Mode: The display may feature riding modes like SPORT, STD (Standard), and ECO (Economy). Consult your e-bike's main controller manual for specific instructions on how to switch between these modes, as this is typically controlled by the e-bike's system rather than directly by the display buttons.
- Access Settings: Long press a combination of buttons (e.g., UP and DOWN simultaneously) to enter the settings menu. Refer to your e-bike's controller manual for detailed parameter adjustments.
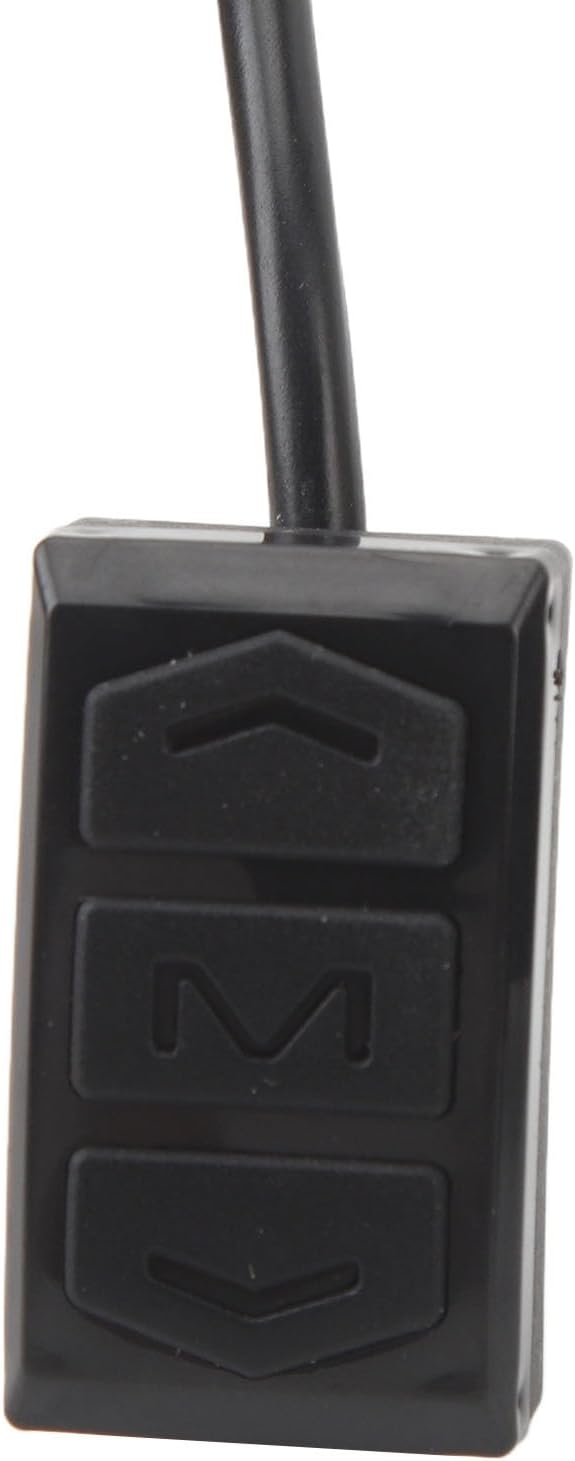
Image: Close-up of the remote control unit, showing the 'M', UP, and DOWN buttons.
6. Maintenance
- Cleaning: Wipe the display screen and body with a soft, damp cloth. Do not use abrasive cleaners, solvents, or harsh chemicals, as these can damage the screen or housing.
- Water Resistance: The display panel offers good waterproof performance. However, avoid high-pressure washing directly onto the display or prolonged exposure to heavy rain. Do not submerge the unit.
- Connection Check: Periodically check all cable connections to ensure they are secure and free from corrosion or damage.
- Storage: If storing the electric bike for an extended period, ensure the display is clean and dry. Store in a cool, dry place away from direct sunlight.
7. Troubleshooting
| Problem | Possible Cause | Solution |
|---|---|---|
| Display does not power on | Loose cable connection, low e-bike battery, faulty display/controller | Check all cable connections. Ensure e-bike battery is charged. If problem persists, contact support. |
| Display shows 'ERROR' code | System malfunction (e.g., motor, controller, sensor issue) | Note the error code and consult your e-bike's main controller manual for specific error definitions and troubleshooting steps. |
| Inaccurate speed reading | Speed sensor issue, incorrect wheel circumference setting | Check speed sensor for damage or obstruction. Verify wheel circumference setting in display parameters (if adjustable). |
| Buttons unresponsive | Dirt/debris, internal fault | Clean buttons. If still unresponsive, contact support. |
8. Specifications
| Feature | Detail |
|---|---|
| Model | S966 |
| Material | ABS |
| Voltage Compatibility | 24-72V |
| Handlebar Diameter | 22.2mm |
| Display Type | LCD |
| Item Weight | 228 Grams (approx. 8.04 oz) |
| Product Dimensions (LxWxH) | 5.1" x 3.9" x 3.1" (approx. 13cm x 10cm x 8cm) |
| Connectivity Technology | Bluetooth (as per product specifications, for potential future features or app integration) |
| Mounting Type | Handlebar Mount |
| Human Interface Input | Buttons |
| Included Components | Display Panel, Remote Control, Cable |
9. Warranty and Support
For warranty information and technical support, please refer to the documentation provided with your purchase or contact TANIQIACA customer service directly. Ensure you have your product model (S966) and purchase details available when seeking support.
Contact Information: Please refer to your purchase receipt or the official TANIQIACA website for the most current customer support contact details.

