Introduction
The TERRAMASTER F8 SSD is an 8-bay all-SSD Network Attached Storage (NAS) server designed for high-performance data storage and management. It features an N95 Quad-Core CPU, 8GB DDR5 RAM, and a 10GbE port, making it suitable for both small business and home users requiring fast, reliable, and quiet storage solutions. This manual provides comprehensive instructions for setting up, operating, maintaining, and troubleshooting your F8 SSD NAS.
Safety Information
Please read and understand all safety instructions before using the device. Failure to follow these instructions may result in electric shock, fire, or damage to the device.
- Ensure the device is placed on a stable, level surface to prevent accidental falls.
- Do not expose the device to water, moisture, or extreme temperatures.
- Use only the power adapter supplied with the device.
- Do not open the device casing unless specifically instructed to do so for maintenance or upgrades.
- Disconnect the power cable before performing any maintenance or installation procedures.
- Keep ventilation openings clear to prevent overheating.
Package Contents
Verify that all items are present in the package:
- TERRAMASTER F8 SSD NAS Unit (Diskless)
- Power Adapter
- Ethernet Cable
- 8 x M.2 SSD Heat Sinks
- Screws and accessories for SSD installation
- Quick Installation Guide

Image: The TERRAMASTER F8 SSD NAS unit shown alongside eight M.2 SSD heat sinks, which are included for optimal thermal management.
Product Overview
The TERRAMASTER F8 SSD is designed for compact efficiency and high performance. Its palm-sized form factor allows for flexible placement while offering robust storage capabilities.

Image: The F8 SSD NAS is shown held in a hand, emphasizing its tiny, light, and portable design, ideal for travel or limited spaces.
Key Features:
- Processor: N95 4-core, 4-thread CPU with turbo frequency up to 3.4GHz.
- Graphics: UHD Graphics with 16 Execution Units.
- Memory: 8GB DDR5 4800MHz RAM (expandable).
- Network: 10GbE Ethernet port for speeds up to 1024MB/s.
- Storage: 8 M.2 2280 NVMe SSD interfaces, supporting up to 8TB per SSD for a total capacity of 64TB.
- Cooling: Innovative convection active cooling design with heat sinks on each SSD and silent fans.
- Noise Level: Below 19dB in standby mode.
- Connectivity: Multiple USB 3.2 ports for external storage expansion.

Image: A visual representation of the F8 SSD's core specifications, highlighting its powerful N95 4-core CPU, 8GB DDR5 RAM, 10GbE port, and support for 8 M.2 SSDs.

Image: The rear panel of the F8 SSD NAS, emphasizing the 10GbE port and illustrating its high-speed data transfer capabilities up to 1024MB/s, suitable for 4K video editing.

Image: This diagram illustrates how eight M.2 2280 NVMe SSDs can be installed to achieve a total storage capacity of up to 64TB.

Image: The F8 SSD NAS can be expanded using USB 3.2 ports, allowing connection to external storage units like the D8 Hybrid to increase total capacity from 64TB to 128TB.
Setup
1. Hardware Installation (SSD & RAM)
The F8 SSD NAS features a tool-free design for easy installation of M.2 NVMe SSDs and RAM expansion. It is recommended to install SSDs and RAM before initial power-on.

Image: This visual guide demonstrates the simple, tool-less process for installing M.2 SSDs and expanding RAM, which can be completed in approximately 2 minutes.
M.2 SSD Installation:
- Gently slide out the internal tray from the NAS unit.
- Locate the M.2 slots on the mainboard.
- Insert each M.2 NVMe SSD into an available slot at a 30-degree angle.
- Gently push down the SSD until it clicks into place. Secure it with the provided screw.
- Attach the included heat sinks to each installed M.2 SSD for optimal thermal performance.
RAM Installation:
- Locate the RAM slot on the mainboard.
- Align the notch on the RAM module with the slot.
- Insert the RAM module firmly into the slot until the clips on both sides lock it in place.
Video: This official TERRAMASTER video demonstrates the step-by-step process for installing M.2 SSDs and upgrading RAM in the F8 SSD NAS unit.
2. Initial Connection
- Connect the Ethernet cable from the NAS's 10GbE port to your network router or switch.
- Connect the power adapter to the NAS and then plug it into a power outlet.
- Press the power button to turn on the NAS.
3. Software Installation and Access (TOS)
The TERRAMASTER F8 SSD runs on the TerraMaster Operating System (TOS). You can access and manage your NAS through a web browser.
- Ensure your computer is connected to the same network as the NAS.
- Open a web browser and enter the IP address of your NAS. If you don't know the IP address, you can use the TerraMaster TNAS PC application (available on the official TerraMaster website) to discover it.
- Follow the on-screen instructions to complete the initial setup, including creating an administrator account and configuring storage volumes (RAID setup). The F8 SSD supports TerraMaster Flexible RAID Array (TRAID / TRAID+).

Image: This diagram illustrates the benefits of TerraMaster Flexible RAID Array (TRAID / TRAID+), comparing its efficiency in available space and protection with traditional RAID 5 and RAID 6 configurations.
Operating Your F8 SSD NAS
File Management and Access
Once configured, you can access your files on the NAS through network shares, FTP, or web-based file managers provided by TOS. The 10GbE port ensures rapid data transfer for large files and demanding applications.
Business Backup Suite (BBS)
The F8 SSD NAS includes TerraMaster's Business Backup Suite (BBS), offering comprehensive data protection features:
- Centralized Backup: Consolidate data from various sources (Windows, physical servers, file servers) to your NAS.
- TerraSync: Synchronize files between your server, PC, and mobile devices.
- Duple Backup: Create off-site backups for disaster recovery.
- CloudSync: Synchronize data with popular cloud storage services (e.g., Amazon S3, Dropbox, Google Drive).
- Snapshot: Protect against ransomware and accidental data deletion with point-in-time recovery.

Image: A comprehensive diagram showcasing the various components and functionalities of the TerraMaster Business Backup Suite (BBS), designed for robust data protection and recovery.
Multimedia Management
The F8 SSD supports 4K hardware decoding, making it an excellent choice for multimedia enthusiasts. It is compatible with popular media servers like Plex, Emby, and Jellyfin.
- Terra Photos: An intelligent photo management application for organizing and accessing your photo collection.
- Stream 4K content directly from your NAS to compatible devices.

Image: This image highlights the F8 SSD's capability for 4K video decoding, supporting popular media platforms like Plex, Emby, and Jellyfin for an enhanced home entertainment experience.
Surveillance Manager
Transform your F8 SSD into a comprehensive surveillance solution by connecting compatible IP cameras. The Surveillance Manager allows for live viewing, recording, and playback of video feeds.
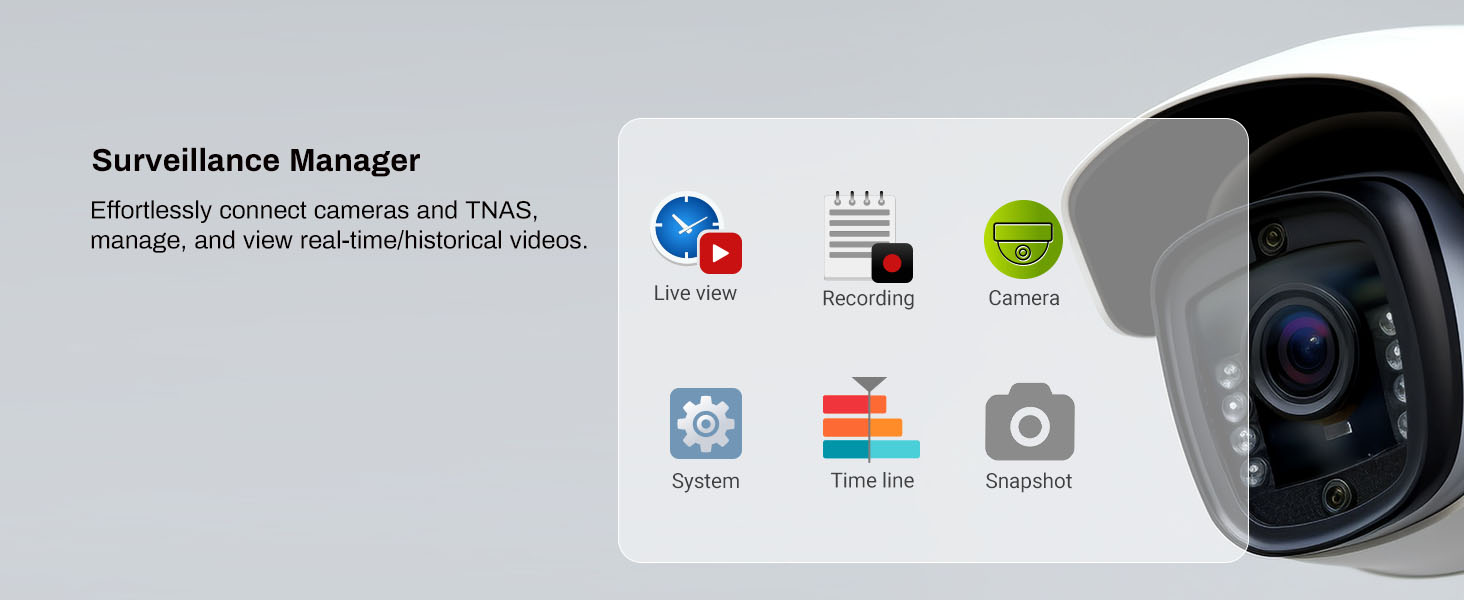
Image: The Surveillance Manager interface is shown, demonstrating its features for effortlessly connecting cameras to the TNAS, managing, and viewing real-time or historical video recordings.
Maintenance
Regular maintenance ensures the longevity and optimal performance of your TERRAMASTER F8 SSD NAS.
- Cleaning: Periodically clean the exterior of the NAS with a soft, dry cloth. Ensure ventilation openings are free from dust and debris. Do not use liquid cleaners.
- Firmware Updates: Regularly check for and install the latest TOS firmware updates through the web interface. Updates often include performance improvements, security patches, and new features.
- Disk Health Check: Monitor the health of your SSDs through the TOS storage manager. Replace any failing drives promptly.
- Backup Verification: Periodically verify your backup jobs to ensure data integrity and successful recovery in case of an emergency.
- Environmental Conditions: Ensure the NAS is operating within recommended temperature and humidity ranges to prevent hardware degradation.

Image: This image highlights the F8 SSD's innovative cooling design, featuring convection active cooling, heat sinks on each SSD, and silent fans to ensure stable and efficient performance even under heavy load.
Troubleshooting
This section addresses common issues you might encounter with your F8 SSD NAS.
| Problem | Possible Cause | Solution |
|---|---|---|
| NAS not powering on | Power cable disconnected, faulty power adapter, power outlet issue. | Check power cable connections. Test the power adapter with another device if possible. Try a different power outlet. |
| Cannot access NAS via network | Network cable disconnected, incorrect IP address, firewall blocking connection, NAS not fully booted. | Verify Ethernet cable connection. Use TNAS PC to find the correct IP. Temporarily disable firewall. Wait for NAS to fully boot (indicated by status lights). |
| Slow data transfer speeds | Network congestion, faulty Ethernet cable, SSD performance degradation, network adapter issues. | Check network activity. Replace Ethernet cable. Monitor SSD health in TOS. Ensure your network adapter supports 10GbE for optimal performance. |
| Disk volume degraded/crashed | One or more SSDs have failed. | Check the storage manager in TOS to identify the faulty SSD. Replace the faulty SSD and initiate RAID rebuild if applicable. Refer to the TOS user guide for detailed RAID recovery steps. |
Specifications
| Feature | Detail |
|---|---|
| Product Dimensions | 5.91 x 3.94 x 1.57 inches (2.4"D x 5.5"W x 6.9"H) |
| Item Weight | 1.32 pounds |
| Manufacturer | TERRAMASTER |
| Item Model Number | F8 SSD |
| Color | Black |
| Material | Plastic |
| Compatible Devices | Android, Linux, Mac, Windows, iOS |
Warranty and Support
TERRAMASTER products typically come with a limited warranty. For specific warranty terms and conditions, please refer to the warranty card included with your product or visit the official TERRAMASTER website. Technical support is available through the TERRAMASTER support portal, knowledge base, and community forums.
For the latest drivers, software, and support resources, please visit: www.terra-master.com
