Suchtale 40-Inch Tow-Behind Spiker Seeder
Suchtale 40-Inch Tow-Behind Spiker Seeder and Aerator Instruction Manual
Model: 40-Inch Tow-Behind Spiker Seeder
1. Introduction
This manual provides essential instructions for the safe assembly, operation, maintenance, and troubleshooting of your Suchtale 40-Inch Tow-Behind Spiker Seeder and Aerator. Please read this manual thoroughly before using the equipment to ensure proper function and to prevent injury or damage.
1.1 Safety Information
Always observe basic safety precautions when operating this equipment. Failure to do so may result in personal injury or damage to the product.
- Read and understand all instructions before assembly and operation.
- Wear appropriate personal protective equipment, including gloves and eye protection.
- Ensure all fasteners are securely tightened before each use.
- Keep children and pets away from the operating area.
- Do not exceed the maximum load capacity of the hopper (100 lbs).
- Operate the unit at a safe and controlled speed, especially on uneven terrain.
2. Components and Parts Identification
Before beginning assembly, verify that all parts are present and undamaged. Refer to the diagram below for identification of major components.

Figure 2.1: Overview of the Suchtale 40-Inch Tow-Behind Spiker Seeder and Aerator.

Figure 2.2: Product dimensions and illustration of working and walking modes. The unit measures 40 inches in length and 19.6 inches in height. The aerator spikes are 8 inches in diameter and can penetrate up to 2 inches deep. The diagram also shows the transition between working mode (spikes engaged) and walking mode (spikes disengaged for transport).
Key Components:
- Hopper: Steel container for seeds or fertilizer.
- Spiker Aerator Tines: Nine 3D star-shaped steel tines for soil penetration.
- Spreader Mechanism: Internal agitator and flow control plate for material distribution.
- Tow Bar: Connects the unit to a tractor or ATV.
- Wheels: 8-inch rubber wheels for mobility.
- Flow Control Lever: Adjusts the opening for material release.
- Transport Handle: Used to lift the aerator spikes for transport mode.
3. Assembly Instructions
Assembly typically requires approximately 2-3 hours. It is recommended to have a second person assist with certain steps. Ensure you have adequate space and the necessary tools (wrenches, screwdrivers) before starting.
3.1 Unpacking and Part Sorting
- Carefully unpack all components from the packaging.
- Sort all nuts, bolts, washers, and other small hardware. While some hardware may be in a single bag, it is crucial to identify each piece according to the provided parts list in your separate assembly guide to ensure correct usage.
- Inspect all parts for any signs of damage. Contact customer service if any parts are missing or damaged.
3.2 Frame Assembly
Follow the detailed diagrams in your separate assembly guide to connect the main frame components. Ensure all bolts are finger-tightened initially, then fully tightened once the section is complete.
3.3 Hopper and Spreader Mechanism Installation
Attach the steel hopper to the assembled frame. Install the internal agitator and the flow control plate. Pay close attention to the orientation of these parts to ensure proper material flow.
3.4 Aerator Spike and Wheel Attachment
Mount the aerator spike assembly onto the axle. Ensure the spikes rotate freely. Attach the 8-inch rubber wheels to the axle, securing them with the appropriate washers and cotter pins. The wheels are designed for smooth movement across various terrains.

Figure 3.1: Illustration of the 8-inch wheels with bearings, designed for smooth movement on various terrains including grass, soil, and paved surfaces.
3.5 Tow Bar and Handle Installation
Attach the tow bar to the front of the unit. Install the transport handle, ensuring it can freely move between the working and transport positions.

Figure 3.2: Detailed view of the nine 3D star-shaped spikes, showing a maximum penetration depth of 2 inches. Also visible are the durable universal tow hitch and the 6mm thick handle designed to prevent bending.
3.6 Final Inspection
After assembly, double-check all connections and fasteners to ensure they are tight and secure. Test the movement of the wheels, the operation of the flow control lever, and the engagement/disengagement of the aerator spikes.
4. Operation
This unit functions as a combination spiker aerator and broadcast spreader, designed to distribute materials while simultaneously aerating the soil.
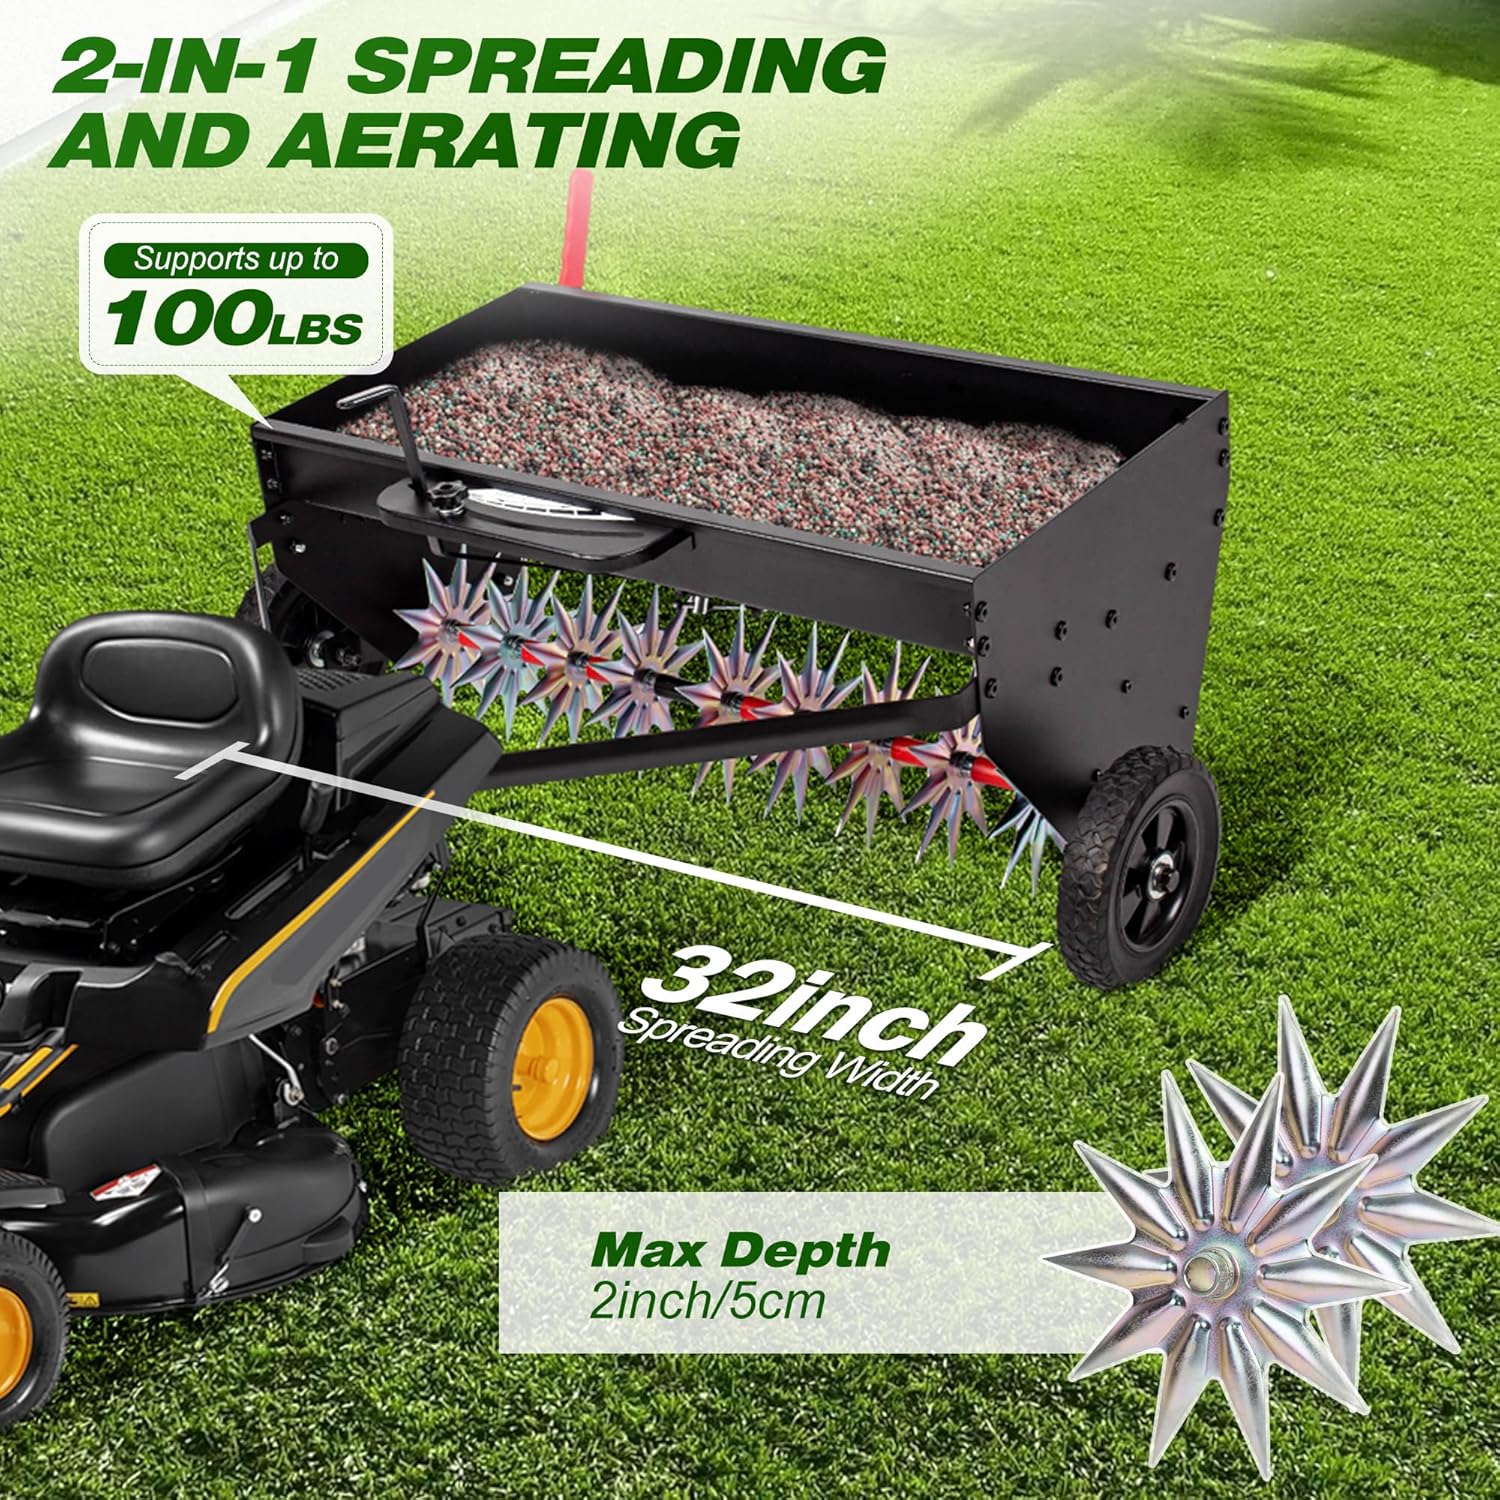
Figure 4.1: The unit supports up to 100 lbs of material and offers a 32-inch spreading width, combining spreading and aerating functions. The aerator spikes penetrate up to 2 inches deep.
4.1 Preparing for Use
- Attach to Tow Vehicle: Securely attach the tow bar to your tractor or ATV using the universal tow hitch.
- Load Hopper: Fill the steel hopper with your desired seed, fertilizer, or other granular material. Do not exceed the 100 lbs capacity.
- Adjust Flow Control: Use the flow control lever with its clear indicators to set the desired spreading rate. The infinitely adjustable stop device allows for precise control and minimizes waste.

Figure 4.2: The flow control mechanism features stepless adjustments for precise flow rate settings, allowing for infinite adjustments for finer seeding or spreading. The image shows the minimum and maximum settings.
4.2 Spreading and Aerating
- Engage Aerator: Lower the transport handle to engage the nine star-shaped aerator spikes into the soil. The spikes must be engaged for the spreading mechanism to operate, as the spreader rotates via a chain connected to the spike rod.
- Begin Operation: Drive your tow vehicle at a consistent, moderate speed. The unit has a spreading width of 32 inches, allowing efficient coverage of large areas.
- Soil Penetration: The 3D steel tines are designed to penetrate compacted soil up to 2 inches deep, creating channels for water, seeds, and nutrients to reach the roots.
- Prevent Clumping: The high-quality steel agitator within the hopper stirs seeds and fertilizers to prevent clumping and ensure even distribution.
4.3 Transport Mode
To move the unit across driveways, sidewalks, or other areas where aeration is not desired, lift the transport handle to disengage the aerator spikes. This raises the spikes off the ground, allowing the unit to roll on its 8-inch transport wheels without aerating.
5. Maintenance
Regular maintenance ensures the longevity and optimal performance of your Suchtale Spiker Seeder and Aerator.
5.1 Cleaning
- After each use, empty any remaining material from the hopper.
- Clean the hopper and spreader mechanism thoroughly to prevent residue buildup, which can lead to clumping or uneven spreading.
- Rinse the aerator spikes to remove soil and debris.
5.2 Inspection and Lubrication
- Regularly inspect all moving parts, including the wheels, axle, and aerator tines, for wear or damage.
- Check all fasteners for tightness and re-tighten as necessary.
- Lubricate moving parts, such as the axle and any pivot points, with a suitable lubricant to ensure smooth operation and prevent rust.
5.3 Storage
- Store the unit in a dry, covered area to protect it from the elements.
- Ensure the hopper is empty and clean before storage.
- If storing for an extended period, consider applying a rust preventative to exposed metal surfaces.
6. Troubleshooting
This section addresses common issues you might encounter during the operation of your spiker seeder and aerator.
| Problem | Possible Cause | Solution |
|---|---|---|
| Uneven spreading or no material flow |
|
|
| Aerator spikes not penetrating soil deeply |
|
|
| Difficulty in assembly (e.g., missing parts, unclear instructions) |
|
|
7. Specifications
| Feature | Detail |
|---|---|
| Model | 40-Inch Tow-Behind Spiker Seeder |
| Spreading Width | 32 inches |
| Hopper Capacity | Supports up to 100 lbs |
| Aerator Tines | 9 star-shaped 3D steel tines |
| Max Aeration Depth | 2 inches (5 cm) |
| Wheels | 8-inch rubber wheels with bearings |
| Construction Material | High-quality steel frame with powder coating, steel hopper |
| Item Weight | 57.9 pounds |
| Package Dimensions | 37 x 17 x 5.5 inches |
8. Customer Service and Support
Suchtale is committed to ensuring that each customer enjoys a satisfying experience. If you have any questions, concerns, or require assistance with your product, please do not hesitate to contact our customer service team. Our team is dedicated to offering expert assistance and resolving any issues you may have.
For support, please refer to the contact information provided with your purchase documentation or visit the official Suchtale website.
Ask a question about this manual
Ask about setup, troubleshooting, compatibility, parts, safety, or missing instructions. Manuals+ will review the question and use this page’s manual context to help answer it.