1. Introduction
The Graigar JW-6000C Intelligent Tile Bond Strength Tester is a specialized instrument designed for accurately measuring the bonding strength of various construction materials. This device is essential for quality control and assessment in construction, particularly for decorative bricks, tiles, mosaics, and various types of panels, paints, coatings, and exterior wall insulation materials such as EPS and SPS panels.
Its integrated design, combining a portable hydraulic jack, pressurization device, and hollow jack, ensures ease of use and reliable performance. The instrument is also suitable for testing the adhesion strength of a wide range of exterior wall building materials and adhesives.
Key Features:
- Measures bonding strength of decorative bricks, tiles, mosaics, and various panels.
- Suitable for testing paints, coatings, and exterior wall insulation materials.
- Portable hydraulic jack with integrated structural design.
- Integrated display and instrument body for streamlined operation.
- Digital display with Mpa/EN adjustable modes.
- Data storage for up to 200 items with query and deletion functions.
- Peak hold function and liquid crystal illumination for enhanced usability.
- High-capacity lithium-ion battery with USB port charging.
2. Product Components
The JW-6000C Intelligent Tile Bond Strength Tester comes with the following components:
- Digital display pressure gauge (integrated with main unit)
- Charger
- Carrying case
- 3 pieces of test blocks (95*45mm/40*40mm)
- AB adhesive
- User manual

Figure 2.1: The JW-6000C Intelligent Tile Bond Strength Tester shown with its included accessories, including test blocks and adhesive.
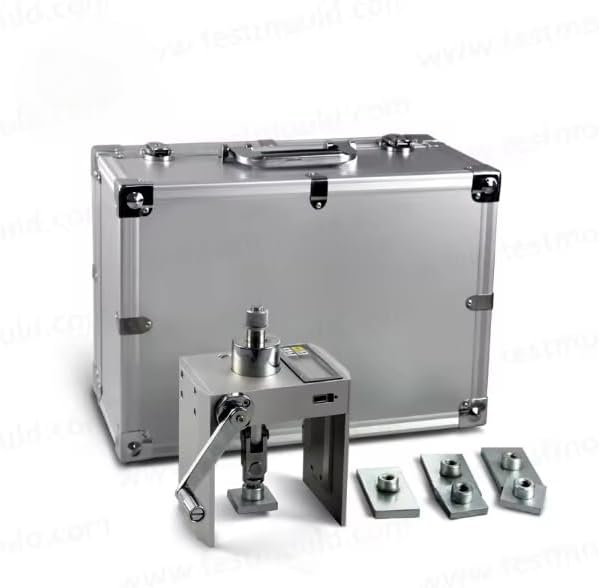
Figure 2.2: The JW-6000C Tester, accessories, and the protective carrying case for transport and storage.
3. Specifications
| Feature | Specification |
|---|---|
| Measuring Range | 0 ~ 6.000 KN / 3.75 Mpa |
| Display Mode | Mpa / EN adjustable |
| Resolution | 0.001 KN |
| Hollow Cylinder Stroke | 10 mm |
| Body Material | Imported alloy material |
| Main Body Weight | 2.0 kg (4.4 lbs) |
| Configurator Display Mode | Digital |
| Data Storage | 200 items |
| Data Query and Deletion | Yes |
| Peak Hold Function | Yes |
| Liquid Crystal Illumination | Yes |
| Battery Type | High-capacity lithium-ion battery |
| Fold Correction | 10 segments |
| Charging Port | USB |
| Product Dimensions | 5.91 x 1.5 x 3.15 inches |
| Item Weight | 7 pounds (total package weight) |
| Manufacturer | Graigar |
| Model Number | JW-6000C |
4. Setup
4.1 Battery Installation and Charging
- Ensure the device is powered off before handling the battery compartment.
- Locate the battery compartment on the device.
- Insert the high-capacity lithium-ion battery, ensuring correct polarity.
- Close the battery compartment securely.
- Connect the provided charger to the USB port on the device and plug it into a power source. The display will indicate charging status.
- Allow the battery to fully charge before first use for optimal performance.
4.2 Preparing for a Test
- Surface Preparation: Ensure the surface of the material to be tested is clean, dry, and free from loose debris.
- Adhesive Application: Apply the AB adhesive evenly to one side of the test block.
- Test Block Attachment: Firmly press the test block onto the prepared surface. Ensure good contact and allow the adhesive to cure completely according to the adhesive manufacturer's instructions. The curing time is critical for accurate results.
- Device Attachment: Position the JW-6000C tester over the attached test block. Align the hollow cylinder of the tester with the center of the test block.
- Secure the Tester: Use the integrated clamping mechanism to securely attach the tester to the test block. Ensure the connection is stable and the tester is perpendicular to the surface.
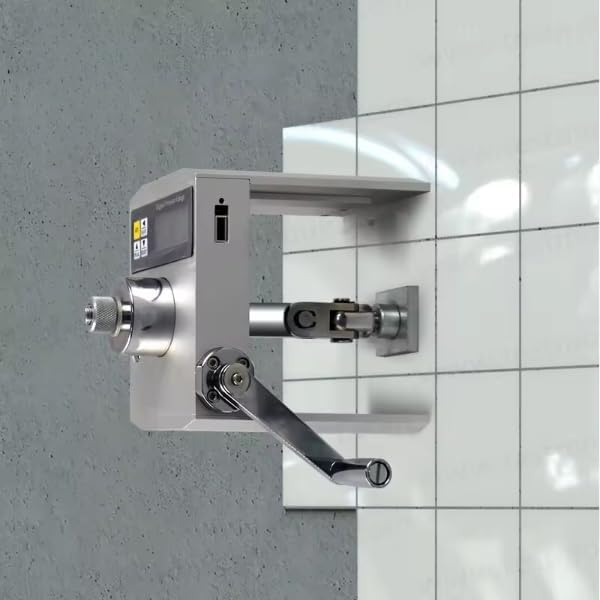
Figure 4.1: The JW-6000C tester securely attached to a tiled wall, ready to perform a bond strength test.
5. Operating Instructions
5.1 Powering On and Display Settings
- Press the power button to turn on the device. The digital display will illuminate.
- Use the mode button to switch between Mpa and EN display units as required for your test.
- If visibility is low, activate the liquid crystal illumination function for better readability.
5.2 Performing a Bond Strength Test
- With the tester securely attached to the test block (as described in Section 4.2), ensure the display reads zero or is reset.
- Slowly and steadily turn the handle of the hydraulic jack. This action will apply an upward force to the test block.
- Observe the digital display. The force being applied will increase until the bond between the test block and the surface breaks.
- The device's peak hold function will automatically record and display the maximum force (bond strength) achieved at the point of failure.
- Record the displayed bond strength value.
- Release the pressure by turning the handle in the opposite direction.
- Carefully detach the tester from the test block.
5.3 Data Management
- The JW-6000C can store up to 200 test results.
- Use the navigation buttons to query stored data.
- Individual test results can be reviewed and deleted as needed. Refer to the on-screen menu for specific instructions on data management.
6. Maintenance
6.1 Cleaning
- After each use, wipe the exterior of the device with a soft, dry cloth to remove any dust or residue.
- Avoid using abrasive cleaners or solvents, as these can damage the display or housing.
- Ensure no moisture enters the electronic components.
6.2 Storage
- Store the JW-6000C in its protective carrying case when not in use.
- Keep the device in a cool, dry place, away from direct sunlight, extreme temperatures, and high humidity.
- For long-term storage, ensure the battery is partially charged (around 50%) to prolong its lifespan. Recharge periodically if stored for extended periods.
6.3 Battery Care
- Avoid fully discharging the battery frequently.
- Charge the battery using only the provided charger.
- If the battery shows signs of damage or swelling, discontinue use and replace it with an authorized replacement.
7. Troubleshooting
This section addresses common issues you might encounter with the JW-6000C tester.
7.1 Device Does Not Power On
- Check Battery: Ensure the battery is correctly installed and sufficiently charged. Connect the charger and attempt to power on.
- Charger Connection: Verify the charger is properly connected to both the device and a working power outlet.
7.2 Inaccurate Readings
- Test Block Adhesion: Ensure the test block was properly adhered to the surface and the adhesive fully cured. Poor adhesion will lead to premature failure and low readings.
- Device Alignment: Verify the tester is securely and perpendicularly attached to the test block. Misalignment can introduce errors.
- Surface Condition: Ensure the test surface was clean and dry before applying the test block.
- Calibration: If persistent inaccuracies occur, the device may require recalibration. Contact customer support for assistance.
7.3 Display Issues
- No Display/Flickering: Check battery charge. If the issue persists, contact customer support.
- Unreadable Display: Ensure liquid crystal illumination is active in low-light conditions.
7.4 Data Storage/Retrieval Problems
- Memory Full: If the device indicates memory is full, delete old or unnecessary data to free up space.
- Corrupted Data: If data appears corrupted, try resetting the device (refer to the full manual for reset procedures, if available). If the problem persists, contact customer support.
8. Warranty and Support
Specific warranty details for the Graigar JW-6000C Intelligent Tile Bond Strength Tester are not provided in this document. Please refer to the warranty card included with your product or visit the official Graigar website for comprehensive warranty information.
For technical support, service, or inquiries regarding your device, please contact Graigar customer service through their official channels. Contact information can typically be found on the manufacturer's website or in the product packaging.


