Important Safety Information
Please read all instructions carefully before assembly and use. Keep this manual for future reference.
- Ensure all components are present and undamaged before beginning assembly.
- Install anti-noise foam stickers properly to minimize noise and ensure a quiet sleeping environment.
- Be careful around sharp edges during assembly to prevent injury.
- Do not exceed the maximum weight capacity of 900 pounds (408 kg).
- Periodically check all bolts and screws to ensure they remain tight.
- Keep electrical components (LED lights, USB charging station) away from water.
Package Contents
Verify that all the following items are included in your package:
- Bed Frame Components (Metal beams, support legs, slats)
- LED Light Strips
- Accessory Bag (Screws, bolts, nuts, anti-noise foam stickers, zip ties)
- Assembly Tool (Hex key, wrench)
- Instruction Manual
Setup Instructions
Follow these steps for proper assembly of your SANGMUCEN Floating Full Bed Frame. It is recommended to have two people for assembly.
Step 1: Frame Assembly
Unpack all components and lay them out on a clean, soft surface to prevent scratches. Connect the main frame sections using the provided bolts and the assembly tool. Ensure all connections are secure but do not fully tighten until the entire frame is assembled.

Image: Initial assembly of the metal bed frame components.
Step 2: Install Support Legs and Slats
Attach the central support legs to the frame. Then, place the steel slats across the frame. Ensure the slats are evenly spaced and securely fastened to the side rails. Apply the anti-noise foam stickers to the slats where they contact the frame to prevent squeaking.

Image: Detail of the sturdy frame structure and mattress stopper installation.
Step 3: Attach Mattress Stopper and Power Outlet
Install the mattress slide stoppers at the foot of the bed frame to prevent the mattress from shifting. Secure the built-in power strip with 2 outlets and 2 USB ports to the designated area on the headboard side of the frame.
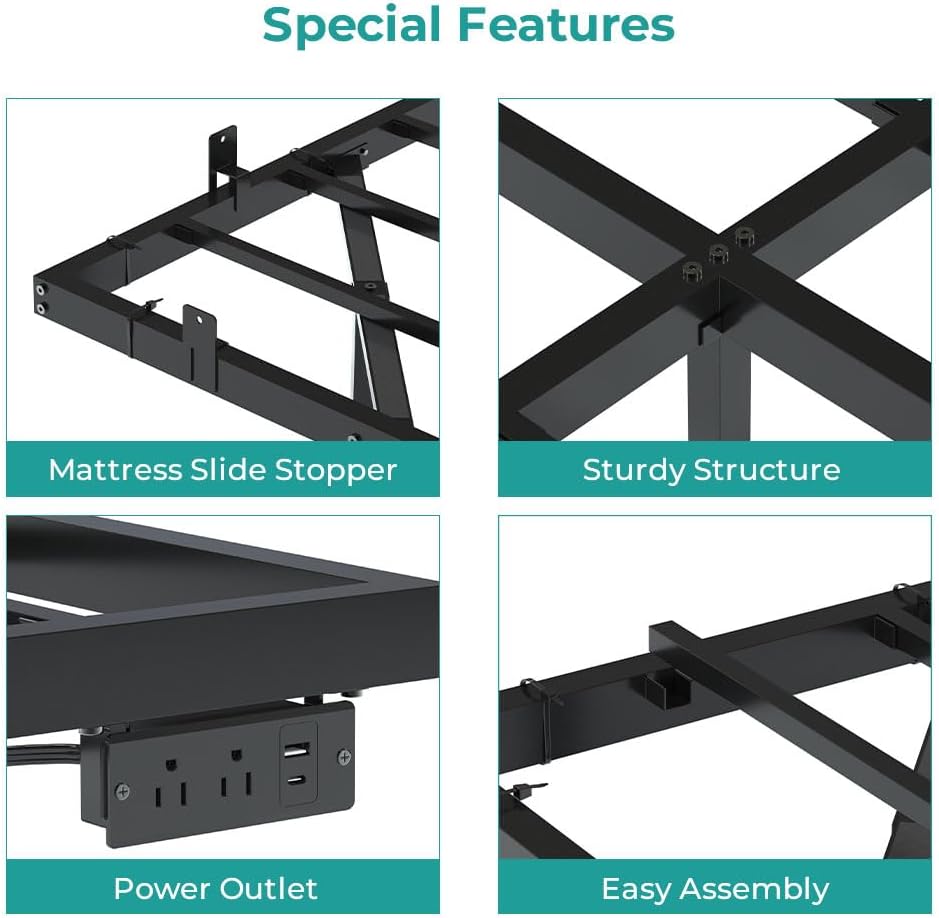
Image: The integrated power outlet with two AC outlets and two USB ports.
Step 4: Install LED Light Strips
Carefully attach the RGB LED light strips to the three sides of the underbed frame using the strong Velcro and provided zip ties. Ensure the strips are firmly secured to prevent them from falling off. Connect the LED light controller.

Image: Zip ties are provided to ensure the LED light strips remain securely attached to the metal frame.
Step 5: Final Tightening
Once all components are in place, go back and fully tighten all bolts and screws. Place your mattress on the frame. The hidden support legs create a floating effect, enhancing the modern aesthetic of your bedroom.
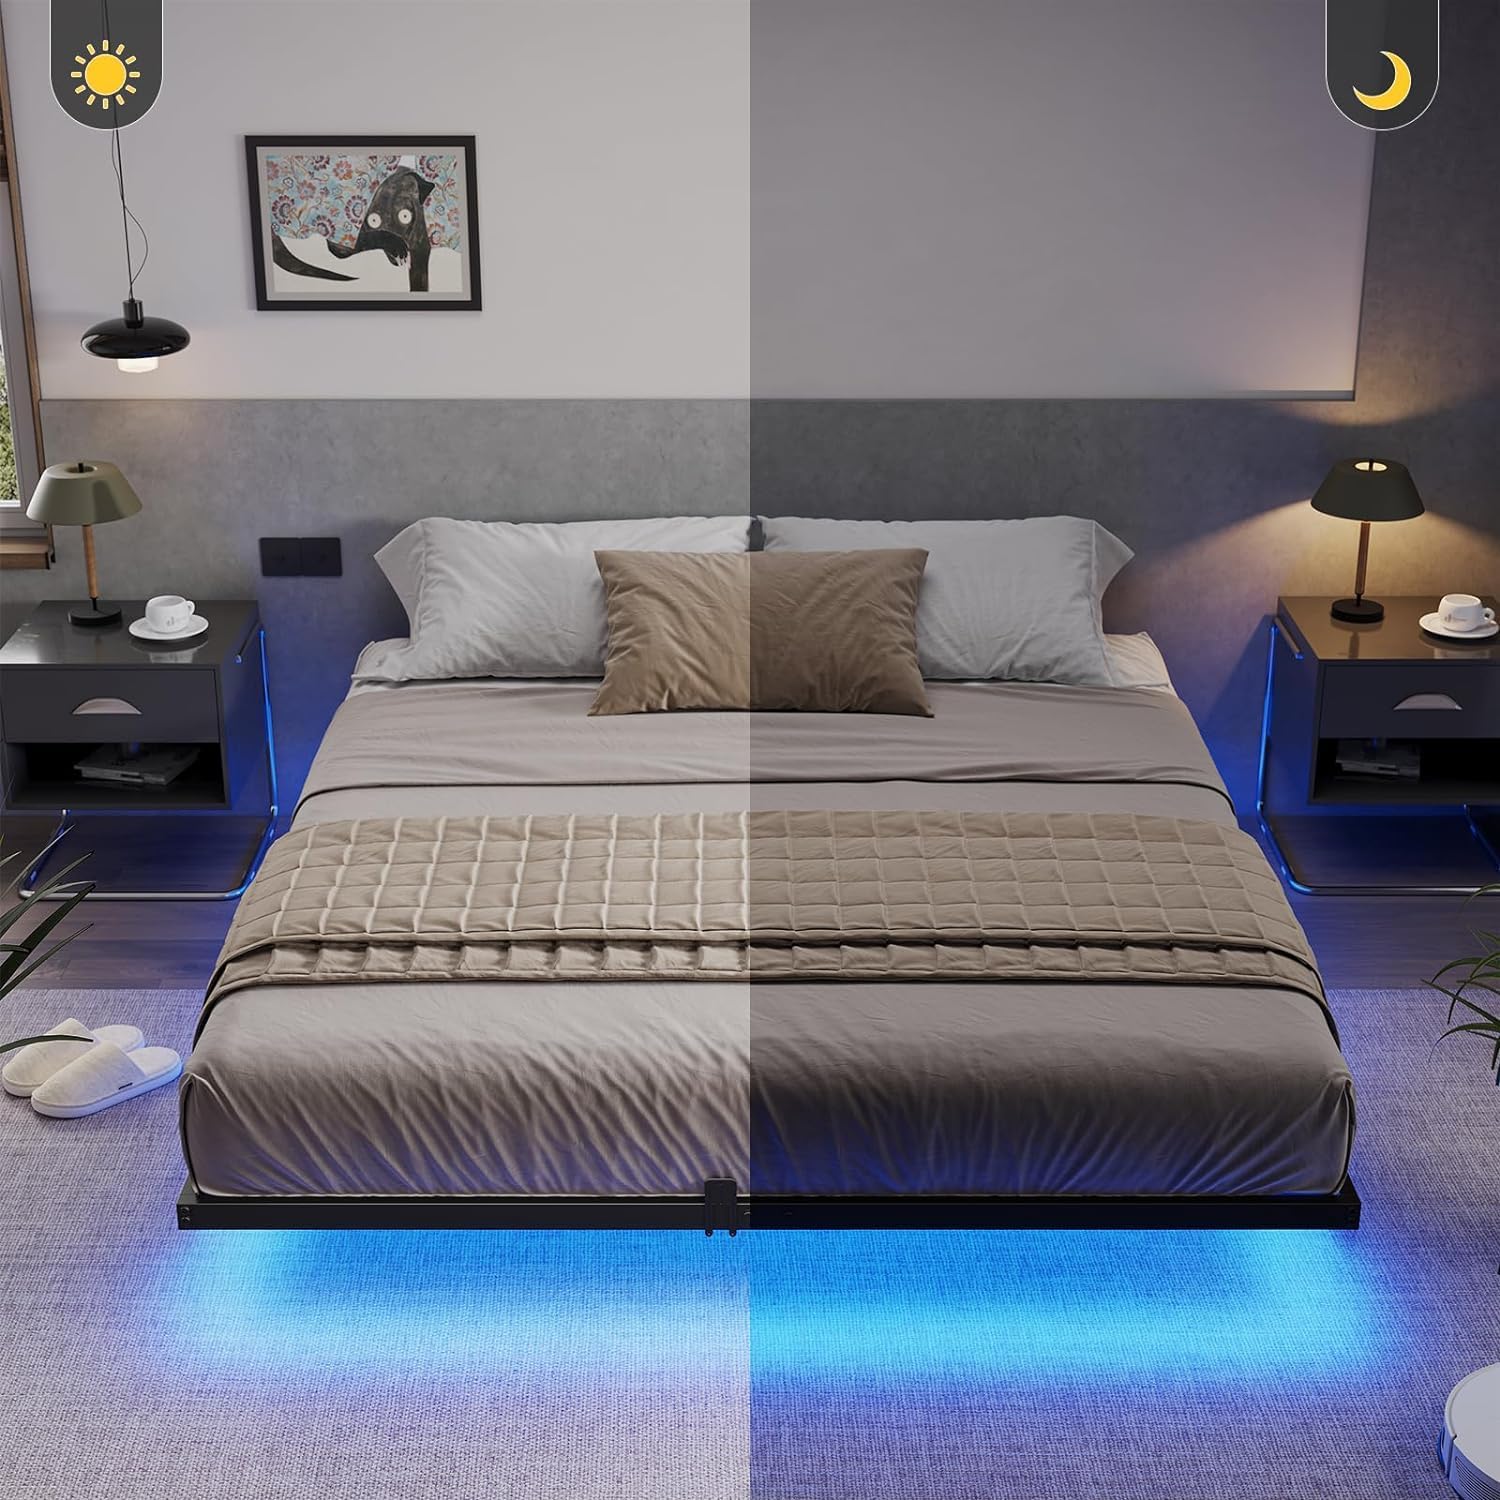
Image: The floating design of the bed frame with integrated LED lighting.
Operating Instructions
LED Lights Operation
The RGB LED lights can be controlled via a mobile app, remote control, or a button on the light strip controller. Refer to the separate LED light controller manual for detailed instructions on app pairing and remote functions.
- Color Selection: Explore over 60,000 colors through the mobile app.
- Brightness Adjustment: Customize the light intensity to your preference.
- Modes: Choose from various dynamic modes, including music sync, which allows the lights to change with your audio.
- Timer Function: Set schedules for the lights to turn on or off automatically.

Image: Overview of the smart RGB LED lights and their control methods (switch, app, remote).
USB Charging Station
The built-in power strip provides convenient access to charge your electronic devices. Simply plug your phone, tablet, or other mobile devices into the 2 outlets or 2 USB ports located on the headboard.
Maintenance
- Cleaning: Wipe the metal frame with a damp cloth and mild detergent. Avoid abrasive cleaners.
- Connections: Periodically check all bolts and screws for tightness. Re-tighten if necessary to maintain stability and prevent noise.
- LED Strips: Ensure the LED strips remain securely attached. If they become loose, re-secure them with the provided zip ties or suitable adhesive.
- Electrical: Keep the charging station clean and free of dust. Do not attempt to repair or modify the electrical components.
Troubleshooting
- Bed Frame is Squeaky: Ensure all bolts are fully tightened. Check that anti-noise foam stickers are properly installed between the slats and the frame.
- LED Lights Not Working: Check the power connection to the LED controller. Ensure the remote control battery is functional. Verify the light strips are securely connected to the controller. Refer to the LED light controller manual for specific troubleshooting steps.
- LED Strips Falling Off: Re-secure the LED strips using the provided zip ties. If necessary, use additional strong adhesive or clips designed for LED strip installation.
- Devices Not Charging via USB/Outlets: Ensure the power strip is properly plugged into a functional wall outlet. Check if the devices themselves are working correctly.
- Frame Feels Unstable: Double-check that all frame connections and support legs are correctly assembled and fully tightened. Ensure the bed is on a flat, level surface.
Specifications
| Brand | SANGMUCEN |
| Model Number | HBF002H01 |
| Size | Full/Double |
| Product Dimensions | 190L x 137W x 20H Centimetres (75.0"L x 54.0"W x 7.7"H) |
| Material | Alloy Steel |
| Color | Black |
| Weight Capacity | 900 lbs (408 kg) |
| Special Features | No Box Spring Needed, LED Lighting, USB Port, Floating Design, Charging Station |
| Included Components | Bed Frame, Light Strips, Accessory Bag, Assembly Tool, Instructions |

Image: Full size bed frame dimensions and weight capacity.
Warranty and Support
For warranty information or technical support, please refer to the contact details provided with your purchase documentation or visit the official SANGMUCEN website. Please have your model number (HBF002H01) and purchase date ready when contacting support.