1. Introduction
This manual provides detailed instructions for the installation, operation, and maintenance of the repustor Car Headlight Switch, model 5L3Z-11654-CAB. This product is designed as a direct replacement part for specific Ford F150 models, ensuring proper fitment and functionality. Please read this manual thoroughly before installation and use to ensure safe and correct operation.
2. Vehicle Compatibility
This headlight switch is specifically designed to be compatible with the following vehicle models:
- Ford F150: 2004, 2005, 2006, 2007, 2008 models.
Important Note: Always verify the part number (5L3Z-11654-CAB or 5L3Z11654CAB) and compare with the original part and provided images before purchasing and installing to ensure proper fitment.
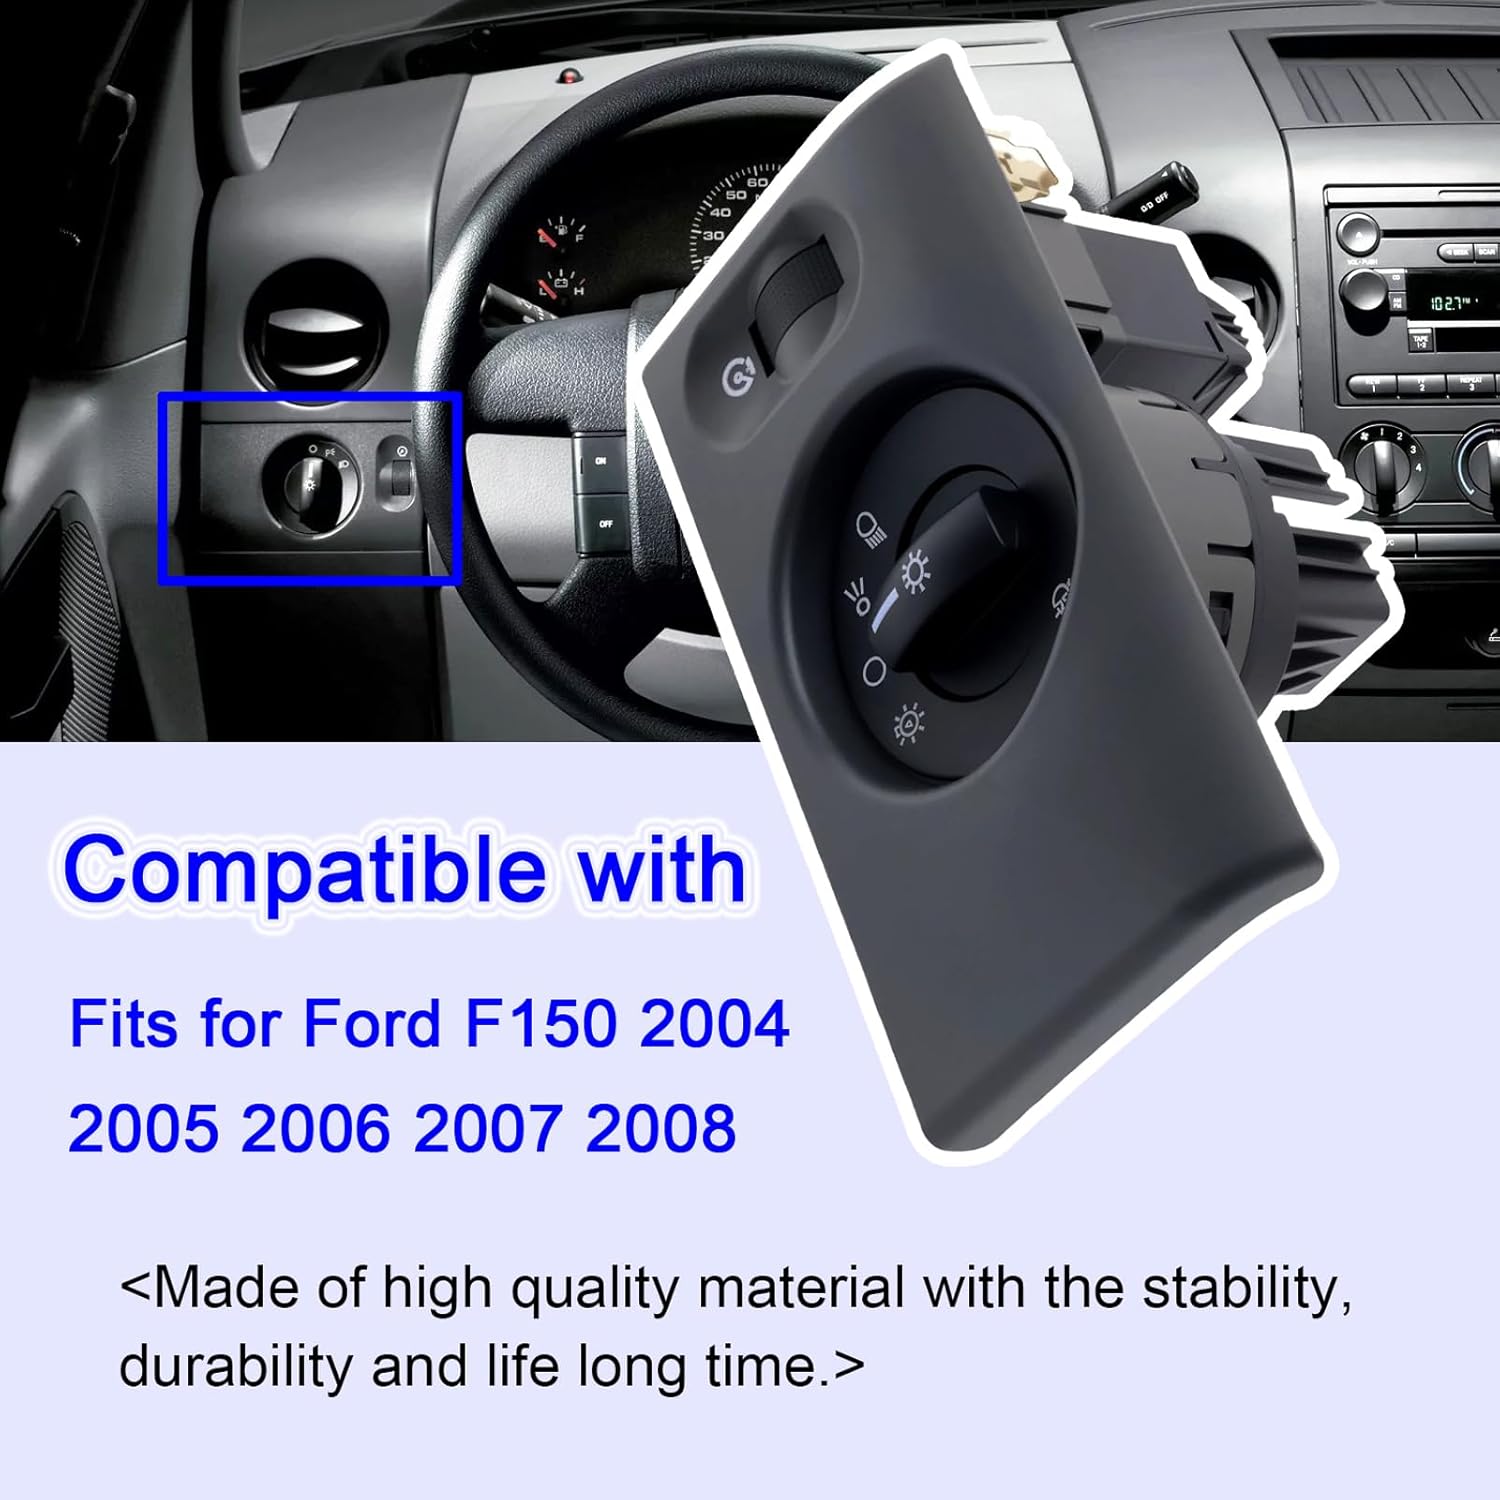
Image: The repustor headlight switch shown in a compatible Ford F150 dashboard, highlighting its intended fit and appearance within the vehicle's interior. This image helps confirm visual compatibility for users.
3. Product Features
The repustor Car Headlight Switch offers the following key features:
- Direct Replacement: Designed to directly replace OEM part numbers 5L3Z-11654-CAB and 5L3Z11654CAB.
- High Quality Construction: Manufactured from durable materials for stability, longevity, and reliable performance.
- Plug and Play Installation: Engineered for straightforward installation without complex modifications.
- Integrated Controls: Features controls for headlights, parking lights, fog lights, and dashboard dimming.
- Color: Black finish to match vehicle interior.

Image: A detailed display of the headlight switch, showcasing the various control icons for headlights, parking lights, and fog lights, along with the dimmer knob and the rear electrical connectors. This view emphasizes the functional aspects and build quality.
4. Installation Guide
While this product is designed for plug-and-play installation, it is recommended that installation be performed by a qualified automotive technician. Incorrect installation can lead to electrical issues or damage to the vehicle's systems. Always disconnect the vehicle's battery before beginning any electrical work.
Required Tools:
- Basic automotive trim removal tools (plastic pry tools)
- Screwdriver set (Phillips and/or Torx, depending on vehicle)
- Socket wrench set (if applicable for mounting bolts)
Installation Steps:
- Safety First: Ensure the vehicle is turned off and the parking brake is engaged. Disconnect the negative terminal of the vehicle's battery to prevent electrical shorts.
- Access the Old Switch: Carefully locate the existing headlight switch on your dashboard. Depending on your vehicle model, you may need to remove surrounding trim panels to access the switch mounting screws or clips. Use plastic pry tools to avoid scratching interior surfaces.
- Remove Old Switch: Unscrew any retaining screws or release clips holding the old switch in place. Gently pull the switch assembly out from the dashboard.
- Disconnect Wiring: Carefully disconnect the electrical connectors from the back of the old headlight switch. Note the orientation of the connectors if there are multiple.
- Inspect New Switch: Before installing, compare the new repustor headlight switch with the old one to ensure they are identical in shape, size, and connector configuration.
- Connect New Switch: Connect the vehicle's electrical harnesses to the corresponding ports on the back of the new repustor headlight switch. Ensure connections are secure and click into place.
- Install New Switch: Slide the new switch assembly into the dashboard opening. Secure it with the retaining screws or clips removed earlier. Ensure it sits flush with the dashboard.
- Reassemble Trim: Reinstall any trim panels that were removed during the process, ensuring all clips and screws are properly secured.
- Reconnect Battery: Reconnect the negative terminal of the vehicle's battery.
- Test Functionality: Turn on the vehicle and test all functions of the new headlight switch, including headlights (low and high beam), parking lights, fog lights (if applicable), and dashboard dimmer.

Image: A dual view of the repustor headlight switch, displaying both its front control panel and its rear with the electrical connectors. This image is crucial for verifying the correct part and understanding the connection points during installation.
5. Operating Instructions
The repustor Car Headlight Switch operates similarly to the original equipment manufacturer (OEM) part. Familiarize yourself with the various positions and functions:
- OFF Position (O): All exterior lights are off.
- Parking Lights Position (P): Activates parking lights, taillights, side marker lights, and dashboard lights.
- Headlights ON Position (Headlight Symbol): Activates low beam headlights, along with parking lights, taillights, side marker lights, and dashboard lights.
- Automatic Headlights (A - if equipped): In this position, the vehicle's light sensor automatically turns the headlights on or off based on ambient light conditions.
- Fog Lights (Fog Light Symbol - if equipped): Pull the switch out or press the button (depending on design) to activate front fog lights when headlights are on.
- Dashboard Dimmer (Rotary Knob): Rotate the small knob (often located above the main switch) to adjust the brightness of the dashboard illumination.

Image: The primary view of the repustor car headlight switch, showcasing its black finish and the clear markings for various light functions, including the main rotary switch and the dimmer knob. This image provides a clear visual reference for operation.
6. Maintenance and Care
The repustor Car Headlight Switch requires minimal maintenance. Follow these guidelines to ensure its longevity:
- Cleaning: Wipe the surface of the switch with a soft, damp cloth. Avoid using harsh chemicals or abrasive cleaners, as these can damage the finish or markings.
- Inspection: Periodically check the switch for any signs of physical damage, loose connections, or unusual operation.
- Avoid Force: Do not apply excessive force when operating the switch. It is designed for smooth, precise movements.
7. Troubleshooting
If you encounter issues with your repustor Car Headlight Switch, consider the following common troubleshooting steps:
- Lights Not Turning On/Off:
- Check vehicle fuses related to lighting. A blown fuse can prevent lights from working.
- Ensure all electrical connectors are securely plugged into the back of the switch.
- Verify that the light bulbs themselves are not burnt out.
- Intermittent Operation:
- This could indicate a loose connection. Re-check the wiring harness connections.
- Inspect for any debris or foreign objects that might be obstructing the switch mechanism.
- Dashboard Lights Not Dimming:
- Ensure the dimmer knob is rotated correctly.
- Check for any separate fuses related to interior illumination.
- Switch Feels Loose or Sticky:
- This may indicate physical damage or wear. If the switch is new, ensure it was installed correctly and securely.
If troubleshooting steps do not resolve the issue, it is recommended to consult a professional automotive technician for diagnosis and repair.
8. Product Specifications
| Attribute | Detail |
|---|---|
| Brand | repustor |
| Model Number | 5L3Z-11654-CAB, 5L3Z11654CAB |
| Compatible Vehicles | Ford F150 (2004-2008) |
| Color | Black |
| Operation Mode | Manual |
| Contact Type | Normally Open |
| Connector Type | Plug In |
| Terminal Type | Screw |
| Circuit Type | 1-way |
| Actuator Type | Hinge Lever |
| Contact Material | Copper |
| Number of Positions | 1 |
| Control Method | Touch |
| Item Dimensions (L x W x H) | 5 x 4 x 3 inches |
| Item Weight | 8 ounces |

Image: A diagram illustrating the physical dimensions of the repustor headlight switch, with measurements of 5.31 inches, 3.35 inches, and 2.95 inches. This image is helpful for verifying the physical fit before installation.
9. Warranty and Support
For information regarding product warranty, returns, or technical support, please refer to the seller's policy on the platform where the product was purchased or contact the manufacturer directly. Keep your purchase receipt as proof of purchase.
For any questions or assistance, please send a message to the seller or manufacturer through the respective customer service channels.