Introduction
Thank you for choosing the Luminzone 3-Head Outdoor Post Lamp. This manual provides essential information for the safe installation, operation, and maintenance of your new outdoor lighting fixture. Please read these instructions thoroughly before beginning installation and retain them for future reference.

Image: Overall view of the Luminzone 3-Head Outdoor Post Lamp with seeded glass.
Important Safety Information
WARNING: Risk of Electric Shock. Disconnect power at the fuse or circuit breaker before installing or servicing.
- Always consult a qualified electrician if you are unsure about the installation process.
- Ensure all electrical connections comply with local codes and ordinances.
- Do not install this fixture on a wet surface.
- Use only bulbs of the specified type and wattage.
- Keep flammable materials away from the light fixture.
Package Contents
Verify that all components are present before beginning installation:
- Luminzone 3-Head Outdoor Post Lamp (Model 7X7PL-3W BK)
- Mounting Hardware
- Assembly Instructions (this manual)
Note: Bulbs are NOT included and must be purchased separately.
Product Specifications
| Feature | Specification |
|---|---|
| Brand | Luminzone |
| Model Number | 7X7PL-3W BK |
| Color | Black-3 Head Seeded Glass |
| Material | Aluminum frame, Glass shade |
| Style | Antique |
| Dimensions (L x W x H) | 85.5"L x 22"W x 22"H |
| Indoor/Outdoor Usage | Outdoor |
| Power Source | AC (Hard-wired) |
| Water Resistance Level | Waterproof |
| Bulb Base | E26 (3 bulbs required) |
| Max Wattage per Bulb | 60W (Bulbs NOT Included) |
| Voltage | 120 Volts |
| Mounting Type | Pole Mount |
| Required Assembly | Yes |

Image: Detailed view of the lamp post's metal frame, seeded glass, and base for easy setup.
Setup and Installation
This lamp post requires hard-wired installation. Professional installation is recommended.
- Prepare the Installation Area: Ensure the power supply to the installation area is turned OFF at the circuit breaker or fuse box.
- Assemble the Post: Carefully unpackage all components. Follow the included assembly instructions for connecting the various sections of the lamp post.
- Mount the Base: Secure the lamp post base to a stable, level surface using the provided mounting hardware. Ensure the base is firmly anchored.
- Wire the Fixture:
- Connect the black wire from the fixture to the black (live) wire from your power supply.
- Connect the white wire from the fixture to the white (neutral) wire from your power supply.
- Connect the ground wire (usually green or bare copper) from the fixture to the ground wire from your power supply.
- Secure all connections with wire nuts and electrical tape.
Note: Some wires from the fixture may both be black. The wire with writing on it typically connects to the black (live) house wire, and the other wire connects to the white (neutral) house wire. Consult a professional if unsure.
- Install Bulbs: Insert three E26 base bulbs (not included) into the sockets. Do not exceed 60W per bulb. Compatible bulb types include incandescent, LED, CFL, and halogen.
- Secure Glass Shades: Carefully attach the seeded glass shades to each lamp head.
- Restore Power: Once installation is complete and all connections are secure, turn the power supply back ON at the circuit breaker.
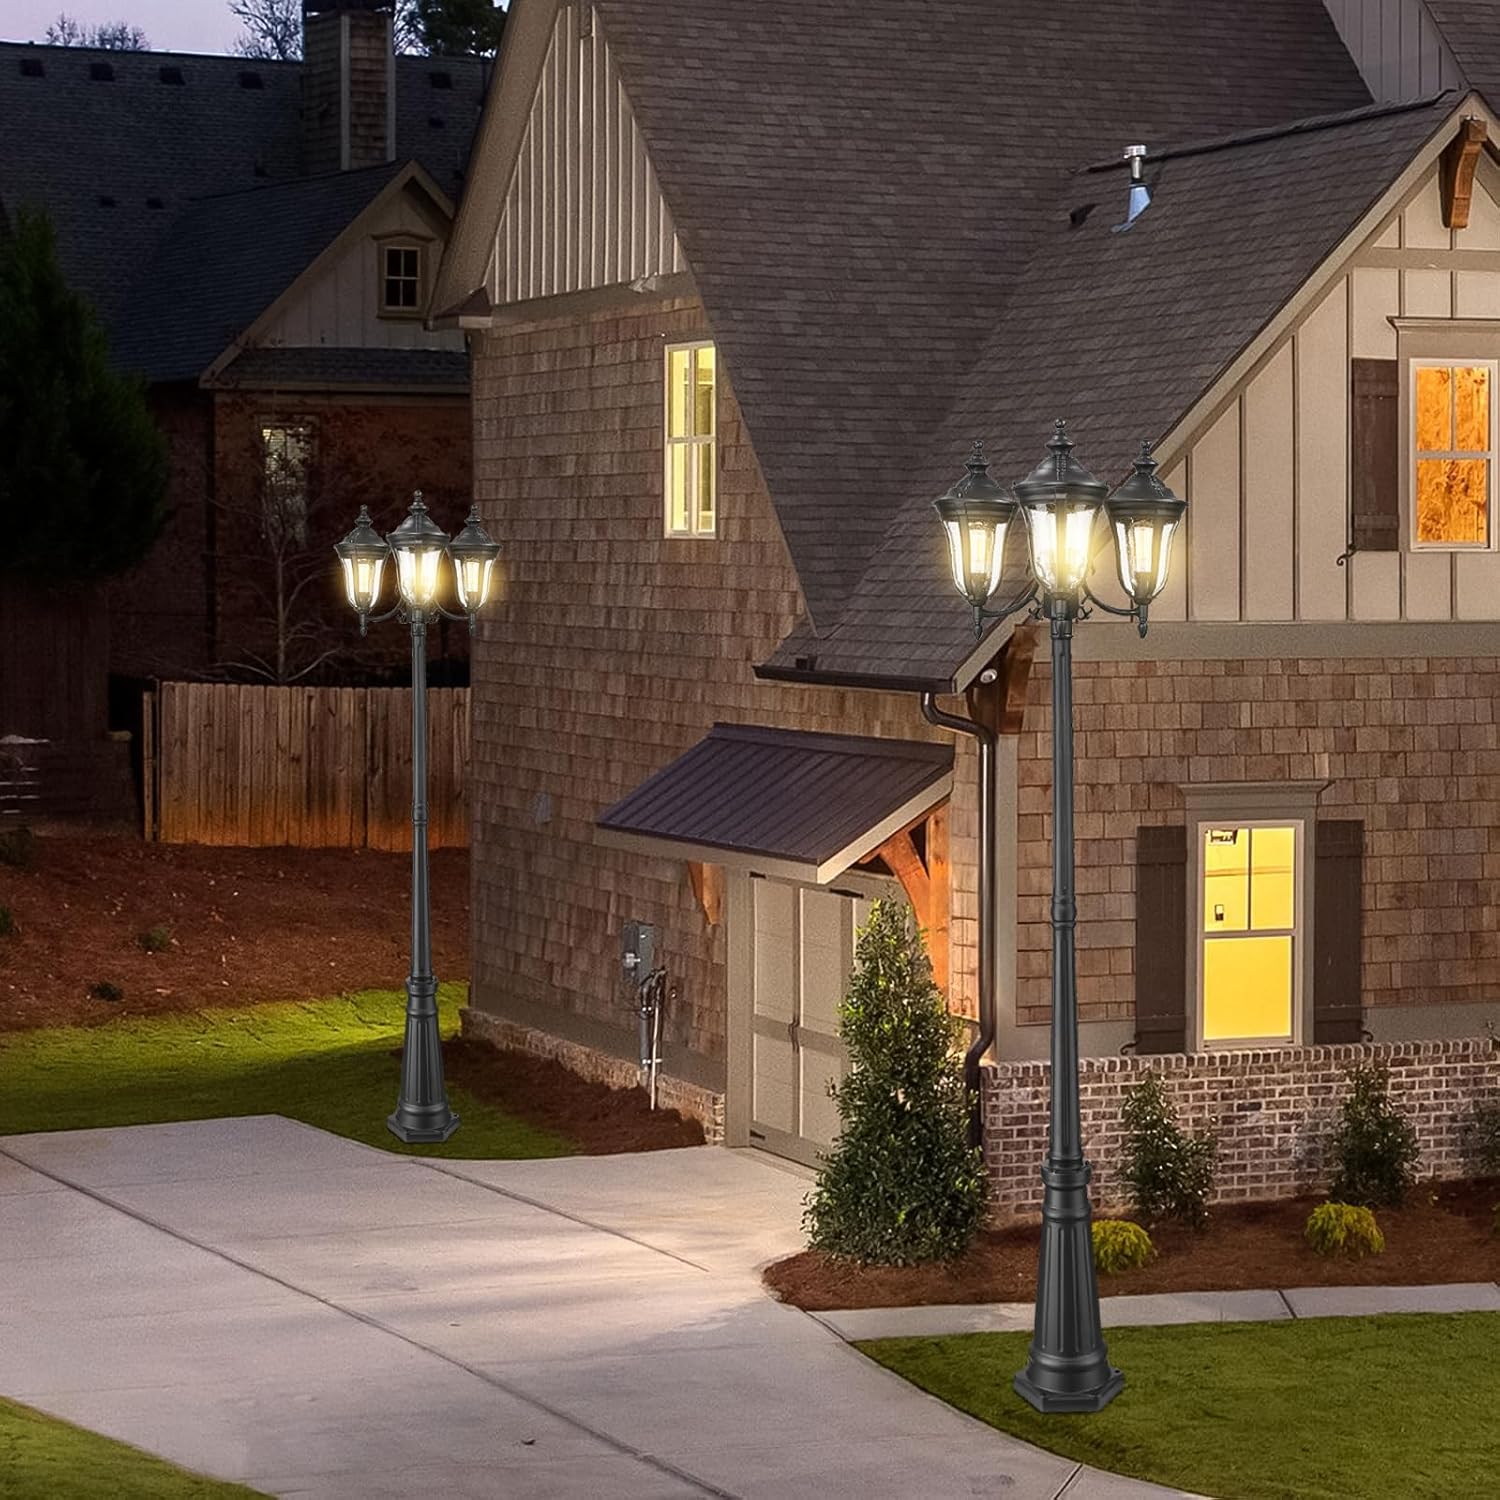
Image: Icons indicating hard-wired connection and easy installation.

Image: Information detailing E26 bulb compatibility, requiring three E26 base bulbs, maximum 60W, bulbs not included.
Operating Instructions
The Luminzone 3-Head Outdoor Post Lamp is designed for continuous outdoor illumination once hard-wired. Operation is typically controlled by an external wall switch or a compatible outdoor lighting timer (not included).
Bulb Replacement:
- Ensure power to the fixture is OFF at the circuit breaker before replacing bulbs.
- Carefully remove the glass shade to access the bulb.
- Unscrew the old bulb and screw in a new E26 base bulb, not exceeding 60W.
- Reattach the glass shade securely.
- Restore power to the fixture.
Maintenance
This outdoor post lamp is constructed from durable materials and designed to be weather-resistant, requiring minimal maintenance.
- Cleaning: To clean the fixture, ensure power is off. Wipe with a soft, damp cloth. Do not use abrasive cleaners or solvents, as these may damage the finish or glass.
- Weather Resistance: The fixture is designed to be waterproof, sunproof, snowproof, and stormproof. Regularly inspect for any damage that might compromise its weather resistance.

Image: Icons illustrating the weather-resistant features of the lamp: waterproof, sunproof, snowproof, and stormproof.
Troubleshooting
| Problem | Possible Cause | Solution |
|---|---|---|
| Light does not turn on. |
|
|
| Light flickers. |
|
|
| Water inside fixture. |
|
|
Warranty and Support
This Luminzone product comes with a 1-year manufacturer's warranty. If you encounter any issues or have questions regarding your product, please contact Luminzone customer service for assistance.
For further support, please visit the Luminzone store on Amazon: Luminzone Store