
1. Introduction
This manual provides essential information for the safe and efficient operation of your suplife PD9260C 60 Amp RV Power Converter. The PD9260C is designed to convert 105-130 VAC shore power into 13.6 VDC power, suitable for charging lead-acid batteries and powering 12V RV appliances. It features intelligent 4-stage charging and various protection mechanisms to ensure reliable performance. Please read this manual thoroughly before installation and use.

Image 1.1: The suplife PD9260C 60 Amp RV Power Converter with included Allen wrench and power cord.
2. Safety Information
WARNING: Failure to follow these safety instructions may result in electric shock, fire, or serious injury.
- Always disconnect AC power before making or breaking any electrical connections.
- Ensure proper grounding of the converter.
- Do not operate the converter in wet or damp conditions.
- Do not attempt to open or service the converter yourself. Refer all servicing to qualified personnel.
- Ensure adequate ventilation around the converter to prevent overheating.
- This converter is designed for lead-acid batteries (including AGL and GEM types). Do not use with other battery chemistries unless explicitly stated by the manufacturer.
- Verify correct polarity when connecting to batteries to prevent damage.
3. Product Features
- Smart 4-Stage Charging: Actively monitors battery and load, adjusting output for rapid charging, float maintenance, and load coverage.
- Battery Compatibility: Designed for lead-acid batteries, AGL batteries, and GEM batteries.
- Wide Compatibility: Compatible as a replacement for PD9260C, PD9260CV, PD9260, and other Inteli-Power PD9200 Series converters.
- Protection Features: Includes over-voltage, under-voltage, short-circuit, and reverse polarity protection.
- Intelligent Cooling Fan: Features a fan for efficient heat dissipation.

Image 3.1: The PD9260C Power Converter shown in an RV environment, highlighting its application.
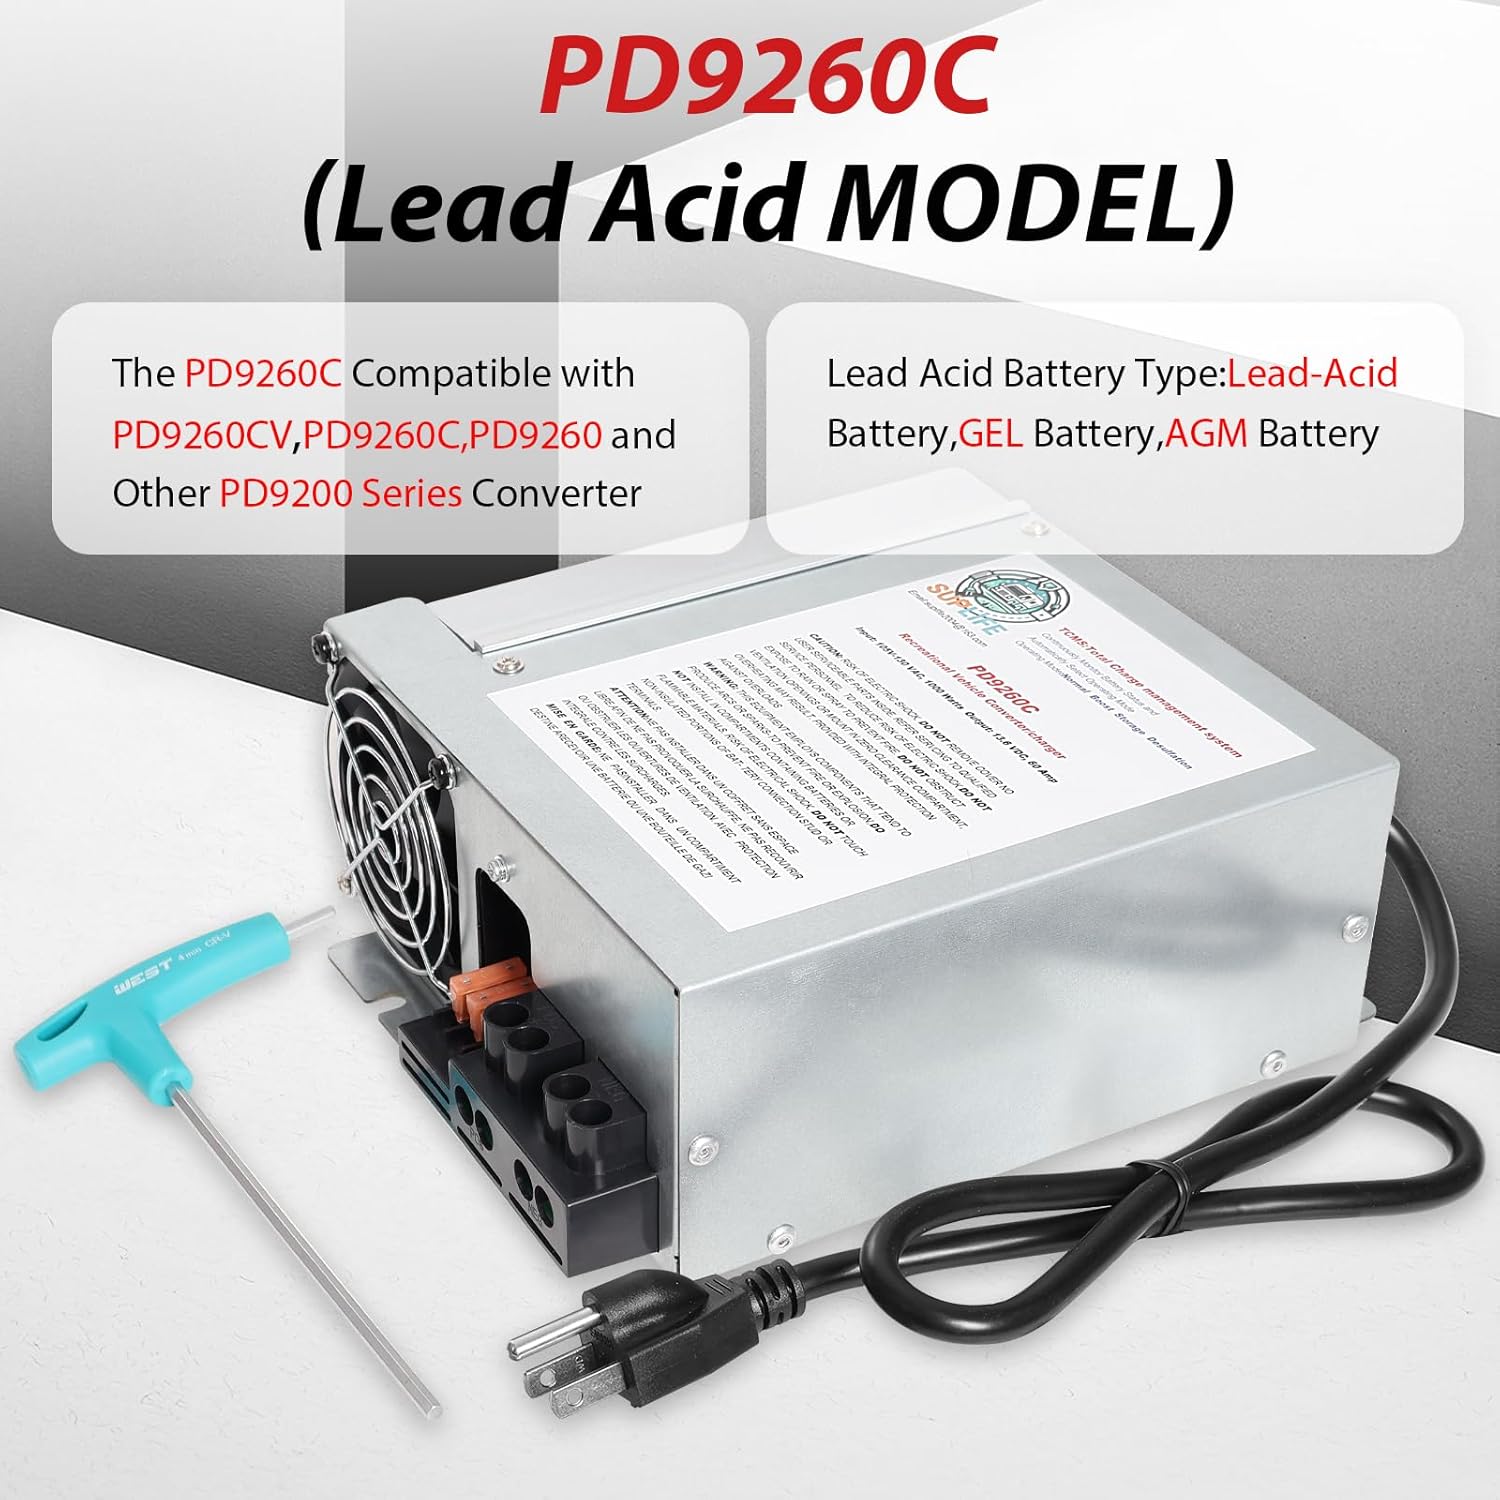
Image 3.2: Compatibility details for the PD9260C, including supported battery types.
3.3 Protection Mechanisms
The converter incorporates several safety features to protect both the unit and your RV's electrical system:

Short Circuit Protection

Over Current Protection

Over-voltage Protection (Trickle)

Automatic Desulfation
These protections safeguard against common electrical issues, ensuring the longevity of your converter and connected devices.
4. Specifications
| Parameter | Value |
|---|---|
| Input Voltage | 105-130 VAC |
| Input Frequency | 50/60 Hz |
| Max Input Power | 1000 Watts |
| Output Voltage | 13.6 VDC |
| Output Current | 60 Amp |
| Dimensions (L x W x H) | 9.17" x 7.4" x 3.35" |
| Weight | 5.4 lbs |
| Compatible Battery Types | Lead-Acid, AGL, GEM |
| Color | Silver |

Image 4.1: Physical dimensions of the PD9260C Power Converter.
5. Setup and Installation
Proper installation is crucial for the safe and efficient operation of your RV power converter. If you are unsure about any steps, consult a qualified electrician or RV technician.
5.1 Mounting Location
- Mount the converter in a dry, well-ventilated area, away from direct sunlight or heat sources.
- Ensure there is sufficient clearance around the cooling fan for proper airflow.
- Securely fasten the converter to a stable surface using appropriate hardware.
5.2 Electrical Connections
- Disconnect Power: Before making any connections, ensure all AC power to the RV is disconnected (shore power, generator, inverter). Disconnect the RV battery.
- DC Output Connection: Connect the positive (+) DC output terminal of the converter to the positive (+) terminal of your RV's 12V distribution panel or battery bank. Connect the negative (-) DC output terminal to the negative (-) terminal of your RV's 12V distribution panel or battery bank. Ensure correct polarity.
- Grounding: Connect the converter's chassis ground terminal to the RV's chassis ground.
- AC Input Connection: Plug the converter's AC input cord into a standard 105-130 VAC, 50/60Hz outlet. Ensure the outlet is properly wired and protected by a circuit breaker.
- Battery Connection: Connect your lead-acid battery (or compatible type) to the RV's 12V system. The converter will automatically detect and charge the battery once AC power is applied.
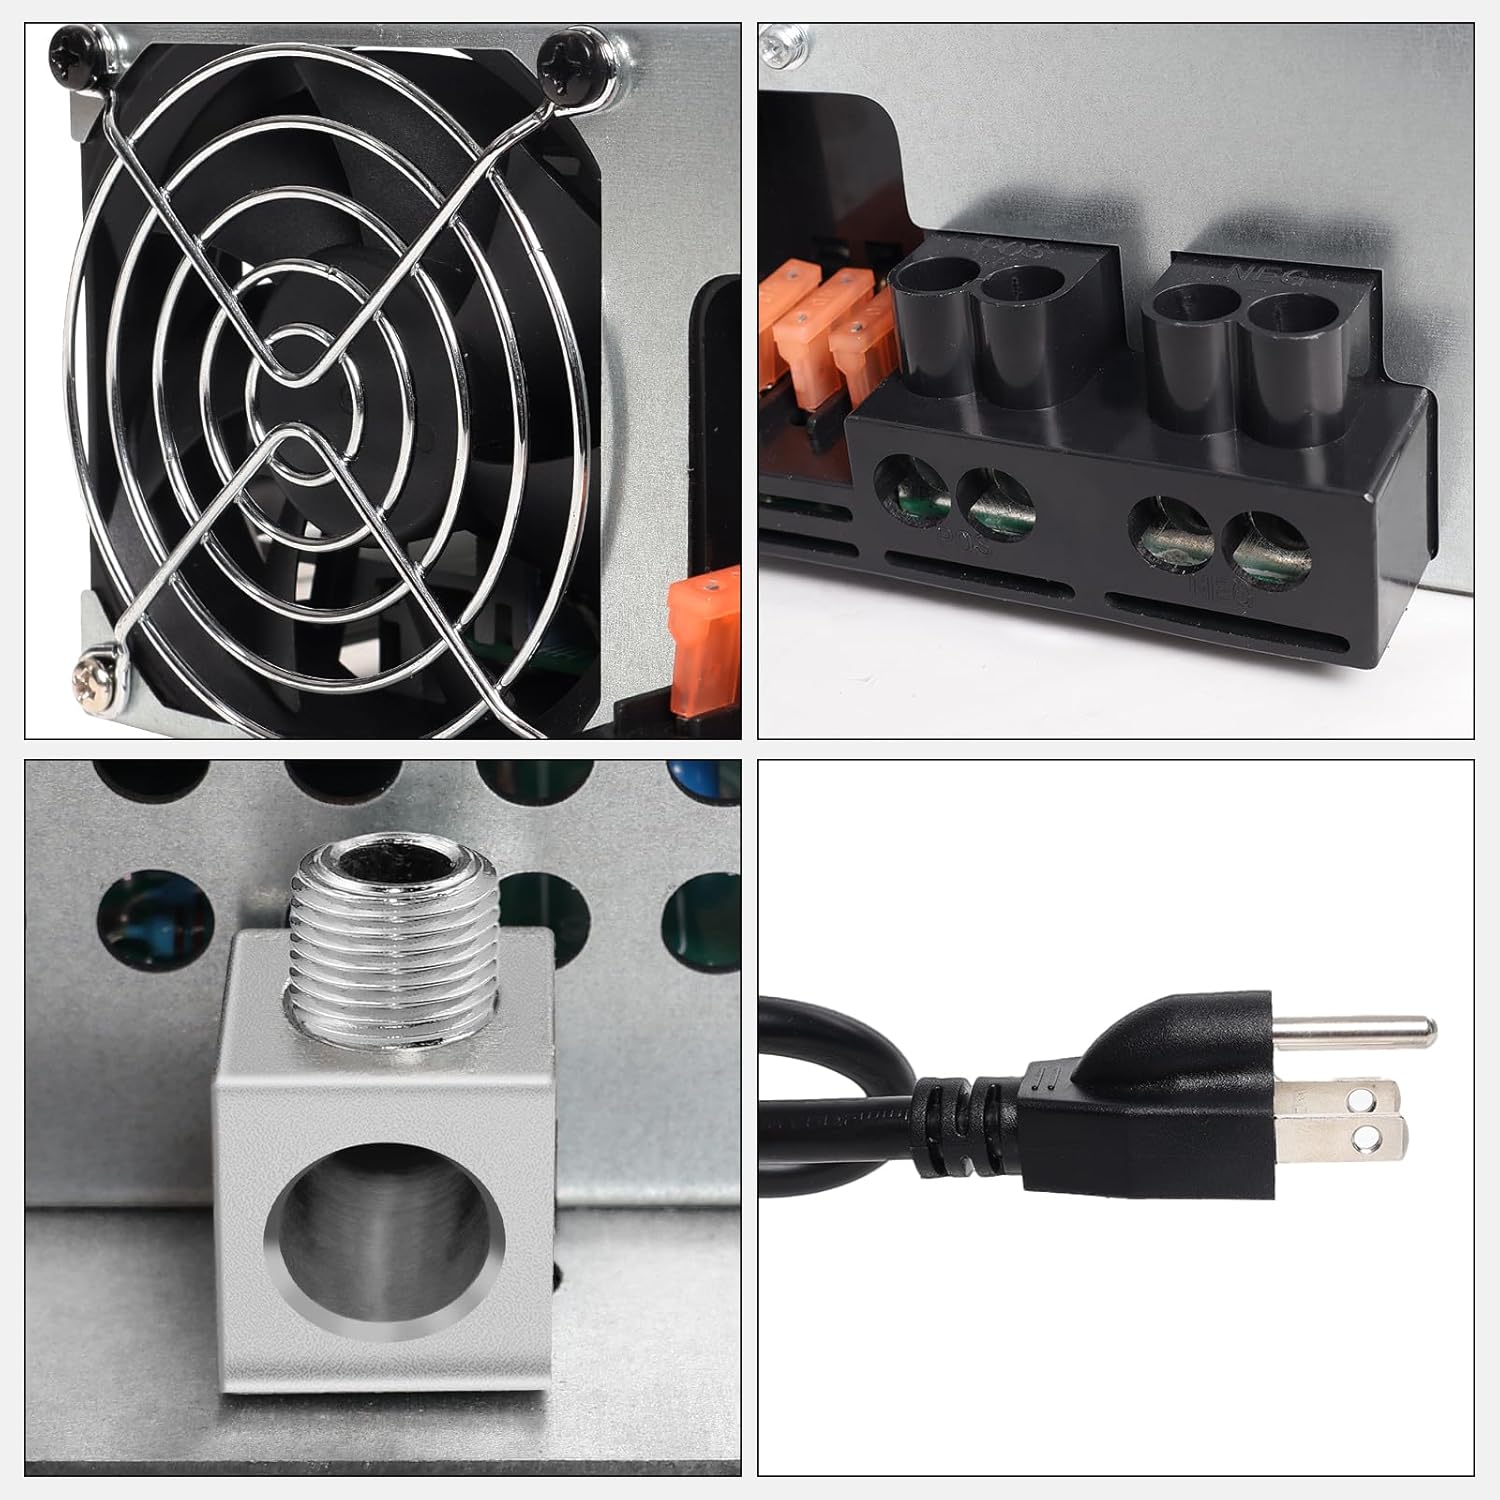
Image 5.1: Detailed views of the cooling fan, DC output terminals, grounding lug, and AC input plug.
6. Operating Instructions
The suplife PD9260C converter operates automatically once properly installed and connected to AC power and a battery. It features an intelligent 4-stage charging process to optimize battery health and longevity.
6.1 4-Stage Smart Charging
- Bulk Charge (14.4V): When the battery requires charging, the converter delivers full wattage at 14.4V for a rapid charge, quickly bringing the battery to approximately 90% capacity.
- Absorption Charge (13.6V): After the bulk stage, the voltage is maintained at 13.6V to safely complete the charge and prevent overcharging.
- Float Mode (13.6V): Once the battery is fully charged, the converter enters a float mode, maintaining the battery at 13.6V to prevent self-discharge and keep it topped off.
- Desulfation Mode (Automatic): The converter may periodically enter a desulfation mode to break down sulfate crystals that can form on lead-acid battery plates, improving battery performance and lifespan.

Image 6.1: Visual representation of the 4-stage intelligent charging process.
6.2 Cooling Fan Operation
The intelligent cooling fan activates automatically when needed to maintain optimal operating temperature. Its speed adjusts based on the converter's load and internal temperature.

Image 6.2: The intelligent cooling fan designed for efficient heat dissipation.
7. Maintenance
The suplife PD9260C converter is designed for minimal maintenance. However, periodic checks can help ensure its longevity and performance.
- Ventilation: Ensure the cooling fan and vents are free from dust, debris, or obstructions. Clean gently with compressed air if necessary.
- Connections: Periodically check all electrical connections for tightness and corrosion. Loose connections can cause overheating or poor performance.
- Environment: Keep the converter in a dry, clean environment. Avoid exposure to extreme temperatures or humidity.
8. Troubleshooting
If you encounter issues with your PD9260C converter, refer to the following common troubleshooting steps.
| Problem | Possible Cause | Solution |
|---|---|---|
| No DC output / Converter not working | No AC input power; Blown fuse; Reverse polarity connection; Internal fault. | Check AC power source and circuit breaker. Verify fuses are intact. Check DC wiring for correct polarity. If issues persist, contact support. |
| Battery not charging | Loose battery connections; Battery fault; Converter fault. | Ensure battery terminals are clean and tight. Test battery condition. Verify converter is receiving AC power and providing DC output. |
| Cooling fan is noisy or constantly running | High load; Restricted airflow; Fan bearing wear. | Ensure adequate ventilation. Reduce 12V load if possible. Clean fan vents. If noise is excessive and persistent, contact support. |
| Over-voltage or Under-voltage protection activated | Input AC voltage outside specified range; Internal fault. | Check AC input voltage. Ensure stable power supply. Disconnect and reconnect power. If protection repeatedly activates, contact support. |
9. Warranty and Support
The suplife PD9260C RV Power Converter comes with a 3-Year Warranty.
For any quality issues or technical assistance, please contact suplife customer support directly through Amazon. We aim to provide assistance within 12 hours.
Note: No return is needed for warranty claims; direct replacement will be provided for qualifying issues.