1. Introduction
This manual provides essential instructions for the safe and proper use, assembly, and maintenance of your Kinderkraft HELSI 2 Black 3-Wheel Jogging Stroller. Please read this manual thoroughly before using the product and retain it for future reference. The HELSI 2 is designed as an all-terrain stroller, featuring three large inflatable wheels, a stable frame, and integrated safety features for both daily use and extended trips.
2. Safety Information
- Always ensure your child is secured with the 5-point harness system.
- Never leave your child unattended in the stroller.
- Engage the brake whenever the stroller is stationary.
- Do not overload the stroller or the storage basket. The maximum weight recommendation for the child is 22 kilograms. The storage basket has a maximum capacity of 5 kilograms.
- Ensure all locking devices are engaged before use.
- Do not use accessories or spare parts other than those approved by the manufacturer.
- Be aware of the risk of open fires and other sources of strong heat near the stroller.
- Always check that the pram body, seat unit, or car seat attachment device is correctly engaged before use.
3. Product Overview
The Kinderkraft HELSI 2 is a robust 3-wheel jogging stroller designed for various terrains. Key components include a durable frame, large inflatable wheels, an adjustable handle, a comfortable seat with recline function, and a spacious storage basket.
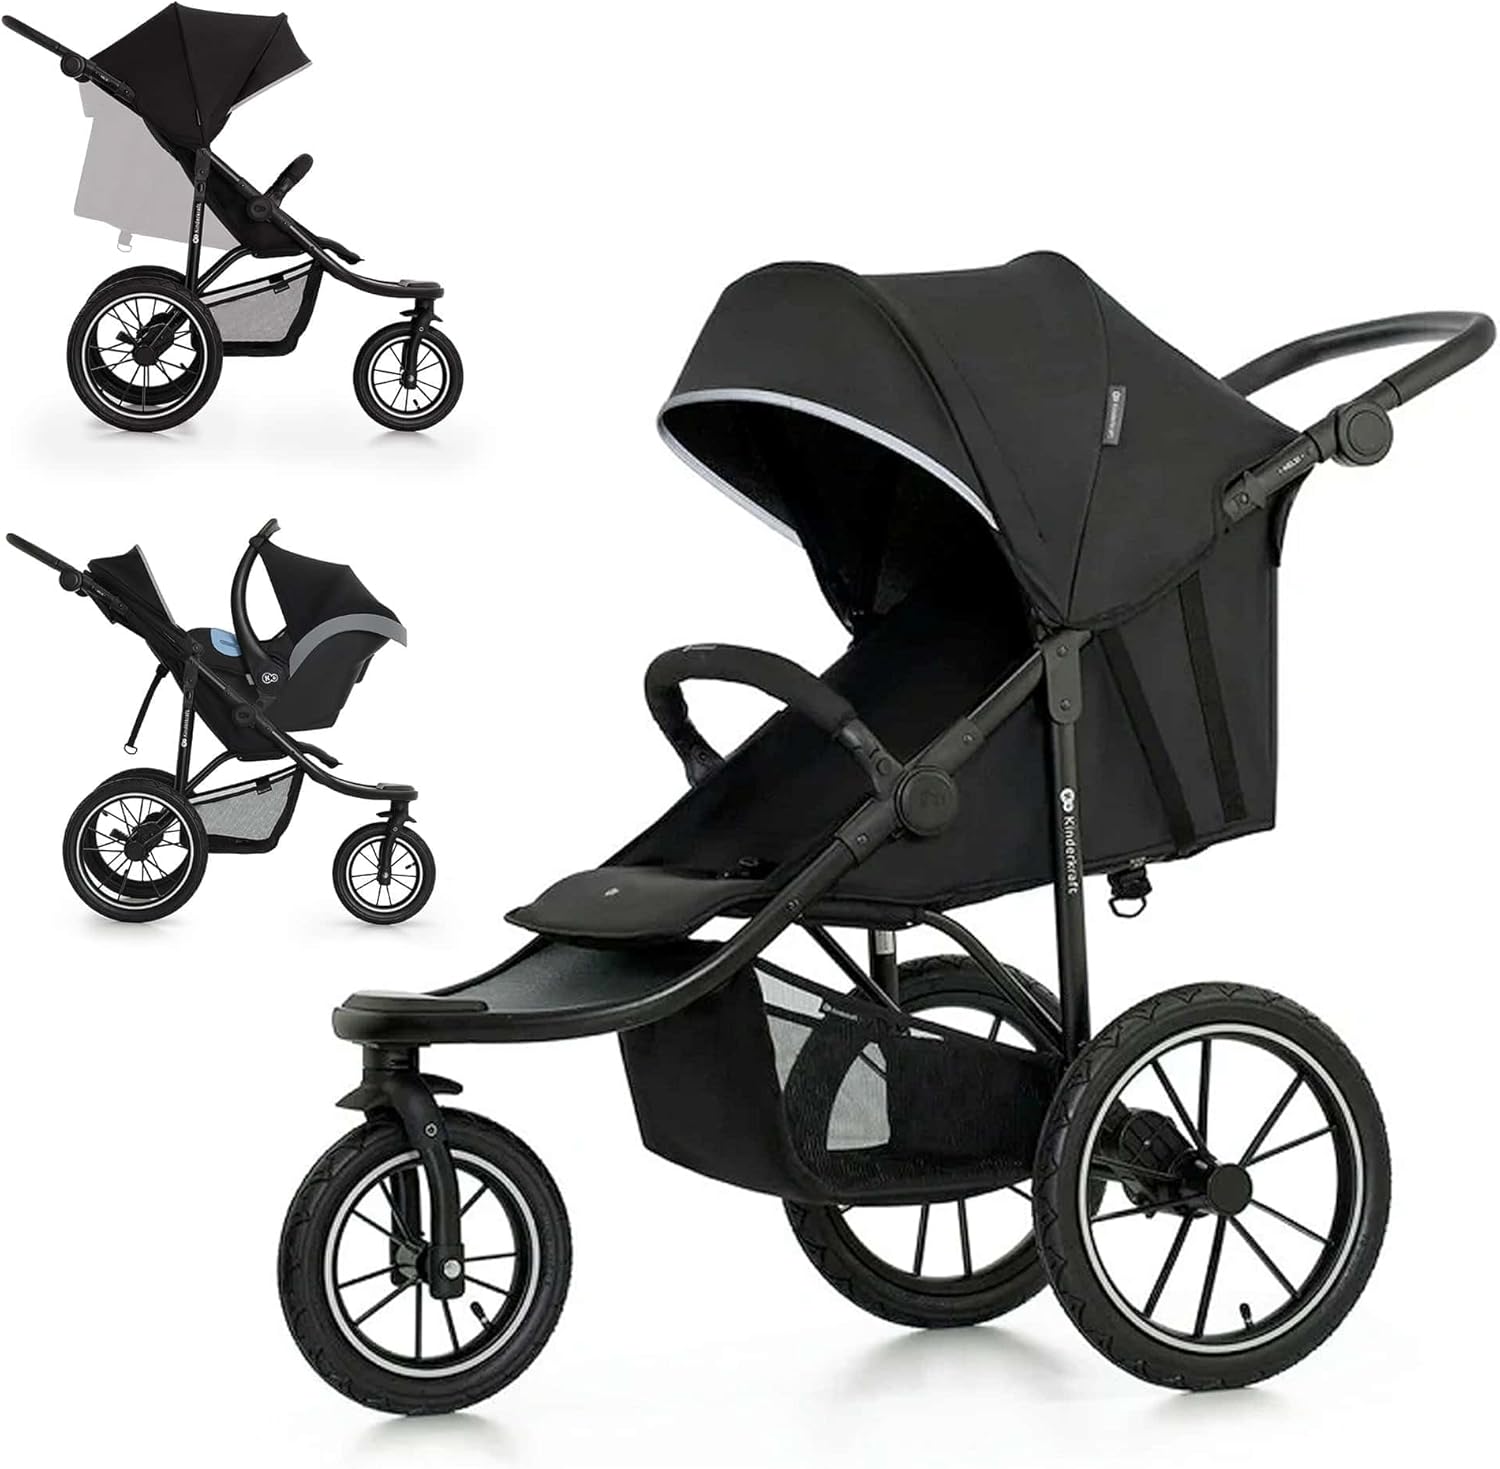
Image 3.1: The Kinderkraft HELSI 2 Black 3-Wheel Jogging Stroller, showcasing its main configuration and adaptability with a bassinet and car seat (shown in smaller insets).

Image 3.2: Detail view of the stroller's wheels, highlighting the swivel front wheel with locking capability, large air-filled tires for various terrains, and full shock absorption on the wheels and rear axle.

Image 3.3: The stroller's under-seat storage basket, designed to hold up to 5 kg of essentials, ensuring everything is always on hand.
4. Setup
The HELSI 2 stroller requires minimal assembly. Ensure all components are present and undamaged before proceeding.
4.1 Wheel Installation
- Unfold the stroller frame as per the unfolding instructions in Section 5.1.
- Attach the rear wheels by pushing them onto the axle until they click into place.
- Attach the front wheel by inserting its stem into the front housing until it locks securely.
- Verify all wheels are securely attached by gently pulling on them.
4.2 Travel System Configuration
The HELSI 2 is compatible with a travel system using specific adapters (sold separately) to attach a car seat or bassinet.
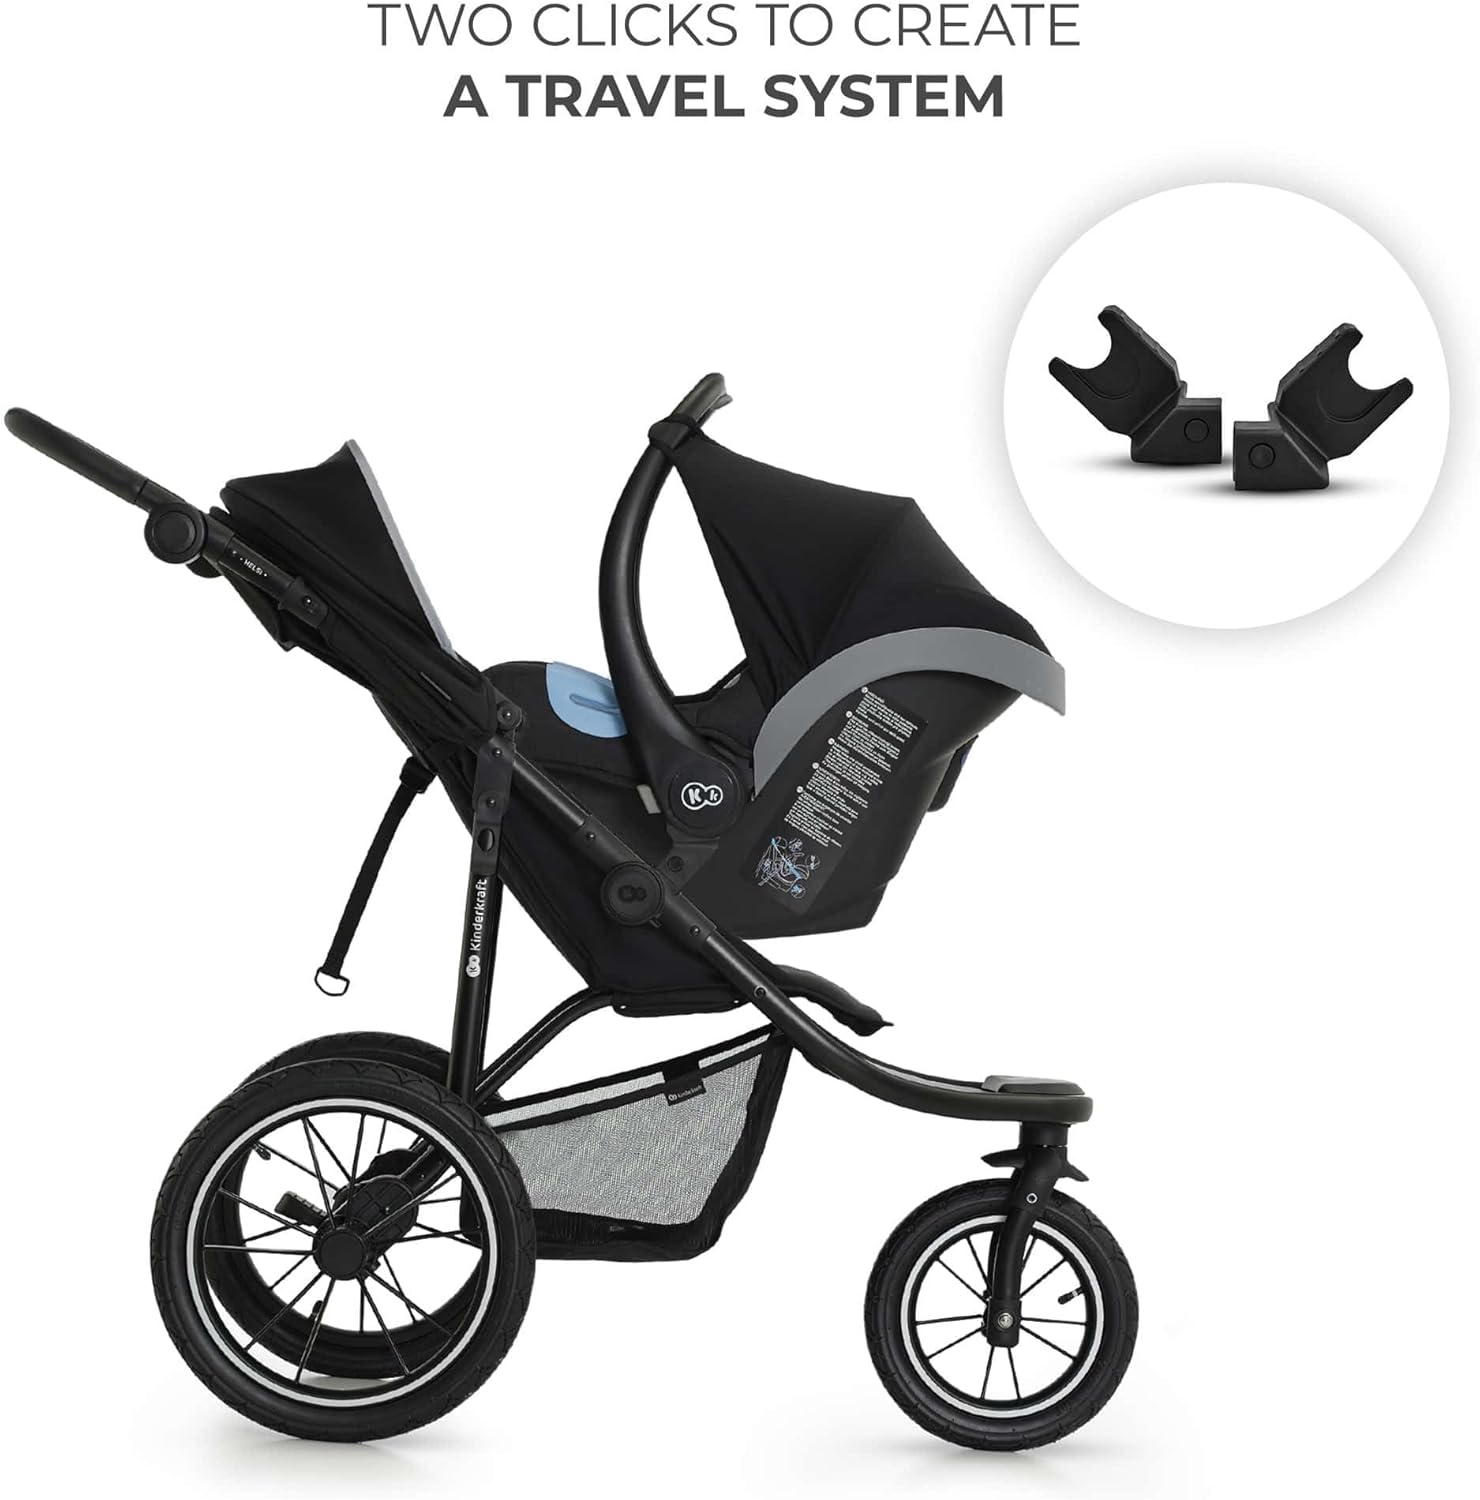
Image 4.1: The stroller configured with car seat adapters, illustrating the "two clicks" mechanism for creating a travel system.
- Ensure the stroller seat is in the fully reclined position or removed if necessary.
- Attach the travel system adapters to the designated points on the stroller frame until they click securely.
- Place the compatible car seat onto the adapters, ensuring it locks into place with an audible click.
- Always check the secure attachment of the car seat before placing a child inside.

Image 4.2: A woman demonstrating the placement of a car seat onto the stroller frame, forming a complete travel system.
5. Operating Instructions
5.1 Unfolding the Stroller
To unfold the stroller, release any locking mechanisms and lift the handle until the frame fully extends and locks into the open position. Ensure all parts are securely locked before use.
5.2 Folding the Stroller
The HELSI 2 features an easy folding mechanism for convenient transport and storage.

Image 5.1: A woman holding the HELSI 2 stroller in its folded state next to a car, demonstrating its compact size for easy transport and storage.
- Ensure the child is removed from the stroller.
- Follow the specific folding instructions located on the stroller frame or in the quick-start guide.
- Engage the folding lock to keep the stroller compact.
5.3 Handle Adjustment
The stroller handle can be adjusted to ensure correct posture and comfort for the user.
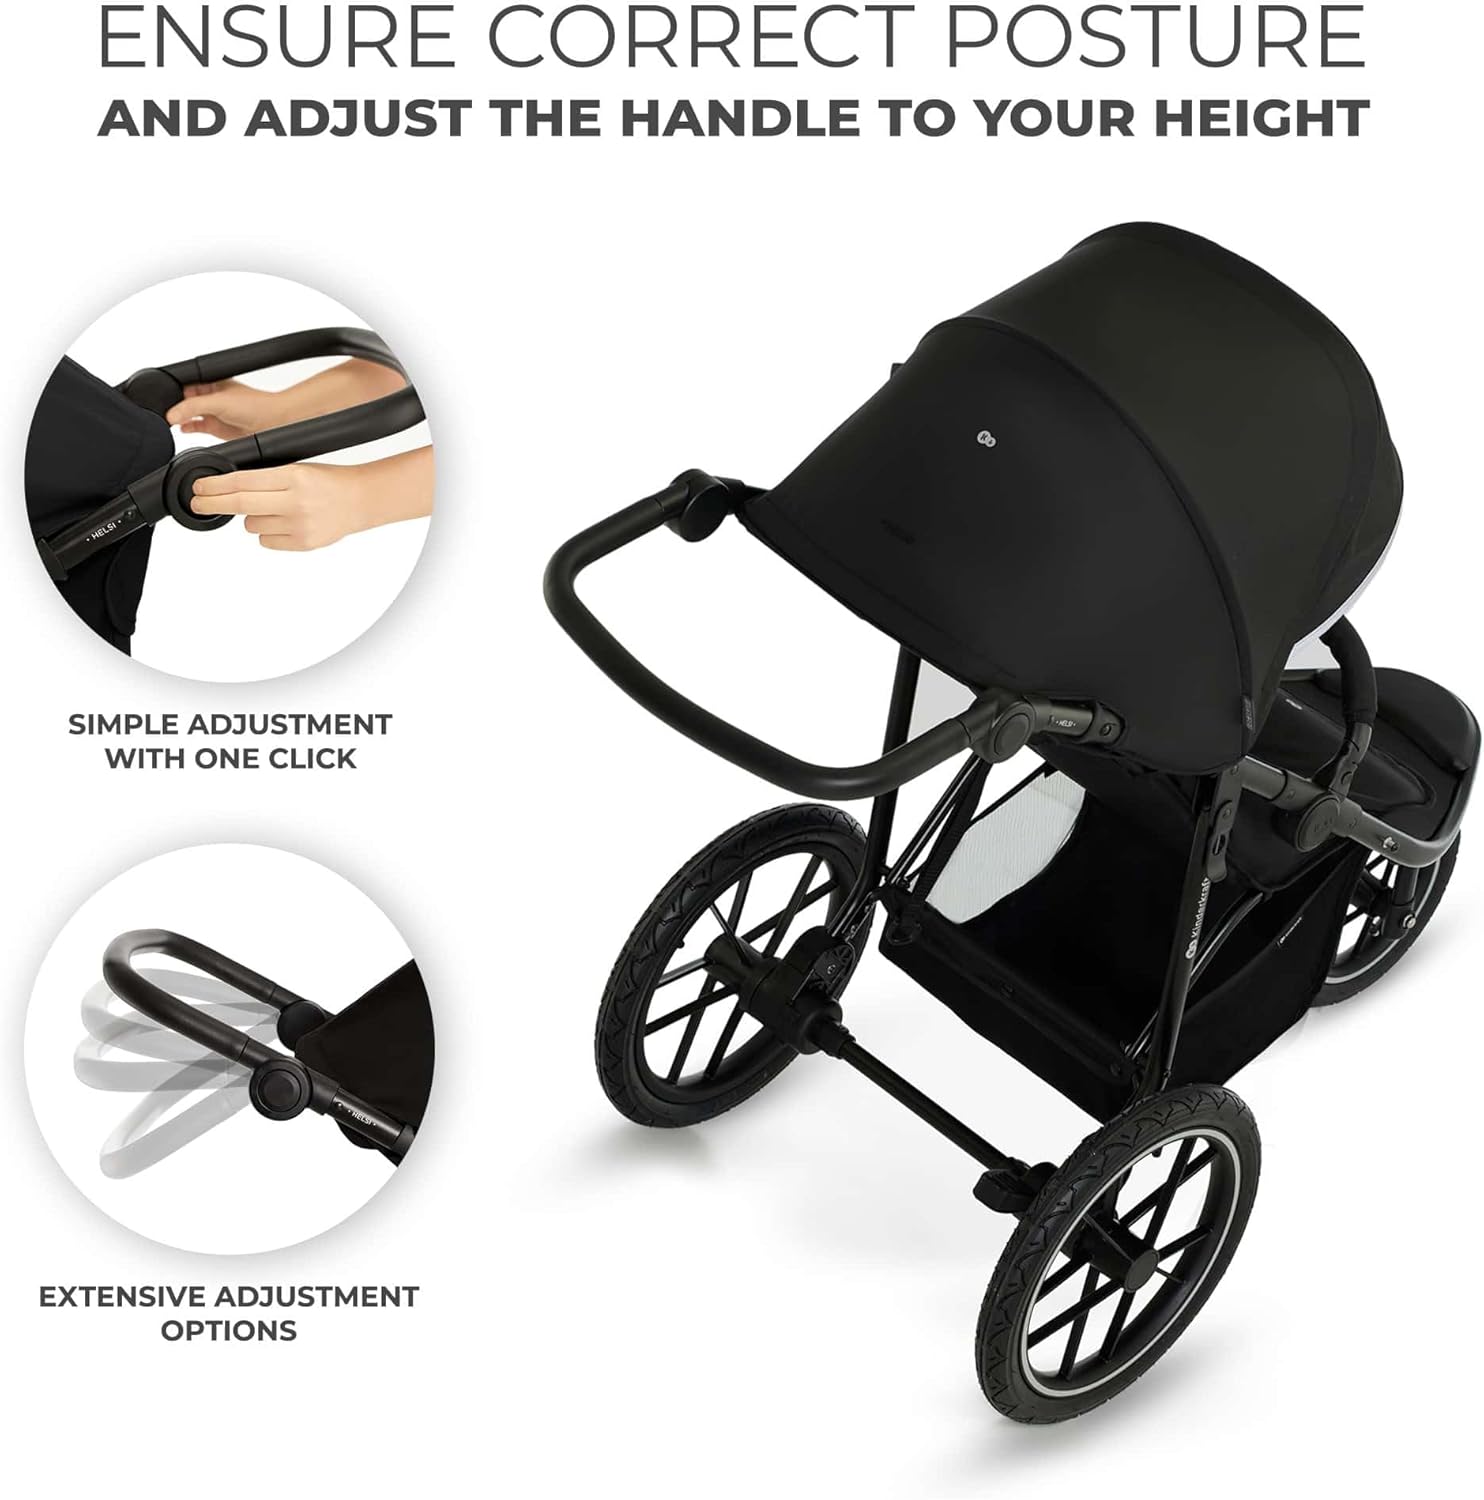
Image 5.2: Close-up of the stroller handle, illustrating the simple one-click adjustment mechanism and the extensive range of adjustment options to suit different user heights.
- Locate the adjustment buttons or levers on the handle.
- Press the button/lever and adjust the handle to your desired height.
- Release the button/lever to lock the handle in place.
5.4 Backrest Adjustment
The backrest can be smoothly adjusted to accommodate your child's needs, whether for sleeping or active use.

Image 5.3: The stroller's backrest shown in an upright position with an arrow indicating the smooth recline function, allowing adjustment to various angles for child comfort.
- Locate the backrest adjustment mechanism, typically a strap or lever behind the seat.
- Adjust the backrest to the desired recline angle.
- Ensure the backrest is securely locked in position.
5.5 Harness System
The 5-point harness system provides security for your child. Always use the harness when the child is in the stroller.
- Place your child in the seat.
- Fasten the shoulder straps, waist straps, and crotch strap into the central buckle.
- Adjust the straps to fit snugly around your child without being too tight.
5.6 Brake Operation
The stroller is equipped with a smooth brake system. Always engage the brake when the stroller is stationary.
- To engage the brake, press down firmly on the brake pedal located near the rear wheels.
- To release the brake, lift the pedal upwards.
- Always test the brake engagement by gently pushing the stroller.
5.7 Footrest
The stroller features a large, comfortable footrest suitable for children as they grow.

Image 5.4: A child comfortably seated in the stroller, highlighting the large and comfortable footrest designed to support children up to 22 kg (as per specifications, note that the image text indicates up to 27 kg).
6. Maintenance
6.1 Cleaning
The stroller's fabric components are easy to clean. Use a damp cloth with mild soap and water. Do not use harsh chemicals or abrasive cleaners. Allow all parts to air dry completely before folding or storing the stroller.
6.2 Wheel Care
Regularly check the inflatable wheels for proper tire pressure and any signs of wear or damage. Keep the wheel axles clean and free of debris to ensure smooth operation.
6.3 General Inspection
Periodically inspect the stroller for loose fasteners, worn parts, or damaged materials. If any issues are found, discontinue use and contact customer support for assistance.
7. Troubleshooting
This section addresses common issues you might encounter with your stroller. For problems not listed here, please contact customer support.
- Stroller does not unfold/fold smoothly: Ensure all locking mechanisms are disengaged. Check for any obstructions in the folding joints.
- Wheels are squeaky or stiff: Clean the wheel axles and apply a silicone-based lubricant if necessary. Check tire pressure for inflatable wheels.
- Harness is difficult to buckle/unbuckle: Ensure the buckle is clean and free of debris. Do not force the buckle.
8. Specifications

Image 8.1: Diagram illustrating the approximate key dimensions of the Kinderkraft HELSI 2 stroller in both unfolded and folded states.
| Feature | Detail |
|---|---|
| Model Number | KSHELS02BLK0000 |
| Product Dimensions (Unfolded) | Approx. 126 cm (L) x 61.5 cm (W) x 71-113 cm (H, adjustable handle) |
| Folded Size | Approx. 80 cm (L) x 60 cm (W) x 100 cm (H) |
| Item Weight | 10 Kilograms |
| Maximum Weight Recommendation (Child) | 22 Kilograms |
| Maximum Weight Recommendation (Basket) | 5 Kilograms |
| Material Type (Fabric) | Polyester |
| Material Type (Tires) | Rubber |
| Frame Material | Alloy Steel |
| Harness Type | 5 Point |
| Seating Capacity | 1 |
| Stroller Type | Jogging Stroller |
| Additional Features | Fibreglass reinforced wheels for difficult terrain and full tilt |
9. Warranty and Support
The Kinderkraft HELSI 2 stroller comes with a 10-year warranty, reflecting our commitment to high quality and durability.

Image 9.1: Promotional image highlighting the "10 Years Warranty" and "High Quality Standard" associated with the HELSI 2 stroller, shown with a woman pushing a child in the stroller outdoors.
For warranty claims, technical support, or any questions regarding your Kinderkraft HELSI 2 stroller, please refer to the contact information provided on the official Kinderkraft website or your purchase documentation.


