1. Introduction
This manual provides essential instructions for the safe and effective use of your JALOSOFO AC/DC Power Adapter. This charger is designed as a replacement power supply for specific Geek Aire rechargeable fan models. Please read this manual thoroughly before use and retain it for future reference.

Image 1.1: The JALOSOFO AC/DC Power Adapter, a black rectangular unit with a standard US plug and a DC output connector.
2. Safety Information
Your safety is paramount. Please observe the following precautions:
- Voltage Compatibility: This charger provides an output of 24V. It is designed for Geek Aire fan models CF1, CF1SE 12'', and CF2 16''. Before connecting, always verify that your specific fan model requires a 24V input. Using an incorrect voltage charger can damage your device.
- Protection Features: The charger is built with 5 protection designs to ensure safe operation: over current, over temperature, over load, over voltage, and short circuit protection.
- Indoor Use Only: Use the charger in dry indoor environments. Avoid exposure to water, moisture, or extreme temperatures.
- Proper Handling: Do not drop, disassemble, or attempt to repair the charger. Do not use if the cord or plug is damaged.
- Ventilation: Ensure adequate ventilation around the charger during use. Do not cover it with cloths or other materials.
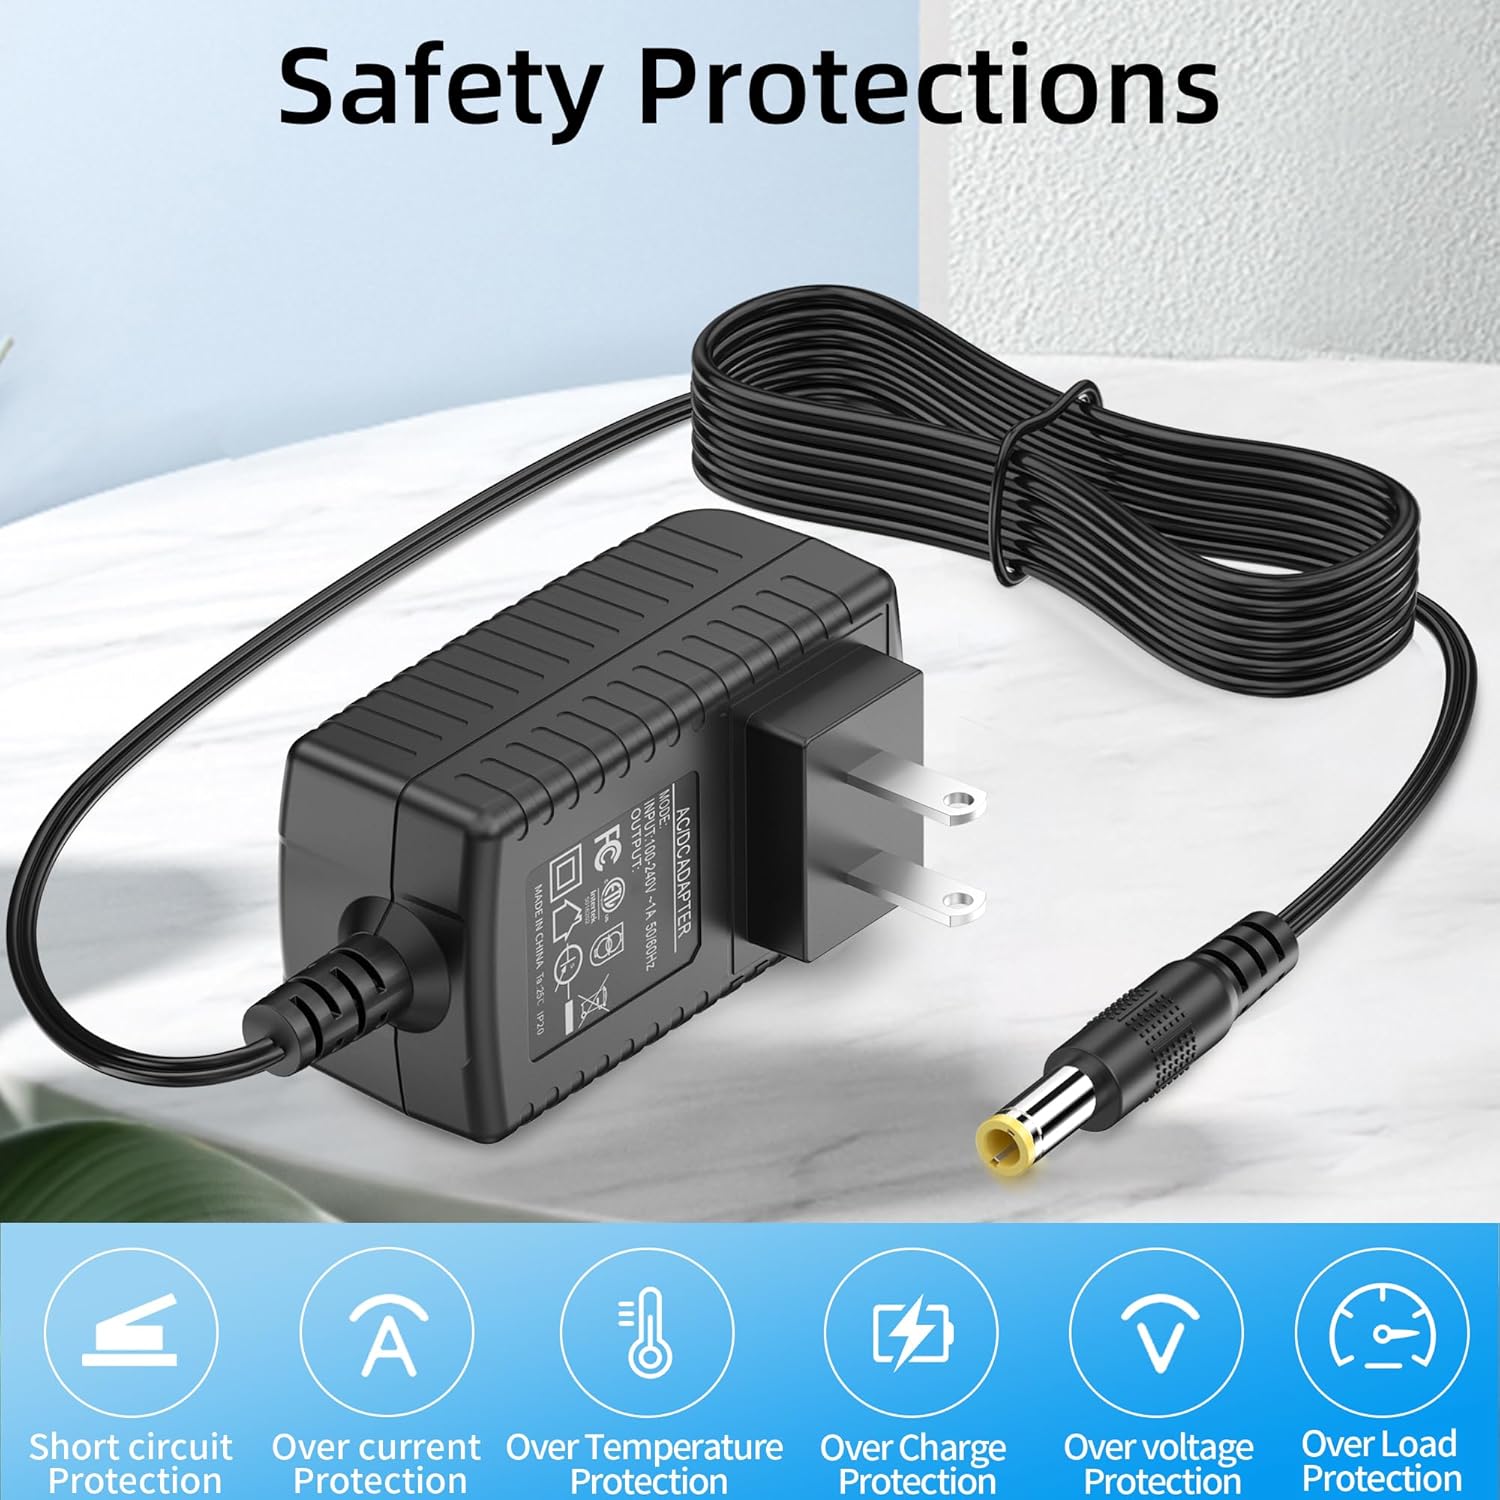
Image 2.1: Visual representation of the charger's safety features, including icons for short circuit, over current, over temperature, over charge, over voltage, and over load protection.
3. Package Contents
Upon opening your package, you should find the following items:
- 1 x JALOSOFO AC/DC Power Adapter (with integrated cable)
Note: The cable length is approximately 5.9 feet (1.8 meters).
4. Setup
Follow these steps to set up your JALOSOFO charger:
- Verify Compatibility: Confirm that your Geek Aire fan model is CF1, CF1SE 12'', or CF2 16'' and requires a 24V input.
- Connect to Fan: Insert the DC output connector of the charger firmly into the charging port of your Geek Aire fan.
- Connect to Power Outlet: Plug the AC input plug of the charger into a standard AC 100-240V 50/60HZ wall outlet.

Image 4.1: The JALOSOFO charger plugged into a wall outlet and connected to a Geek Aire fan, illustrating proper setup.

Image 4.2: Depiction of compatible Geek Aire fan models: CF1 12", CF1SE 12", and CF2 16", shown alongside the charger.
5. Operating Instructions
Once connected, the charger will begin supplying power to your Geek Aire fan. The fan's charging indicator lights will typically illuminate to show that charging is in progress.
- Charging Indication: Refer to your Geek Aire fan's specific manual for details on its charging indicator behavior. Some users have reported that the fan's charging lights may remain fully illuminated throughout the charging cycle, rather than indicating stages of charge.
- Charging Time: Charging time will vary depending on the fan's battery capacity and its current charge level.
- Disconnection: Once charging is complete, or if you need to disconnect, first unplug the charger from the wall outlet, then disconnect the DC connector from the fan.
6. Maintenance
To ensure the longevity and proper function of your charger, follow these maintenance guidelines:
- Cleaning: Disconnect the charger from all power sources before cleaning. Use a soft, dry cloth to wipe the exterior. Do not use liquid cleaners or solvents.
- Storage: Store the charger in a cool, dry place away from direct sunlight and moisture when not in use.
- Cable Care: Avoid sharp bends, kinks, or excessive pulling on the power cord. Do not place heavy objects on the cable.

Image 6.1: Illustration highlighting the flexible PVC cable line and anti-oxidant connector, emphasizing the durability of the charger's components.
7. Troubleshooting
If you encounter issues with your charger, refer to the following common problems and solutions:
- Fan Not Charging:
- Ensure the charger is securely plugged into both the wall outlet and the fan.
- Verify the wall outlet is functional by testing it with another device.
- Check the charger cable and connectors for any visible damage.
- Crucially, re-confirm that your Geek Aire fan model (CF1, CF1SE, CF2) specifically requires a 24V input. If your fan requires a different voltage (e.g., 12V), this charger is incompatible and could damage your fan.
- Charger Overheating:
- Disconnect the charger immediately.
- Ensure the charger is in a well-ventilated area and not covered.
- If overheating persists, discontinue use and contact customer support.
- Fan Charging Lights Behavior: Some Geek Aire fans may show all charging indicator lights illuminated throughout the charging process, rather than progressing in stages. This is a known characteristic for some models and does not necessarily indicate a fault with the charger or fan.
8. Specifications
| Feature | Specification |
|---|---|
| Input Voltage | AC 100-240V, 50/60HZ |
| Output Voltage | 24V |
| Output Amperage | 1A |
| Wattage | 24W |
| Cable Length | 5.9FT / 1.8m |
| Connector Type | DC |
| Color | Black |
| Special Feature | Fast Charging |
| Compatible Devices | Geek Aire CF1, CF1SE 12'', CF2 16'' Fans |

Image 8.1: Visual display of the charger's input (100V-240V) and output (24V 1A) specifications.

Image 8.2: Diagram showing the compact dimensions of the charger unit and the length of its power cord.
9. Warranty and Support
JALOSOFO provides the following support for this product:
- Refund Guarantee: 30-day refund guarantee from the date of purchase.
- Exchange Policy: 1-year worry-free exchange for product defects.
- Customer Service: Lifetime friendly customer service.
For any questions or concerns regarding your JALOSOFO charger, please contact our customer service team.