1. Introduction
The Wiwreenm Mini Disco Ball Light is a compact, rechargeable, and portable lighting device designed to create dynamic light effects. It features sound-activated modes and can also function as a night light. This manual provides instructions for proper setup, operation, and maintenance of your device.

Image 1.1: Main view of the Wiwreenm Mini Disco Ball Light.
2. What's in the Box
Carefully unpack your Wiwreenm Mini Disco Ball Light and ensure all items are present:
- Small Disco Ball Light (1 unit)
- USB Charging Cable (1 unit)
- Magnetic Magnet Sheets (3 units)
- Night Light Cover (1 unit)
- Instruction Manual (1 unit)

Image 2.1: Package contents including the disco ball light, USB cable, magnetic sheets, night light cover, and manual.
3. Product Features
- Voice Control & Self-propelled Mode: Features a built-in sound sensor. The LED lights flash with music rhythm when sound reaches 60 decibels. Self-propelled mode allows for automatic light pattern changes.
- Built-in Rechargeable Battery: Portable design with a built-in battery, offering approximately 2.5 hours of continuous operation on a single charge. Charges via USB.
- Portable & Easy Installation: Equipped with strong magnets in the base and includes adhesive sheets for versatile mounting on various surfaces like walls, glass, and tables.
- Night Light Mode: Includes a cover to transform the device into a soft night light, suitable for children's rooms. Light effects can still respond to sound in this mode.
- Compact Size: Designed for portability, ideal for small spaces such as bedrooms or car interiors. For larger areas, multiple units are recommended.
4. Setup and Installation
Follow these steps to set up your Mini Disco Ball Light:
- Prepare Mounting Surface: If using the magnetic sheets, tear off the adhesive surface from one of the supplied iron sheets and stick it firmly to your desired placement surface (e.g., wall, car ceiling, table).
- Power On: Click the switch button on the device to turn on the disco ball light.
- Attach Device: Attach the disco ball light to the installed iron sheet. The built-in magnets will secure it in place.
- Placement: Position the light to project patterns as desired. For optimal effect, use in a darkened room.

Image 4.1: Visual guide for installation and use, showing magnetic attachment in a car interior.
The device dimensions are approximately 1.88 inches (width) x 2.45 inches (height), making it suitable for compact spaces.
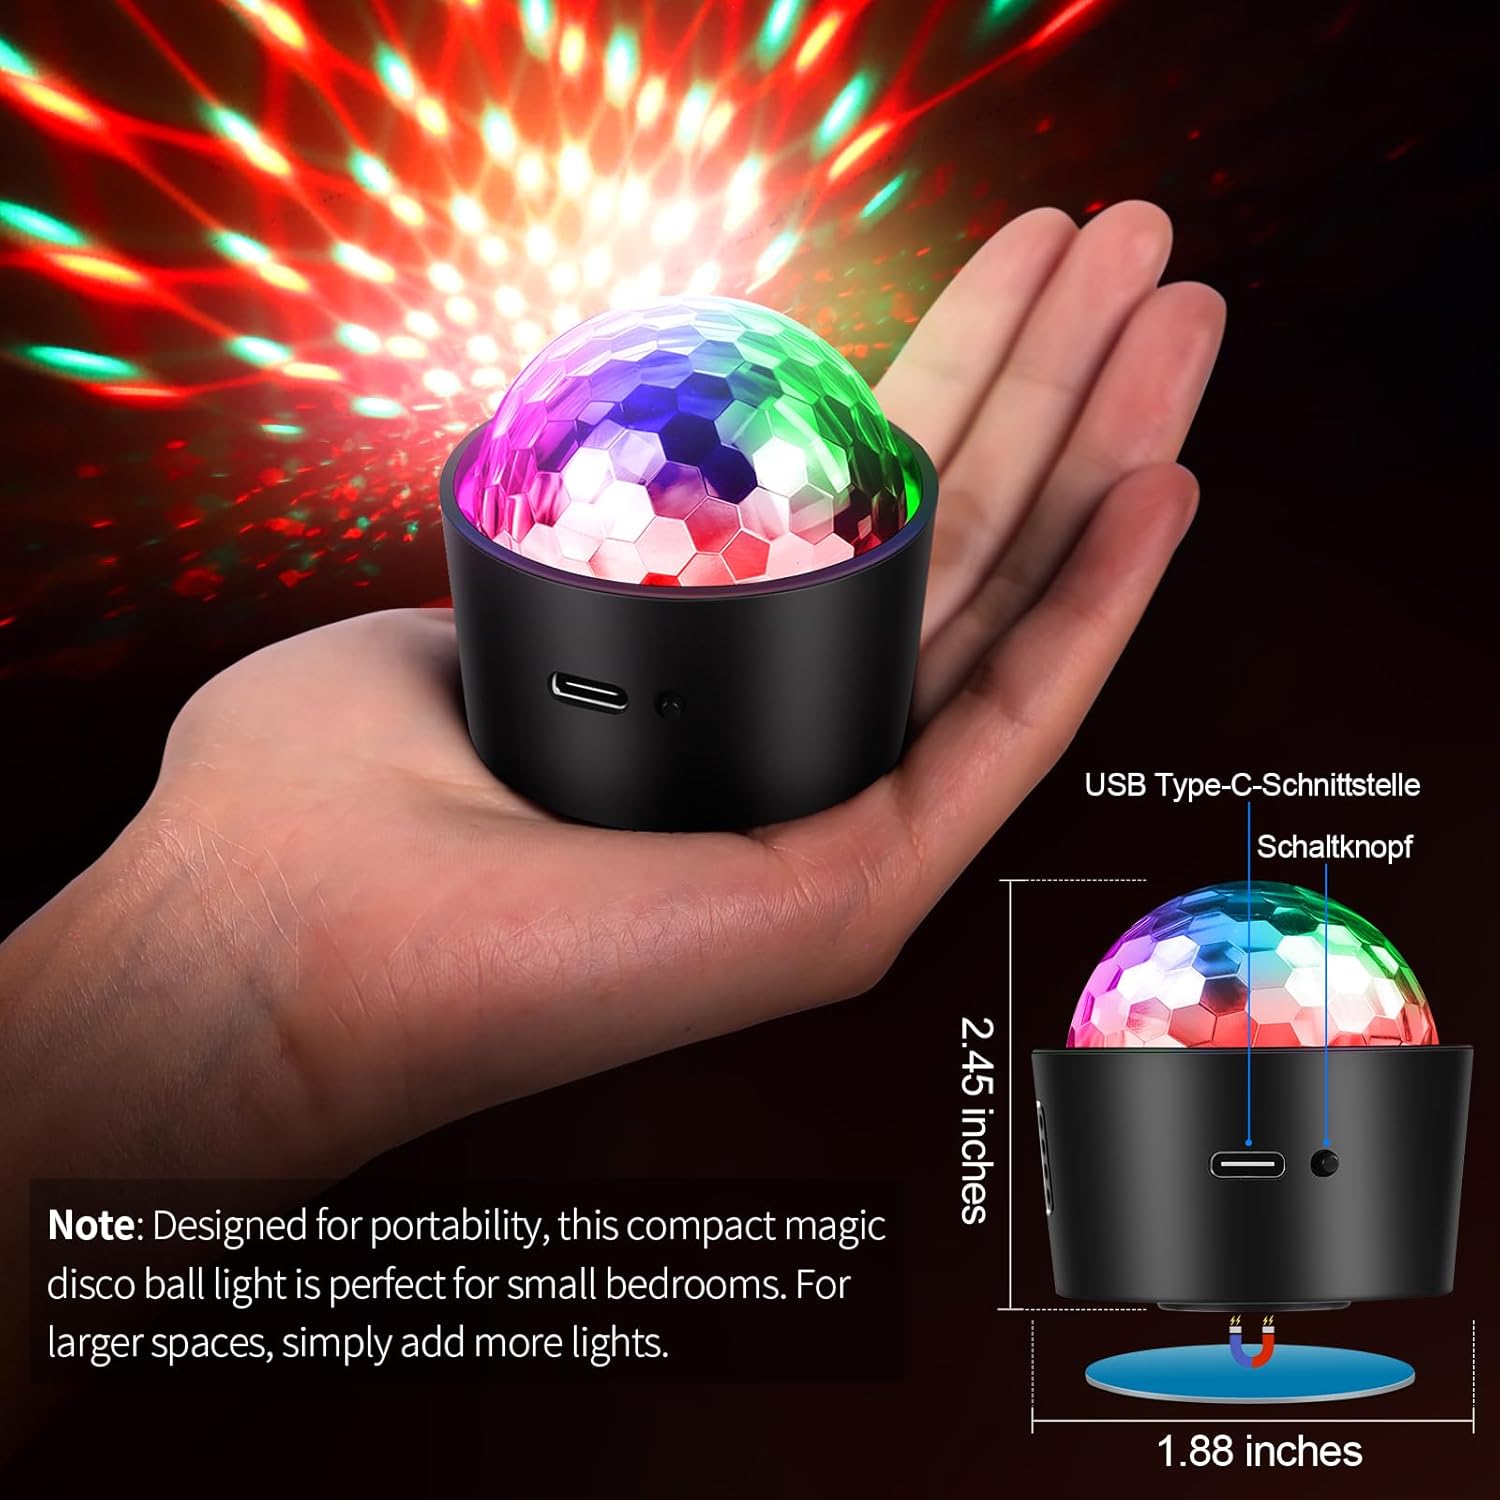
Image 4.2: The compact size of the disco ball light, shown in hand with dimensions.
5. Operating Instructions
The Mini Disco Ball Light offers multiple operating modes:
- Switching Modes: Press and hold the power switch for two seconds to toggle between modes.
- Self-propelled Strobe Mode: In this mode, the light patterns change automatically. This mode operates continuously regardless of sound.
- Sound-Activated Strobe Mode: The light will flash and change patterns in response to ambient sound, such as music or clapping. A sound level of 60 decibels or higher activates this mode.
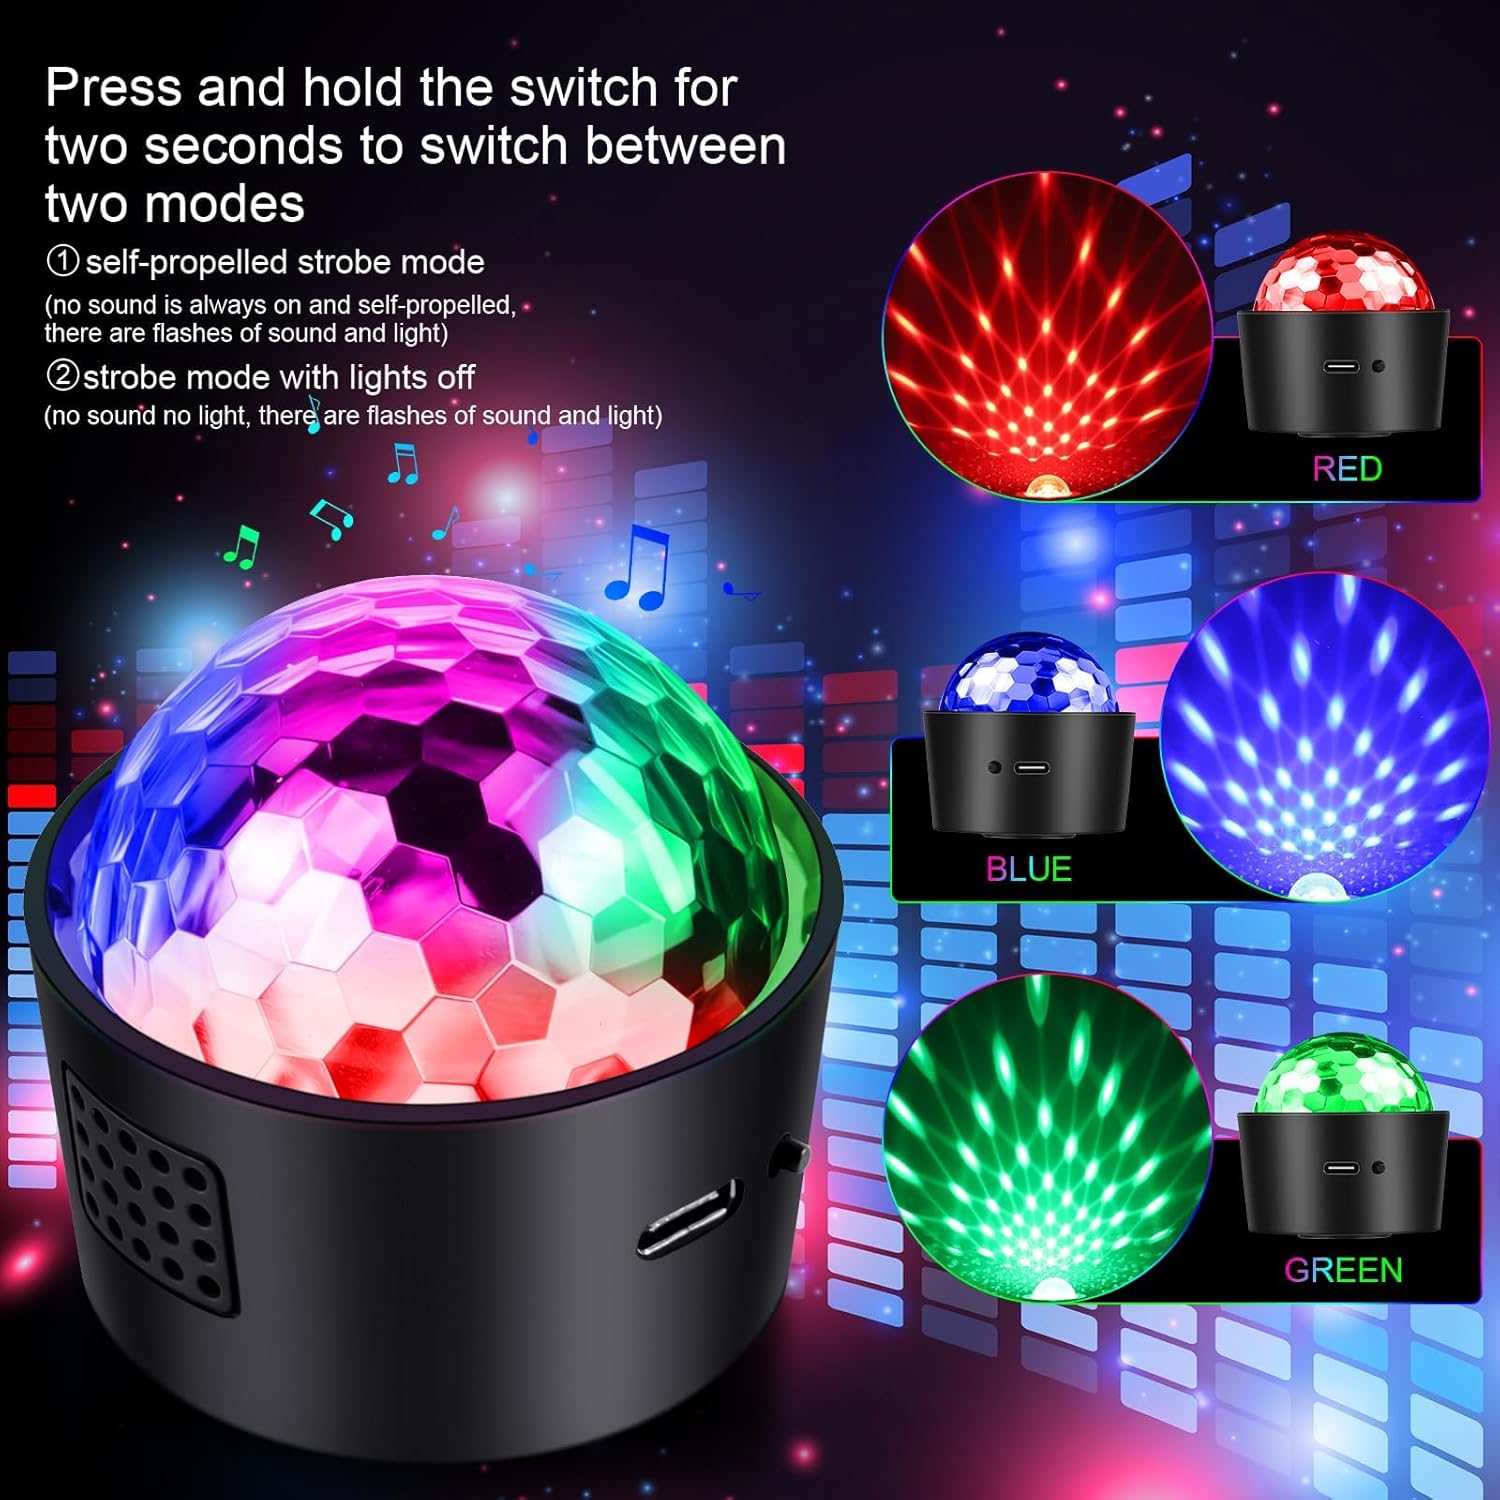
Image 5.1: Examples of red, blue, and green light patterns in various operating modes.

Image 5.2: Illustration of the three music-activated modes: DJ Mode, Dynamic Mode, and Flash Mode.
6. Night Light Mode
To use the device as a night light, simply place the included night light cover over the disco ball. This diffuses the light, making it softer and suitable for a child's room. The light can still respond to music and clapping in this mode, providing an interactive night light experience.

Image 6.1: The disco ball light operating in night light mode within a bedroom setting.
7. Charging
The Mini Disco Ball Light is equipped with a built-in rechargeable battery. Use the provided USB Type-C charging cable to charge the device. Connect the cable to a compatible USB power source such as:
- Mobile phone chargers
- Computer USB ports
- Mobile power banks
- Car chargers
- Wall chargers with USB output
A full charge provides approximately 2.5 hours of continuous flashing. Charging time is approximately 1 hour for a 400 mAh battery, providing up to 5 hours duration.

Image 7.1: The disco ball light charging from various USB power sources.
8. Specifications
| Model Number | ZQ04032US |
| Brand | Wiwreenm |
| Material | Acrylonitrile Butadiene Styrene (ABS) |
| Light Source Type | Light Emitting Diode |
| Power Source | Battery Powered |
| Voltage | 5 Volts |
| Item Weight | 3.2 ounces (0.09 Kilograms) |
| Product Dimensions | 3.12"L x 3.12"W x 2.96"H |
| Mounting Type | Magnetic mount |
| Bulb Features | Sound activation, Changing light patterns |
| UPC | 757539178464 |
9. Troubleshooting
- Light not turning on: Ensure the device is charged. Connect it to a USB power source and allow it to charge for at least 15 minutes before attempting to power on again.
- Lights not responding to music: Verify that the device is in sound-activated mode. Ensure the sound source is close enough and loud enough (above 60 decibels) for the sensor to detect.
- Short battery life: Ensure the device is fully charged before use. Battery performance can vary with usage patterns and environmental conditions.
- Light patterns appear dim: Ensure the night light cover is removed if you desire brighter, more defined patterns. Use in a dark environment for best results.
- Difficulty switching modes: Press and hold the power button for approximately two seconds to switch modes. A quick press will only turn the device on/off.
10. Maintenance
- Cleaning: Use a soft, dry cloth to clean the exterior of the device. Do not use abrasive cleaners or immerse the device in water.
- Storage: Store the device in a cool, dry place away from direct sunlight and extreme temperatures when not in use.
- Battery Care: For optimal battery longevity, avoid fully discharging the battery frequently. Charge the device regularly, even if not in constant use.
11. Warranty and Support
For warranty information or technical support, please refer to the contact details provided with your purchase documentation or visit the official Wiwreenm website. Keep your proof of purchase for any warranty claims.