1. Introduction
The Topdiag BT300 is a versatile 12V/24V automotive battery and alternator tester designed for comprehensive diagnostic analysis of vehicle battery and charging systems. This device provides accurate readings for battery health, charge status, Cold Cranking Amps (CCA), and internal impedance. It supports a wide range of battery types and vehicle applications, making it suitable for both professional mechanics and DIY enthusiasts.

Image 1.1: The Topdiag BT300 device showcasing its main interface and key features.
2. Safety Information
Always observe the following safety precautions when using the Topdiag BT300 battery tester:
- Wear appropriate eye protection and protective clothing.
- Ensure the vehicle is in a well-ventilated area.
- Avoid smoking or open flames near the battery.
- Do not touch moving engine parts or hot surfaces.
- The BT300 features Reverse Polarity Protection and Short-Circuit Protection, but always connect the clamps correctly: red to positive (+), black to negative (-).
- Keep the device dry and clean.
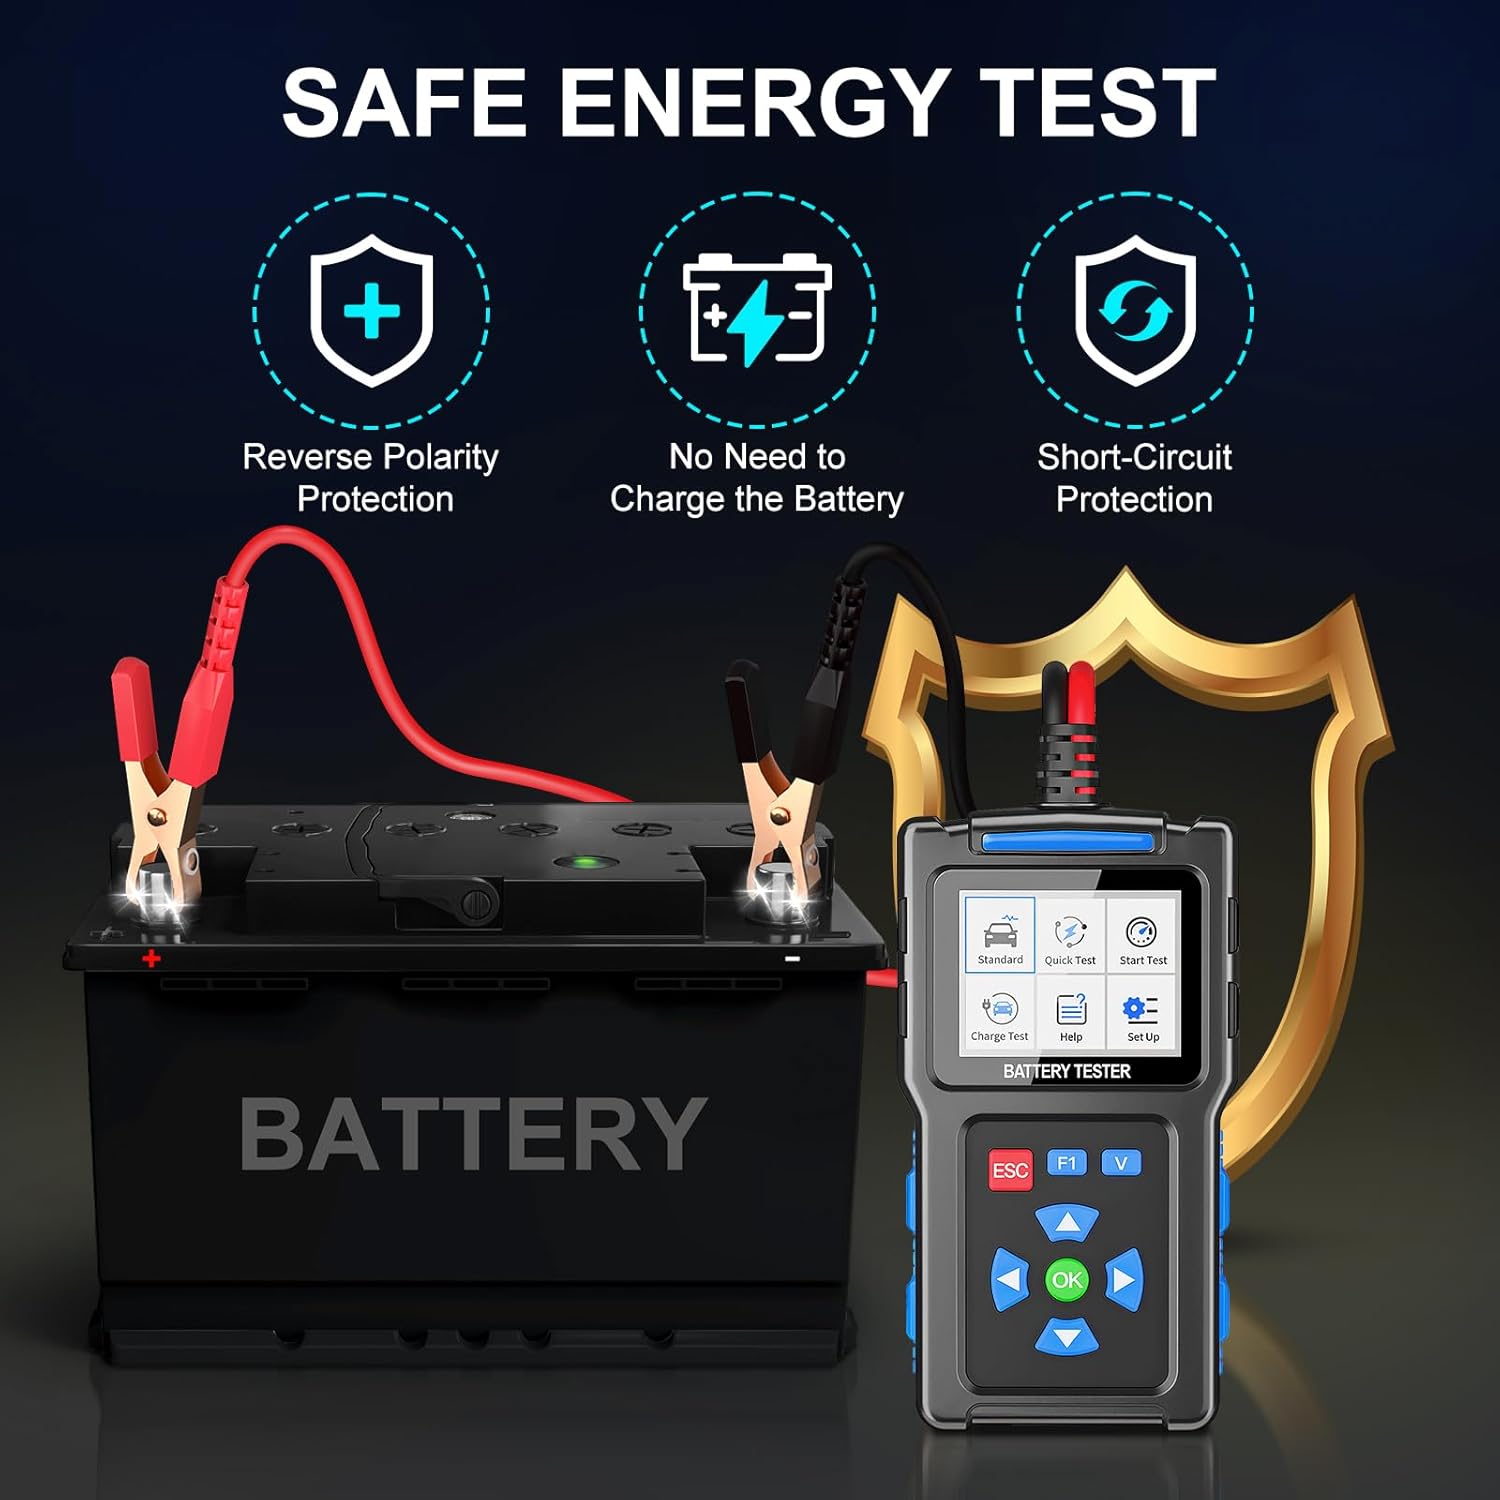
Image 2.1: Safety features of the BT300, including reverse polarity and short-circuit protection.
3. Product Overview
The Topdiag BT300 unit consists of a main testing device with an LCD screen and control buttons, connected to two battery clamps (red for positive, black for negative).
3.1 Device Components
- 2.4-Inch TFT Color Screen: Displays test results and menu options.
- Control Buttons: ESC (Escape), F1 (Function 1), V (Voltage), OK (Confirm), and directional arrow buttons for navigation.
- Battery Clamps: Red for positive terminal, Black for negative terminal.
- USB Interface: For software updates.

Image 3.1: Front view of the Topdiag BT300 battery tester.

Image 3.2: Labeled diagram of the BT300 components and dimensions.
4. Specifications
| Feature | Specification |
|---|---|
| Screen Size | 2.4-Inch TFT Color Screen (320*240) |
| Voltage Range | 12V/24V Battery |
| CCA Range | 20-2000 CCA |
| Battery Range | 10AH-300AH |
| Test Standards | CCA, JIS, GB, SAE, MCA, CA, DIN, IEC, EN, BCI |
| Item Model Number | TD-BT300 |
| Package Dimensions | 6.77 x 3.43 x 2.24 inches |
| Item Weight | 9.91 ounces |
| Power Source | Corded Electric (via battery connection) |
| Min. Operating Voltage | 12 Volts (DC) |
5. Setup and Connection
To begin testing, connect the BT300 to the vehicle battery terminals.
- Step 1: Ensure the vehicle's ignition is off and all electrical accessories are disconnected.
- Step 2: Connect the red clamp of the BT300 to the positive (+) terminal of the battery.
- Step 3: Connect the black clamp of the BT300 to the negative (-) terminal of the battery.
- Step 4: The device will power on automatically. Select the desired test mode from the main menu.

Image 5.1: Step-by-step guide for connecting the BT300 to a battery.
6. Operating Instructions
The BT300 offers several testing modes to diagnose your battery and charging system.
6.1 General Navigation
Use the arrow buttons to navigate through menu options and the OK button to confirm selections. The ESC button returns to the previous screen.
6.2 Standard Test
The Standard Test provides a comprehensive analysis of the battery's condition.
- From the main menu, select Standard Test.
- Choose In-Vehicle or Out-of-Vehicle test.
- Select the Battery Type (e.g., Normal Lead-Acid, AGM Flat, AGM Spiral, GEL, EFB).
- Select the appropriate Test Standard (e.g., CCA, JIS, GB, SAE).
- Input the battery's Rated CCA value.
- The tester will display results including Life (SOH), Voltage, Input Rating, CCA, Impedance, and Power.

Image 6.1: Workflow for performing a Standard Test.
6.3 Quick Test
The Quick Test provides a rapid assessment of the battery's condition, requiring only the AH value.
- From the main menu, select Quick Test.
- Input the battery's AH (Ampere-Hour) rating.
- The tester will quickly display results for battery health, voltage, CCA, and impedance.

Image 6.2: Quick Test procedure and result display.
6.4 Start Test (Cranking System Test)
This test evaluates the vehicle's starting system performance.
- From the main menu, select Start Test.
- Follow the on-screen prompts to crank the engine.
- The tester will analyze the cranking voltage and display results, including minimum and maximum voltage during cranking.

Image 6.3: Start Test results displaying voltage fluctuations during engine cranking.
6.5 Charge Test (Charging System Test)
This test assesses the vehicle's charging system (alternator) performance.
- From the main menu, select Charge Test.
- Follow the on-screen instructions, which typically involve starting the engine and increasing RPMs to a specified level (e.g., 2000-2500 RPM).
- The tester will analyze the charging voltage and ripple, providing a diagnosis of the alternator's health.

Image 6.4: Charge Test instructions and result display.
6.6 Language Settings
The BT300 supports multiple languages for user convenience.
- From the main menu, select Set Up.
- Navigate to Language.
- Select your preferred language from the list (English, Spanish, German, French, Italian, Portuguese, Polish, Chinese, etc.).

Image 6.5: Language selection menu on the BT300.
6.7 Help Function
The device includes a built-in help function to assist with battery specifications and parameters.
- From the main menu, select Help.
- Browse through the help pages to find information on various battery specifications (e.g., CCA values for different AH ratings).
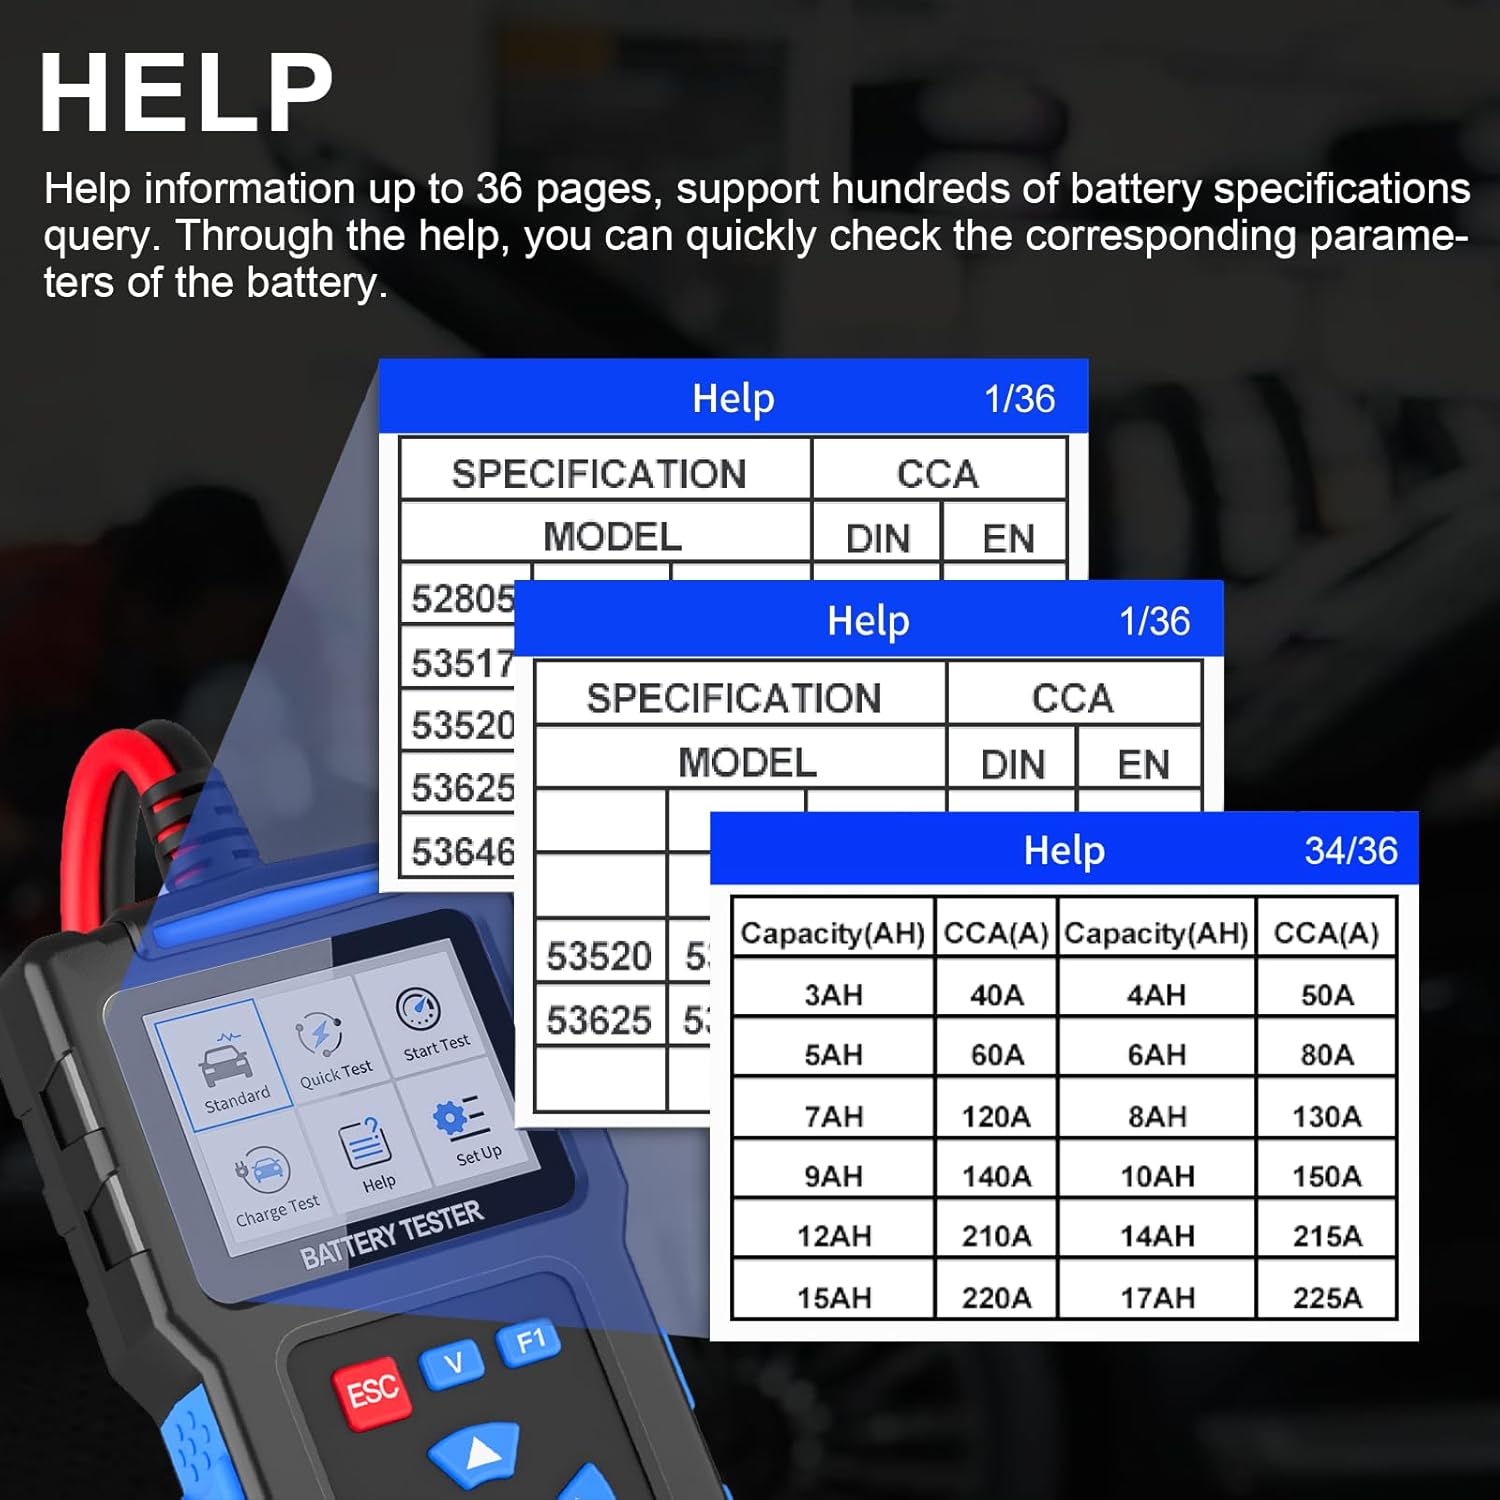
Image 6.6: Examples of the integrated help function providing battery specifications.
7. Battery Types and Vehicle Compatibility
7.1 Supported Battery Types
The Topdiag BT300 is compatible with a wide range of 12V/24V starter batteries:
- Ordinary Lead-Acid Batteries
- AGM Flat Plate Batteries
- AGM Spiral Batteries
- GEL Batteries
- EFB Liquid-Rich Batteries

Image 7.1: Universal battery types compatible with the BT300.
7.2 Vehicle Compatibility
The BT300 can be used on various 12V/24V vehicle battery systems, including but not limited to:
- Cars
- Trucks
- Buses
- Diesel Vehicles
- Motorcycles
- Boats
- Beach Carts
- SUVs
- Golf Carts
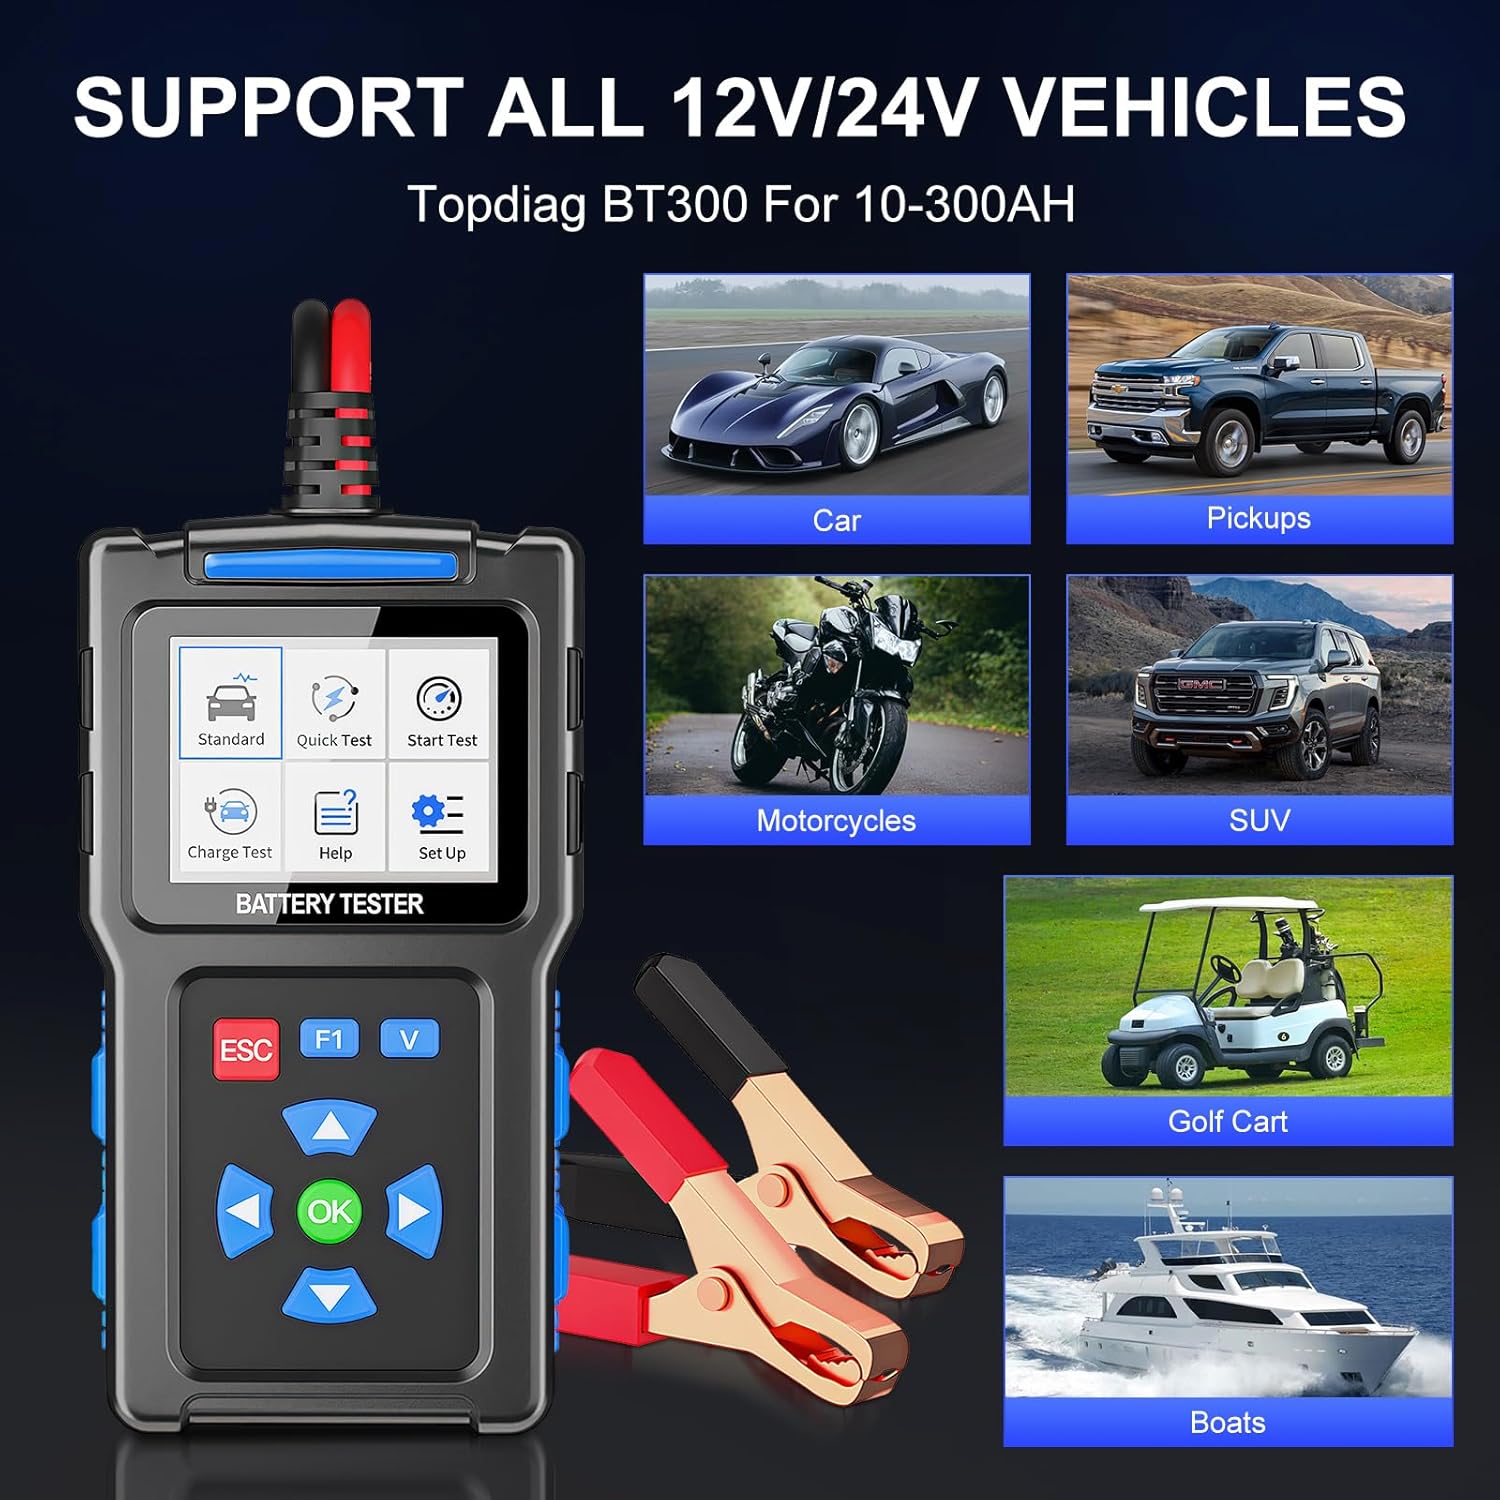
Image 7.2: Examples of vehicles compatible with the BT300.
8. Maintenance
To ensure the longevity and accurate performance of your Topdiag BT300:
- Keep the device clean and free from dust and moisture. Use a soft, dry cloth for cleaning.
- Store the tester in a cool, dry place when not in use.
- Inspect the battery clamps and cables regularly for any signs of damage or wear. Replace if necessary.
- Avoid dropping the device or subjecting it to severe impacts.
9. Troubleshooting
If you encounter issues with your BT300, consider the following:
- Device not powering on: Ensure the battery clamps are securely connected to the correct terminals of a 12V/24V battery. Check for corrosion on battery terminals.
- Inaccurate readings: Verify that the correct battery type and CCA/AH values have been entered for the test. Ensure good contact between the clamps and battery terminals.
- "Right clip positive error" or similar connection errors: Double-check that the red clamp is connected to the positive (+) terminal and the black clamp to the negative (-) terminal. Ensure connections are firm.
- Screen frozen or unresponsive: Disconnect the device from the battery, wait a few seconds, and then reconnect. If the issue persists, contact customer support.
10. Software Update
The Topdiag BT300 supports software updates to ensure access to the latest features and improved compatibility.
- Visit the official Topdiag website or contact your dealer for the latest software version and upgrade tool.
- Connect the BT300 to a PC using the provided USB cable.
- Follow the instructions provided with the software update tool to complete the upgrade process.

Image 10.1: BT300 connected to a computer for software updates.
11. Warranty and Support
Each Topdiag BT300 comes with a 1-year manufacturer warranty. For any suggestions, questions, or technical support regarding your product, please contact Topdiag customer service. Refer to your purchase documentation for specific contact details.


