
1. Introduction
This manual provides comprehensive instructions for the installation, operation, and maintenance of your new DYYMPFA replacement carburetor. This carburetor is designed to restore optimal fuel delivery and engine performance for compatible Mitsubishi engines. Please read this manual thoroughly before attempting any installation or maintenance procedures.
2. Safety Information
Always prioritize safety when working with fuel systems and internal combustion engines. Failure to follow safety precautions can result in serious injury or property damage.
- Ensure the engine is completely off and cooled down before beginning any work.
- Disconnect the spark plug wire to prevent accidental starting.
- Work in a well-ventilated area to avoid inhaling fuel fumes.
- Wear appropriate personal protective equipment, including safety glasses and gloves.
- Have a fire extinguisher readily available.
- Handle fuel with extreme care. Do not smoke or use open flames near fuel.
- Dispose of old fuel and parts responsibly according to local regulations.
- If you are unsure about any step, consult a qualified technician.
3. Compatibility
This DYYMPFA carburetor (Model DYYMPFA8866) is a direct replacement for the following Mitsubishi engine models and equipment:
- Mitsubishi GM291, GM301, GB290, GB300, GT1000 (296CC)
- Mitsubishi 4-Stroke 8HP and 10HP Roto-Tillers
- Mitsubishi MBG/MGE 5500, 4000, 4800 Series Generators
- Mitsubishi Water Pumps
Please verify your engine's model number and compare the appearance and specifications of your existing carburetor with the images provided in this manual to ensure proper fitment. The mounting hole distance (center to center) is approximately 45mm.
4. Installation
This section outlines the general steps for replacing your carburetor. Specific procedures may vary slightly depending on your engine model. Always refer to your engine's service manual for detailed instructions.
4.1. Tools Required
- Socket wrench set
- Screwdriver set (flathead and Phillips)
- Pliers
- Fuel line clamps or pinch-off tool
- Clean rags
- New gaskets (often included with the replacement carburetor)
4.2. Removal of Old Carburetor
- Prepare the Engine: Ensure the engine is cool. Turn off the fuel supply valve. Disconnect the spark plug wire to prevent accidental starting.
- Drain Fuel: Place a suitable container under the carburetor's fuel bowl drain screw (if present) or disconnect the fuel line to drain any remaining fuel.
- Disconnect Fuel Line: Use pliers or a screwdriver to loosen the clamp on the fuel line connected to the carburetor. Carefully pull the fuel line off the carburetor's inlet. Use a fuel line clamp to prevent fuel leakage from the tank.
- Disconnect Linkages: Carefully observe and disconnect all throttle and choke linkages connected to the carburetor. Take photos or make notes to aid reassembly.
- Remove Mounting Bolts: Locate and remove the nuts or bolts that secure the carburetor to the engine's intake manifold. There are typically two bolts.
- Remove Carburetor: Carefully pull the old carburetor away from the engine. Be mindful of any gaskets between the carburetor and the engine/air filter housing.
4.3. Installation of New Carburetor
- Prepare Mounting Surface: Clean any old gasket material from the engine's intake manifold and the air filter housing mounting surface. Ensure surfaces are smooth and clean.
- Install New Gaskets: Place new gaskets in their correct positions. Refer to your engine's service manual for the correct gasket order and orientation.
- Position New Carburetor: Carefully align the new DYYMPFA carburetor with the mounting studs/holes on the engine.
- Secure Carburetor: Install the mounting nuts or bolts and tighten them evenly to the manufacturer's specified torque. Do not overtighten.
- Connect Linkages: Reconnect the throttle and choke linkages to the new carburetor. Ensure they move freely and operate correctly.
- Connect Fuel Line: Reattach the fuel line to the carburetor's fuel inlet. Secure it with the fuel line clamp. Remove any fuel line pinch-off tools.
- Final Checks: Double-check all connections, ensuring they are secure. Verify that no tools or debris are left in the engine area.

Figure 1: Front view of the carburetor, highlighting the throttle plate and mounting points.
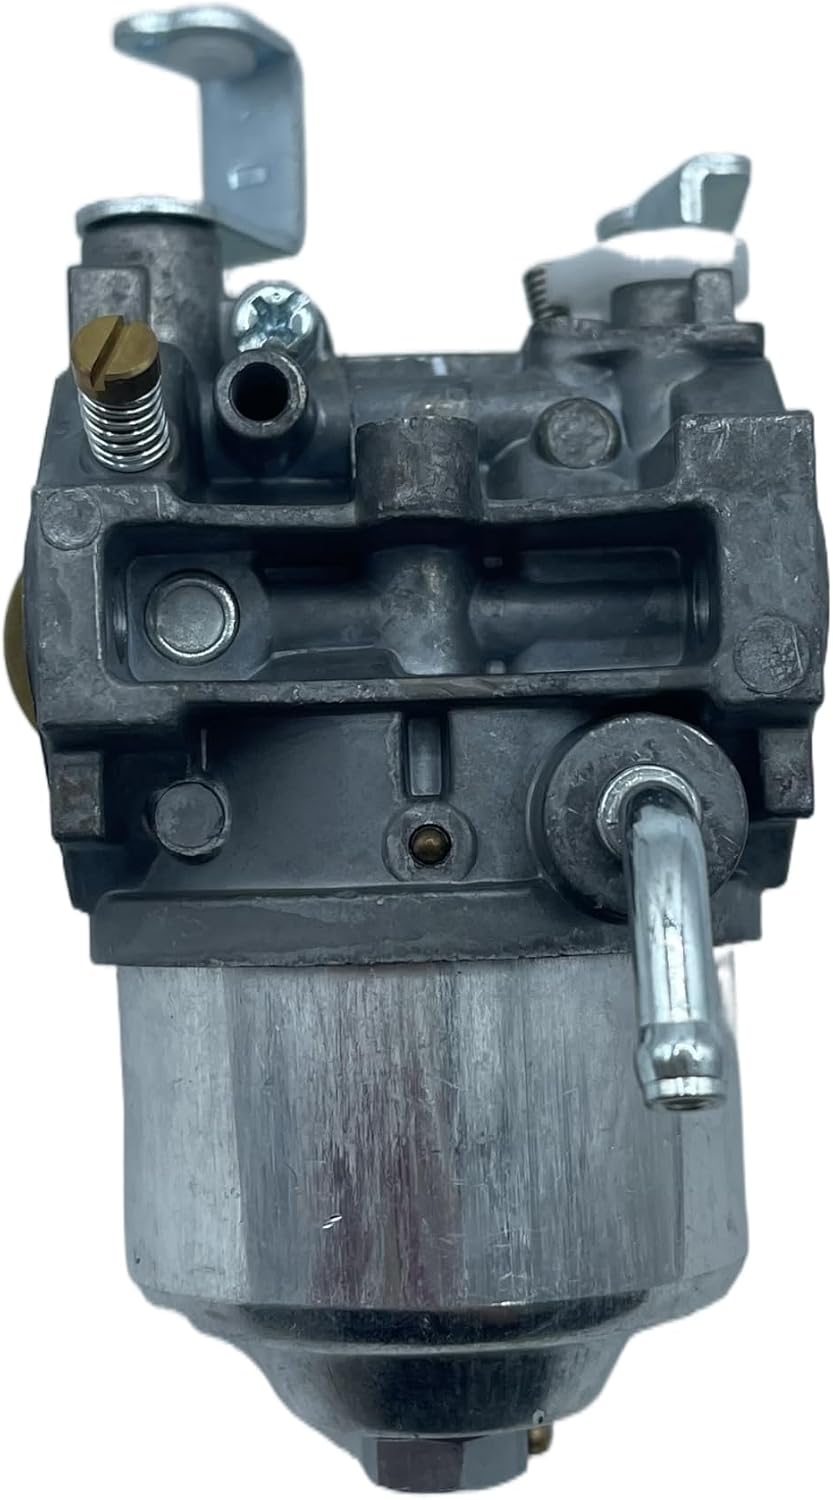
Figure 2: Side view, illustrating the fuel inlet and linkage attachment points.

Figure 3: Side view with "GM291" marking, showing the fuel bowl and additional linkages.

Figure 4: Angled view, providing a clearer perspective of the mounting flange and fuel inlet.

Figure 5: Top view, detailing the throttle and choke linkage mechanisms.
5. Operation
After successful installation, the carburetor will regulate the air-fuel mixture for your engine. Follow your engine manufacturer's instructions for starting and operating your equipment. Ensure the fuel tank contains fresh, clean fuel appropriate for your engine type.
- Fuel Supply: Open the fuel supply valve.
- Choke: For cold starts, engage the choke as per your engine's instructions.
- Throttle: Set the throttle to the appropriate starting position.
- Starting: Pull the recoil starter or engage the electric starter.
- Warm-up: Allow the engine to warm up before disengaging the choke and operating at full throttle.
6. Maintenance
Regular maintenance helps ensure the longevity and optimal performance of your carburetor and engine.
- Fuel Quality: Always use fresh, clean, and ethanol-free fuel if possible. Ethanol can degrade carburetor components over time.
- Fuel Filter: Regularly inspect and replace the fuel filter to prevent contaminants from reaching the carburetor.
- Air Filter: Keep the air filter clean to ensure proper airflow to the carburetor. A dirty air filter can cause a rich fuel mixture.
- Storage: Before long-term storage, drain the fuel from the carburetor bowl or run the engine until it runs out of fuel to prevent gumming and varnish buildup. Alternatively, use a fuel stabilizer.
- Cleaning: If performance issues arise, the carburetor may need cleaning. This typically involves disassembling the carburetor, cleaning jets and passages with carburetor cleaner, and replacing gaskets. This procedure should only be performed by individuals with mechanical experience.
7. Troubleshooting
If you experience issues after installing the new carburetor, consider the following common problems and solutions:
- Engine Not Starting:
- Check fuel supply (on, fresh fuel).
- Ensure spark plug is connected and functional.
- Verify choke operation.
- Check for proper fuel line connection and no kinks.
- Engine Runs Poorly/Rough:
- Inspect air filter for cleanliness.
- Check for vacuum leaks around carburetor gaskets.
- Ensure throttle and choke linkages are correctly adjusted and move freely.
- Verify fuel quality.
- Fuel Leaks:
- Check all fuel line connections and clamps.
- Ensure carburetor bowl gasket is properly seated and not damaged.
- Verify float level and needle valve are functioning correctly (requires carburetor disassembly).
If problems persist after basic troubleshooting, it is recommended to consult a professional engine technician.
8. Specifications
| Brand: | DYYMPFA |
| Model Number: | DYYMPFA8866 |
| Mounting Hole Distance (C-C): | Approx. 45mm |
| Item Weight: | 50 Grams |
| Unit Count: | 1.0 Count |
| Compatible Engine HP: | 8HP - 10HP |
9. Warranty and Support
For warranty information or technical support regarding your DYYMPFA replacement carburetor, please contact the seller or manufacturer directly. Keep your purchase receipt as proof of purchase.