Wisoqu Wisoqupay5qbc1gd
Wisoqu Dash Cam User Manual
Model: Wisoqupay5qbc1gd
1. Introduction
Thank you for choosing the Wisoqu Dash Cam. This device is designed to provide reliable video recording of your journeys, offering enhanced safety and evidence in case of incidents. Featuring 1080P Full HD resolution, a wide-angle lens, and advanced functions like Super Night Vision, Loop Recording, Motion Detection, WDR, G-Sensor, and Parking Monitor, this dash cam ensures comprehensive coverage of your vehicle's surroundings.
Please read this manual carefully before using the product to ensure proper operation and to maximize its performance and longevity.
2. Package Contents
Please verify that all items listed below are included in your package. If any items are missing or damaged, please contact customer support.
- 1 x Dash Camera (Main Unit)
- 1 x Charger (Car Power Adapter)
- 1 x Rear Camera
- 1 x Bracket (Suction Cup Mount)
- 1 x Double Sided Sticker
- 2 x Screws
- 1 x Instruction Manual

Image: All components included in the Wisoqu Dash Cam package.
3. Product Features
The Wisoqu Dash Cam is equipped with several advanced features to provide a robust recording solution for your vehicle:
- High Definition Image: The dash camera utilizes a high-definition lens, recording clearer picture and sound, enhancing video quality and visibility.
- Record Inside and Outside: Features a 170° wide-angle front lens and a 120° wide-angle interior lens, allowing you to record both the road ahead and the vehicle's interior simultaneously.
- Three-Way Camera System: Supports picture-in-picture display, enabling different screen viewing modes. It can record simultaneously from the front, inside, and rear of the vehicle, providing comprehensive coverage.
- All-Round Video Recording: Records all details of the driving process from multiple angles, improving evidence reliability and aiding in accident responsibility identification.
- Easy to Install: Designed for straightforward installation, saving time and effort.
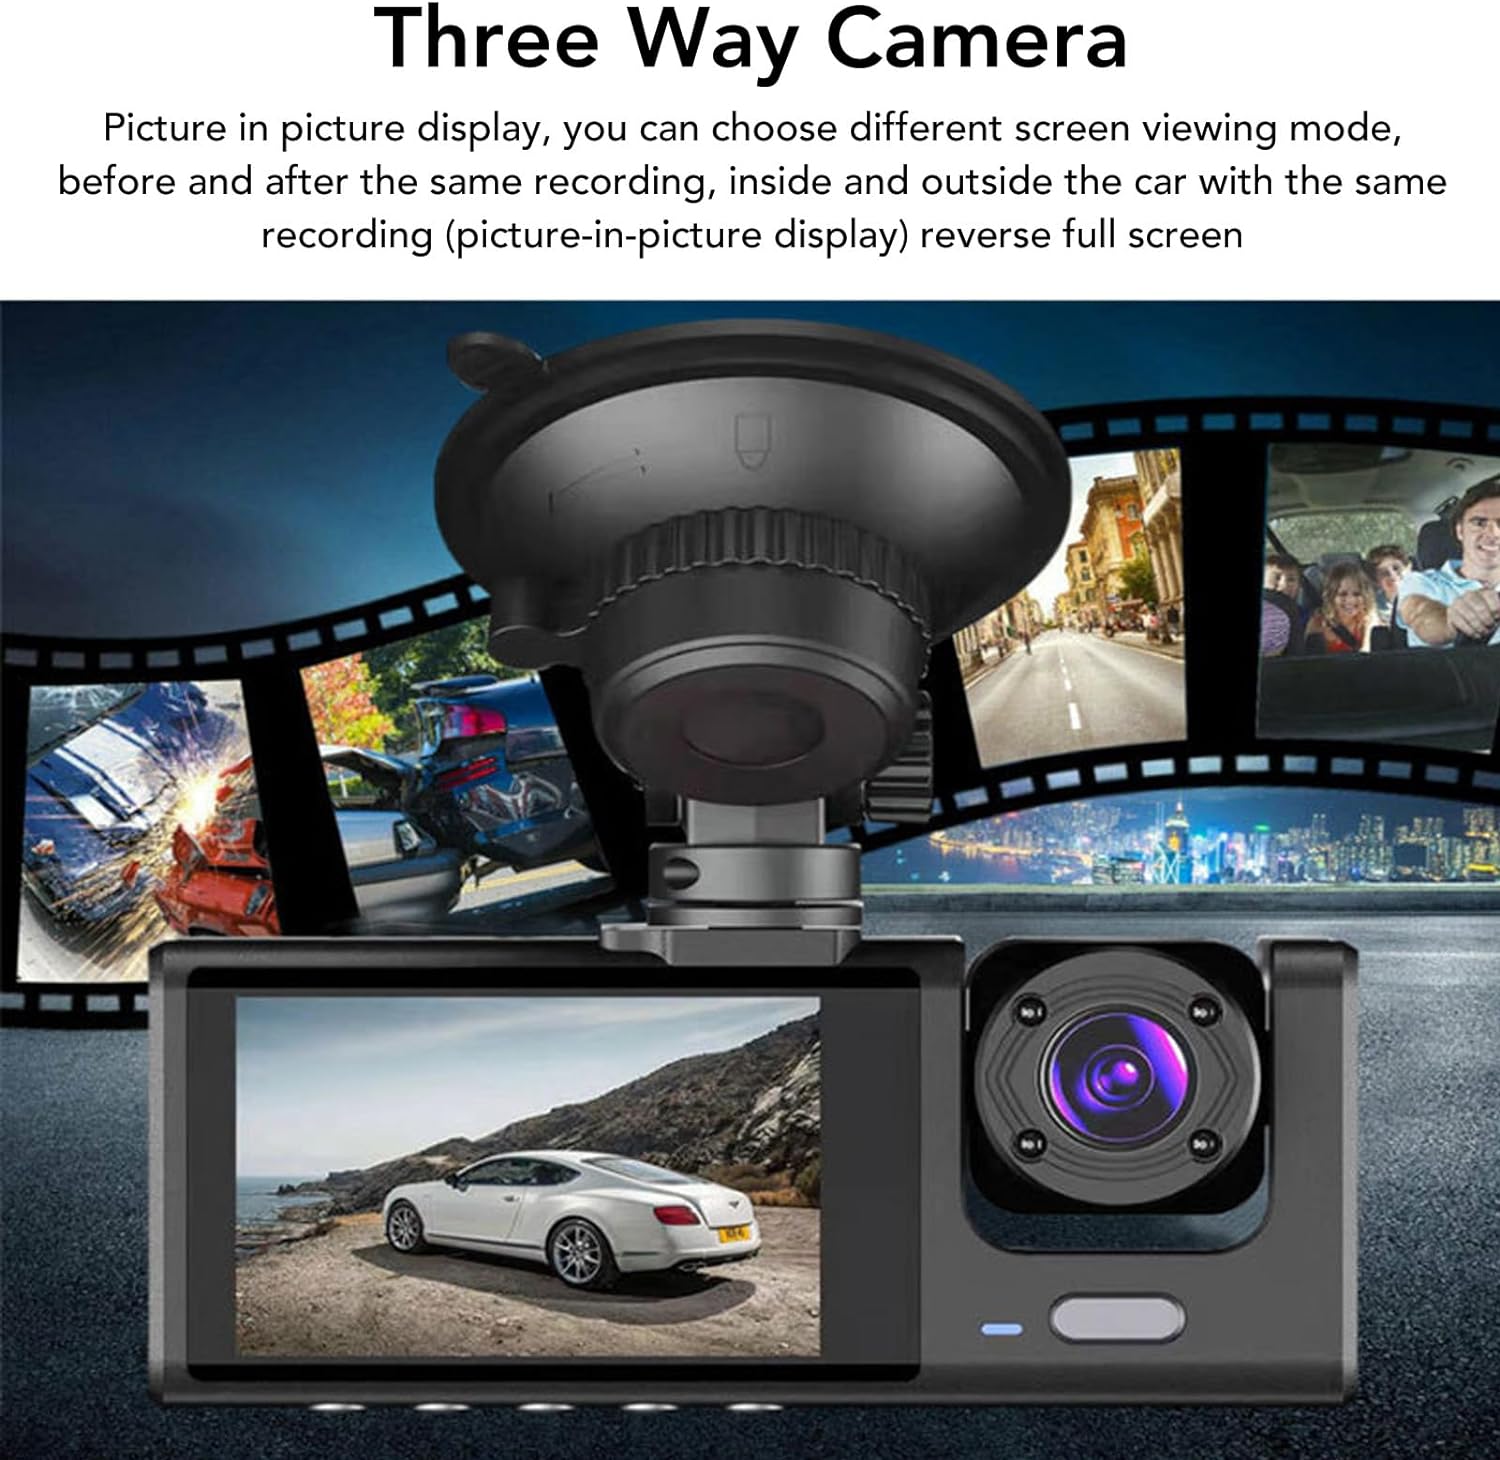
Image: Illustration of the three-way camera system displaying simultaneous views.

Image: Visual representation of the 170° front and 120° interior wide-angle coverage.
4. Product Diagram
Familiarize yourself with the main components and ports of your Wisoqu Dash Cam:
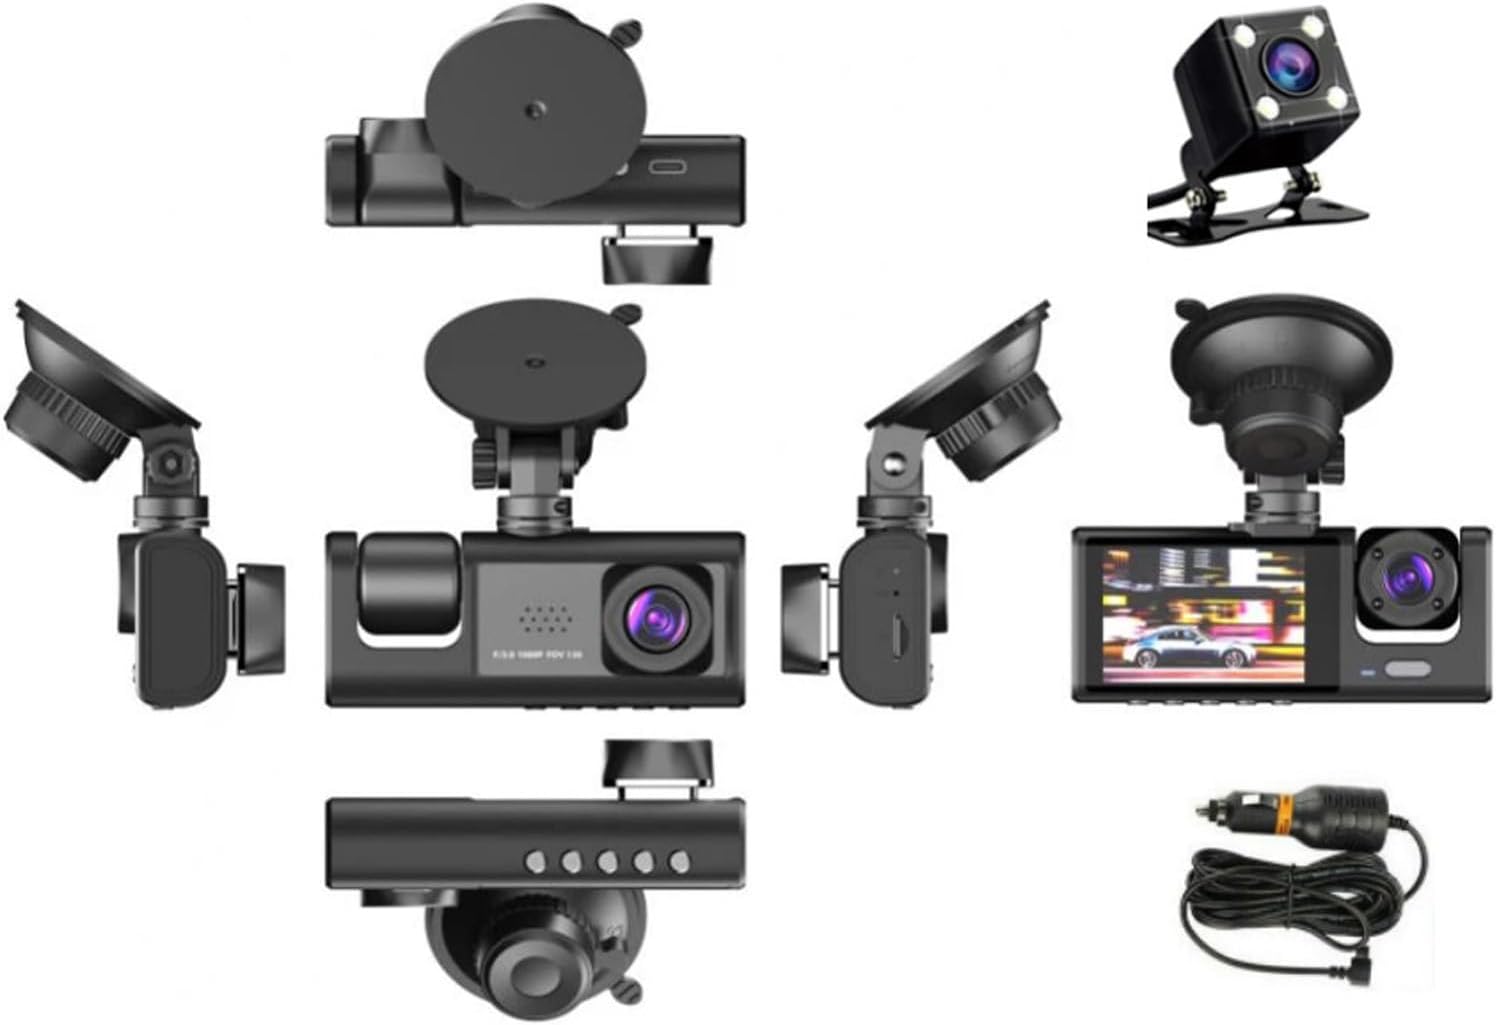
Image: Various angles of the dash cam and its accessories, highlighting different ports and buttons.
- Front Lens: Main recording lens for the road ahead.
- Interior Lens: Records the vehicle's cabin.
- Display Screen: For viewing live footage, playback, and menu navigation.
- Mounting Slot: For attaching the suction cup bracket.
- Power Port: Connects to the car charger.
- TF Card Slot: Insert MicroSD card (not included) for storage.
- Rear Camera Port: Connects the rear camera cable.
- Control Buttons: For menu navigation, recording start/stop, mode switching, etc.
- Rear Camera: Records footage from the back of the vehicle.
5. Setup and Installation
Follow these steps to properly install your Wisoqu Dash Cam:
5.1 Preparing the MicroSD Card
The dash cam requires a MicroSD card (Class 10 or higher, up to 32GB recommended) for recording. Please format the card in the dash cam's settings menu before first use and periodically thereafter to ensure optimal performance.
5.2 Installing the Front Dash Cam
- Clean the windshield area where you intend to mount the dash cam.
- Attach the suction cup bracket to the dash cam's mounting slot.
- Press the suction cup firmly against the windshield and lock it into place.
- Adjust the angle of the dash cam to ensure a clear view of the road and interior.
5.3 Installing the Rear Camera
- Identify a suitable location on your rear windshield for the rear camera. Ensure it has a clear view and does not obstruct your vision.
- Use the provided double-sided sticker or screws to securely mount the rear camera.
- Route the rear camera cable to the main dash cam unit, ensuring it does not interfere with airbags or vehicle controls. Connect the cable to the rear camera port on the main unit.
5.4 Power Connection
- Connect the car charger to the dash cam's power port.
- Plug the other end of the car charger into your vehicle's cigarette lighter socket.
- The dash cam will typically power on automatically when the vehicle starts and power off when the engine is turned off.

Image: The dash cam installed on a windshield, ready for operation.
6. Operating Instructions
This section details the basic operation and key functions of your dash cam.
6.1 Power On/Off
- Automatic: The dash cam will power on and begin recording automatically when connected to power and the vehicle engine starts. It will power off automatically when the engine is turned off.
- Manual: Press and hold the Power button to manually turn the device on or off.
6.2 Recording Modes
- Loop Recording: The dash cam continuously records video in short segments (e.g., 1, 3, or 5 minutes). When the memory card is full, the oldest unlocked files will be overwritten.
- Motion Detection: When enabled, the dash cam will automatically start recording if it detects motion in front of the vehicle while parked. This requires a continuous power supply (e.g., hardwire kit, not included).
- G-Sensor (Emergency Recording): In the event of a sudden impact or collision, the built-in G-Sensor will automatically lock the current video file, preventing it from being overwritten by loop recording.
- Parking Monitor: When enabled, the dash cam will automatically record a short video if it detects a collision or vibration while the vehicle is parked. This also typically requires a continuous power supply.
6.3 Menu Navigation
Use the control buttons on the dash cam to navigate through the menu options. Common settings include:
- Video Resolution
- Loop Recording Duration
- G-Sensor Sensitivity
- Motion Detection On/Off
- Parking Monitor On/Off
- Date/Time Stamp
- Language Settings
- Format SD Card
7. Maintenance
Proper care and maintenance will extend the life of your dash cam:
- Cleaning: Use a soft, dry cloth to clean the camera lenses and screen. Do not use abrasive cleaners or solvents.
- Temperature: Avoid exposing the dash cam to extreme temperatures (hot or cold) for prolonged periods, as this can damage the internal components and battery.
- MicroSD Card: Regularly format your MicroSD card (at least once a month) to prevent data corruption and ensure smooth recording. Replace the card if it shows signs of degradation or errors.
- Firmware: Check the manufacturer's website periodically for firmware updates. Updating firmware can improve performance and add new features.
8. Troubleshooting
If you encounter issues with your Wisoqu Dash Cam, refer to the following common problems and solutions:
| Problem | Possible Cause | Solution |
|---|---|---|
| Dash cam does not power on. | No power, faulty charger, or dead battery. | Check power connection. Ensure car charger is working. Charge the internal battery for a few minutes. |
| Recording stops or freezes. | Faulty/slow MicroSD card, card full, or G-Sensor too sensitive. | Use a Class 10 or higher MicroSD card. Format the card. Reduce G-Sensor sensitivity. |
| Video quality is poor. | Dirty lens, protective film on lens, or low resolution setting. | Clean the lens. Remove any protective film. Set video resolution to 1080P in settings. |
| Buttons are unresponsive. | System crash or temporary software issue. | Perform a soft reset by pressing the reset button (if available) or disconnecting and reconnecting power. |
| Rear camera not displaying. | Loose connection or faulty cable/camera. | Check the connection of the rear camera cable to the main unit. Ensure the cable is not damaged. |
9. Specifications
Detailed technical specifications for the Wisoqu Dash Cam:
| Feature | Specification |
|---|---|
| Model Name | Wisoqupay5qbc1gd |
| Product Dimensions | 5.91 x 4.33 x 2.76 inches |
| Item Weight | 1.17 pounds |
| Video Capture Resolution | 1080p |
| Front Lens Angle | 170° Wide Angle |
| Interior Lens Angle | 120° Wide Angle |
| Battery | Lithium battery (320mAH) (built-in) |
| Voltage | 12 to 24V |
| Connectivity Technology | Ethernet (for internal communication) |
| Special Features | Adjustable, Super Night Vision, Loop Recording, Motion Detection, WDR, G Sensor, Parking Monitor |
| Supported Languages | Chinese, English, Spanish and other multinational languages |
10. Warranty and Support
Wisoqu products are manufactured to high quality standards. For specific warranty information, please refer to the warranty card included with your purchase or visit the official Wisoqu website. If you require technical assistance or have questions not covered in this manual, please contact Wisoqu customer support through the retailer or the official brand channels.
no relevant documents
Ask a question about this manual
Ask about setup, troubleshooting, compatibility, parts, safety, or missing instructions. Manuals+ will review the question and use this page’s manual context to help answer it.