Introduction
This manual provides detailed instructions for the INQMEGA Metal 20X Zoom 4G Cellular Security Solar Camera. This device is designed for outdoor surveillance, featuring 4G LTE connectivity, a 10W solar panel, a 20000mA battery, dual-lens with 20X optical zoom, 6MP resolution, PIR motion detection, and color night vision. Please read this manual thoroughly before installation and operation to ensure proper use and optimal performance.
What's in the Box

Image: A visual representation of all components included in the product package, showing the camera, solar panel, battery partner, bracket, extension cord, user manual, power cable, and screws.
- Solar Camera x 1
- Solar Panel x 1
- Battery Partner x 1
- Bracket x 1
- Extension Cord x 1
- User Manual x 1
- Power Cable x 1
- Screw Set (including screws and wrench)
Specifications
| Feature | Detail |
|---|---|
| Model Number | ST-599-6M-20X-10W-4G-US-4 |
| Indoor/Outdoor Usage | Outdoor |
| Connectivity Protocol | Cellular (4G LTE) |
| Power Source | Solar Powered (10W Solar Panel) with 20000mA Built-in Battery |
| Video Capture Resolution | 6MP |
| Optical Zoom | 20X |
| Lens Configuration | Lens①: 2.8mm, Lens②: 4.9+47.04mm (Dual-Lens) |
| Night Vision | Color Night Vision, Infrared distance up to 50m (164ft), Dual spotlights for illumination up to 65ft. |
| Motion Detection | PIR Human Detection (Max 12M) |
| Storage Options | Amazon Cloud & TF Card (MAX 128GB, Not Included) |
| Controller Type | UBOX App |
| Mounting Type | Wall Mount |
| Material | Metal |
| Water Resistance Level | Waterproof (IP67) |
| Item Weight | 5.5 pounds |
Setup
1. SIM Card Installation
This camera operates on 4G LTE cellular networks. Ensure the included 4G LTE SIM card is properly installed into the camera's designated slot. The camera does not require Wi-Fi connectivity.
2. Charging the Battery
Before initial use, it is recommended to fully charge the camera's built-in 20000mA battery using the provided power cable. Connect the power cable to the camera and a suitable power adapter (not included). The solar panel will maintain the charge once installed.
3. Mounting the Camera and Solar Panel
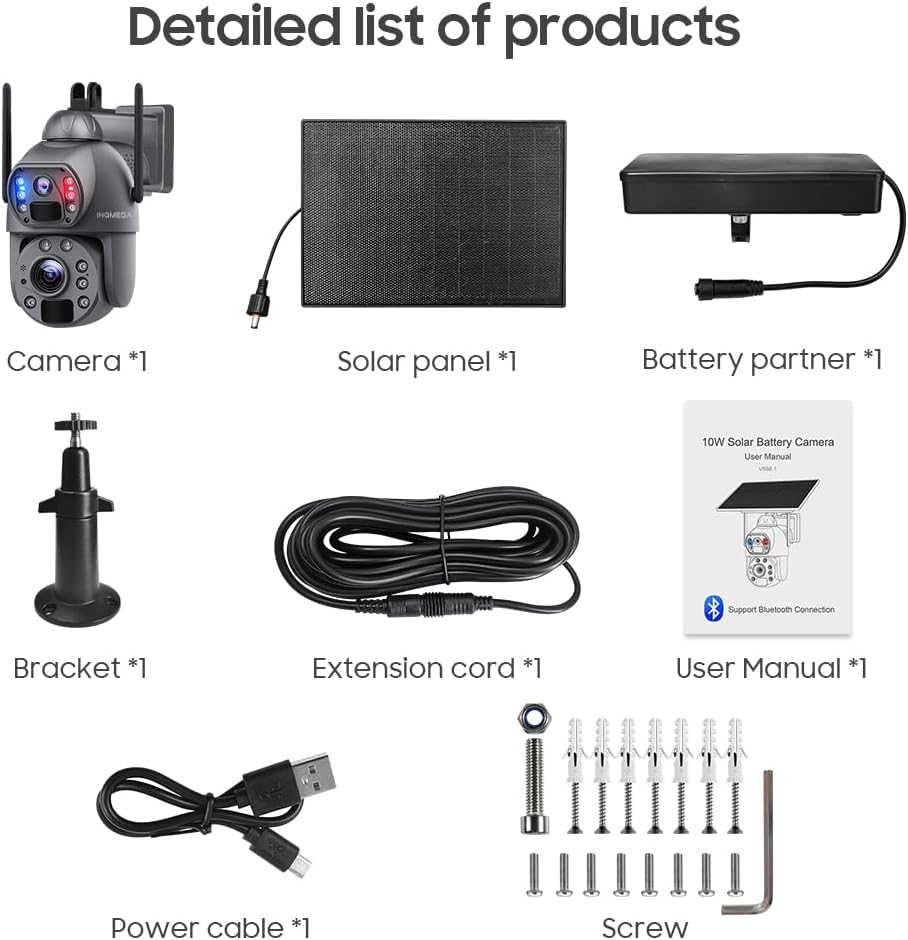
Image: Illustration of two installation methods: integrated, where the solar panel is attached directly to the camera, and extended, where the solar panel is mounted separately using an extension cable for optimal sun exposure.
The camera supports two installation methods:
- Integrated Installation: Attach the solar panel directly to the camera unit. This is suitable when the camera's mounting location receives ample direct sunlight.
- Extended Installation: Use the provided extension cable to mount the solar panel separately from the camera. This allows you to place the camera in the desired surveillance spot and the solar panel in a location with maximum sun exposure for continuous power absorption.
Use the included bracket and screws to securely mount the camera and/or solar panel to a wall or suitable surface. Ensure the mounting location provides a clear field of view and, for the solar panel, unobstructed sunlight.

Image: A visual demonstrating the solar panel connected to the camera, highlighting its ability to provide uninterrupted power throughout the day and night.
4. App Installation and Pairing
Download the UBOX app from your smartphone's app store (iOS or Android). Follow the in-app instructions to register an account and add your camera. The app will guide you through the pairing process, which typically involves scanning a QR code on the camera or entering its device ID.
Operating Instructions
1. Live View and Dual-Lens Functionality

Image: A smartphone screen displaying the UBOX app, showing two simultaneous video feeds from the camera's dual lenses: one wide-angle and one PTZ zoom lens.
Open the UBOX app to access the live view from your camera. The dual-lens system provides two distinct video screens within the app:
- One screen displays the wide-angle view from Lens① (2.8mm).
- The other screen displays the view from the PTZ Zoom Lens② (4.9+47.04mm).
You can switch between views or observe both simultaneously, depending on the app's interface.
2. 20X Optical Zoom

Image: A visual comparison demonstrating the clarity and detail gained when zooming from 1X to 10X and then to 20X, showing a distant house and a vehicle's license plate becoming clearly visible.
Utilize the 20X optical zoom feature through the UBOX app to magnify distant objects without significant loss of image quality. This allows for detailed observation of areas far from the camera's immediate vicinity.
3. Night Vision

Image: A detailed view of the camera's upper and lower lenses, highlighting the laser infrared lamps and demonstrating how they enable clear night vision, including zoomed-in views of objects in low light.
The camera is equipped with 2 laser lights and 10 infrared/white lights, providing effective night vision up to 50 meters (164 feet). The powerful dual spotlights can illuminate up to 65 feet, enabling color night vision in low-light conditions.
4. PIR Motion Detection
The Passive Infrared (PIR) sensor detects human motion up to 12 meters. When motion is detected, the camera will wake up, record footage, and send alerts to your UBOX app. Adjust sensitivity settings within the app to minimize false alarms.
5. Storage Methods

Image: A graphic illustrating the two primary storage methods for recorded video: a TF (microSD) card slot for local storage and a cloud storage option for remote backup, both accessible via the app.
Recorded footage can be stored using two methods:
- TF Card: Insert a microSD card (up to 128GB, not included) into the camera's TF card slot for local storage.
- Amazon Cloud Storage: Subscribe to Amazon Cloud storage services (if available and supported by the app) for secure remote backup of your recordings.
Access and manage your recordings through the UBOX app.
Maintenance
- Solar Panel Cleaning: Regularly clean the surface of the solar panel to ensure maximum efficiency in converting sunlight into power. Dust, dirt, and debris can reduce charging performance.
- Lens Cleaning: Gently clean the camera lenses with a soft, lint-free cloth to maintain clear image quality. Avoid abrasive materials or harsh chemicals.
- Battery Performance: While the camera is designed for continuous operation with solar power, prolonged periods of low sunlight or high activity may deplete the battery. Monitor battery status via the UBOX app. The camera can run continuously for approximately 3 months without sunlight under typical usage (30 wake-ups/day, 20s each).
- Firmware Updates: Check the UBOX app periodically for available firmware updates to ensure optimal performance and security.
Troubleshooting
- Camera Not Powering On:
- Ensure the battery is charged. Connect the camera to a power source using the USB cable to charge it directly.
- Verify the solar panel is connected correctly and receiving sufficient sunlight.
- No 4G Connectivity:
- Check if the 4G SIM card is correctly inserted.
- Ensure the SIM card has an active data plan.
- Verify 4G signal strength in the camera's location via the UBOX app.
- App Connection Issues:
- Ensure your smartphone has a stable internet connection.
- Restart the UBOX app.
- If issues persist, try re-pairing the camera with the app.
- Poor Image Quality:
- Clean the camera lenses.
- Ensure there are no obstructions in the camera's field of view.
- Check network signal strength, as poor 4G signal can affect streaming quality.
- Motion Detection Not Working:
- Verify PIR motion detection is enabled in the UBOX app settings.
- Adjust PIR sensitivity settings.
- Ensure the camera's placement allows for effective motion detection within the specified range (up to 12M).
Warranty and Support
For warranty information, please refer to the documentation provided with your purchase or contact INQMEGA customer support directly. Keep your purchase receipt as proof of purchase.
For technical support or further assistance, please visit the INQMEGA official website or contact their customer service channels. Refer to the contact information provided in the packaging or on the brand's official online presence.