Introduction
This manual provides comprehensive instructions for the assembly, installation, operation, and maintenance of your Tecmojo 18U Wall Mount Rack. Please read this manual thoroughly before use to ensure proper setup and safe operation.
Key Features
- Professional Steel Construction: Made from premium cold-rolled steel with a powder-coated finish, supporting up to 176 lbs when wall-mounted and 350 lbs when floor-mounted.
- Space-Efficient Design: Compatible with standard 19-inch rack equipment, offering flexible installation for both freestanding and wall-mounted configurations. Expanded side access enhances cable management and organization.
- Advanced Ventilation & Security: Features dual top-mounted fans for efficient cooling and lockable front glass door and side panels to protect equipment from unauthorized access.
- Easy & Customizable Equipment Setup: Removable side panels, security locks, and included casters provide flexible configurations and mobility.
Product Overview
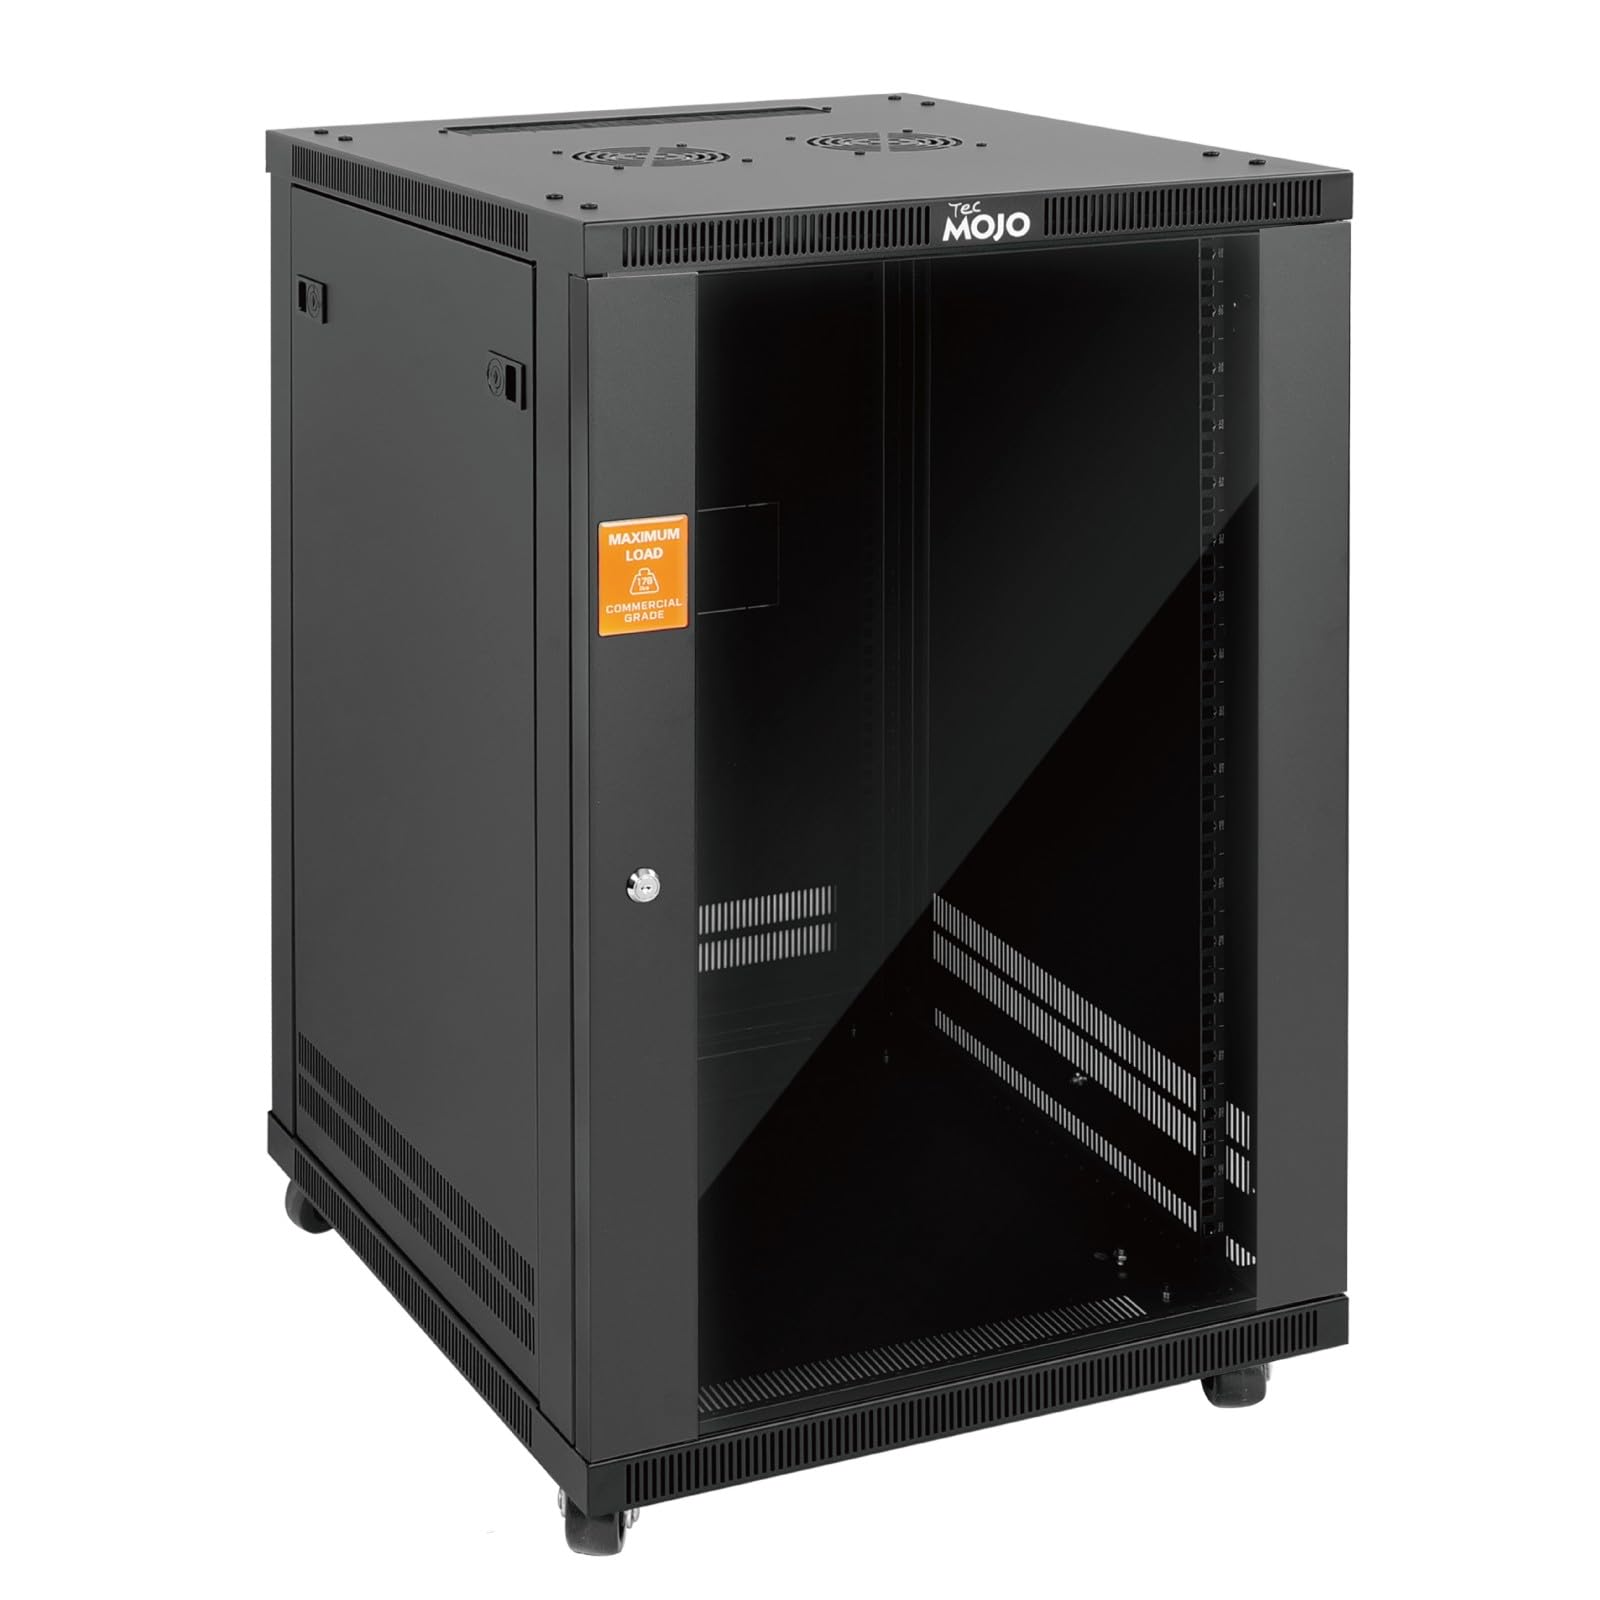
Figure 1: Tecmojo 18U Wall Mount Rack with Glass Door.

Figure 2: Front view of the 18U network cabinet illustrating exterior depth and maximum rail depth.

Figure 3: Detailed specifications chart for the Tecmojo 18U rack.
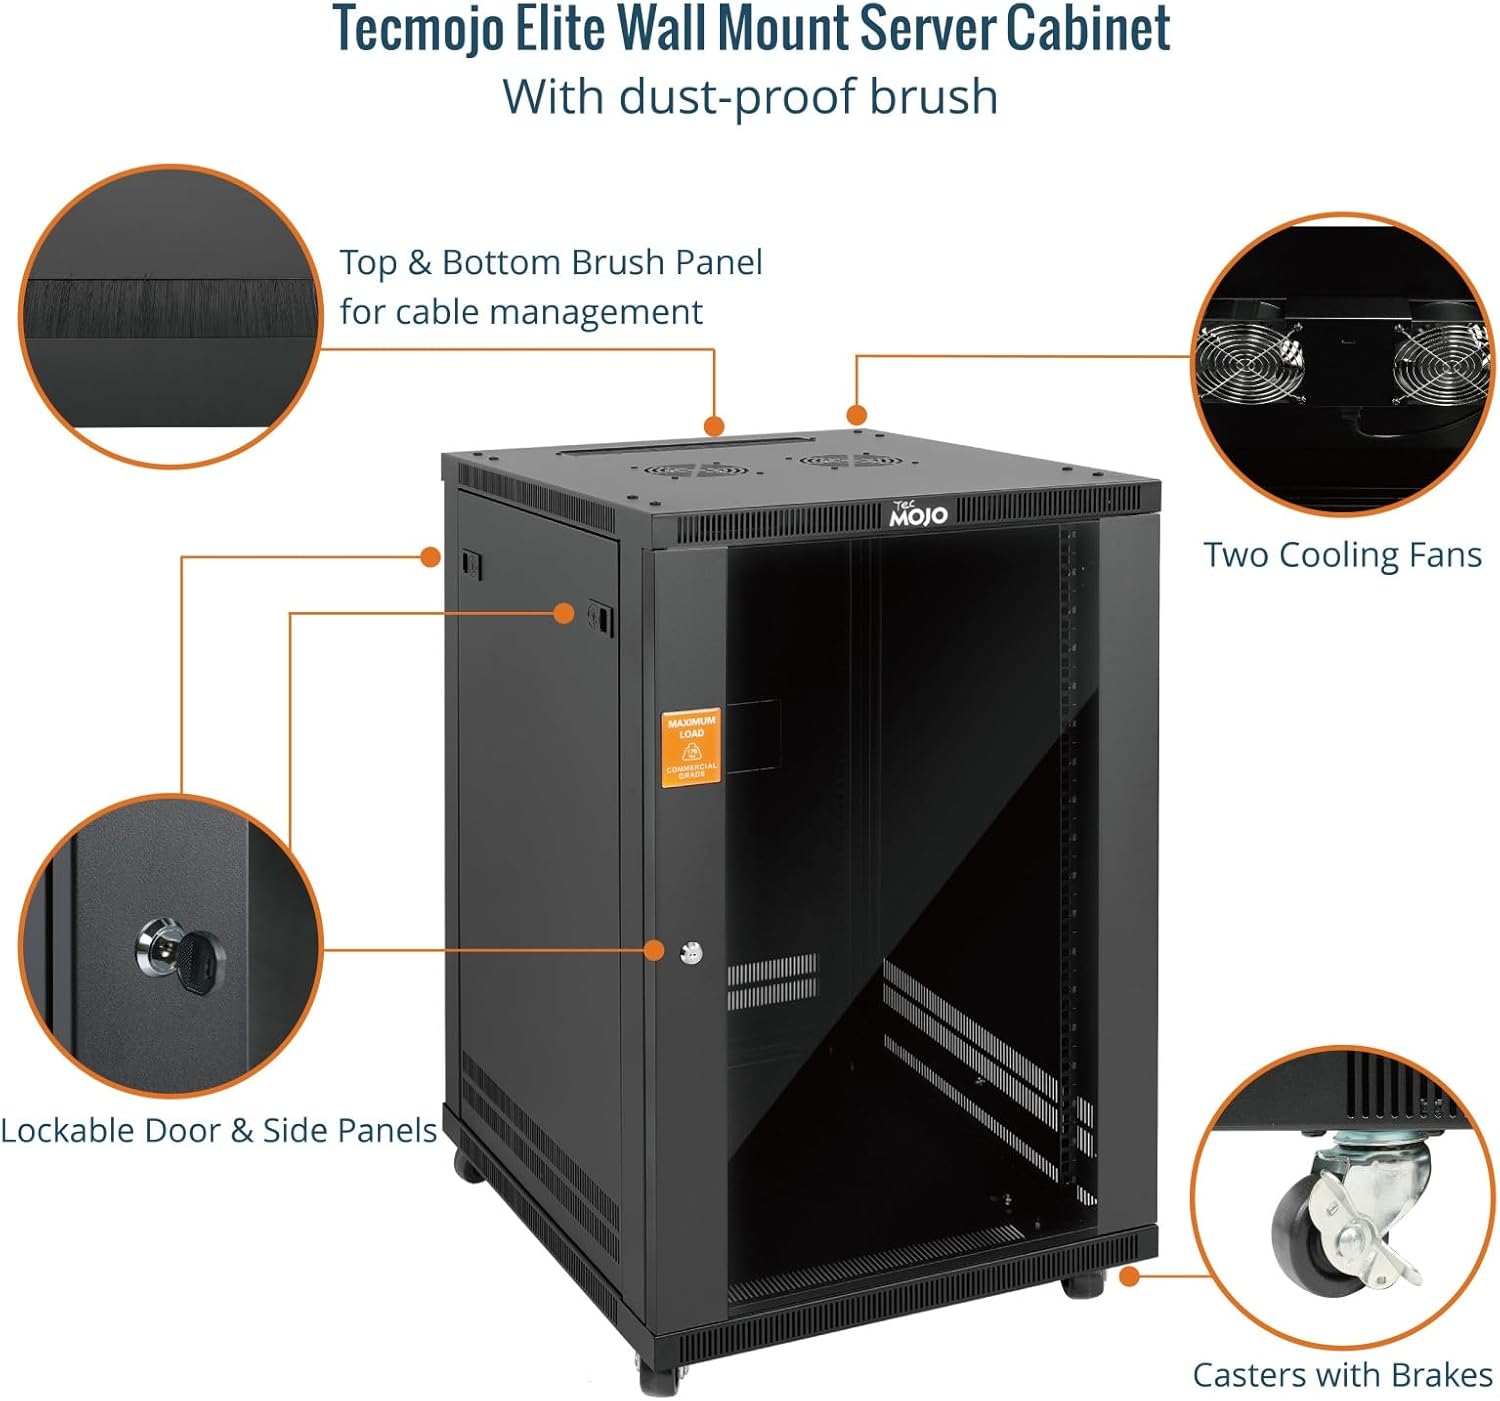
Figure 4: Key features of the Tecmojo Elite Wall Mount Server Cabinet.
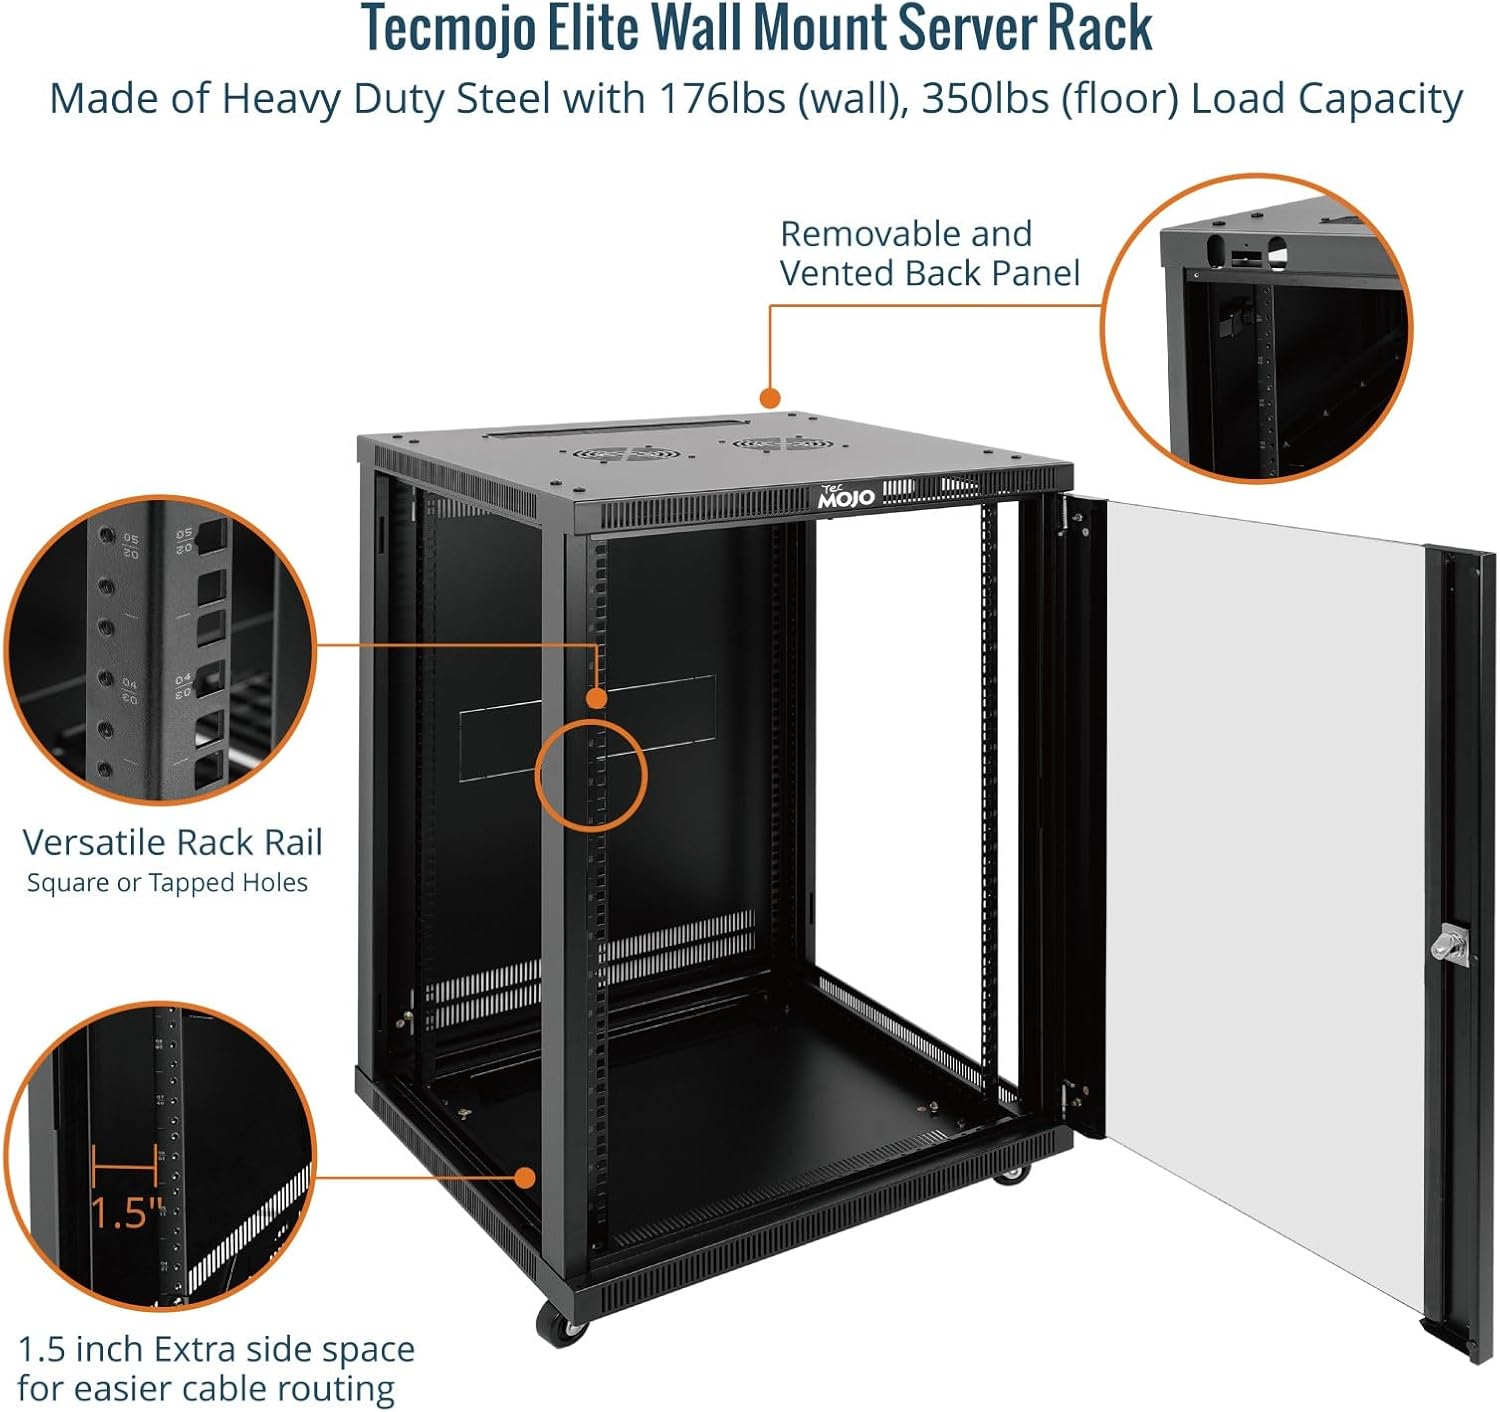
Figure 5: Internal view showcasing cable management and rail features.
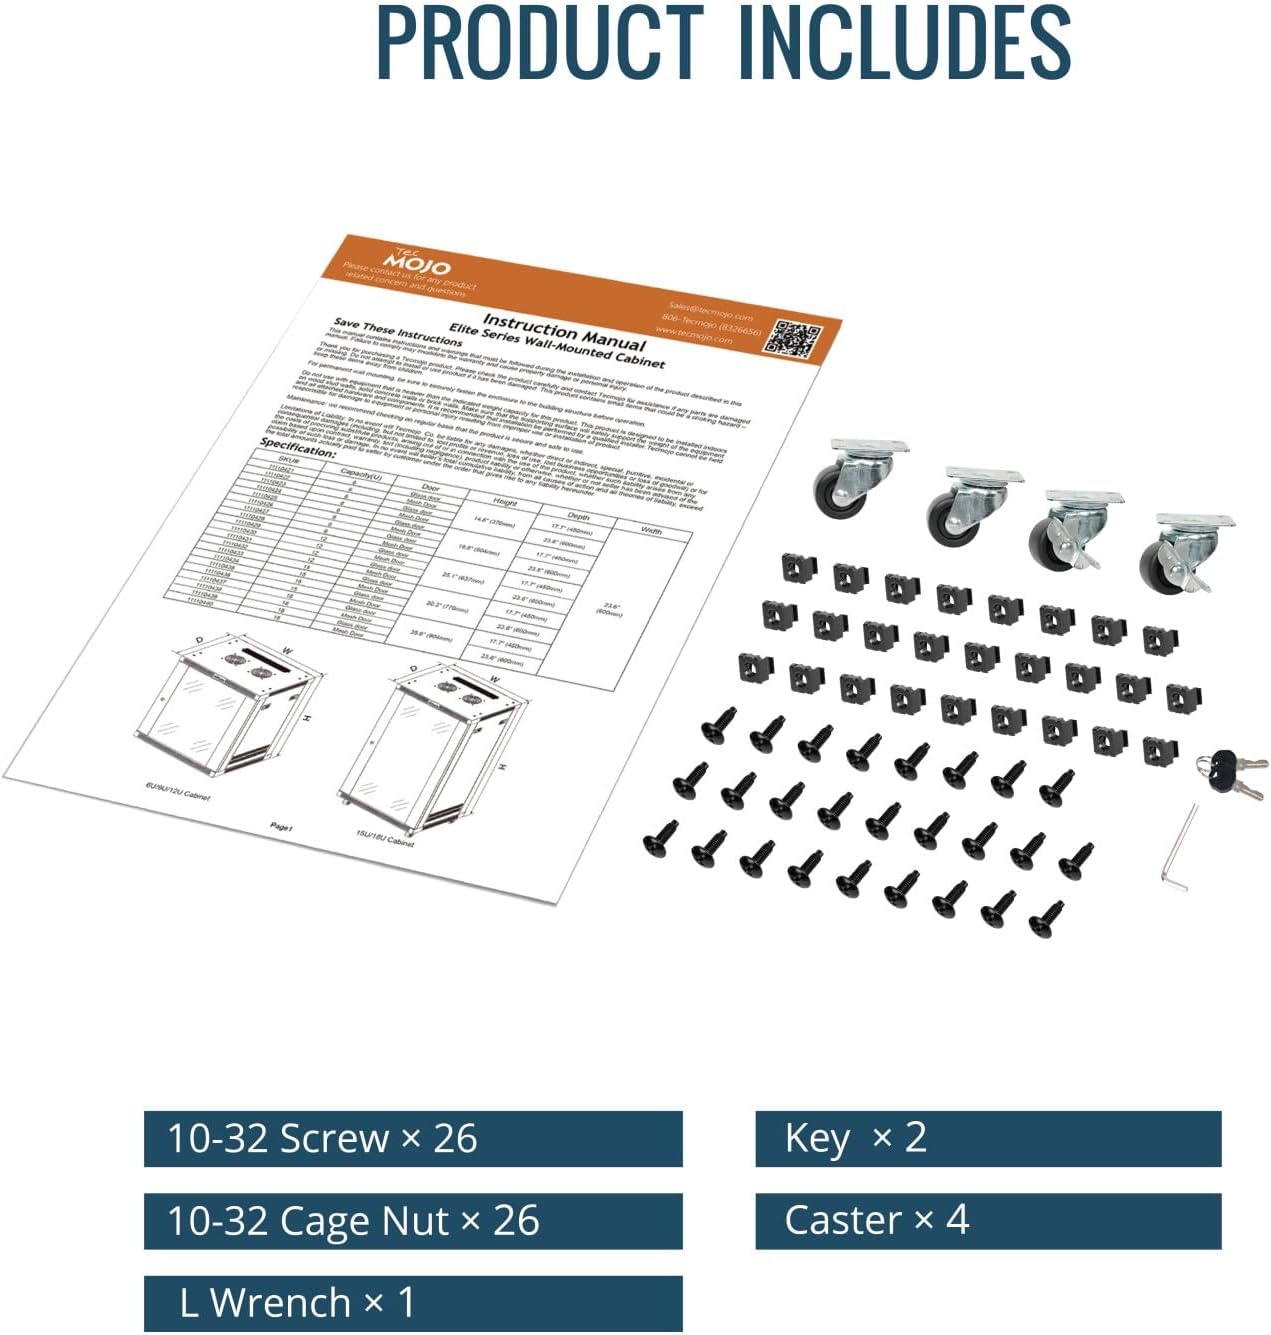
Figure 6: All components included with the product.
Assembly Instructions
The Tecmojo 18U Wall Mount Rack requires assembly. Follow these steps carefully. An included Allen wrench is provided, but an electric driver is recommended to expedite the process.
- Install Rack Rails: Attach the rack rails onto the side frames using the provided screws.
- Install Fixed Brackets: Secure the four fixed brackets with screws to form the basic frame.
- Place Top Cover: Position the top cover onto the frame and secure it with screws.
- Place Bottom Panel and Casters: Attach the bottom panel and casters (if using for freestanding setup) and secure them with screws.
- Install Back Panel: Install the back panel using the appropriate screws.
- Install Side Panels: Attach the side panels to the main frame.
- Install Front Glass Door: Adjust the door pin and install the front glass door.
Assembly Video
Video 1: Tecmojo Elite 15/18U Wall Mount Server Cabinet Assembly Guide. This video provides a visual guide for assembling the rack, including steps for installing components and preparing for use.
Installation (Wall Mount)
For wall-mounted installation, ensure you have adequate support in your wall structure. The mounting support features standard 16-inch spacing for stud placement. It is crucial to fix the rack to wall studs using very well-sized and strong screws.
- Prepare for Wall Mounting: If casters were installed, remove them. Fix the bottom panel directly with screws for a stable base.
- Fix Wall Mount Bracket: Securely fix the wall mount bracket to the wall studs using appropriate screws. Ensure the bracket is level and can support the rack's weight.
- Hang and Secure Cabinet: Carefully hang the assembled cabinet onto the fixed wall mount bracket. The unit is heavy, so assistance may be required. Once in place, fix it with additional screws to prevent accidental lifting.
Installation Video
The assembly video also demonstrates the wall-mounting process:
Video 2: Tecmojo Elite 15/18U Wall Mount Server Cabinet Installation Guide. This video illustrates the steps for securely mounting the rack to a wall.
Operating Instructions
Ventilation System
The rack is equipped with dual top-mounted 110V fans to ensure proper airflow and prevent equipment overheating. Connect the fans to a suitable power source. Ensure the fan vents are not obstructed by cables or other equipment.
Cable Management
Utilize the brush panel openings located on the top and bottom of the rack for organized cable routing. The 1.5-inch extra side space is designed to facilitate efficient cable management, keeping your setup tidy and accessible.
Security
The front glass door and side panels are lockable to secure your valuable IT and AV equipment. Use the provided keys to lock and unlock the cabinet. Always ensure the door is properly closed and locked to maintain security.
Maintenance
Cleaning
- Regularly clean the exterior surfaces of the rack with a soft, damp cloth. Avoid using abrasive cleaners or solvents that could damage the powder-coated finish.
- Ensure the fan vents and any perforated panels are clear of dust and debris to maintain optimal airflow and cooling efficiency.
Inspection
- Periodically check all screws and connections to ensure they remain secure, especially after initial installation and any relocation.
- Inspect the door hinges and locking mechanisms for smooth operation and any signs of wear or damage.
Troubleshooting
Overheating
- Fans Not Operating: Verify that the top-mounted fans are properly connected to a power source and are functioning. Check for any obstructions preventing fan rotation.
- Blocked Airflow: Ensure that equipment within the rack is not blocking the fan vents or other perforated areas designed for airflow. Rearrange equipment if necessary.
- High Ambient Temperature: If the room temperature is excessively high, the rack's cooling system may struggle. Consider improving room ventilation or adding supplementary cooling.
Stability Issues (Wall Mount)
- Improper Mounting: Confirm that the wall mount bracket is securely fastened to wall studs. Drywall anchors alone are insufficient for the weight capacity of this rack.
- Loose Connections: Ensure all screws securing the cabinet to the wall mount bracket are tightened. Verify that the locking screws are engaged to prevent the unit from being lifted off the bracket.
- Uneven Weight Distribution: Distribute equipment weight as evenly as possible within the rack to maintain balance and stability.
Door/Panel Malfunction
- Obstructions: Check hinges and locking mechanisms for any physical obstructions or debris.
- Misalignment: Ensure the door pin is correctly adjusted. If the door is difficult to close or lock, it may be misaligned.
- Damaged Components: If any part of the door or panel mechanism is damaged, contact customer support for replacement parts.
Specifications
| Feature | Detail |
|---|---|
| Brand | Tecmojo |
| Color | Black |
| Product Dimensions (D x W x H) | 23.6"D x 23.6"W x 35.6"H |
| Size | 18U/23.6in Depth/Glass Door |
| Material | Alloy Steel |
| Item Weight | 87.3 Pounds |
| Compatible Devices | Server, CPU |
| Mounting Type | Wall Mount |
| Weight Capacity | 176 Pounds (wall-mounted), 350 Pounds (floor-mounted) |
| Enclosure Material | Alloy Steel |
| Manufacturer | Tecmojo |
| Built-In Media | Shelves |
| Assembly Required | Yes |
Warranty and Support
This Tecmojo 18U Wall Mount Rack comes with a 3-Year Manufacturer Warranty. For any questions, technical assistance, or warranty claims, please contact Tecmojo customer service.
You can find more information and support resources by visiting the Tecmojo Official Store.