1. Introduction
This manual provides comprehensive instructions for the safe and effective use of your Aovly Handheld Sewing Machine, Model A12. Designed for portability and ease of use, this electric mini sewing machine is suitable for quick repairs, DIY projects, and various fabric stitching tasks. Please read this manual thoroughly before operating the machine to ensure proper function and longevity.
2. Important Safety Instructions
- Always keep fingers away from the needle and moving parts during operation.
- Unplug or remove batteries from the machine when not in use, before cleaning, or when changing needles.
- Do not allow children to operate the machine without adult supervision.
- Use only the recommended power sources (USB or AA batteries) as specified.
- Avoid operating the machine in wet or damp conditions.
- Do not attempt to disassemble or repair the machine yourself. Contact qualified service personnel for repairs.
- Ensure the fabric is properly positioned before starting to sew to prevent needle breakage or fabric damage.
3. Package Contents
Upon opening the package, verify that all the following items are included:
- Aovly Handheld Sewing Machine (Model A12)
- Thread Spools (various colors)
- Extra Needles
- Needle Threader
- Measuring Tape
- Scissors
- Tweezers
- Safety Pins
- USB Power Cable
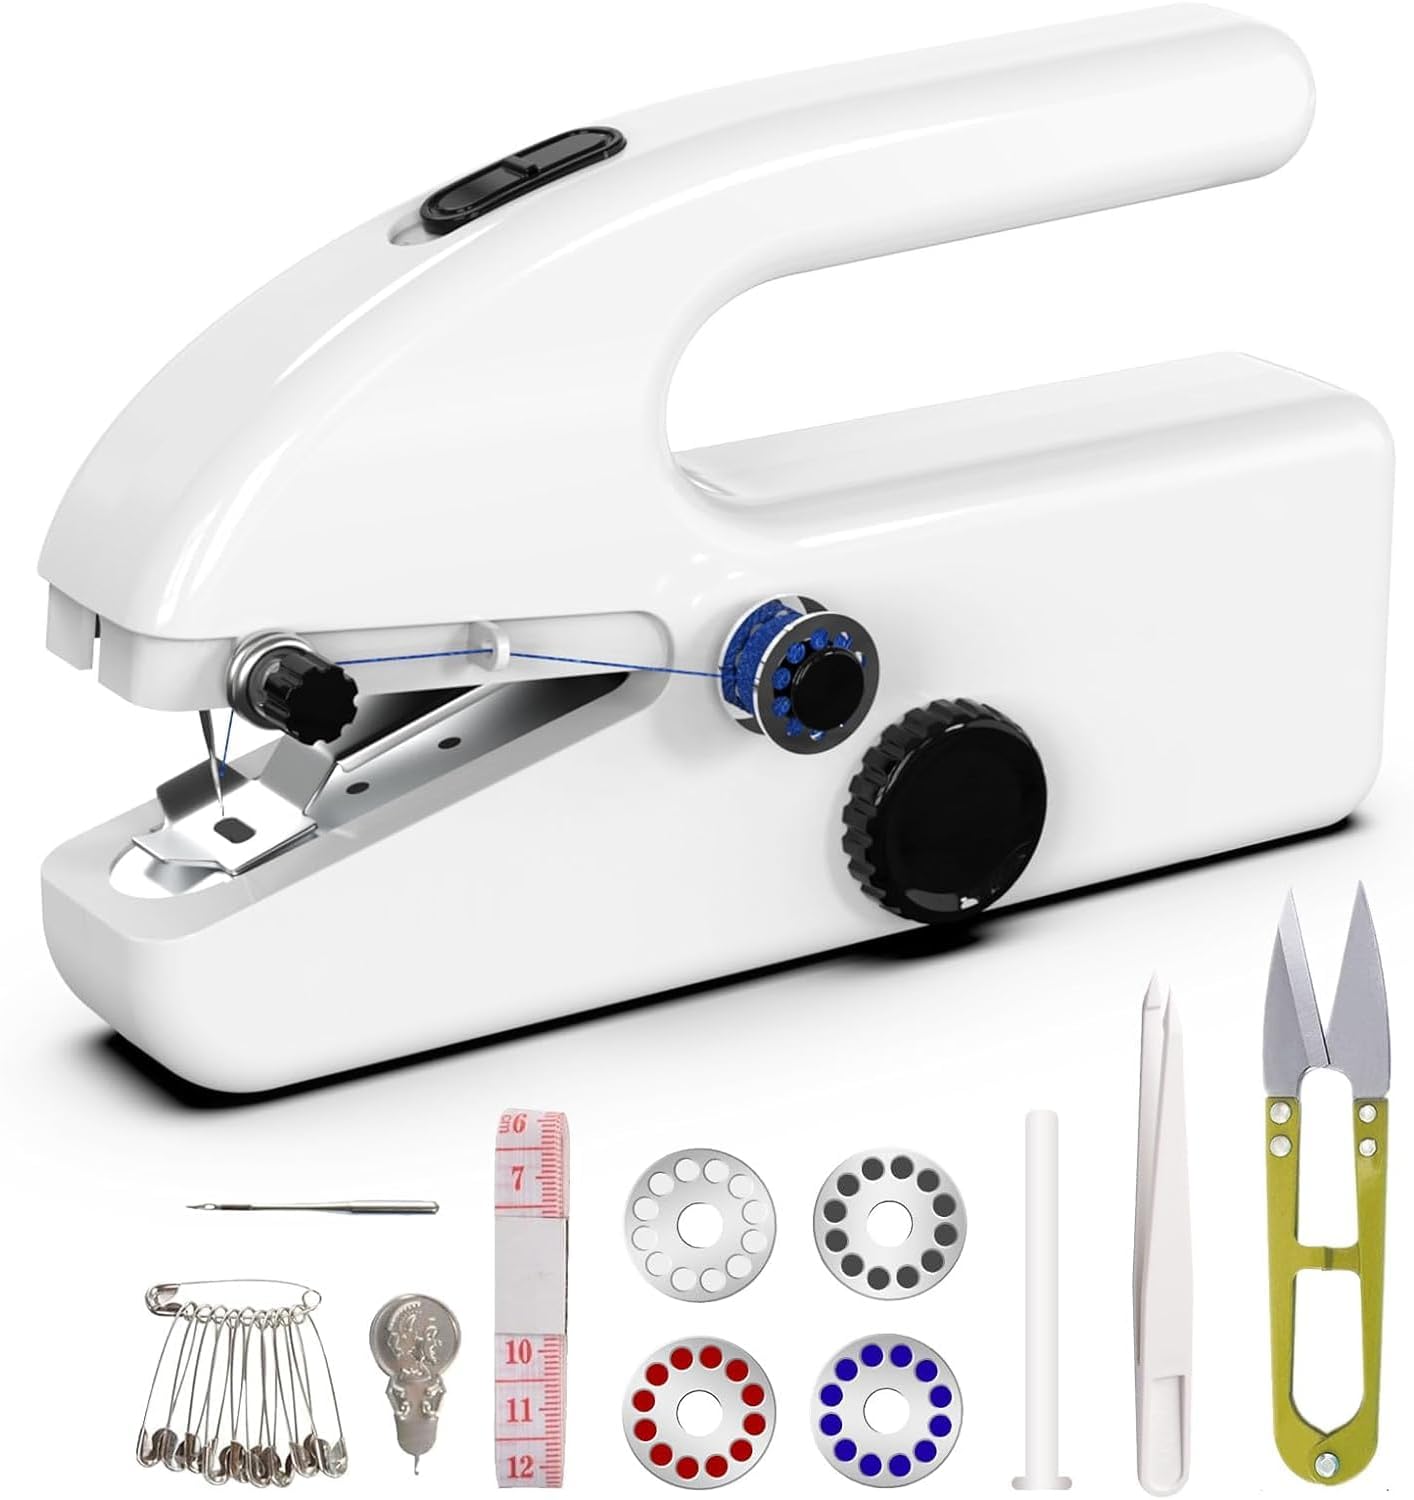
Image: The Aovly Handheld Sewing Machine shown with its accompanying accessories, including thread spools, needles, a needle threader, measuring tape, scissors, tweezers, and safety pins.
4. Parts Diagram
Familiarize yourself with the components of your handheld sewing machine:
- Power Button: Activates and deactivates the machine.
- Speed Adjustment Dial: Controls the sewing speed (Fast/Slow).
- Thread Tension Knob: Adjusts the tension of the upper thread.
- Needle Clamp Screw: Secures the needle in place.
- Presser Foot: Holds the fabric down during sewing.
- Bobbin Holder: Holds the thread bobbin.
- Power Input Port: For USB power connection.
- Battery Compartment: For AA battery installation.
Image: A detailed view of the handheld sewing machine, highlighting the power button, speed adjustment dial, thread tension knob, needle, presser foot, and bobbin area.
5. Setup
5.1 Power Supply
Your Aovly Handheld Sewing Machine can be powered by two methods:
- USB Power: Connect the provided USB cable to the Type-C port on the left side of the machine and plug the other end into a compatible USB power adapter (not included) or power bank.
- AA Batteries: Open the battery compartment on the right side of the machine and insert four (4) AA batteries, ensuring correct polarity. Batteries are not included and must be purchased separately.
Attention: Please select only one power supply mode at a time. Do not attempt to charge rechargeable batteries using this product.

Image: The rear of the handheld sewing machine, illustrating the Type-C USB power input on the left and the AA battery compartment on the right, indicating two distinct power supply options.

Image: A visual comparison showing the machine being powered by a USB cable on the left and by four AA batteries on the right, highlighting the dual power capabilities.
5.2 Threading the Machine
- Place a thread spool onto the bobbin holder pin.
- Guide the thread through the first thread guide (usually a small metal loop).
- Pass the thread through the tension control disc, ensuring it is seated correctly.
- Thread the needle from front to back using the provided needle threader for ease.
- Pull about 4-6 inches of thread through the needle eye.
6. Operating Instructions
6.1 Preparing to Sew
- Ensure the machine is properly threaded and powered.
- Lift the presser foot using the lever.
- Place the fabric under the presser foot, aligning the edge with your desired stitch line.
- Lower the presser foot onto the fabric.
6.2 Stitching
- Hold the fabric gently with one hand, guiding it as you sew.
- Press the power button to start sewing. The machine will begin stitching automatically.
- Use the speed adjustment dial to select your desired sewing speed:
- Fast (High Gear): Suitable for sewing long, straight lines, saving time.
- Slow (Low Gear): Ideal for more precise work, such as sewing fabric corners or intricate details.
- Guide the fabric steadily to maintain a straight stitch. Do not pull or push the fabric forcefully.
- To stop sewing, release the power button.

Image: An illustration demonstrating the two speed settings of the machine: "Fast" for long straight lines and "Slow" for accurate corner stitching, indicating the versatility of the speed control.
6.3 Finishing a Stitch
- Once you reach the end of your seam, lift the presser foot.
- Gently pull the fabric away from the machine, leaving a few inches of thread.
- Cut the thread using the built-in thread cutter or the provided scissors.
- Tie off the ends of the thread to secure the stitch.
6.4 Ergonomics and Safety Features
- The machine features a "Nice snug handle" designed for comfortable and secure gripping during operation, reducing hand fatigue.
- A "Reassuring protective shell" encases all moving parts, enhancing user safety by preventing accidental contact with the needle mechanism and other internal components.

Image: A hand demonstrating the comfortable and secure grip provided by the machine's handle, emphasizing its ergonomic design for ease of use.

Image: The sewing machine in use, with an overlay pointing out its protective shell design, which secures all moving parts inside for enhanced user safety.
7. Maintenance
- Cleaning: Regularly clean lint and dust from the needle area and bobbin case using a small brush or soft cloth. Ensure the machine is powered off or batteries are removed before cleaning.
- Needle Replacement: If the needle becomes dull, bent, or breaks, replace it immediately. Loosen the needle clamp screw, remove the old needle, insert a new one with the flat side facing the back, and tighten the screw.
- Storage: Store the machine in a dry, cool place, away from direct sunlight and moisture. It is recommended to keep it in its original packaging or a protective case when not in use.
8. Troubleshooting
| Problem | Possible Cause | Solution |
|---|---|---|
| Machine not starting | No power; batteries drained or incorrectly inserted; USB cable not connected. | Check power source. Replace batteries or ensure USB cable is securely connected. |
| Skipped stitches | Needle bent or dull; incorrect needle insertion; improper threading; fabric too thick. | Replace needle; re-thread machine; ensure needle is inserted correctly; use appropriate needle for fabric thickness. |
| Thread breaking | Thread tension too high; poor quality thread; needle bent or burred; improper threading. | Adjust thread tension; use good quality thread; replace needle; re-thread machine carefully. |
| Fabric not feeding | Presser foot not lowered; fabric too thick or thin for machine. | Ensure presser foot is lowered; adjust fabric thickness or use appropriate technique. |
9. Specifications
| Brand | Aovly |
| Model Number | A12 |
| Product Dimensions | 8.86 x 4.7 x 2.56 inches |
| Item Weight | 15.2 ounces |
| Color | Porcelain white |
| Power Source | Electric (USB Type-C or 4x AA Batteries) |
| UPC | 797999888541 |
| Date First Available | July 10, 2024 |
10. Warranty and Support
For warranty information, technical support, or service inquiries regarding your Aovly Handheld Sewing Machine, please refer to the purchase documentation or contact the retailer from whom the product was purchased. You may also visit the official Aovly website for further assistance and contact details.