1. Introduction
Thank you for choosing the FLEXMAN Digital Kitchen Timer. This versatile device is designed to assist you with precise time management in various environments, including kitchens, offices, and classrooms. It features both countdown and stopwatch functions, a clear digital display, adjustable volume, and multiple placement options. Please read this manual carefully to ensure proper setup and operation of your timer.
2. Safety Information
- Keep the device away from water and excessive moisture to prevent damage.
- Do not expose the timer to extreme temperatures or direct sunlight for prolonged periods.
- Use only AAA batteries as specified. Ensure correct polarity when inserting batteries.
- Remove batteries if the device will not be used for an extended period to prevent leakage.
- Keep out of reach of small children.
3. Package Contents
Please check the package for the following items:
- 1 x FLEXMAN Digital Kitchen Timer
- 1 x Instruction Manual
Note: 2 x AAA batteries are required and are not included in the package.
4. Product Overview
The FLEXMAN Digital Kitchen Timer features a clear display and intuitive buttons for easy operation. It supports both countdown and stopwatch functions, with a maximum timing capacity of 99 hours, 59 minutes, and 59 seconds.

Figure 4.1: Front view of the FLEXMAN Digital Kitchen Timer, highlighting the display and control buttons.
Key Features:
- Dual Timer Functionality: Supports both countdown and stopwatch (positive timing) modes.
- Large Digital Display: Provides clear visibility of time at a glance.
- Adjustable Volume: Three levels of volume for alerts, suitable for various environments.
- Versatile Placement: Features strong magnets for attachment to metal surfaces and a retractable stand for desk placement.
- Durable Construction: Made from ABS material for long-lasting use.
- Time Display: Can also function as a clock with 12/24 hour conversion.
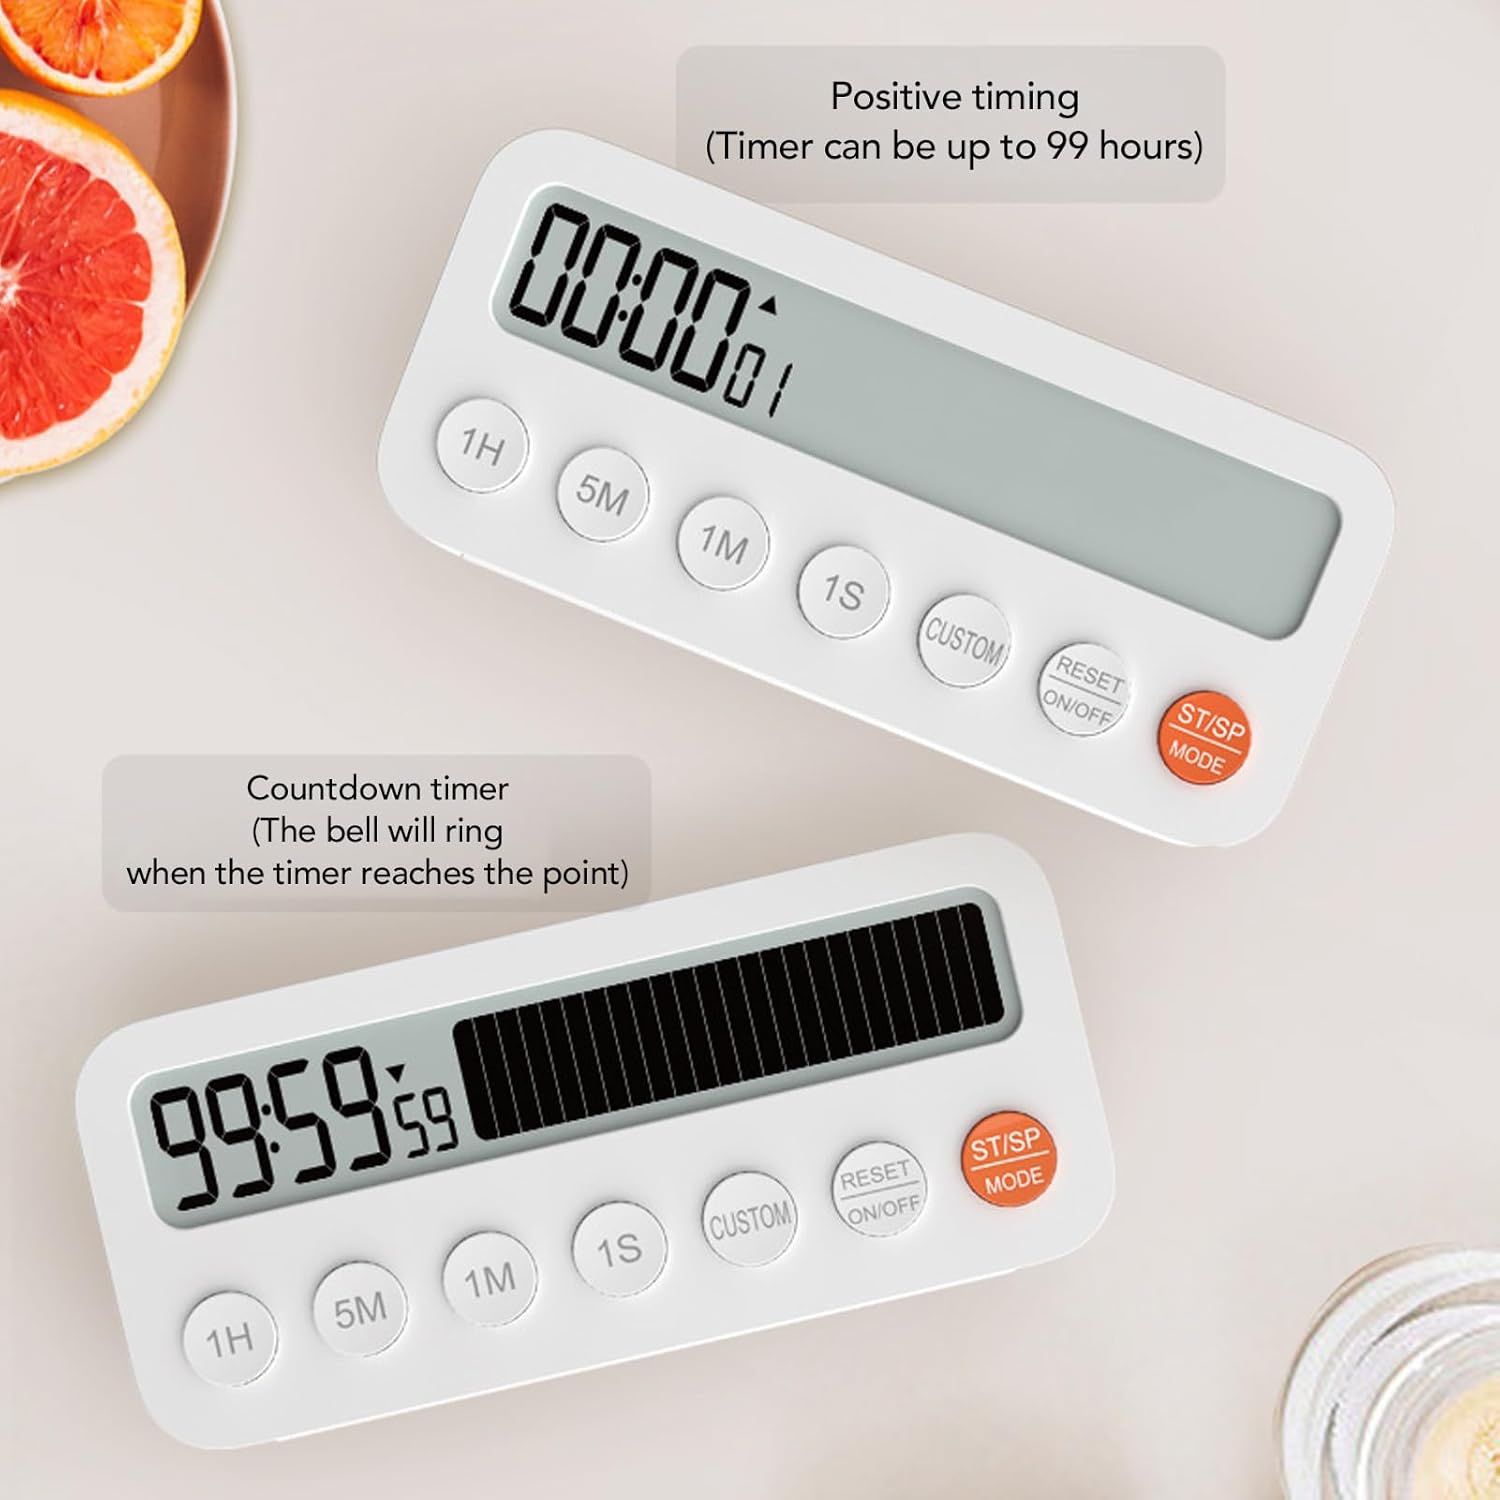
Figure 4.2: The timer displaying both positive timing (stopwatch) and countdown timer functions. The countdown timer will alert when it reaches zero.

Figure 4.3: The timer functioning as a clock, showing the current time. Below, an illustration demonstrates the conversion between 12-hour and 24-hour formats.

Figure 4.4: The timer positioned on a desk using its retractable stand, illustrating its stable and versatile placement options.

Figure 4.5: The timer demonstrating its strong magnetic adsorption, attached to the side of a metal appliance like an oven or refrigerator.
5. Setup
5.1 Battery Installation
The FLEXMAN Digital Kitchen Timer requires two AAA batteries (not included).
- Locate the battery compartment cover on the back of the timer.
- Slide the cover open.
- Insert two AAA batteries, ensuring the correct positive (+) and negative (-) polarity as indicated inside the compartment.
- Close the battery compartment cover securely.
The timer display should now turn on. If not, check battery orientation or replace with fresh batteries.
5.2 Initial Placement
You can place your timer in two ways:
- Magnetic Attachment: The timer has strong magnets on its back. Attach it to any metal surface such as a refrigerator, oven, or whiteboard.
- Stand Placement: Pull out the retractable stand on the back of the timer to place it upright on a desk, countertop, or shelf.
6. Operating Instructions
6.1 Power On/Off and Reset
- Power On: The timer automatically powers on when batteries are inserted. If the display is off, press the RESET ON/OFF button.
- Power Off: Press and hold the RESET ON/OFF button for 3 seconds to turn off the timer.
- Reset: In any mode, a short press of the RESET ON/OFF button will clear the current time setting or stop the alarm.
6.2 Mode Selection
Press the ST/SP MODE button to cycle through the available modes:
- Countdown Timer Mode: Used for setting a specific duration and counting down to zero.
- Stopwatch Mode (Positive Timing): Used for measuring elapsed time from zero upwards.
- Clock Mode: Displays the current time.
6.3 Setting the Countdown Timer
- Ensure the timer is in Countdown Timer Mode (display shows 00:00:00 or a previous countdown).
- Press the 1H button to add hours, 5M for 5-minute increments, 1M for 1-minute increments, and 1S for 1-second increments. Hold down buttons for faster adjustment.
- To set a custom time, press the CUSTOM button. This may allow for more precise minute/second input or recall a saved custom time. (Specific custom function details may vary; refer to on-screen prompts if available.)
- Once the desired time is set, press the ST/SP MODE button to start the countdown.
- To pause the countdown, press ST/SP MODE again. Press it once more to resume.
- When the countdown reaches zero, an alarm will sound. Press RESET ON/OFF to stop the alarm and clear the timer.
6.4 Using the Stopwatch
- Switch to Stopwatch Mode using the ST/SP MODE button (display should show 00:00:00 and start counting up when started).
- Press the ST/SP MODE button to start the stopwatch.
- Press ST/SP MODE again to pause the stopwatch.
- Press RESET ON/OFF to reset the stopwatch to zero.
6.5 Setting the Clock and 12/24 Hour Format
- Switch to Clock Mode using the ST/SP MODE button.
- While in Clock Mode, press and hold the ST/SP MODE button for 3 seconds to enter time setting mode. The hour digits will flash.
- Use the 1H button to adjust the hour.
- Press ST/SP MODE again to switch to minute setting. Use the 1M button to adjust the minutes.
- Press ST/SP MODE one more time to exit time setting.
- To switch between 12-hour and 24-hour formats, while in Clock Mode, press the 1H button.
6.6 Adjusting Volume
The timer features a physical switch on its side to adjust the alarm volume. Slide the switch to select between three volume levels: Silent, Low, and High.
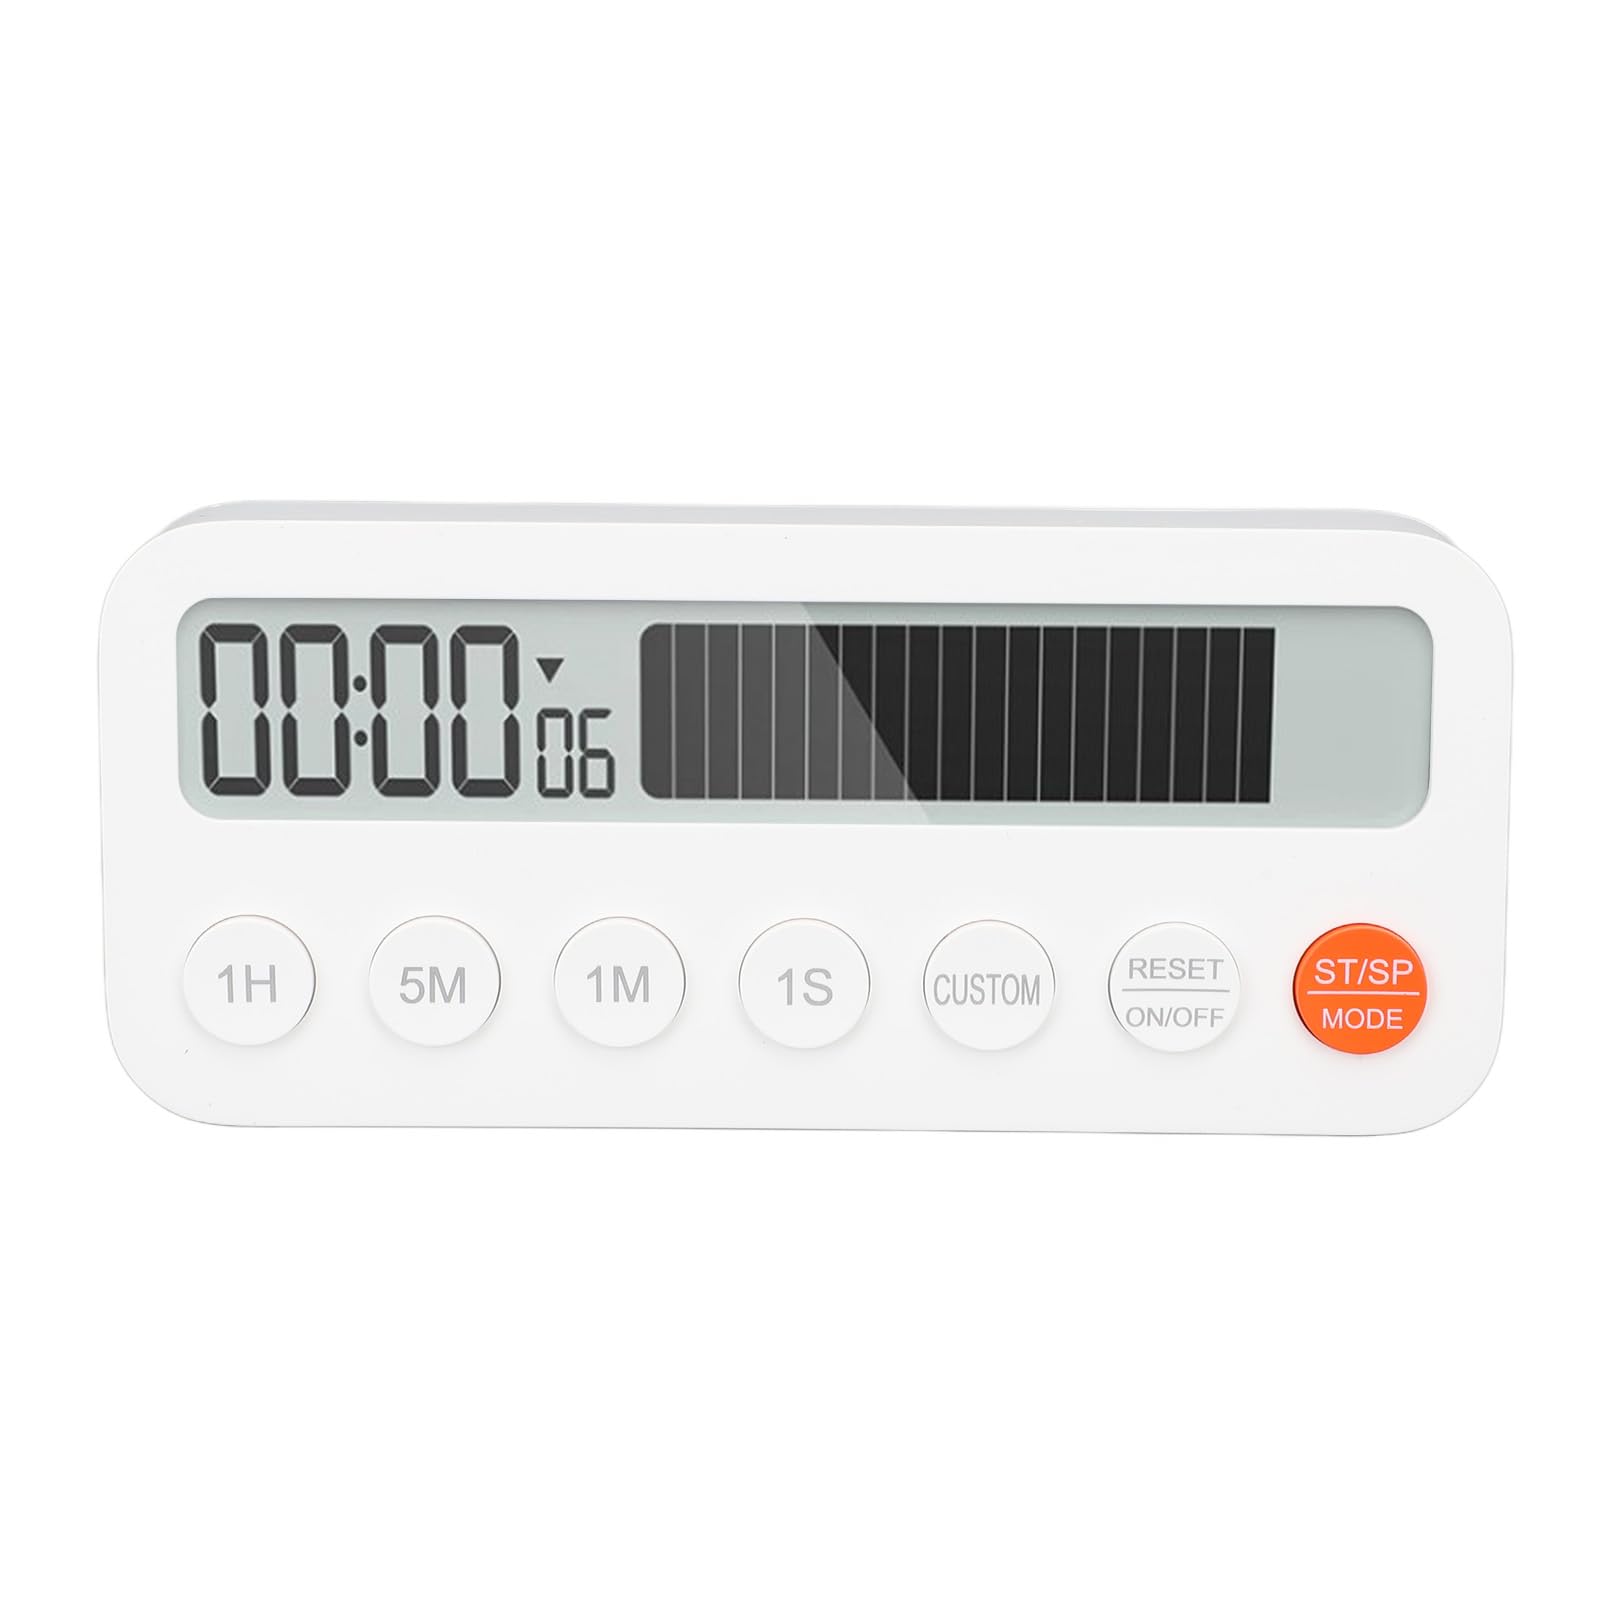
Figure 6.1: Detail of the timer's side, showing the three-level volume adjustment switch.
7. Maintenance
- Cleaning: Wipe the timer with a soft, dry cloth. Do not use abrasive cleaners or immerse in water.
- Battery Replacement: When the display becomes dim or the timer functions erratically, it's time to replace the batteries. Follow the battery installation steps in Section 5.1.
- Storage: Store the timer in a cool, dry place when not in use. Remove batteries if storing for extended periods.
8. Troubleshooting
| Problem | Possible Cause | Solution |
|---|---|---|
| Timer does not turn on or display is blank. | Batteries are dead or incorrectly inserted. | Check battery polarity or replace with new AAA batteries. Press the RESET ON/OFF button. |
| Alarm is too quiet or not sounding. | Volume switch is set to silent or low. | Adjust the volume switch on the side of the timer to a higher setting. |
| Timer counts incorrectly or freezes. | Temporary software glitch or low battery. | Remove and reinsert batteries to perform a hard reset. Replace batteries if necessary. |
| Buttons are unresponsive. | Low battery or internal issue. | Replace batteries. If the issue persists, contact customer support. |
9. Specifications
| Model: | flexmang862qh9max |
| Brand: | FLEXMAN |
| Material: | ABS (Acrylonitrile Butadiene Styrene) |
| Power Source: | 2 x AAA Batteries (not included) |
| Product Dimensions (L x W x H): | 4.72" x 2.36" x 1.18" (120mm x 60mm x 30mm approx.) |
| Item Weight: | 76g / 2.7oz (without batteries) |
| Max Timing Capacity: | 99 Hours, 59 Minutes, 59 Seconds |
| Volume Levels: | 3 (Silent, Low, High) |
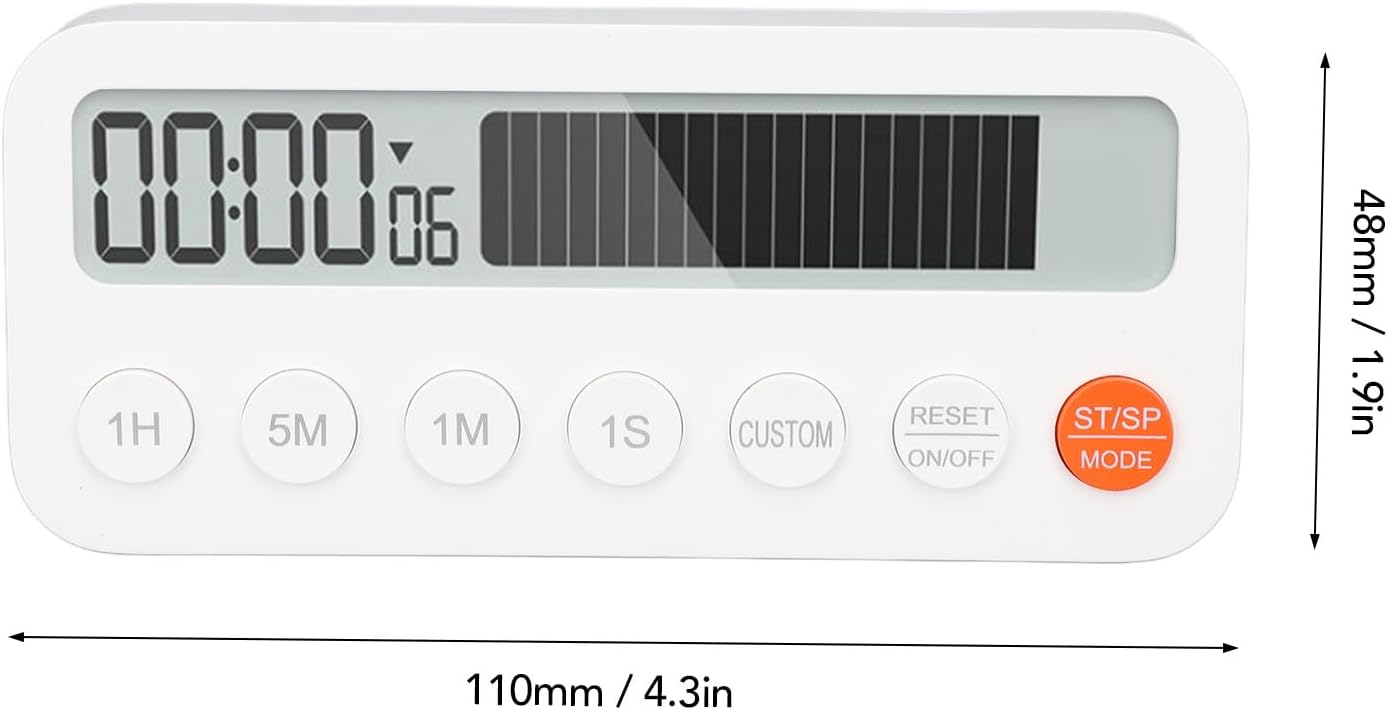
Figure 9.1: Diagram showing the approximate dimensions of the FLEXMAN Digital Kitchen Timer.
10. Warranty and Support
Information regarding warranty coverage and customer support was not provided with this product. For any inquiries or assistance, please refer to the seller's contact information on your purchase platform or the product packaging.