1. Introduction
This manual provides detailed instructions for the installation, operation, and maintenance of the Aepiraza Micro P-711 Refrigerator Main Power Control Circuit Board. This board is designed as a replacement for Dometic 2-Way and 3-Way RV refrigerator control boards.
Important Safety Information: Always disconnect power to the appliance before performing any installation or maintenance. If you are unsure about any steps, consult a qualified technician.
2. Product Overview
The Aepiraza Micro P-711 control board is a robust and reliable replacement part for various Dometic RV refrigerator models. It ensures proper power regulation, temperature control, and defrost cycle management for your refrigerator.

Image: The Aepiraza Micro P-711 circuit board housed within its protective green casing, showing the internal components and connectors.

Image: Various perspectives of the Micro P-711 control board, including the board itself, the closed green casing, and the open casing revealing the board.
2.1 Key Features
- Built-in Temperature Adjustment: Allows for precise adjustment of operating temperature, particularly useful for fixed-temperature models.
- Automatic System Detection: Automatically detects the refrigerator's eyebrow type and selects the proper operating mode.
- Food Saver Features: If communication fails, the board switches to a special mode, allowing continued operation as an AC/Gas fixed-temp system.
- Improved Thermocouple Circuit: Features connections for two thermocouple leads to eliminate grounding issues and prevent "check light" flashing.
- Surge Protection: 12-volt circuits are protected by a fuse and surge absorber against transients and installation errors.
- Robust Construction: Made from high-quality materials for durability and reliable performance.

Image: A visual representation of the P711 control board's features, including built-in temperature adjustment, automatic system detection, food saver features, improved thermocouple circuit, and surge protection.
2.2 Compatibility
The Micro P-711 control board is compatible with Dometic 2-Way and 3-Way, AMES, AES, adjustable-temperature, and fixed-temperature refrigerators. It replaces any black box board part number beginning with "293".
Compatible Dometic Refrigerator Models:
- S1521, S1531, S1621, S1631, S1821, S1831
- RM2554, RM2607, RM2611, RM2612, RM2620, RM2652, RM2807, RM2811, RM2812, RM2820, RM2825, RM3607, RM3662, RM3663, RM3807, RM3862, RM3863, RM4872, RM4873, RM7030, RM7732, RM7832
- NDR1062, NDR1272, NDR1282, NDR1492
Replaceable Part Numbers (beginning with "293"):
- 2931842.01, 2931842.02, 2931842.03, 2931842.04
- 2931843.01, 2931843.02, 2931843.03, 2931843.04
- 2932691.017, 2932177.01, 2932695.01, 2932770.01, 2932881.01
Note: This board CANNOT replace any black box board part number beginning with "385".
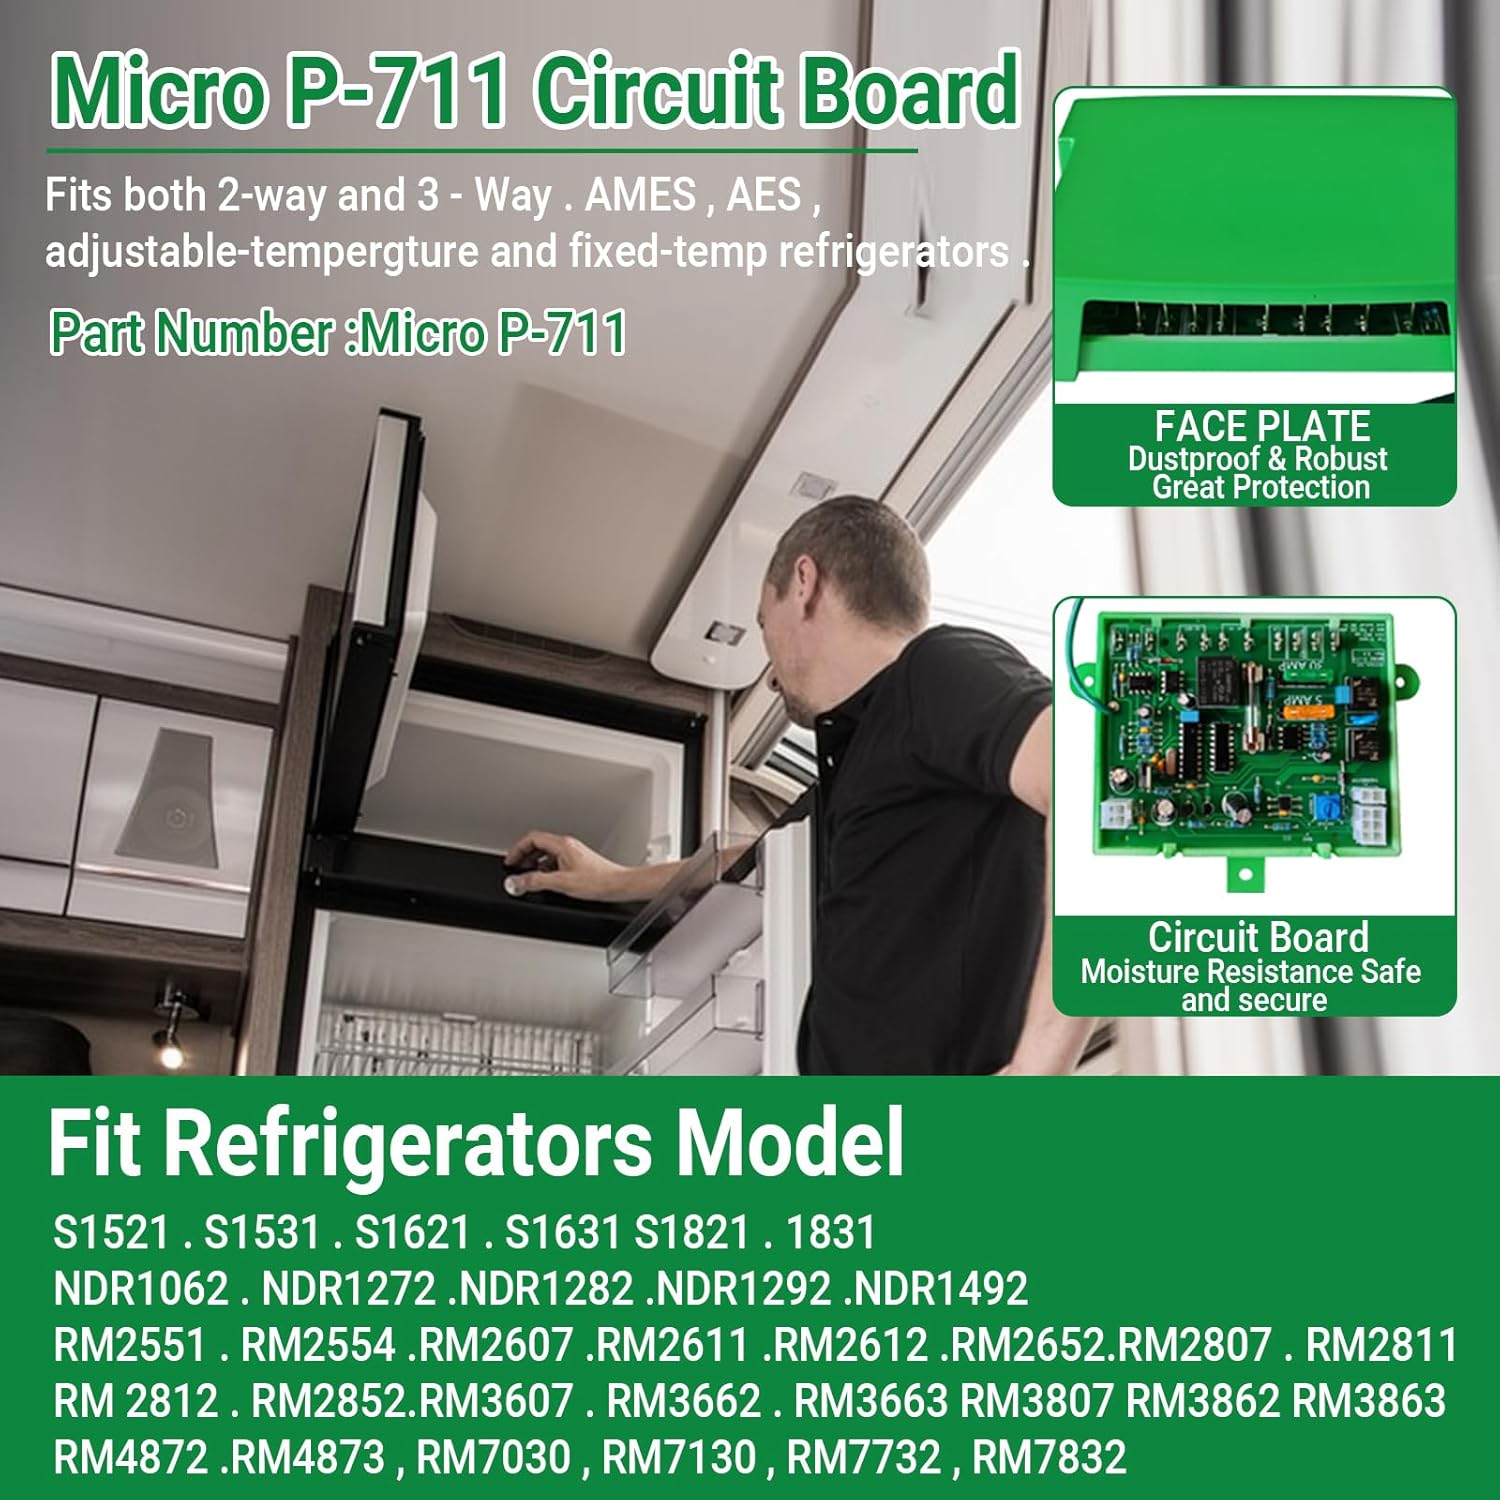
Image: An overview graphic showing the Micro P-711 Circuit Board, its compatibility with 2-way and 3-way Dometic refrigerators, and its part number. It also highlights the face plate and circuit board features.
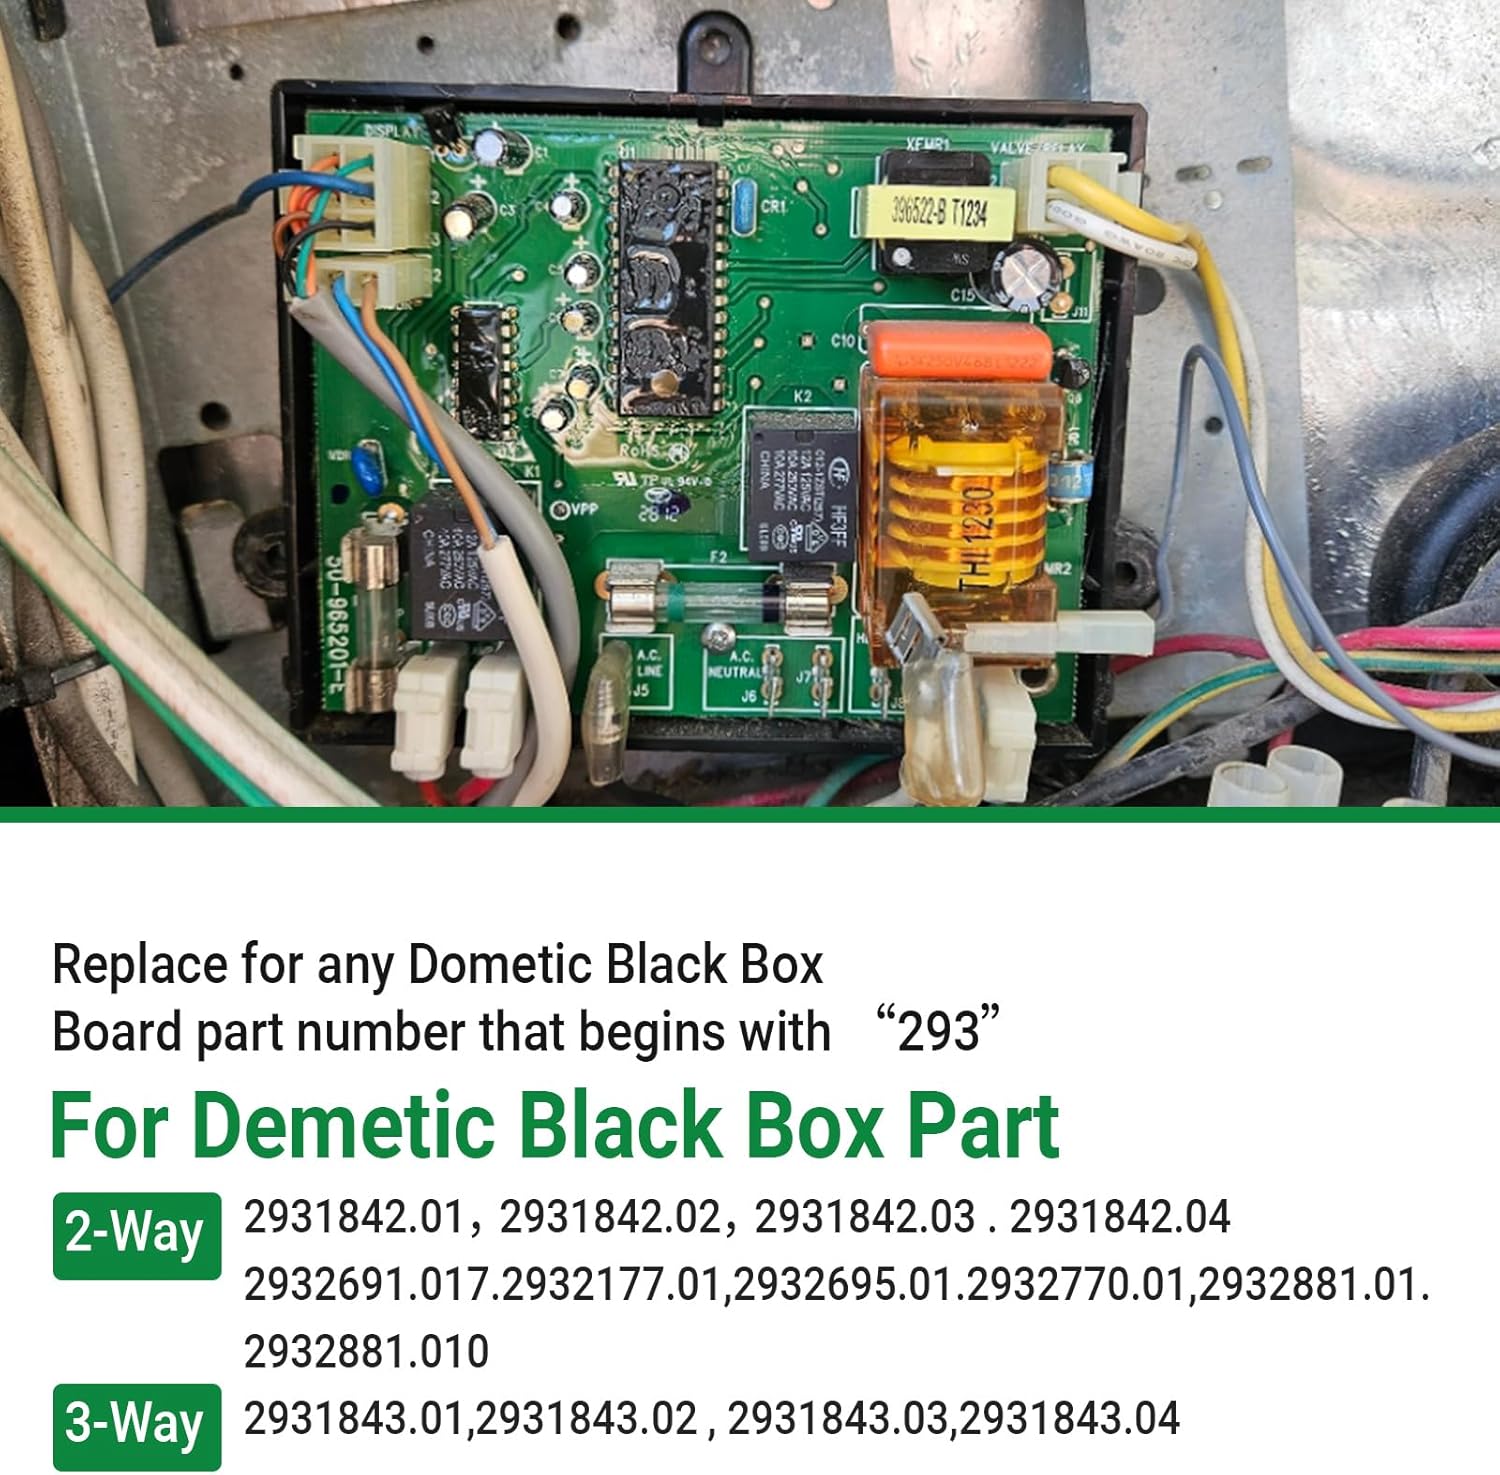
Image: A detailed view of an existing Dometic black box board with its wiring, illustrating the type of component this product replaces.
3. Installation (Setup)
Follow these steps carefully to replace your refrigerator's control board. Ensure all safety precautions are observed.
- Turn Off Power: Before beginning any work, ensure the refrigerator is completely disconnected from all power sources (AC and DC). This includes unplugging from shore power, turning off the inverter, and disconnecting battery power if applicable.
Safety Warning: Failure to disconnect power can result in electric shock or damage to the appliance.
- Remove Old Board: Carefully locate the existing control circuit board. Disconnect all wires and connectors from the old board, noting their positions for reinstallation. Gently detach the old board from its mounting.

Image: Step 1 shows the general area where the board is located within the RV refrigerator compartment. Step 2 shows the new circuit board installed with its wiring connections.
- Install New Board: Position the new Aepiraza Micro P-711 control board in the same location as the old one. Reconnect all wires and connectors to the new board, ensuring they are securely attached to their correct terminals. The board is designed for easy installation and integrates seamlessly with both original and updated wiring configurations.
Note: You may need to make a short ground wire if your previous setup did not utilize the additional ground terminal on this board.
- Test Operation: Once the new board is securely installed and all connections are made, reconnect the refrigerator to its power sources. Turn on the refrigerator and test its functions to ensure the new board is operating correctly and the refrigerator is cooling as expected.
4. Operation
The Aepiraza Micro P-711 control board functions automatically once installed, managing the refrigerator's core operations. Users primarily interact with the refrigerator's existing controls (e.g., temperature dial, mode selection) which are then managed by this board.
4.1 Temperature Control
The board features a built-in temperature adjustment capability. Use your refrigerator's standard temperature controls to set the desired cooling level. The Micro P-711 will regulate the power and cooling cycles to maintain the set temperature.
4.2 Automatic Mode Selection
The board automatically detects the type of "eyebrow" (control panel) in your refrigerator and adapts its operation accordingly, ensuring optimal performance for both 2-way (AC/Gas) and 3-way (AC/DC/Gas) systems.
5. Maintenance
The Aepiraza Micro P-711 control board is designed for long-lasting, reliable performance with minimal maintenance required. However, periodic checks can help ensure continued optimal operation.
- Visual Inspection: Periodically inspect the board and its connections for any signs of loose wires, corrosion, or physical damage. Ensure the protective casing is intact.
- Fuse Check: The board includes fuse protection for 120 VAC circuits, 12 VDC power, and DC elements. If the refrigerator experiences power issues, check the relevant fuses on the board. Refer to the refrigerator's original manual for fuse locations and ratings if needed.
- Cleanliness: Keep the area around the control board clean and free from dust or debris, which can impede proper heat dissipation.
6. Troubleshooting
This section provides guidance for common issues you might encounter after installing the Micro P-711 control board.
| Problem | Possible Cause | Solution |
|---|---|---|
| Refrigerator not cooling after installation. |
|
|
| "Check Light" flashing repeatedly. |
|
|
| Refrigerator not switching between AC/Gas modes. |
|
|
If troubleshooting steps do not resolve the issue, it is recommended to contact a qualified RV appliance technician for further diagnosis and repair.
7. Specifications
| Attribute | Detail |
|---|---|
| Model Name | Micro P-711 |
| Manufacturer Part Number | 2407050102 |
| Brand | Aepiraza |
| Item Weight | 8.1 ounces |
| Package Dimensions | 5.51 x 3.54 x 1.18 inches |
| Compatibility | Dometic 2-Way and 3-Way, AMES, AES, adjustable-temperature and fixed-temp refrigerators. Replaces "293" series black box boards. |
| Protection Features | Fuse protection for 120 VAC, 12 VDC, and DC elements; Surge absorber. |
| Special Features | Improved thermocouple circuit, automatic system detection, food saver mode. |
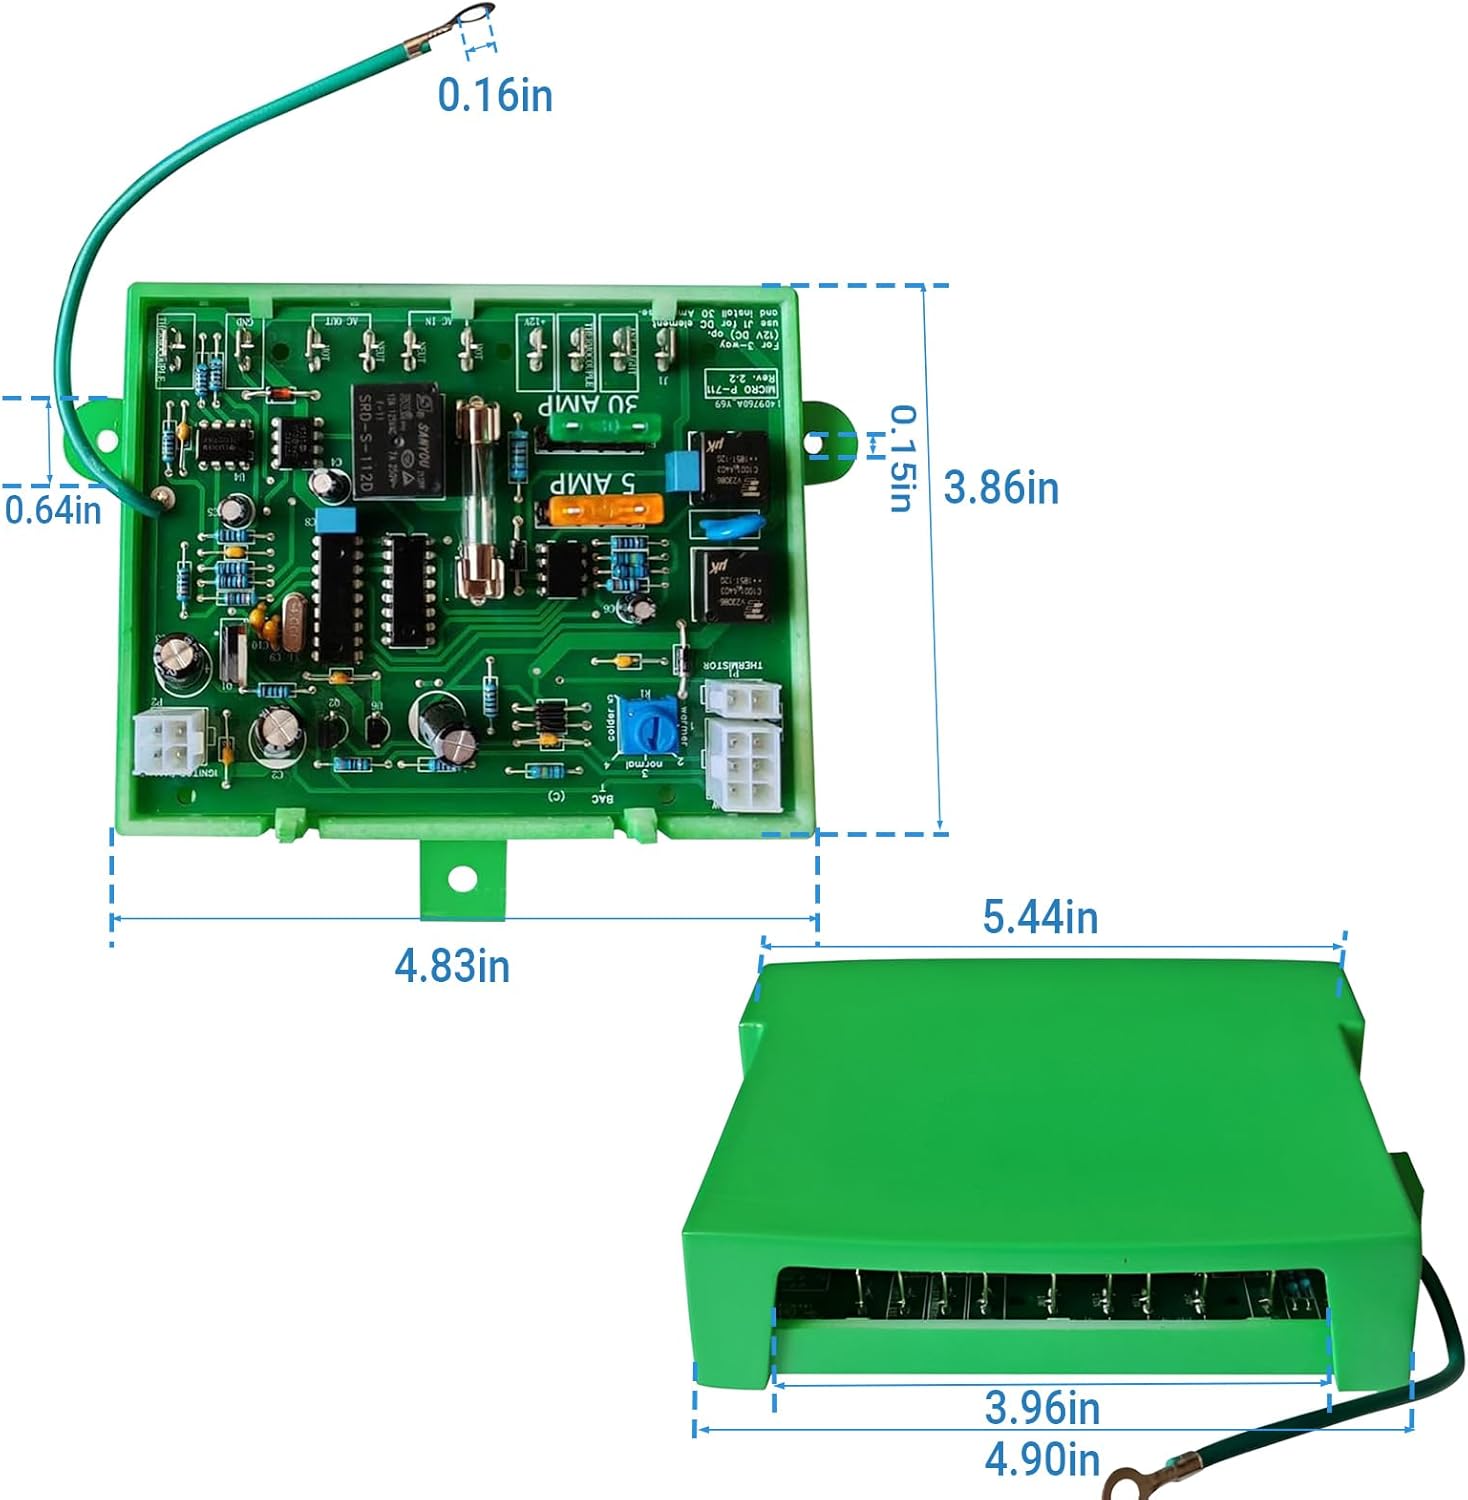
Image: Technical drawing showing the precise dimensions of the Micro P-711 circuit board and its green protective housing in inches.
8. Warranty and Support
For warranty information and technical support, please refer to the manufacturer's official website or contact Aepiraza customer service directly. Keep your purchase receipt as proof of purchase.
Manufacturer: dIvinge
Brand: Aepiraza