1. Introduction
The FNIRSI DWS-200 is a high-performance precision digital soldering station designed for a wide range of soldering applications, from general repairs to intricate SMD work. This station features rapid heating capabilities, a versatile display, and intelligent functions to enhance efficiency and safety.
This manual provides detailed instructions for the setup, operation, and maintenance of your DWS-200 soldering station, ensuring optimal performance and longevity.

Figure 1.1: The FNIRSI DWS-200 Soldering Station Kit, including the main unit, soldering iron, stand, helping hands, and various soldering tips.
2. Product Overview
2.1 Key Features
- Smart Soldering Station: Built-in pure copper transformer, compatible with 100-240 V voltage inputs.
- High Power & Rapid Heating: 200W power for 1-second heating and 3-second melting. Temperature adjustable from 212-842°F (100-450°C).
- Advanced Display: 2.8-inch TFT HD display supporting Temperature Value Mode, Temperature Curve Mode, and combined Temperature Value & Curve Mode.
- Temperature Storage: Three sets of preset functions for frequently used temperatures.
- Energy Saving & Safety: Sleep mode and auto-standby function extend accessory life and save energy. Includes 2 helping hands with 360° adjustable alligator clips.
- Versatile Handle & Tips: F245 Handle suitable for SMD and high-power requirements, with 6 included F245 soldering iron tips for various applications.

Figure 2.1: Visual summary of the DWS-200's smart features, including 200W power, fast heating, 2.8-inch TFT HD screen, dynamic curve mode, and PID control.
2.2 Components and Parts
The FNIRSI DWS-200 Soldering Station Kit includes the following main components:
- DWS-200 Soldering Station Main Unit
- F245 Soldering Iron Handle
- Soldering Iron Stand with Cleaning Sponge/Brass Wool
- 6 x F245 Soldering Iron Tips (various shapes)
- 2 x Helping Hands with Alligator Clips
- Power Cable

Figure 2.2: Detailed view of the DWS-200 main unit and stand, highlighting key parts such as the display screen, operation buttons, power switch, Type-C firmware upgrade interface, soldering iron tip placement area, hibernate holder connection hole, status indicator light, input fuse, power supply interface, and soldering station handle interface.
3. Setup
3.1 Unpacking and Inspection
- Carefully remove all components from the packaging.
- Inspect all items for any signs of damage during transit. If any damage is found, contact customer support immediately.
- Ensure all listed components in Section 2.2 are present.
3.2 Connecting Components
- Place the soldering station main unit and the soldering iron stand on a stable, heat-resistant surface.
- Connect the F245 soldering iron handle cable to the designated port on the soldering station main unit (refer to Figure 2.2 for location).
- Insert the desired F245 soldering iron tip into the soldering iron handle. Ensure it is securely seated.
- Attach the two helping hands to the main unit as needed for your workspace. The flexible arms allow for 360° adjustment.
- Connect the power cable to the power supply interface on the back of the main unit, then plug the other end into a suitable 100-240V AC power outlet.
4. Operation
4.1 Power On/Off
- To power on the station, press the power button located on the front panel. The display will illuminate.
- To power off, press and hold the power button until the display turns off.
4.2 Temperature Adjustment
- Use the navigation buttons (up/down arrows) to adjust the target temperature. The temperature range is 212-842°F (100-450°C).
- The station features rapid heating, reaching the set temperature quickly.
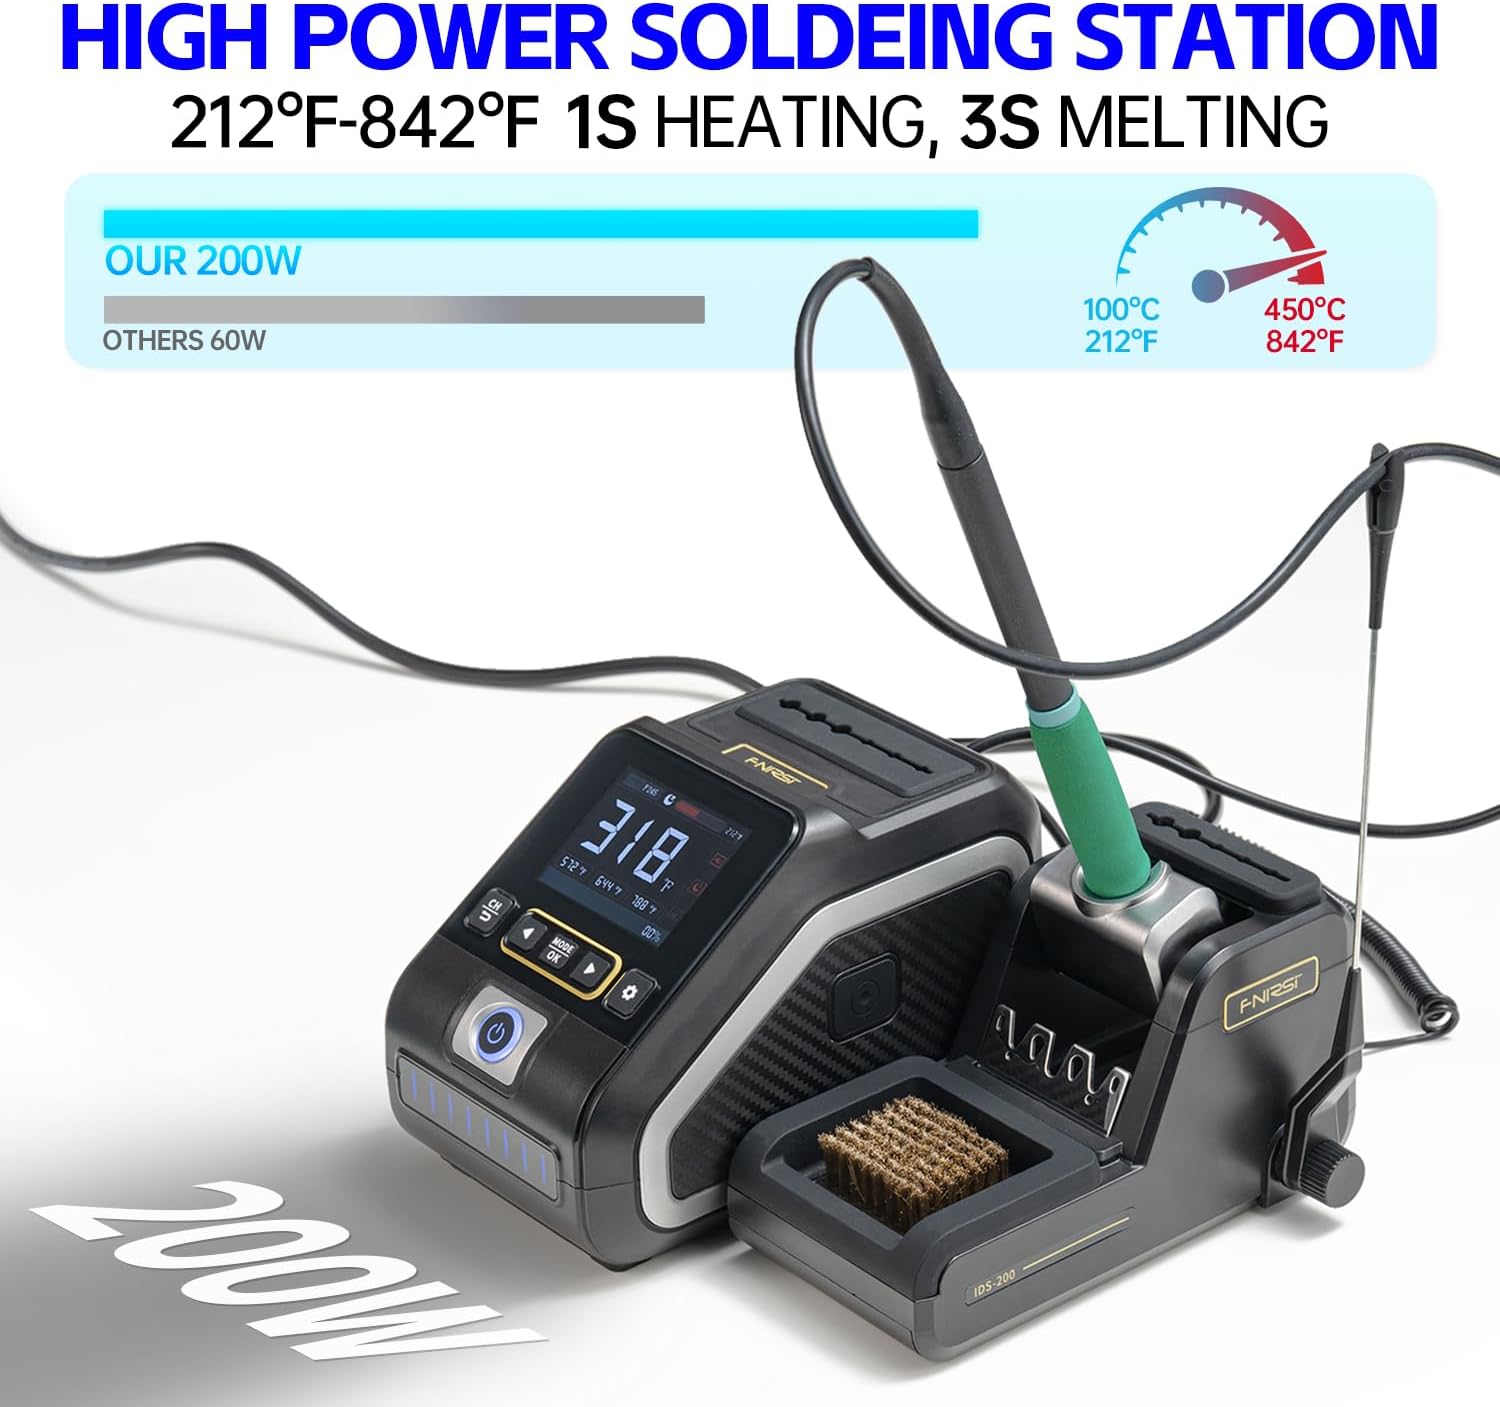
Figure 4.1: The DWS-200's 200W power enables rapid heating, reaching soldering temperatures from 212°F to 842°F (100°C to 450°C) in approximately 1 second, with solder melting in 3 seconds.
4.3 Display Modes
The 2.8-inch TFT HD display offers three viewing modes:
- Temperature Value Mode: Displays the current and target temperatures numerically.
- Temperature Curve Mode: Shows a real-time graph of the temperature over time, useful for monitoring stability.
- Temperature Value & Curve Mode: Combines numerical temperature display with the temperature curve.
Use the 'MODE' button to cycle through these display options.

Figure 4.2: The DWS-200's display offers multiple modes: Temperature Value Mode (left), Temperature Curve Mode (center), and a combined Temperature Value & Curve Mode (right), providing comprehensive temperature monitoring.
4.4 Preset Temperature Functions
The station allows you to store three frequently used temperature settings. Refer to the on-screen prompts or the full user manual for instructions on how to set and recall these presets.
4.5 Sleep Mode and Auto Standby
When the soldering iron is placed in its stand, the station automatically enters sleep mode after a set period of inactivity. This feature conserves energy and extends the lifespan of the soldering tip. The station will resume normal operation when the iron is picked up.
4.6 Using the F245 Handle and Tips
The F245 handle is designed for both high-power applications and precision work. The kit includes 6 different F245 soldering tips, each suited for specific tasks:
- F245-B Tip: General purpose conical tip.
- F245-KU Tip: Knife tip for drag soldering and cutting.
- F245-K Tip: Chisel/knife tip for larger pads and drag soldering.
- F245-C2 Tip: Bevel tip for general soldering and desoldering.
- F245-I Tip: Fine conical tip for precision work.
- F245-JS Tip: Small chisel tip for fine pitch components.
Select the appropriate tip for your soldering task. Ensure the tip is clean before and after use.

Figure 4.3: Various F245 soldering iron tips included with the kit, showing their shapes and approximate dimensions. These tips are used for general soldering with standard-sized circuit boards and components.
4.7 Safety Precautions
- Always work in a well-ventilated area to avoid inhaling solder fumes.
- Wear appropriate eye protection.
- The soldering iron tip reaches very high temperatures. Avoid direct contact with skin or flammable materials.
- Always return the soldering iron to its stand when not in use.
- Ensure the power cable is not damaged and is properly connected.
5. Maintenance
5.1 Soldering Tip Care
- Cleaning: Always clean the soldering tip before and after use. Use the included brass wool or a damp sponge to wipe off excess solder and oxidation.
- Tinning: After cleaning, apply a small amount of fresh solder to the tip to prevent oxidation and prolong its life.
- Replacement: Replace tips when they become excessively worn or corroded, affecting heat transfer or solder wetting. Ensure the station is off and cooled before changing tips.
5.2 Station Cleaning
- Ensure the station is powered off and unplugged before cleaning.
- Wipe the exterior of the main unit and stand with a soft, dry cloth. Do not use abrasive cleaners or solvents.
- Periodically clean the brass wool or replace the sponge in the soldering iron stand.
5.3 Storage
When not in use for extended periods, store the soldering station in a clean, dry environment, away from direct sunlight and extreme temperatures.
6. Troubleshooting
This section addresses common issues you might encounter with your FNIRSI DWS-200 soldering station.
| Problem | Possible Cause | Solution |
|---|---|---|
| Station does not power on. | No power supply; loose connection; faulty power cable. | Check power cable connection to the station and wall outlet. Ensure outlet has power. Try a different power cable if available. |
| Soldering iron not heating up. | Iron not properly connected; faulty heating element/tip; station in sleep mode. | Ensure soldering iron cable is securely connected. Pick up the iron from the stand to exit sleep mode. Check if the tip is properly inserted. If issue persists, the tip or handle may need replacement. |
| Temperature unstable or inaccurate. | Tip oxidation; loose tip; environmental factors. | Clean and re-tin the soldering tip. Ensure the tip is fully seated in the handle. Avoid drafts or sudden temperature changes around the tip. |
| Display not working or showing errors. | Internal error; power fluctuation. | Power off the station, unplug it, wait 30 seconds, then plug it back in and power on. If the error persists, contact customer support. |
If you encounter an issue not listed here or if the suggested solutions do not resolve the problem, please contact FNIRSI customer support for further assistance.
7. Specifications
| Specification | Value |
|---|---|
| Model Number | DWS-200 F245 |
| Brand | FNIRSI |
| Wattage | 200W |
| Voltage Input | 100-240V AC |
| Temperature Range | 212-842°F (100-450°C) |
| Temperature Stability | 330°C (approx. 626°F) |
| Display Type | 2.8-inch TFT HD LCD |
| Heating Time | 1 second to target temperature |
| Melting Time | 3 seconds (for solder) |
| Item Weight | 3.63 pounds |
| Package Dimensions | 9.92 x 8.98 x 5.2 inches |
| Material | Copper, Iron |
| Included Components | Soldering Station, 6 F245 Soldering Iron Tips |
8. Warranty and Support
For warranty information and customer support, please refer to the documentation included with your product or visit the official FNIRSI website. You can also contact the seller directly for assistance.
Visit the FNIRSI Store on Amazon for more products and support resources.


