1. Introduction
Thank you for purchasing the YunLone 13-in-1 Star Projector Planetarium Light. This device is designed to transform your space into a captivating cosmic environment, projecting various celestial scenes onto your walls or ceiling. This manual provides essential information for the safe and effective use of your projector, including setup, operation, maintenance, and troubleshooting.

Image 1.1: The YunLone Star Projector creating a cosmic atmosphere in a living space, showcasing multiple projection options.
2. Safety Instructions
- Do not disassemble: Do not attempt to open or repair the device yourself. This may void the warranty and pose safety risks.
- Power source: Use only the specified power adapter. Ensure the voltage is compatible with your region.
- Water exposure: Keep the projector away from water, moisture, and high humidity environments.
- Heat sources: Avoid placing the projector near heat sources such as radiators, stoves, or other heat-producing appliances.
- Direct eye exposure: Do not look directly into the projection lens when the device is operating, as the bright light may cause eye discomfort.
- Ventilation: Ensure proper ventilation around the device to prevent overheating. Do not cover ventilation openings.
- Children: This device is not a toy. Keep out of reach of small children or supervise their use.
3. Package Contents
Please check the package for the following items:
- YunLone 13-in-1 Star Projector Planetarium Light
- Power Adapter
- 13 Film Discs (including Solar System, Earth, Moon, Milky Way, Andromeda Galaxy, etc.)
- User Manual
4. Product Overview
Familiarize yourself with the components of your YunLone Star Projector:
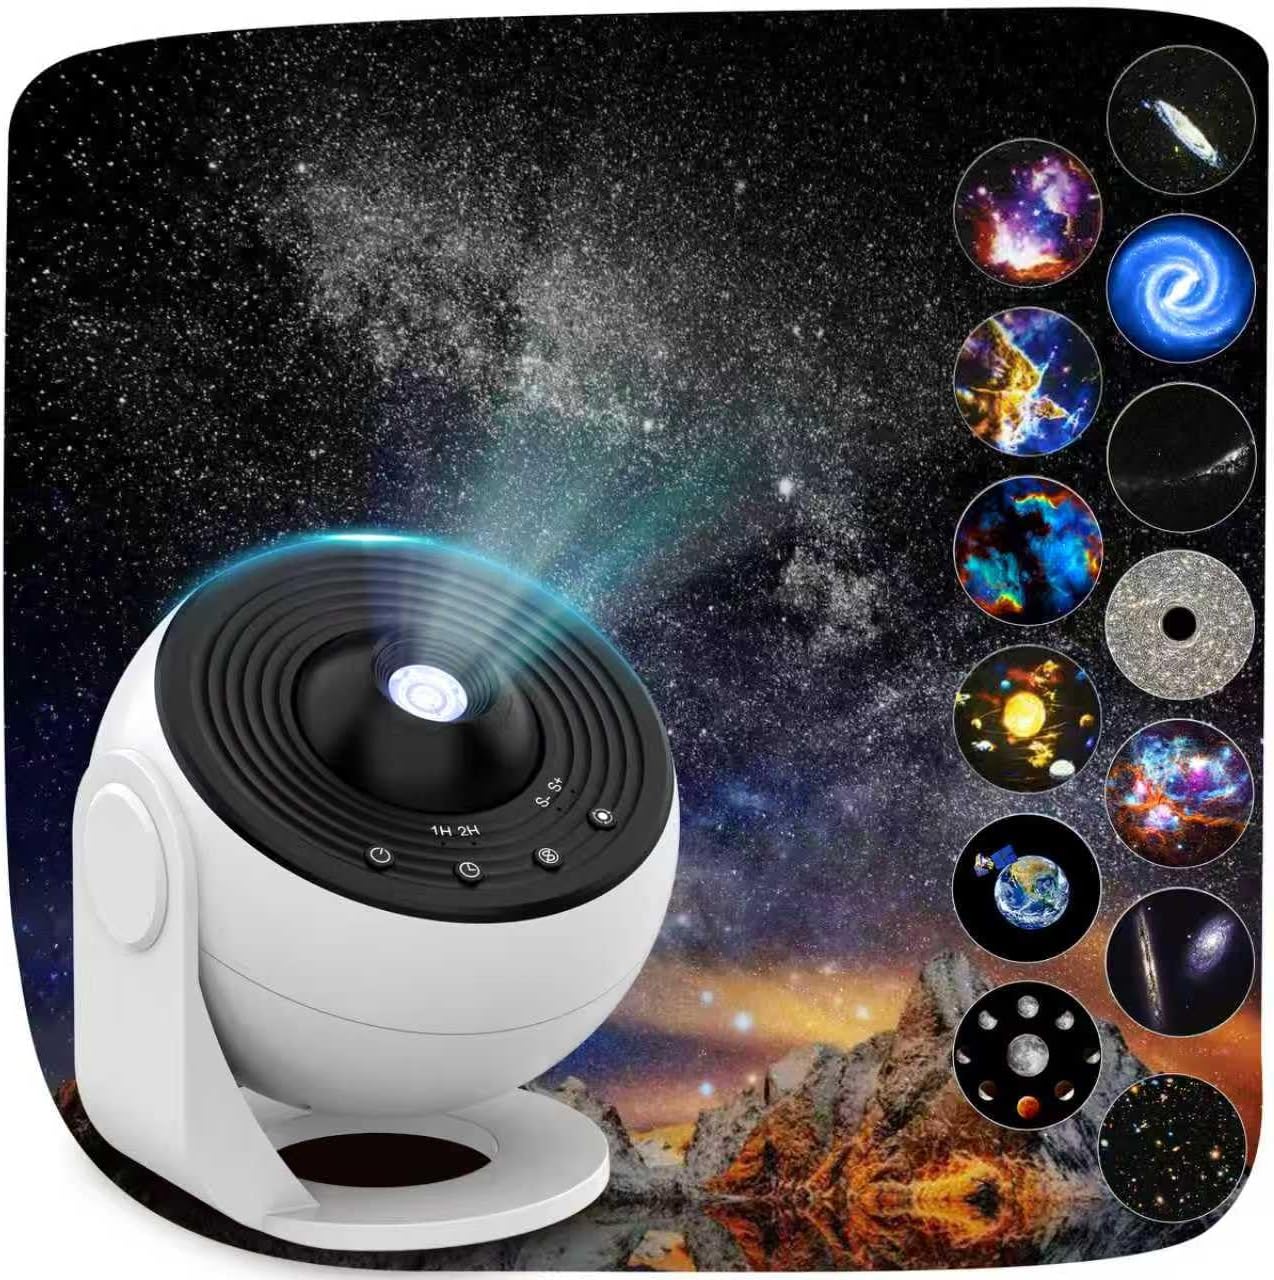
Image 4.1: The YunLone Star Projector, illustrating its compact design and main projection lens.
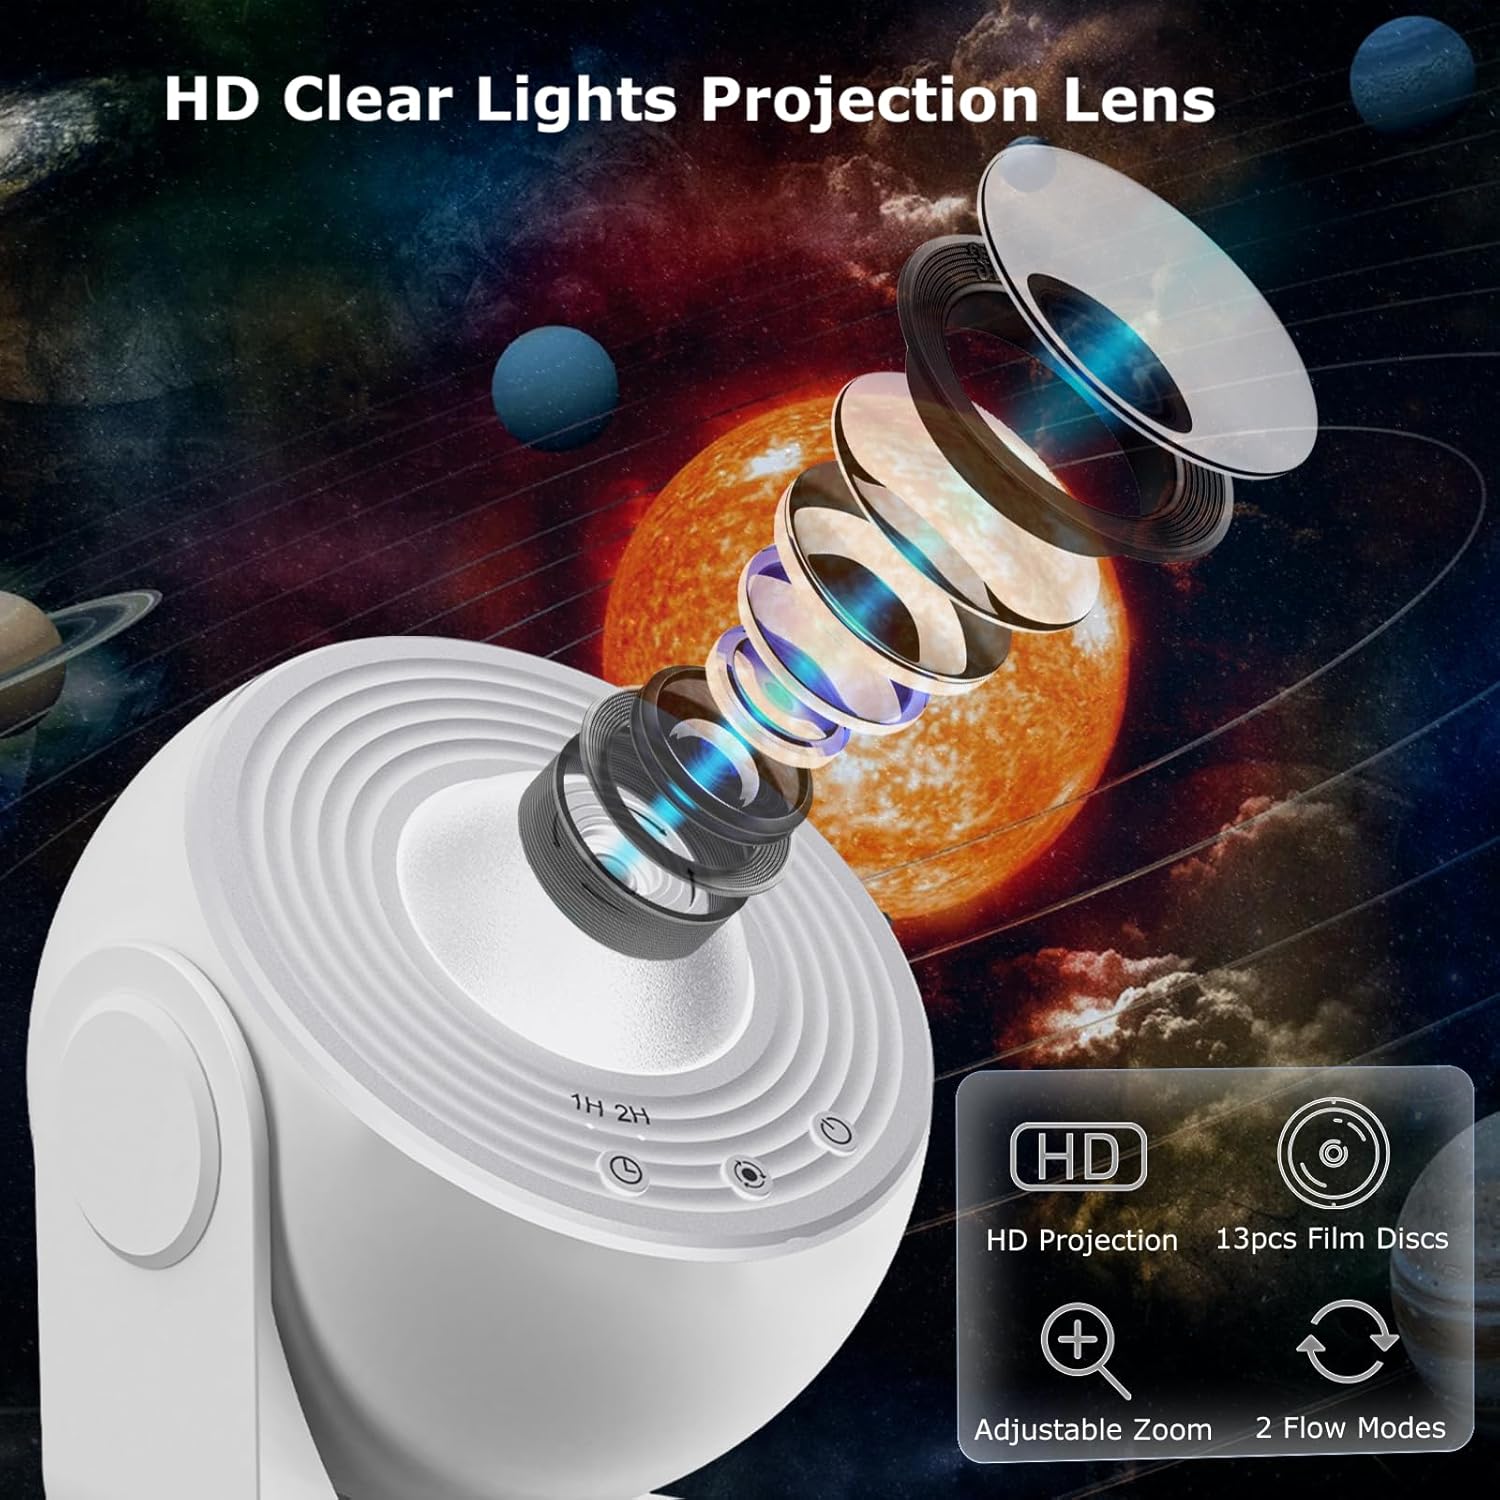
Image 4.2: An exploded view highlighting the HD projection lens system and the control buttons for timer and rotation.
Key Components:
- Projection Lens: Projects the celestial images.
- Film Disc Slot: Where the film discs are inserted.
- Focus Adjustment Knob: Used to sharpen the projected image.
- Power Button: Turns the device on/off.
- Timer Button: Sets the auto-off timer (e.g., 1H, 2H, 4H).
- Rotation Button: Controls the rotation of the projected image.
- Power Input Port: Connects to the power adapter.
5. Setup
- Unpack: Carefully remove all components from the packaging.
- Placement: Place the projector on a stable, flat surface. Ensure there is sufficient space for projection onto a ceiling or wall. The projector can be rotated 360° to direct the projection as desired.
- Insert Film Disc: Open the film disc slot, select one of the 13 film discs, and insert it into the slot. Ensure it is seated correctly.
- Connect Power: Plug the power adapter into the projector's power input port, then plug the adapter into a suitable power outlet.
6. Operating Instructions
6.1 Power On/Off
- Press the Power Button to turn the projector on.
- Press the Power Button again to turn the projector off.
6.2 Changing Film Discs
The projector comes with 13 different film discs, each depicting a unique cosmic scene:
- Solar System
- Earth
- Moon
- Milky Way
- Galaxy
- Andromeda Galaxy
- NGC4302-NGC4298
- Hubble Deep Field
- M60-UCD1
- North America Nebula
- Mystic Mountain
- Small Magellanic Cloud
- The Galaxy (integrated)
To change the projected scene, remove the currently inserted film disc and replace it with another from your collection.
6.3 Adjusting Focus
Rotate the Focus Adjustment Knob (typically located near the lens) to achieve a clear and sharp image on your projection surface. Adjust as needed based on the projection distance.
6.4 Setting the Auto-Off Timer
The projector features an auto-off timer for convenience and energy saving. This ensures a quiet environment and prevents the device from running unnecessarily.

Image 6.1: The projector's control panel showing the timer options and illustrating the subtle rotation feature.
- Press the Timer Button repeatedly to cycle through the available timer settings: 1 hour (1H), 2 hours (2H), 4 hours (4H), or off.
- The projector will automatically turn off after the selected duration.
6.5 Image Rotation
The projector can simulate the slow movement of the starry sky through image rotation.
- Press the Rotation Button to activate or deactivate the image rotation feature.
- The rotation is designed to be gentle and quiet, contributing to a peaceful atmosphere.
6.6 Projection Area
The projector supports a projection distance of 2 to 5 meters, capable of covering an area of up to 25 square meters. This allows for full coverage of a room's ceiling or wall, creating an immersive experience.
7. Maintenance
- Cleaning: Use a soft, dry cloth to clean the exterior of the projector. For the lens, use a lens cleaning cloth and solution specifically designed for optical surfaces. Do not use abrasive cleaners or solvents.
- Storage: When not in use, store the projector and film discs in a cool, dry place, away from direct sunlight and dust.
- Film Discs: Handle film discs by their edges to avoid fingerprints or scratches. Store them in their protective cases.
8. Troubleshooting
| Problem | Possible Cause | Solution |
|---|---|---|
| Projector does not turn on. | No power supply. | Ensure the power adapter is securely connected to both the projector and a working power outlet. |
| Projected image is blurry. | Focus is not adjusted correctly. | Rotate the Focus Adjustment Knob until the image becomes clear. |
| No image projected. | Film disc not inserted or inserted incorrectly. | Check if a film disc is properly inserted into the slot. |
| Image rotation is not working. | Rotation feature is off. | Press the Rotation Button to activate the rotation. |
| Device overheats. | Blocked ventilation. | Ensure the ventilation openings are not covered and the device has adequate airflow. |
9. Specifications
| Feature | Specification |
|---|---|
| Brand | YunLone |
| Manufacturer | YunLone |
| Product Dimensions (L x W x H) | 12 x 12 x 12 cm |
| Item Weight | 12 Kilograms |
| Batteries Required | No |
| Projection Distance | 2 to 5 meters |
| Projection Area | Up to 25 square meters |
| Light Source | 6500K |
| Film Discs Included | 13 |
| ASIN | B0D8Y2T418 |
| Date First Available | July 6, 2024 |
10. Warranty and Support
Specific warranty information for this product is not provided in the available data. For warranty claims, technical support, or inquiries regarding spare parts, please contact the retailer or manufacturer directly. Keep your purchase receipt as proof of purchase.
11. Disposal Information
This product should not be disposed of with household waste. Please recycle it at an appropriate collection point for electrical and electronic equipment. Contact your local authorities for information on recycling facilities in your area. Proper disposal helps prevent potential negative consequences for the environment and human health.