1. Introduction
This manual provides essential information for the safe and efficient operation of your Generic Avarro V2-P55ES Pro E Series 55" 4K Ultra HD LED Commercial Display. Please read these instructions thoroughly before using the product and retain them for future reference. This display is designed for commercial applications, offering 4K Ultra HD resolution and 16/7 operation.
2. Safety Information
Observe the following safety precautions to prevent damage to the display and ensure user safety:
- Do not expose the display to rain or moisture to avoid fire or electric shock.
- Ensure proper ventilation. Do not block ventilation openings.
- Only use attachments/accessories specified by the manufacturer.
- Disconnect the power cord during lightning storms or when unused for long periods.
- Refer all servicing to qualified service personnel.
- Do not place heavy objects on the power cord.
- Keep the display away from direct sunlight, heat sources, and extreme temperatures.
3. Package Contents
Verify that all items are present in the package:
- Avarro V2-P55ES Commercial Display
- Display Stand
- Power Cord
- Remote Control with Batteries
- Quick Start Guide
- User Manual (this document)
4. Product Overview
The Avarro V2-P55ES is a 55-inch 4K Ultra HD LED commercial display designed for clear and vibrant visual presentations. It features a slim design and supports 16/7 operation for extended use.

Figure 4.1: Front view of the Avarro V2-P55ES Commercial Display. This image shows the front of the Avarro V2-P55ES display, featuring its slim bezel and large screen.
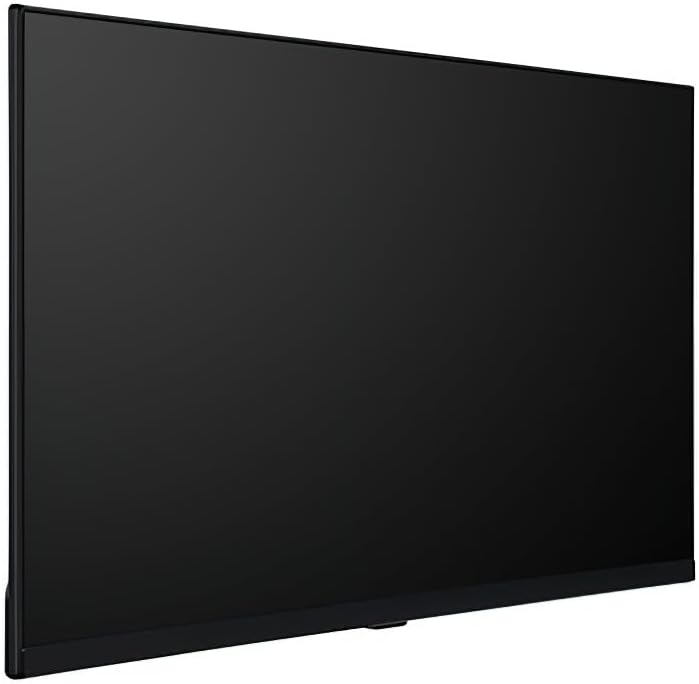
Figure 4.2: Side profile of the Avarro V2-P55ES Commercial Display. A side view highlighting the slim design of the Avarro V2-P55ES display.

Figure 4.3: Rear view of the Avarro V2-P55ES Commercial Display showing input ports. This image displays the rear panel of the Avarro V2-P55ES, detailing the various input and output ports, including HDMI, DisplayPort, and USB.
5. Setup
5.1. Mounting or Stand Installation
The display can be mounted on a wall using a VESA-compatible mount (200 x 200 mm) or placed on its included stand. Follow the instructions provided with your chosen mounting solution or the display stand for secure installation. Ensure the display is placed on a stable, level surface if using the stand.
5.2. Connecting Devices
Connect your source devices (e.g., computer, media player) to the display using the appropriate cables. The display features:
- 2 HDMI Inputs
- 2 DisplayPorts
- 2 USB Ports (1x USB 3.0, 1x USB 2.0)
Insert the power cord into the display's power input and then into a grounded electrical outlet (100-240 VAC).
5.3. Initial Power On
Press the power button on the display or the remote control to turn on the unit. The display will typically show the Avarro logo before displaying the input source.
6. Operating Your Display
6.1. Remote Control
Use the provided remote control to navigate the display's menus, adjust settings, and switch input sources. Familiarize yourself with the buttons for power, volume, input selection, and menu navigation.
6.2. Input Source Selection
To switch between connected devices, press the 'Input' or 'Source' button on the remote control. A menu will appear, allowing you to select HDMI1, HDMI2, DisplayPort1, DisplayPort2, or other available inputs.
6.3. Picture and Sound Settings
Access the display's main menu to adjust picture settings such as brightness, contrast, color, and sharpness. Sound settings, including volume and audio modes, can also be configured here. The display offers 350 Nits brightness for clear visuals.
6.4. Network Connectivity
The display supports Wi-Fi and Bluetooth connectivity. Navigate to the network settings in the main menu to connect to a wireless network or pair Bluetooth devices. This enables features like content streaming or remote management.
6.5. USB Media Playback
Insert a USB drive into one of the available USB ports (USB 3.0 or USB 2.0) to access media files. The display's media player can be used to browse and play compatible photos, videos, or audio files directly from the USB storage.

Figure 6.1: The Avarro V2-P55ES display integrated into a professional meeting environment, showcasing its use for presentations and data visualization.

Figure 6.2: The Avarro V2-P55ES display used in a retail setting, demonstrating its capability for digital signage and advertising.
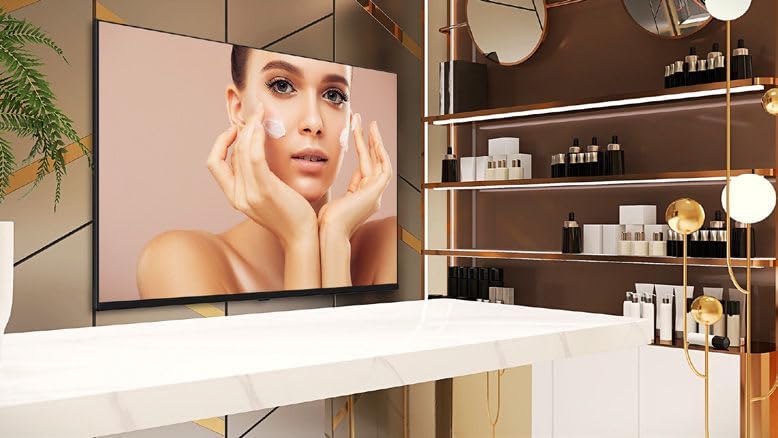
Figure 6.3: The Avarro V2-P55ES display presenting high-quality visual content for a beauty product advertisement.

Figure 6.4: Several Avarro V2-P55ES displays mounted in a sports bar, illustrating their use for entertainment and live event broadcasting.
7. Maintenance
7.1. Cleaning the Display
To clean the screen, gently wipe it with a soft, lint-free cloth. For stubborn marks, dampen the cloth slightly with water or a non-abrasive screen cleaner. Avoid using harsh chemicals or abrasive materials that could damage the screen surface. Ensure the display is powered off and unplugged before cleaning.
7.2. Storage
If storing the display for an extended period, ensure it is powered off, unplugged, and stored in a cool, dry place away from direct sunlight and extreme temperatures. Use the original packaging if available to protect it from dust and physical damage.
8. Troubleshooting
Refer to the table below for solutions to common issues:
| Problem | Solution |
|---|---|
| No power | Check if the power cord is securely connected to both the display and the power outlet. Ensure the power outlet is functional. |
| No image | Verify the input source is correctly selected. Check cable connections between the source device and the display. Ensure the source device is powered on. |
| Poor picture quality | Adjust picture settings (brightness, contrast, sharpness) in the display menu. Ensure the source device is outputting a high-resolution signal. |
| Remote control not working | Check and replace batteries. Ensure there are no obstructions between the remote and the display's IR sensor. |
| No sound | Increase the volume. Check audio settings in the display menu. Ensure the source device's audio output is enabled. |
9. Technical Specifications
| Feature | Specification |
|---|---|
| Model Number | V2-P55ES |
| Screen Size | 55 Inches (54.6" Diagonal) |
| Display Resolution | 3840 x 2160 (4K UHD) |
| Aspect Ratio | 16:9 |
| Brightness | 350 Nits (candela_per_square_meter) |
| Operation Hours | 16/7 |
| Backlight Technology | Slim DLED |
| HDMI Inputs | 2 |
| DisplayPorts | 2 |
| USB Ports | 2 (1x USB 3.0, 1x USB 2.0) |
| Bluetooth | Yes |
| RAM | 2GB DDR4 |
| Solid State Drive Capacity | 16 GB eMMC |
| Processor Speed | 1.5 GHz |
| VESA Mount Standard | 200 x 200 mm |
| Input Voltage | 100-240 VAC |
| Product Dimensions (HxWxD) | 28 x 48.5 x 2.6 inches |
| Item Weight | 29.2 pounds |
| Bezel Width | 0.59" (bottom), 0.10" (right, left, top) |
| Screen Surface Description | Glossy |
10. Warranty and Customer Support
This product comes with a standard manufacturer's warranty. Please refer to the warranty card included in your package for specific terms and conditions, including coverage duration and limitations. For technical assistance, troubleshooting beyond this manual, or warranty claims, please contact your retailer or the manufacturer's customer support. Keep your purchase receipt as proof of purchase.


